

Triple Zipper Bag - Free Sewing Pattern with a Tutorial!
Posted by admin on
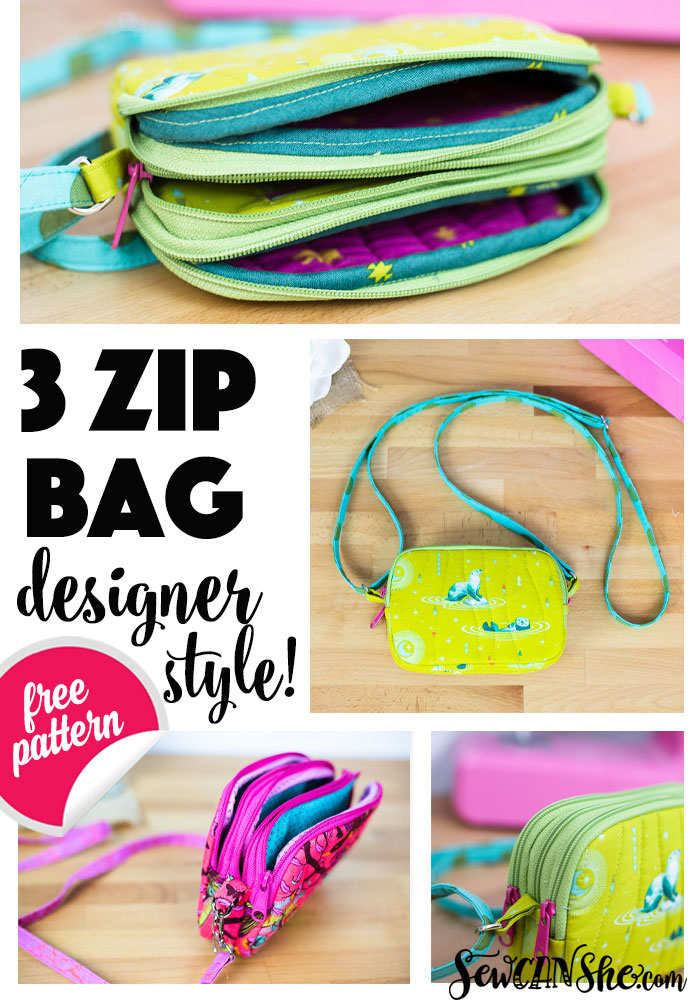
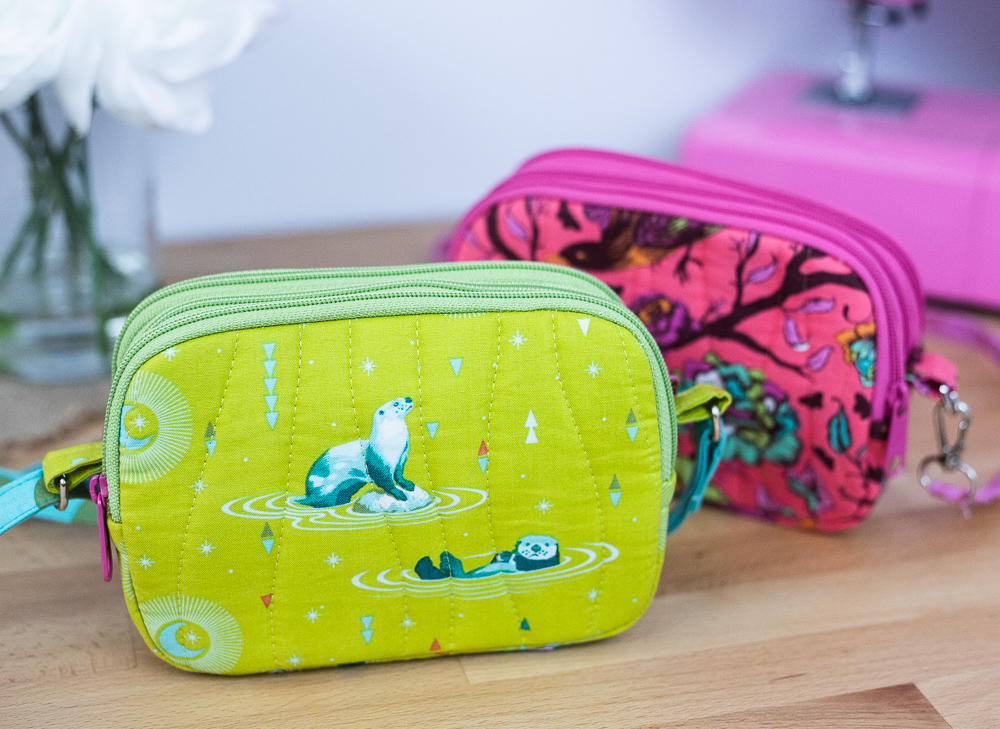
Sew a beautiful clutch bag with 3 zippered compartments!
This sweet little bag has 3 zippers on the exterior, plus another zipper on a coin pocket inside.
Note: This is an intermediate level pattern. If you are new to sewing zipper bags, I suggest trying my free Designer Zipper Bag video course first.
In addition to the blog post, this sewing pattern has been converted to an optional PDF thats optimized for printing. Find it here.
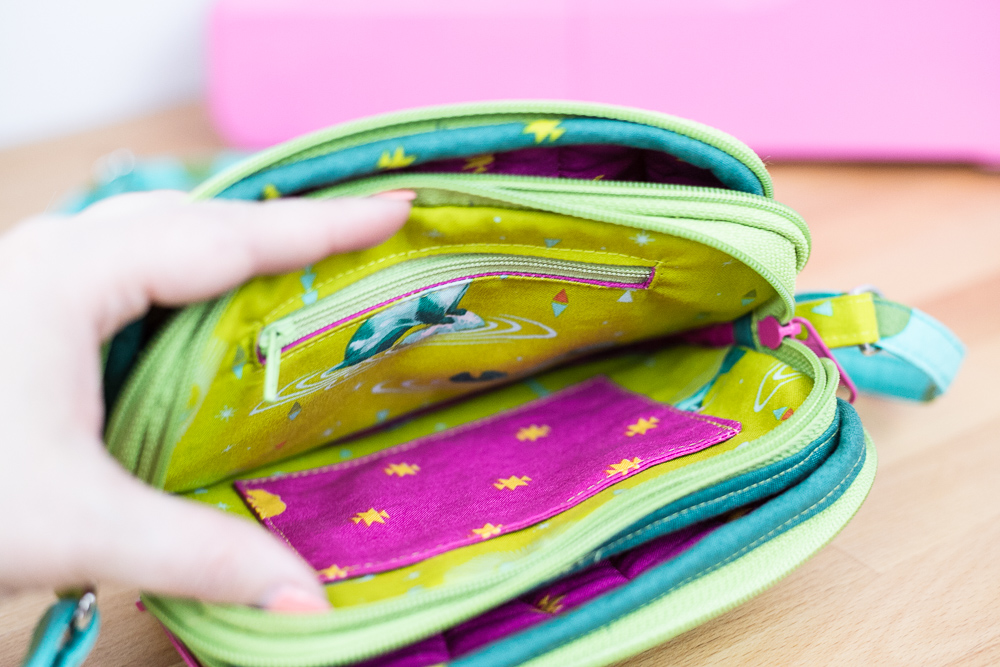
Theres also a little card pocket.
This free sewing pattern will help you make the best little bag youve ever sewn!
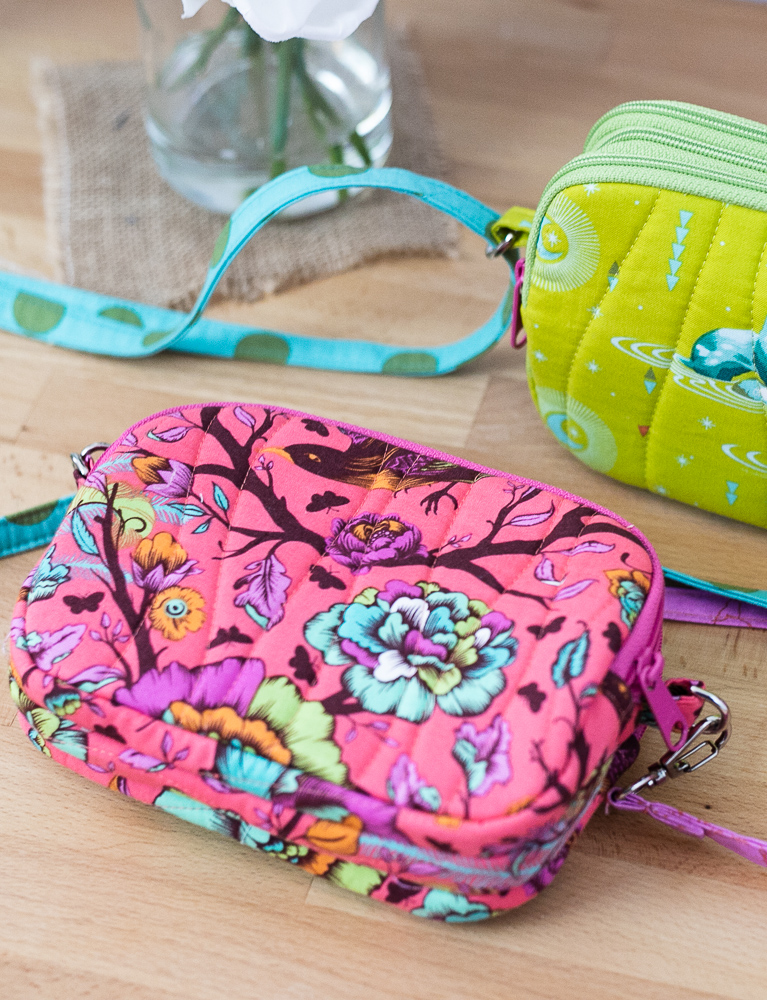
It is approximately 7 wide, 5 tall, and 3 deep, not including the strap. I put 2 small d-rings on either side of my bag so I could attach an adjustable cross body strap (I still have to write that tutorial - its coming in a couple days!).
You could use only one d-ring tab and make a wrist strap instead. Or leave both off if you like!
3 Zipper Bag Free Sewing Pattern and Tutorial
To make my cute little bag, you will need:
1 FQ of main fabric for the exterior and middle compartment lining
1 FQ of coordinating fabric for the lining on the two side pockets
1 FQ of fabric to make bias binding or 3 yards of extra wide bias binding (2 1/4 wide when unfolded)
1/8 yard or fat eighth of fabric for the adjustable strap
1/4 yard medium weight fusible interfacing (such as Pellon SF101)
3 YKK size 4.5 handbag zippers (12 or longer) or approximately 36 of Zipper By the Yard (smaller garment zippers will not work with this project)
1 regular sized zipper at least 4 long (for the coin pocket)
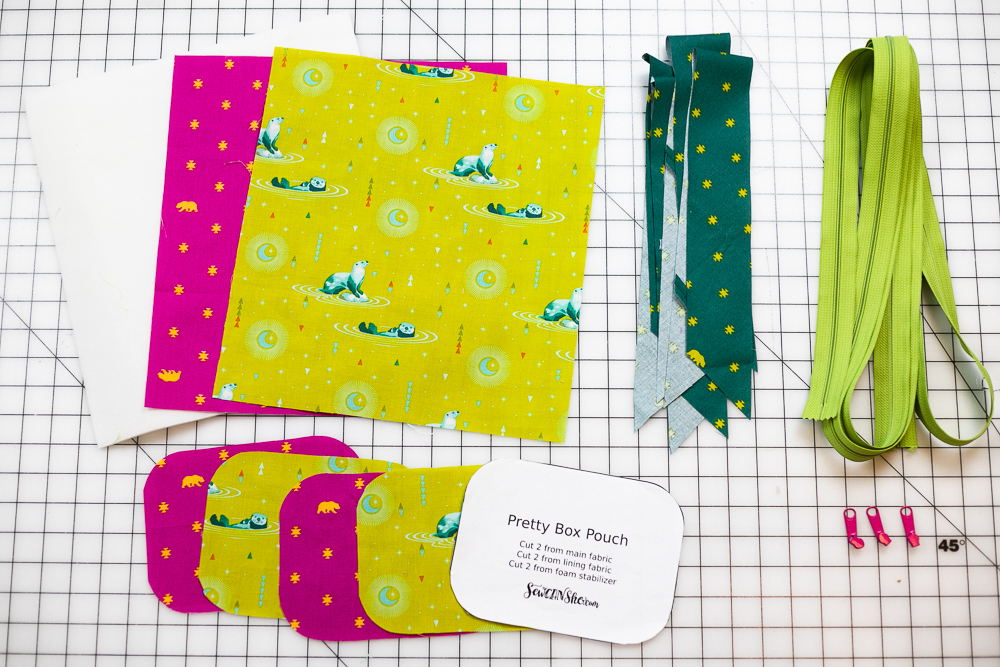
a 13 x 13 square of foam stabilizer (such as ByAnnie Soft and Stable)
fabric marker or Frixion pen (that erases with heat)
Sewing stiletto (very helpful!)
Optional items for your strap:
a triglide slide with an opening the size of your desired strap (I bought these)
2 swivel snap clips that match your desired size strap (such as these)
You can shop all of my recommended items for this project on my SewCanShe Amazon Storefront.
Cutting
Tip: Cutting order matters! Please follow these instructions (cutting and sewing) in the order stated.
From your main fabric cut:
1 square 13 x13
2 pieces from the Pretty Box Pouch Pattern Template (these are lining pieces for the center compartment
1 rectangle 8 x 6 ( for the zippered coin pouch)
1 rectangle 5 1/2 x 4 1/2 (for the card pocket)
2 rectangles 2 x 3 (for the d-ring tabs)
From your coordinating fabric cut:
1 square 13 x 13
2 pieces from the Pretty Box Pouch Pattern Template (these are lining pieces for the outer compartments
If you are making your own bias binding, you can use my easy video tutorial. Cut 4 pieces, each 25 long.
You will also need (I used the same fabric as my bias binding):
6 squares 1 1/2 x 1 1/2 (zipper panel seam binding)

Baste the 13 x 13 squares of fabric to either side of the foam stabilizer. Quilt the whole piece as desired (I used my walking foot to make wavy lines).
Watch Lesson 1 of my free Designer Zipper Bags video course to see how easy this is!

From the 2-sided quilted piece, cut:
2 pieces from the Pretty Box Pouch Pattern Piece
2 strips 1 1/4 x 11 1/2
1 strip 1 1/4 x 12 1/2
Tip: Cut the long strips first and then 2 pieces using the template.
Baste around the pieces 1/8 from the edges to seal the fabrics.
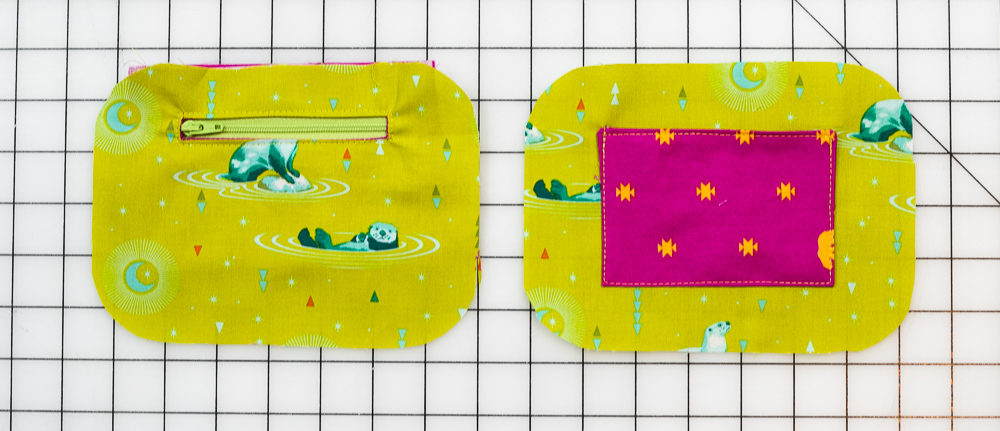
Sew Interior Pockets on the Interior Lining Pieces
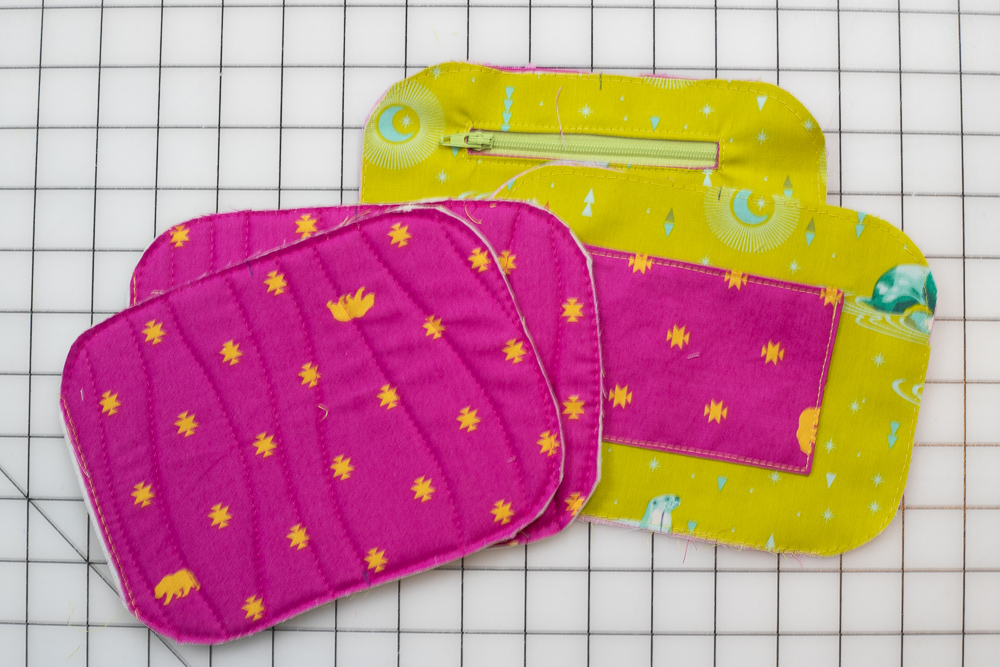
1. Use the 8 by 6 rectangle of fabric to make a welt zipper pocket with a 4 opening using one of the main fabric lining pieces cut from the pattern piece (not a quilted piece - a single layer fabric piece). Use my Welt Zipper Pocket Tutorial and draw a 4 x 1/2 rectangle on the back of the pocket piece. Then continue as directed in the tutorial.
2. Use the 5 1/2 x 4 1/2 rectangle of fabric to make a slip pocket: fold the rectangle in half, right sides together and 4 1/2 edges matching. Sew around the raw edges, leaving an opening for turning. Clip corners, turn, press. Topstitch one long edge to make the top pocket edge. Center the pocket on the remaining main fabric lining piece. Sew around the sides and bottom edge.
Tip: My Favorite Bag Video Sewing Course shows how to make both of these pocket types in Lesson 4.
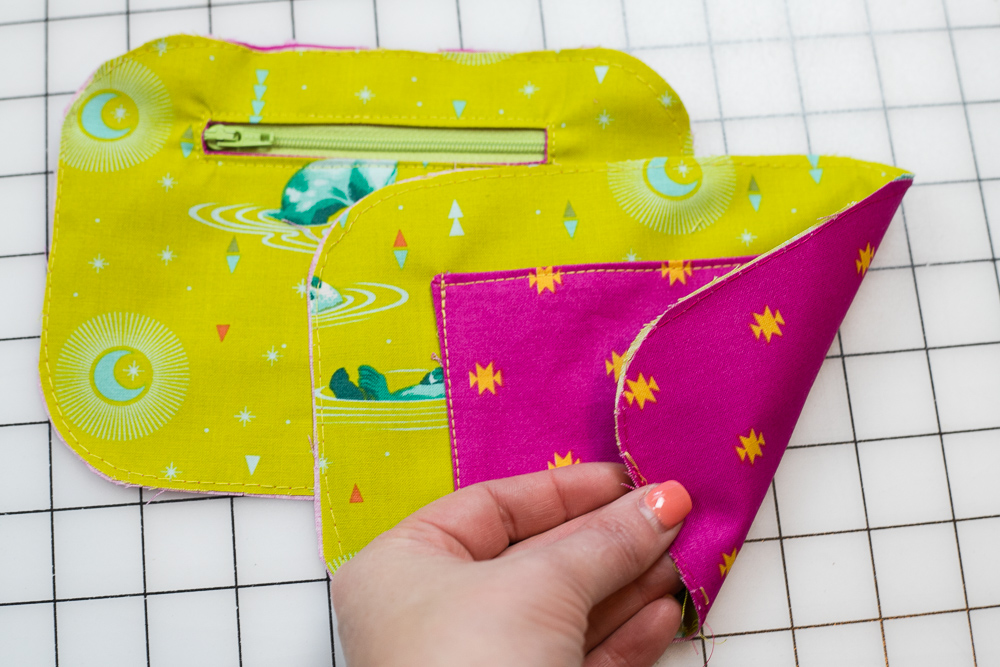
3. Place the coordinating fabric lining pieces (single layer fabric pieces) against the back of the main fabric lining pieces with pockets (wrong sides together) and baste together all the way around 1/8 from the edge.

Make 3 Narrow Zipper Panels
1. Cut your 3 zippers (removing the stoppers) or cut from the Zipper By the Yard:
2 zippers 11 1/2 long (side zippers)
1 zipper 10 1/2 long (center zipper)
Attach the slides, if needed.
2. Place the two 11 1/2 long zippers face down against the right side (exterior side) of the 1 1/4 x 11 1/2 quilted strips. They should be the same length. Clip the ends together.

3. Stitch across each end with a 1/4 seam allowance.
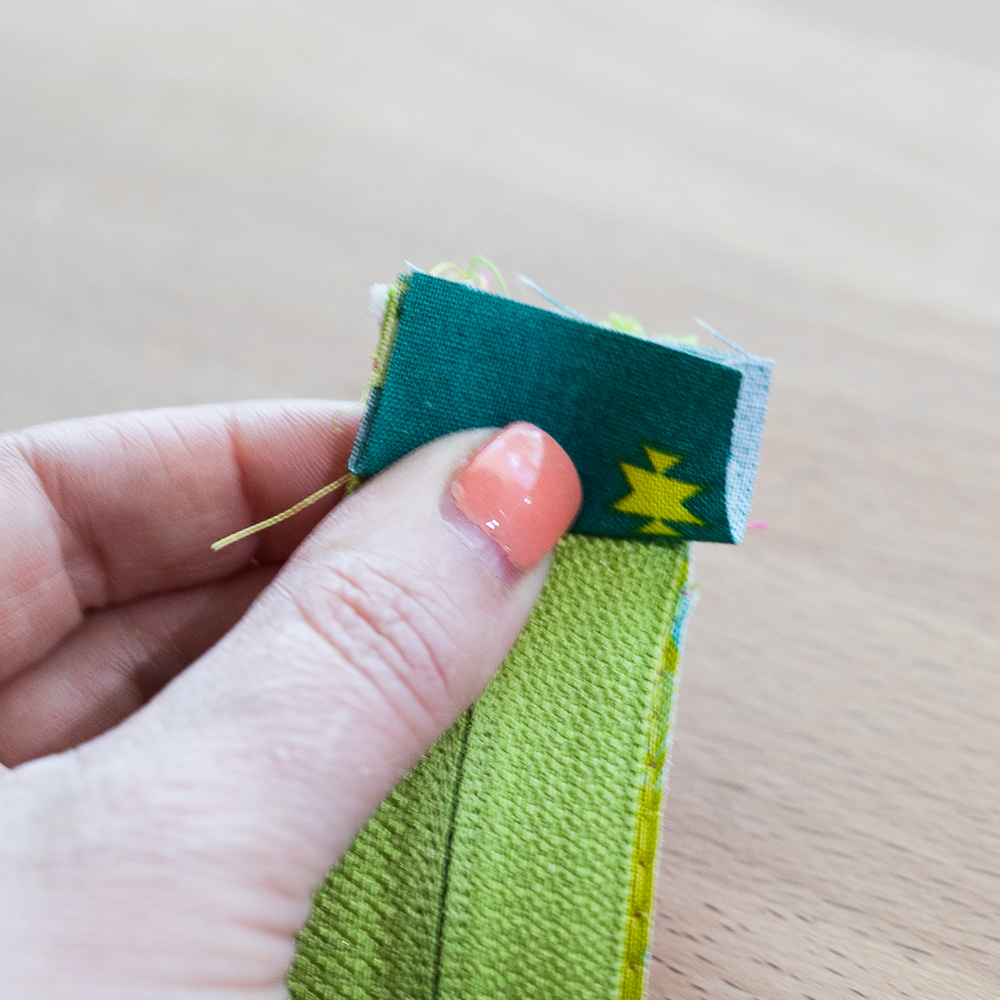
Fold a 1 1/2 binding square in half (wrong sides together) and place the raw edges against the end of a zipper.
Stitch across with a 1/4 seam allowance.
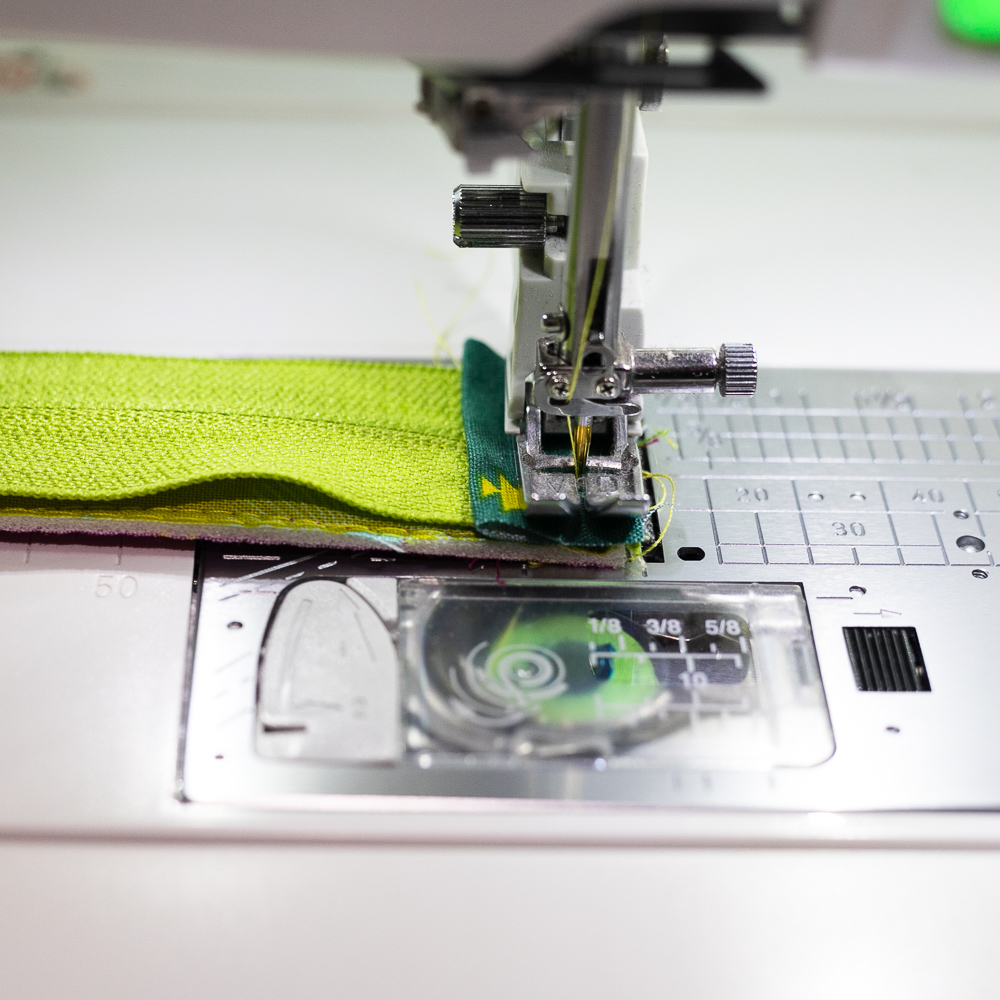
4. Fold the seam allowance and the folded edge of the binding over to the quilted side. Stitch close to the folded edge.
Note: we dont bind all the way around the seam allowance here because it makes the seam too bulky for stitching over later.
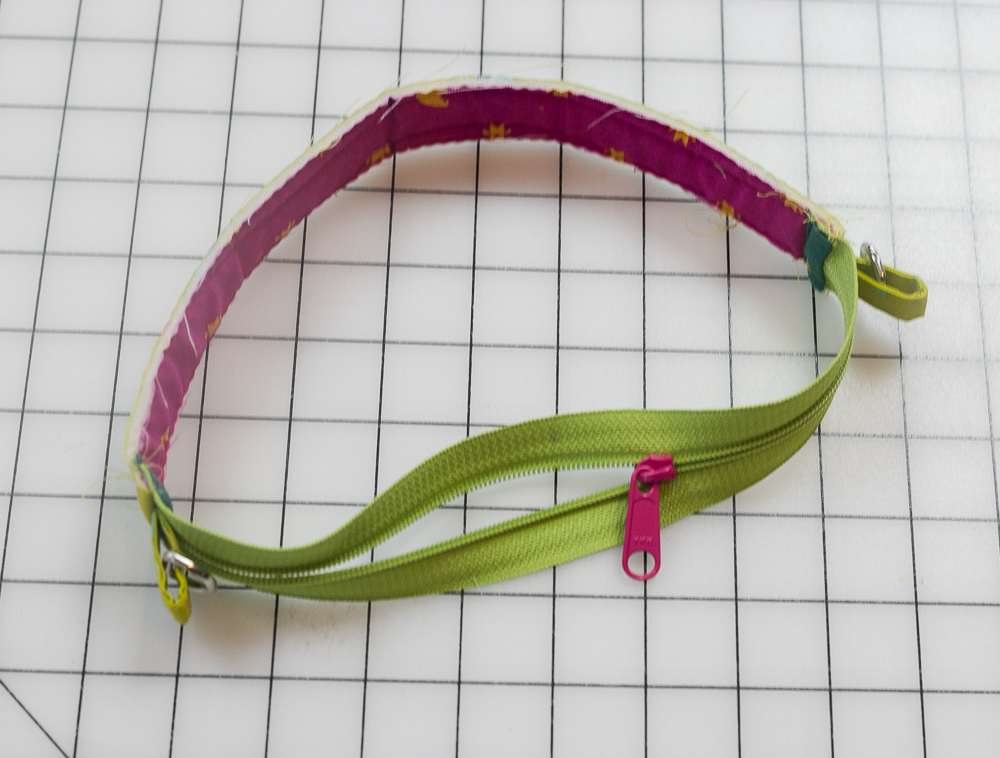
Stitch and bind the zipper to the quilted strip at both ends. Then trim away the extra binding at the sides of the narrow zipper panel.
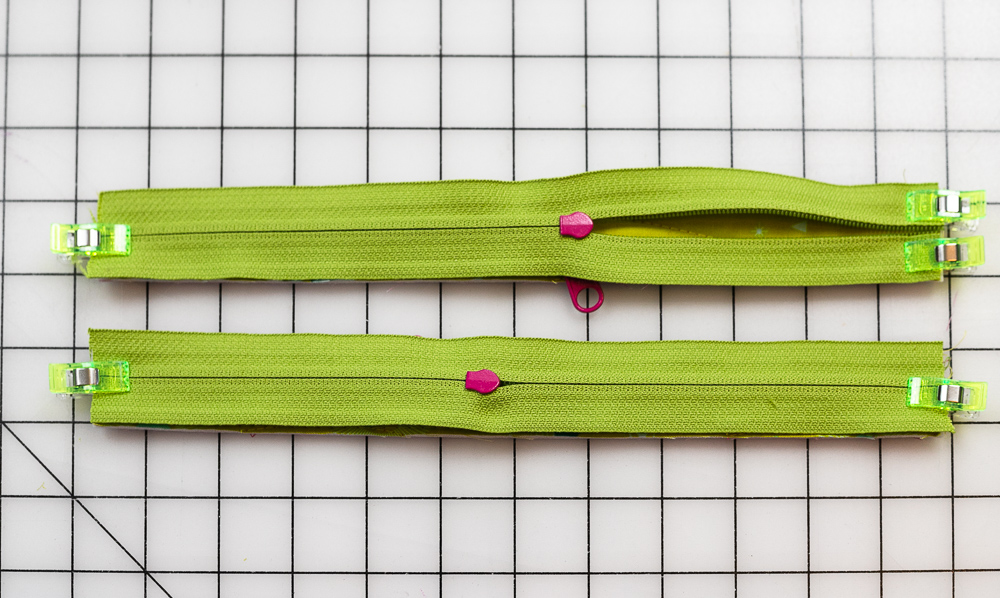
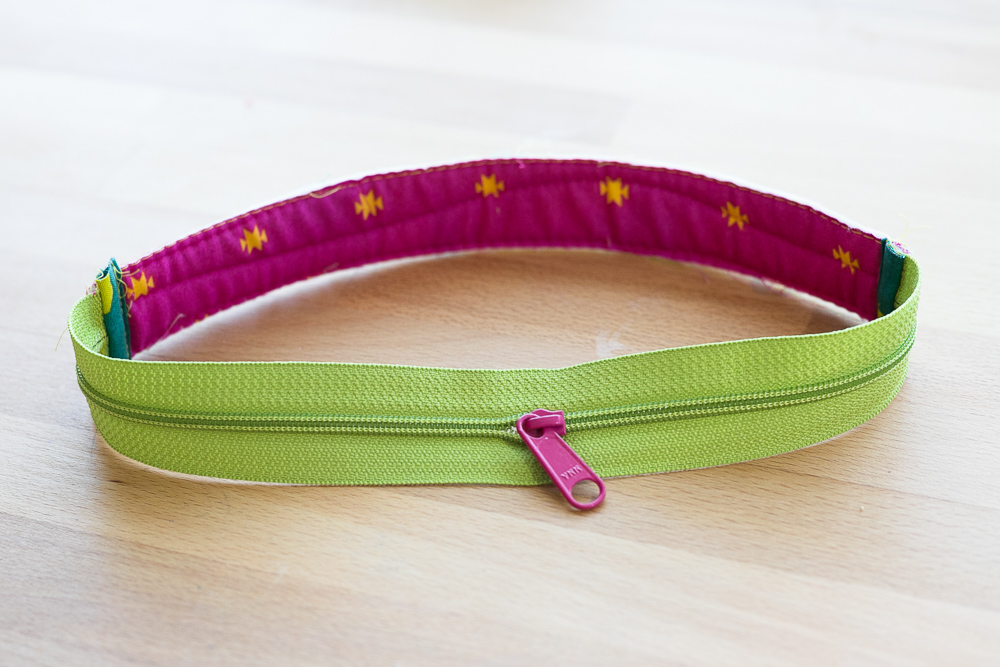
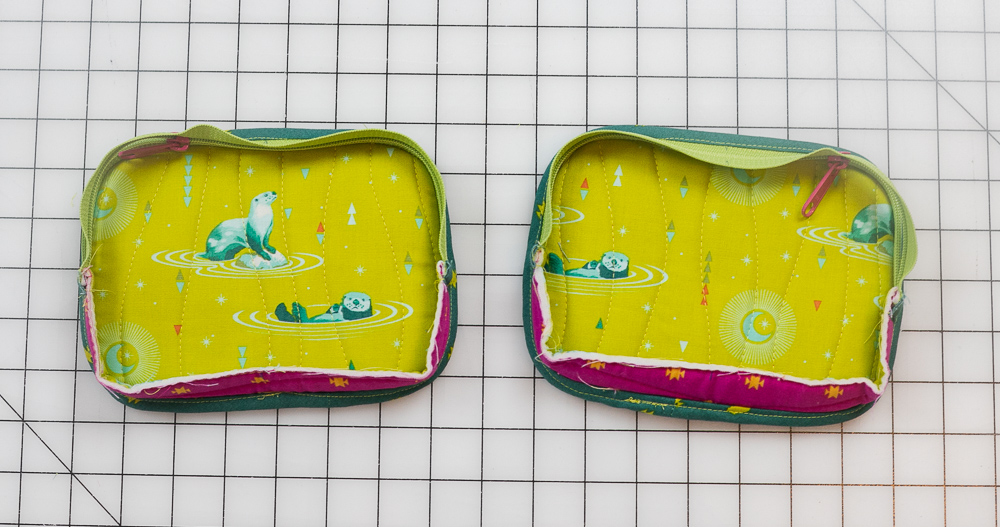
Repeat to make 2 narrow zipper panels that look like this (although your zipper may be open on one side, I hadnt moved my slider that far yet).
These are the side zipper panels.
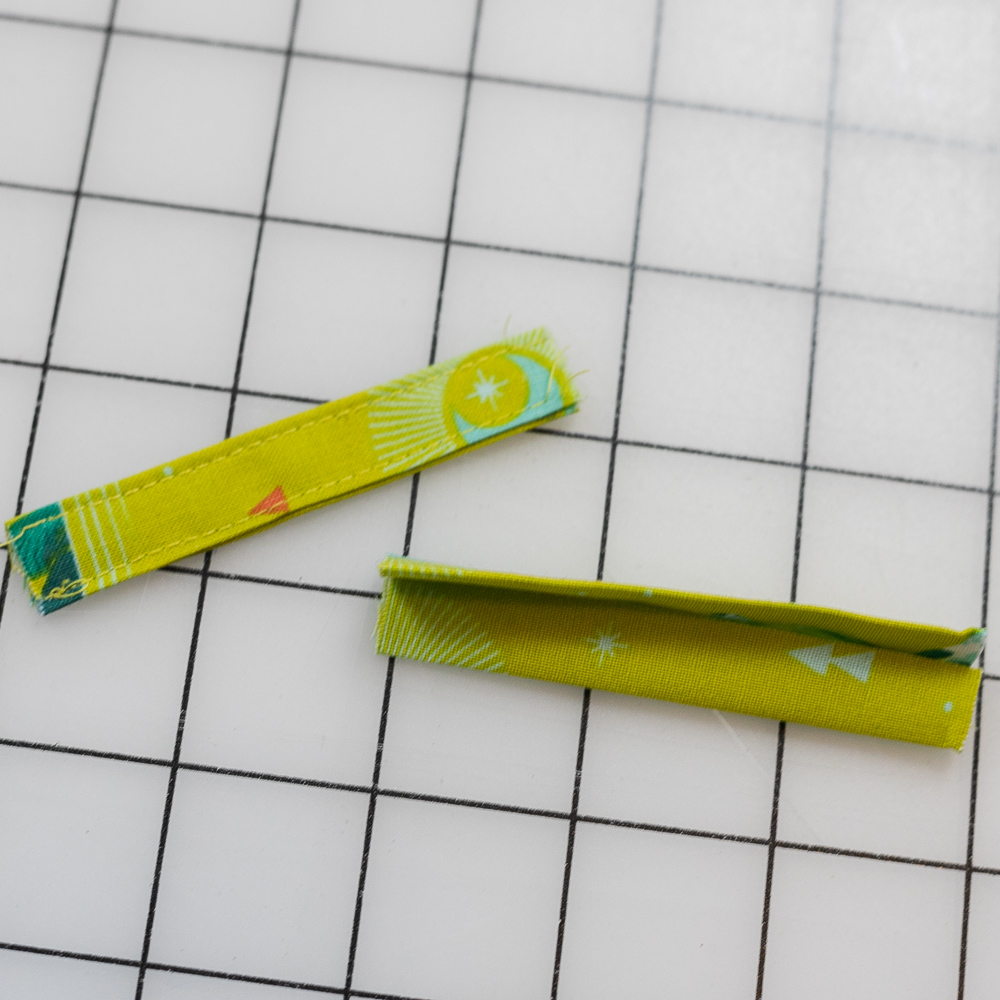
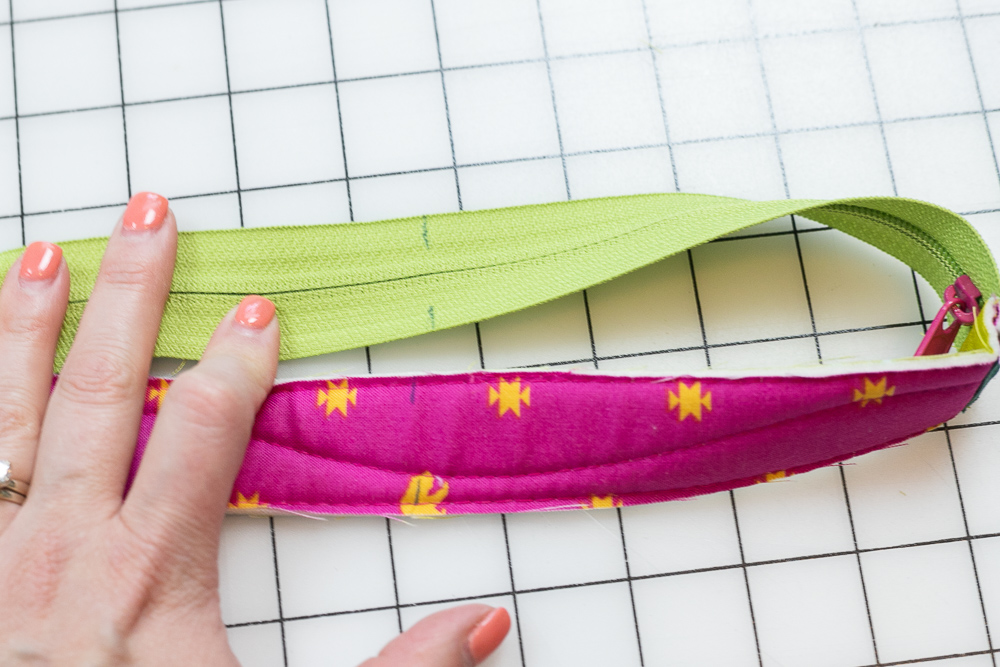
5. Make the d-ring tabs by folding each 2 x 3 fabric strip in half lengthwise. Open and press the edges to the center. Fold in half and press again. Topstitch close to both long edges.
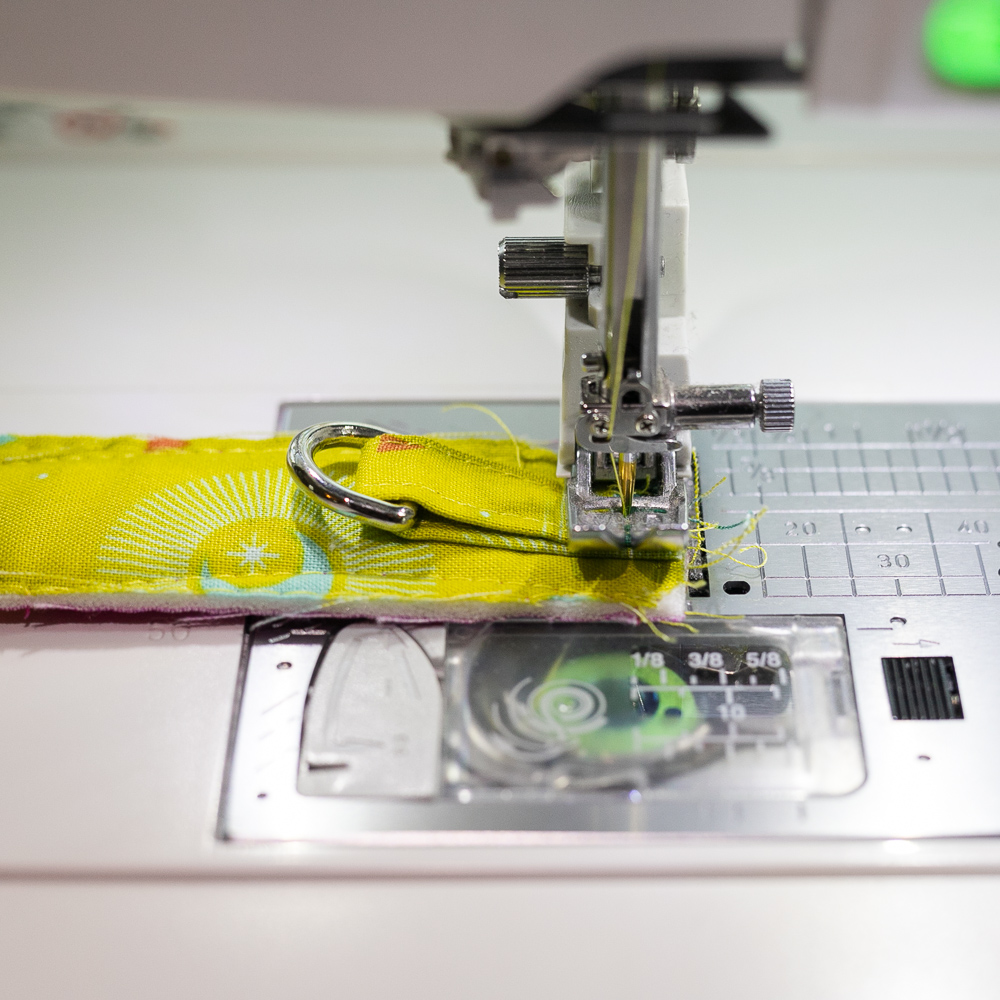
Push a tab piece through a 1/2 d-ring and fold in half. Center the raw edges on one end of the remaining 1 1/4 x 12 1/2 quilted strip (against the exterior side). Stitch in place.
Repeat to sew the remaining d-ring tab (with a d-ring) to the opposite end of the strip.
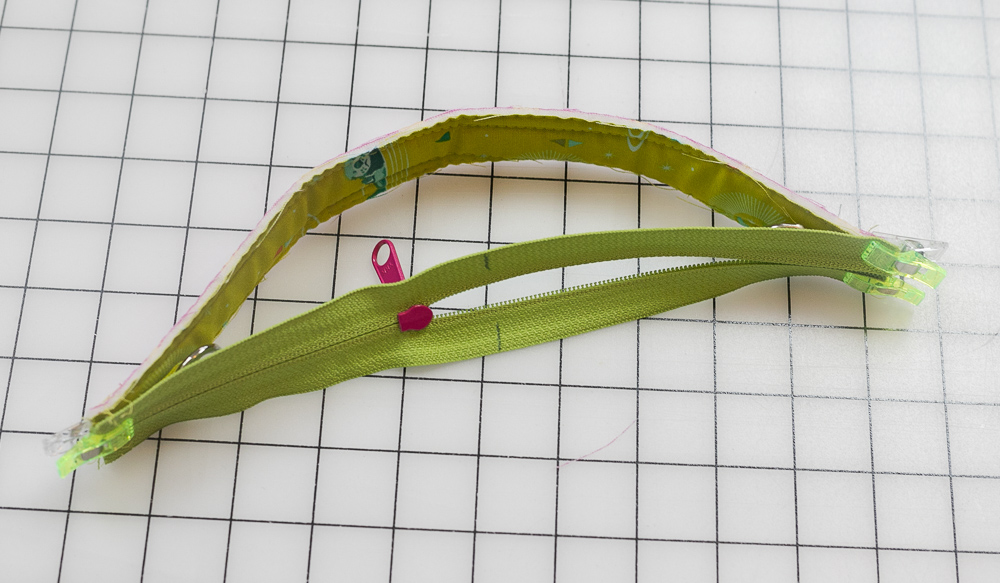
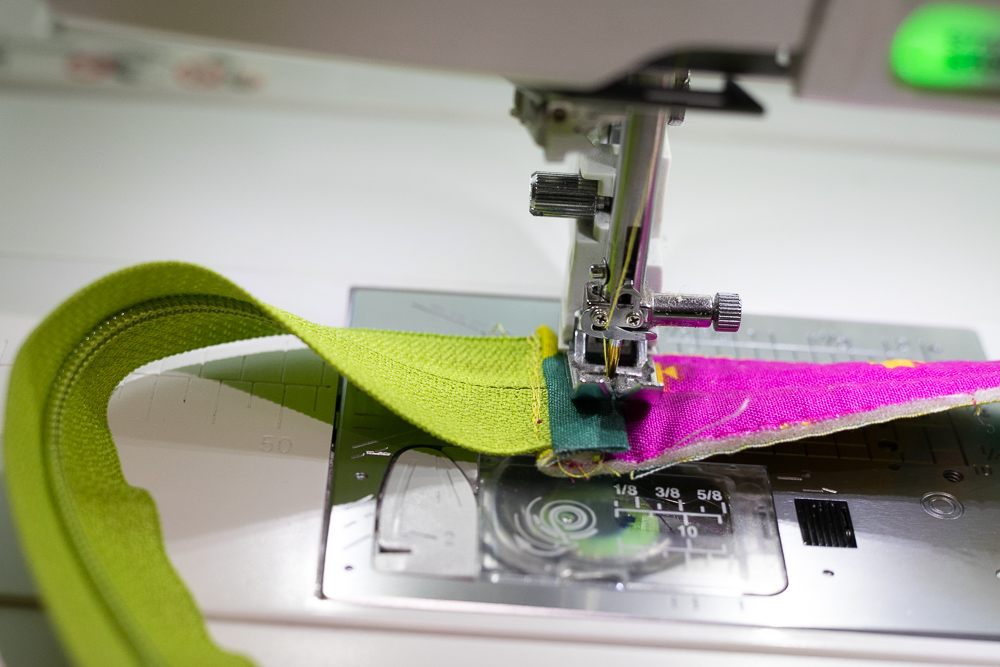
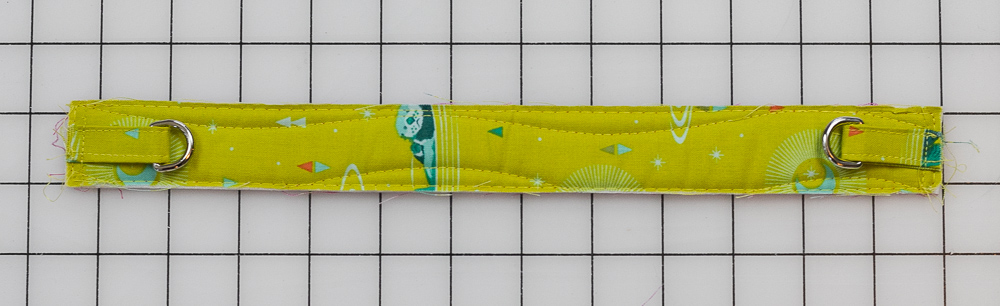
6. Place the remaining 10 1/2 long zipper right side down against the exterior side of the strap. Clip the ends together (it bows out because the strip is longer than the zipper - no matter).
Stitch the zipper to the strip and bind the ends in the exact same manner as before,
This is the center zipper panel.

Mark the Zipper Panels, Sides, and Lining Pieces
1. Fold each narrow zipper panel in half, matching up the bound seams to help you find and mark the center of the quilted piece and the center of the zipper.
2. Mark at either raw edge and on both zipper tapes. Mark all 3 zipper panels the same way.
3. Measure and mark the center at the top and bottom of both quilted side pieces and both lining pieces.

Sew the Sides of the Bag
1. Place one of the side zipper panels (without d-rings) against one of the quilted side pieces with the zipper closed and the slider on the left.
The top side (exterior side) of the zipper panel should be against the exterior side of the quilted side piece.
Match up the marks at the top and bottom of each piece.
Important Tip: Make 1/4 snips into the zipper panel piece 1/2 apart where the panel attaches to the corners of the side piece. These snips will help the quilted edges fan out and fit the side piece. Make plenty of snips on the narrow panel where it attaches to all 4 corners (including on the zipper tape). Snips are not needed on the side piece.
Attach with Wonderclips all the way around.
2. Clip the other side zipper panel piece (without d-rings) to the other quilted side piece in the same way, except this time the zipper slide should be on the right.
On the completed bag, these two zippers will open in the same direction, but since we are making mirroring pieces right now, the zippers appear to open in opposite directions.
NOTE: now that you have clipped the pieces together properly, feel free to move the sliders back and forth as you sew, because sewing next to them is difficult.
Be sure to make plenty of clips in the panel piece to help it fit smoothly around the corners.
3. Sew all the way around both pieces with a 1/4 seam allowance. Switch to your zipper foot if needed. I used my sewing stiletto a lot for the rest of this project. It really helps you keep fabrics together around corners.
4. Fold a 2 1/4 x 24 bias binding strip in half lengthwise and sew it over the seam with a 1/4 seam allowance. Leave the ends free for a few inches to help you join the ends.
As seen above, I join my ends by folding them back where they meet and cutting each end with an extra 1/4.
Then I sew the ends of the binding together with a 1/4 seam allowance, finger press the seam open, re-fold the binding, and finish stitching it to the seam.
This step is demonstrated with additional pictures in my blog post about mini quilt binding.
5. Flip the binding over to the other side and stitch it down close to the fold.
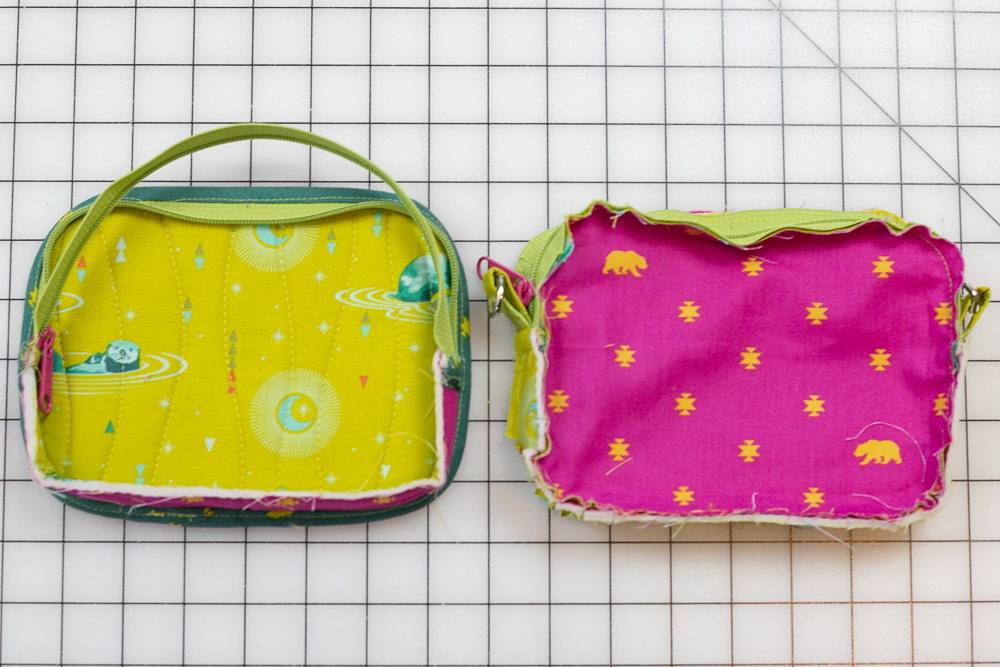
You should now have two opposite bag sides with zipper panels and bound seams. Set these aside for now.

Make the Center of the Bag
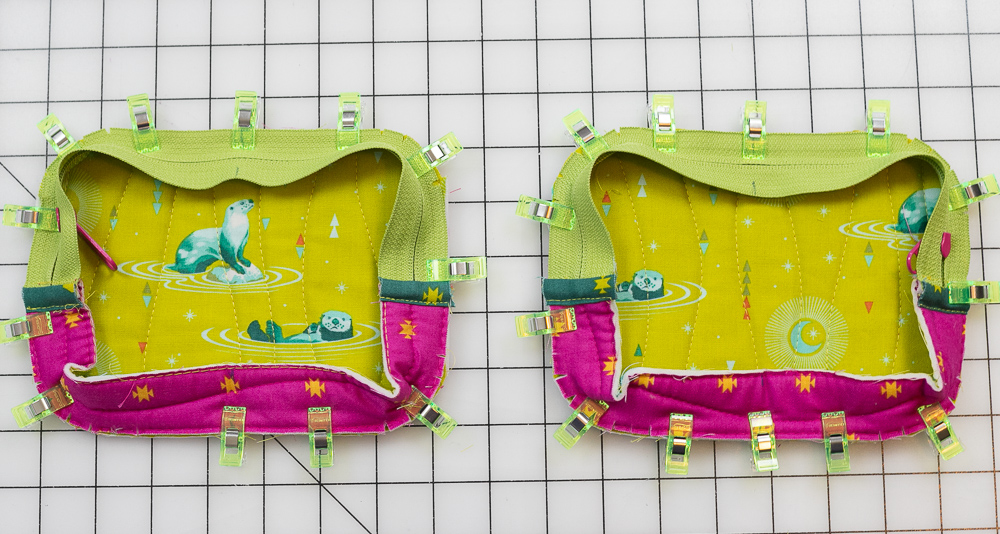
1. Clip the center zipper panel (with d-rings) to one of the lining pieces with the WRONG side of the zipper against the MAIN FABRIC side of the lining piece - the side with a pocket.
As before, match up the marks at the top and bottom and make snips around each corner.
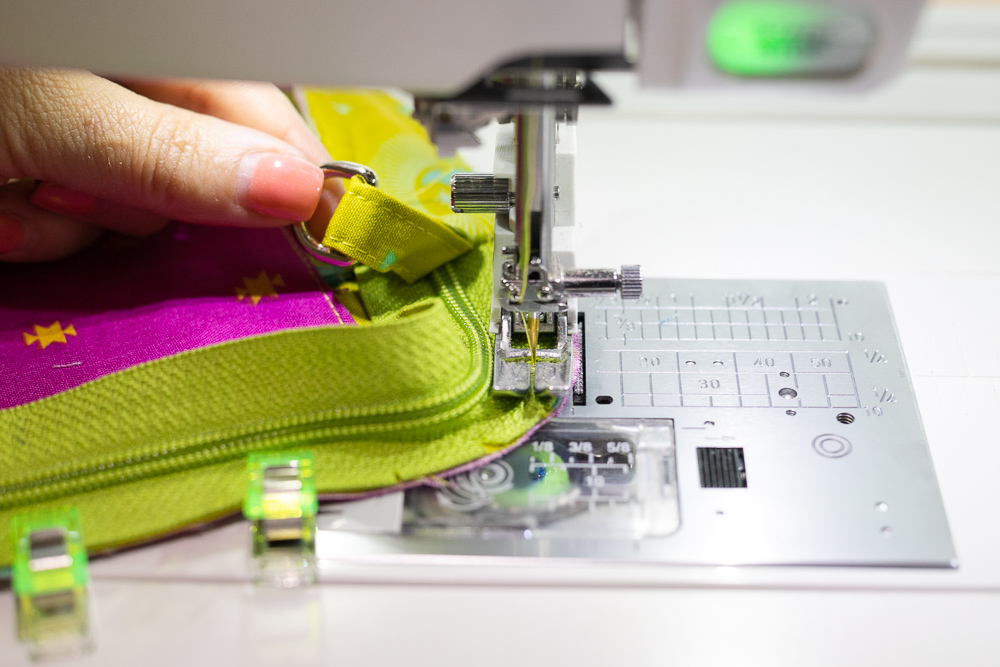
2. Sew the zipper panel to the lining piece with a 1/4 seam allowance, making sure to hold the d-ring out of the way. Move the zipper slider out of your way too as needed.
3. Now turn this piece over and clip the wrong side of the zipper against the main fabric side of the remaining lining piece. You will be placing the main fabric lining pieces facing one another and from the outside of this piece you can see the coordinating fabric linings on front and back.
4. Sew with a 1/4 seam allowance.
Finish Assembling the Bag
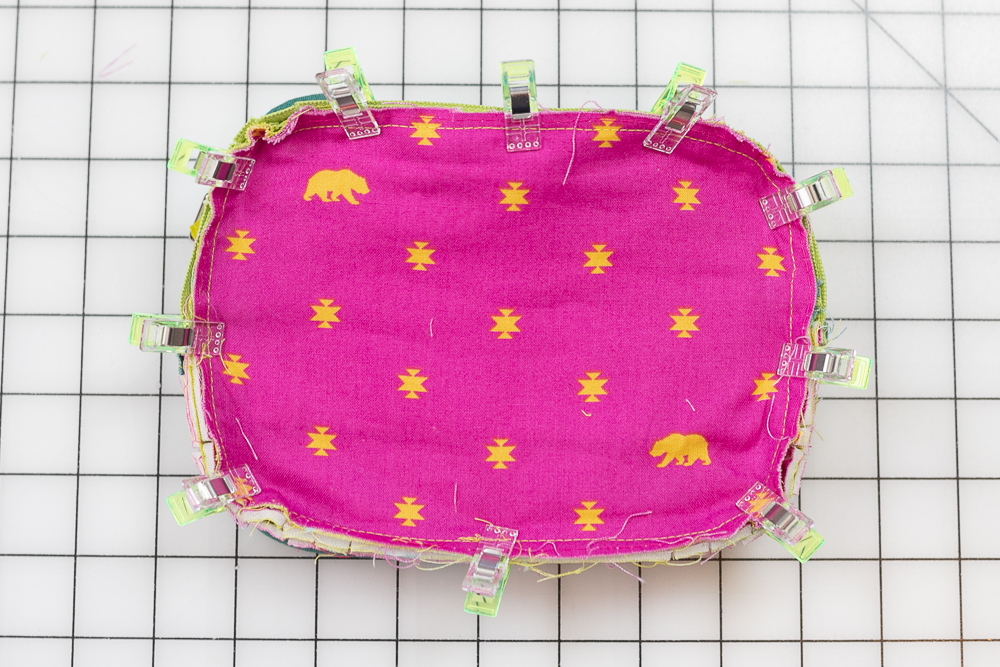
1. Place one bag side piece against your work space, still inside out with the zipper open, and the pull on the inside left. If the pull is on the inside right when the zipper is open then set that piece aside for now and use the other one.
Place the bag center piece on your workspace, with the zipper right side out and closed.

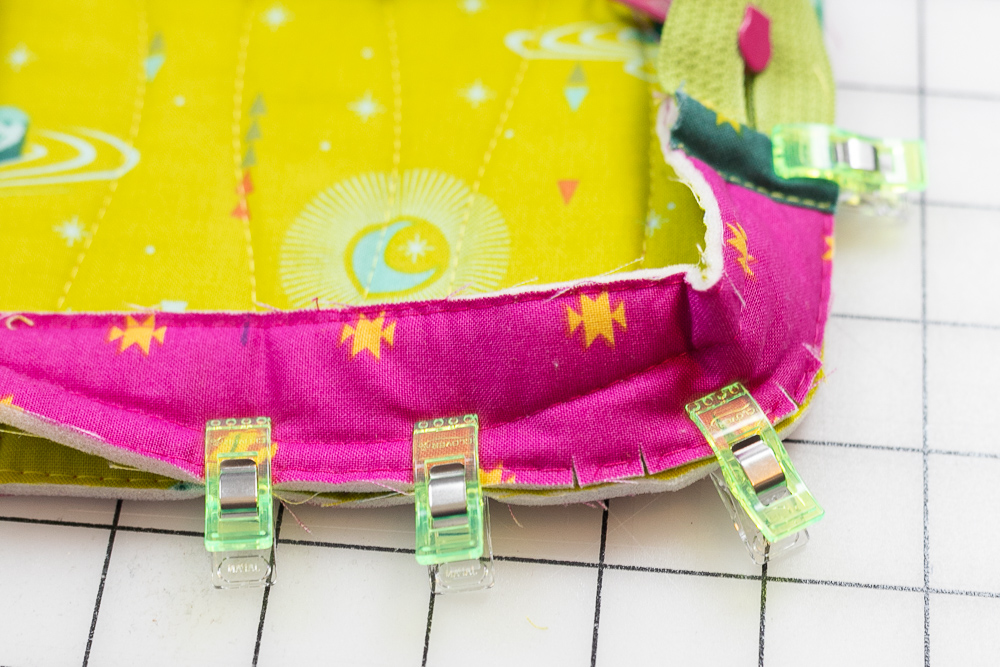
2. Place the bag center piece completely inside the bag side piece so that the closed zipper is directly under the open zipper. The two zipper pulls should be on the same side, probably touching.
Note that the bound seams in the zipper panels should nest together - not sit on top of one another or far away from each other.
Clip all the way around with the bottom of the clips facing up. Make snips in the zipper side panel on top to help it fit around the corners.
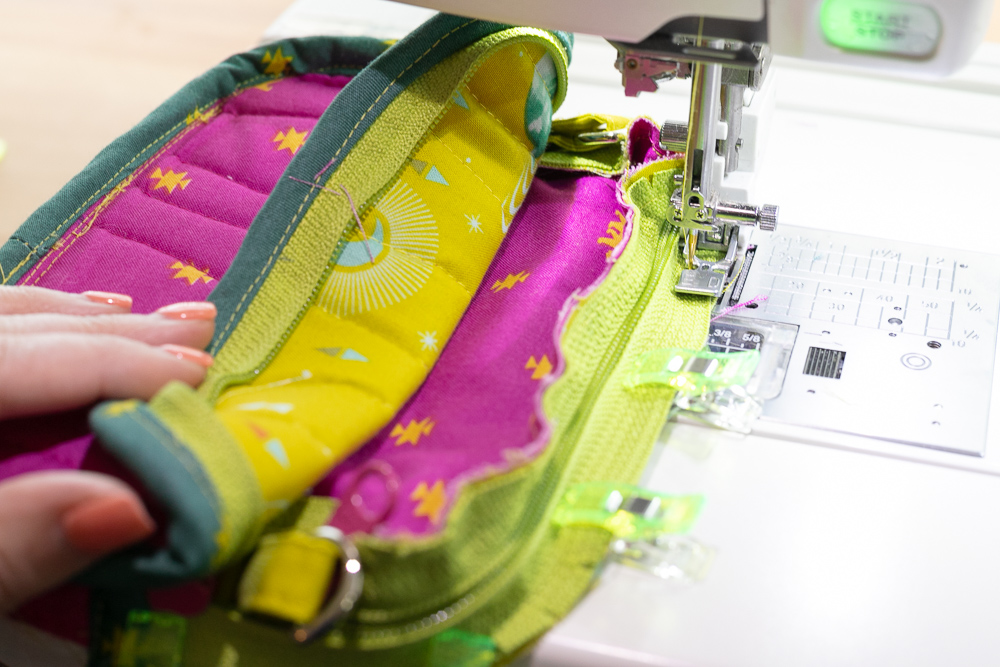
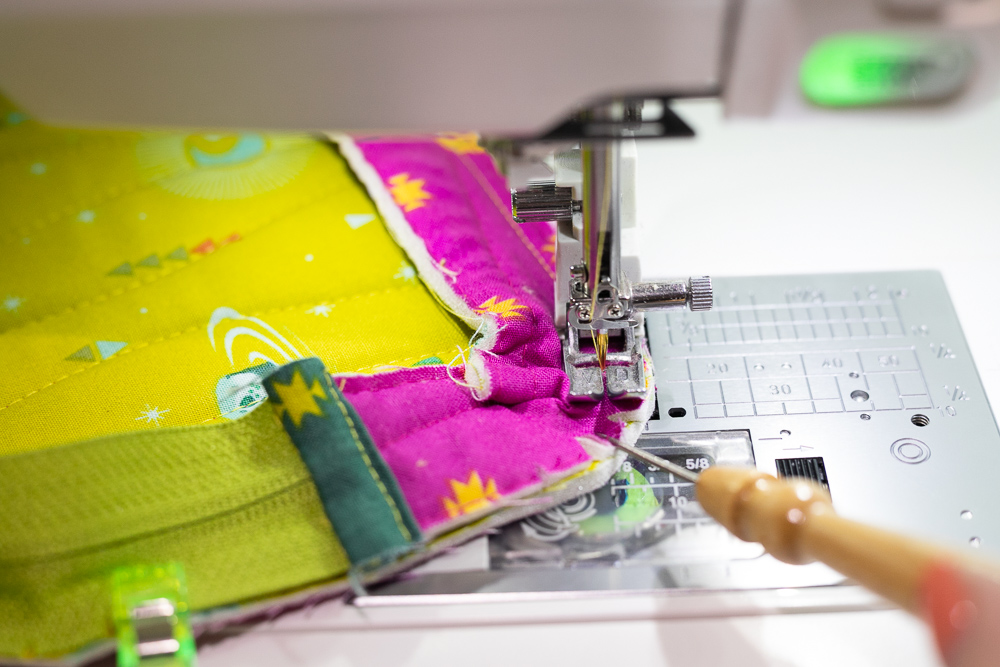
At this point I had to switch to a zipper foot. Even my narrow foot was not narrow enough to sew the 2 zipper tapes together.
3. Turn the bag over and sew all the way around with a 1/4 seam allowance. You are sewing an open zipper on top, and the lining piece on the bottom, with the closed center zipper sandwiched in between (and around the bottom of the bag too).
Of course, move the zipper sliders around as needed to help you sew. Sometimes I had to remove the bag from my machine to move the sliders, it was just too tight to move them while sewing.

4. Bind this seam allowance with another 2 1/4 x 24 piece of bias binding.
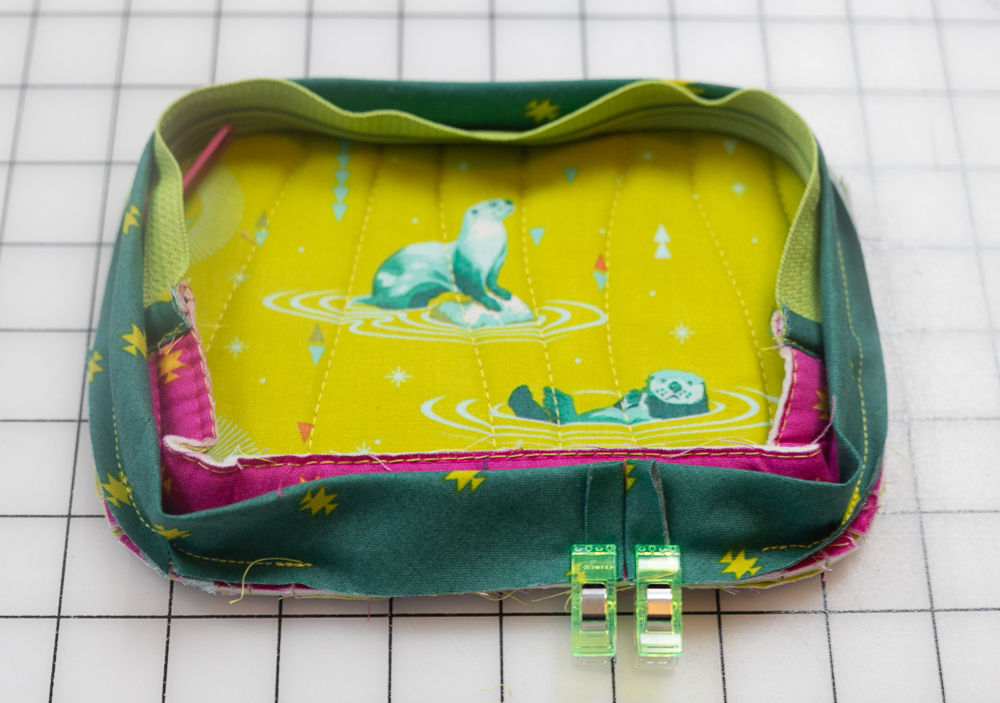
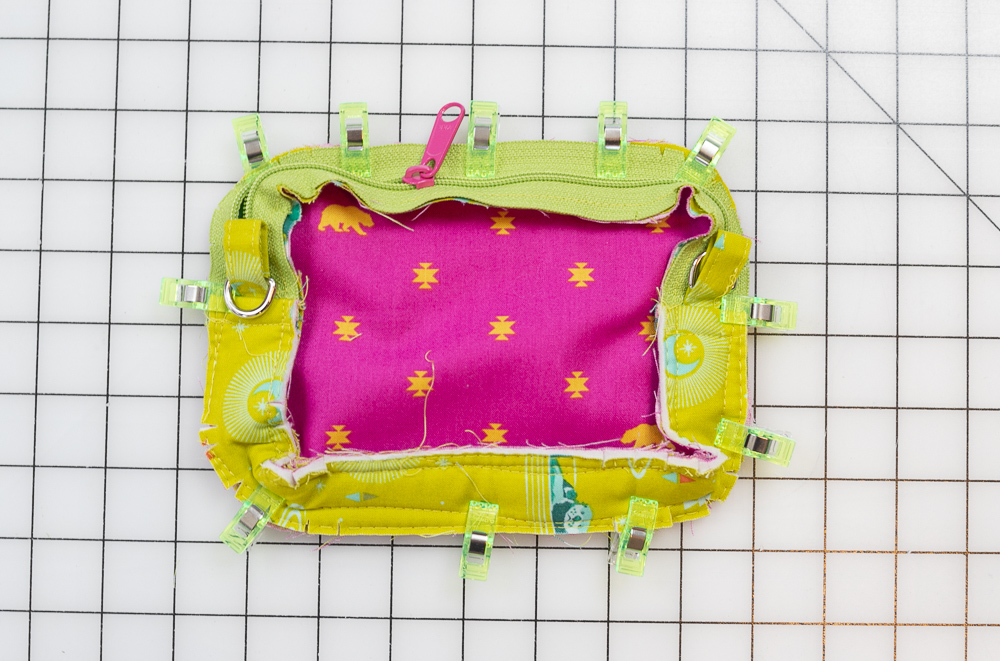
Turn the bag right side out through the open zipper.
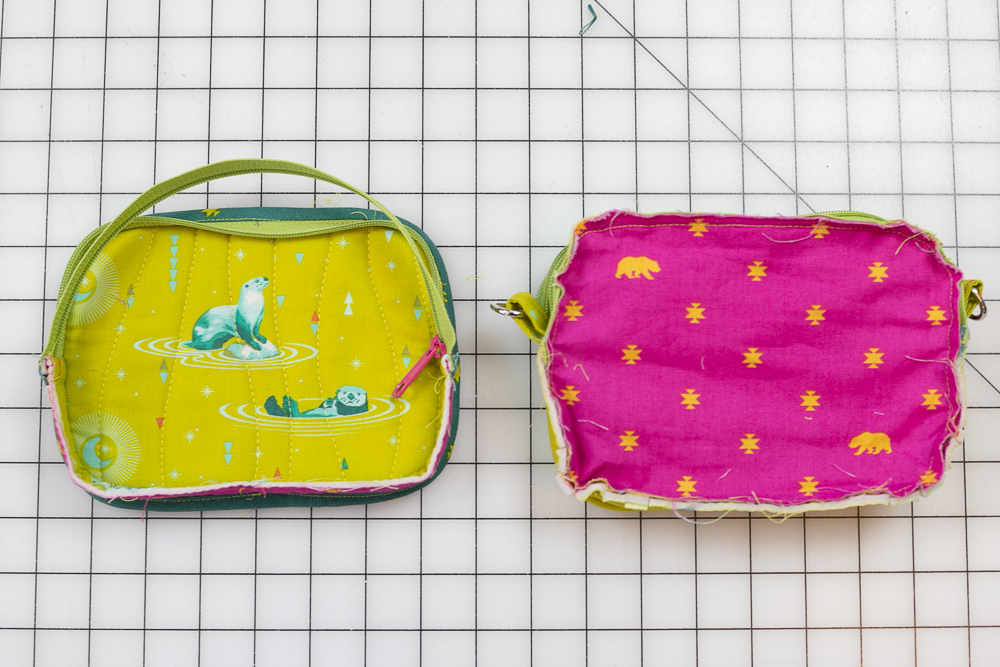
This photo is different from the photo above because the zipper slider on the side piece is now open to the right side.
The side zipper compartment (no d-rings) should now be right side out and the center compartment is also right side out but it might not appear to be because you can see the lining with raw edges.
1. Place the remaining bag side piece against your work space, still inside out with the zipper open, and the pull on the inside right.
Place the rest of the bag on your workspace, with the lining side (raw edges) facing up and both zippers closed.
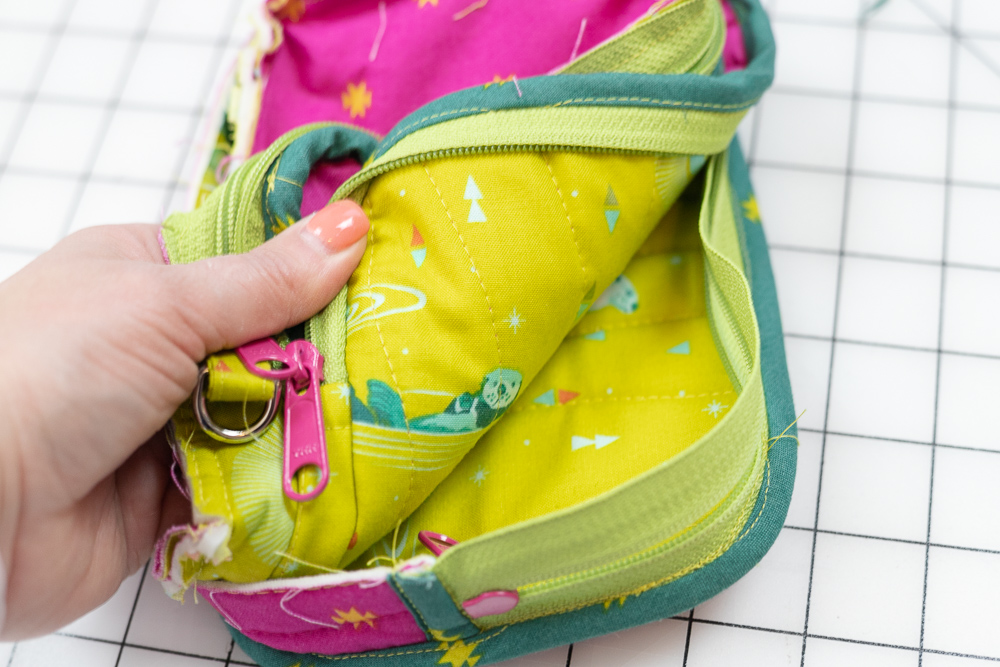
2. Now you really have to stuff the bag piece down into the side piece so that the closed center zipper is under the open side zipper and those two sliders are touching.
Note that the quilted exterior side pieces are facing each other.
Once again, the bound side seams in the zipper panels should nest together.
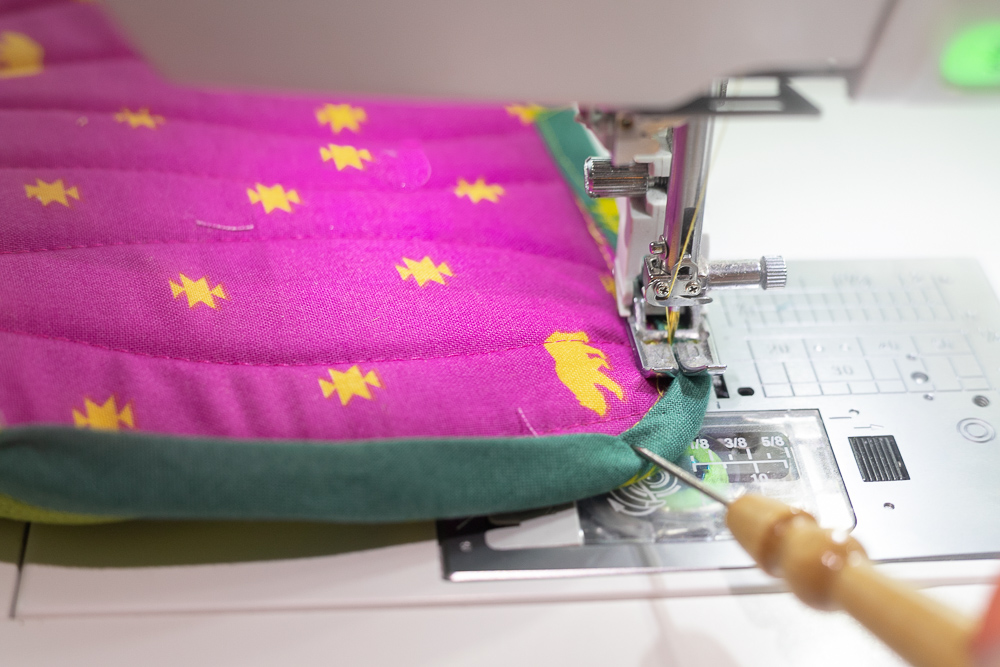
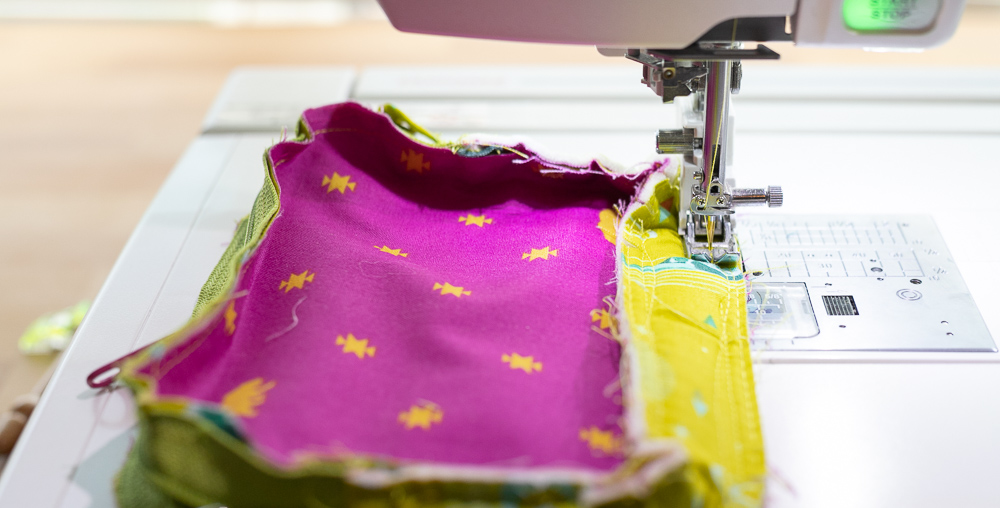
3. Clip around the bag, again with the bottom side of the clips facing upward so that you can turn it over to sew. Cut snips around the last panel edges to help it fit the curves in the lining.
4. Turn the bag over and sew all the way around with a 1/4 seam allowance.
5. Bind the seam allowance with the last 2 1/4 x 24 piece of bias binding.

Your 3 Zipper Bag is finally done! Well, almost. Now all you need to do is make a strap.
Sew your own beautiful, easy, and adjustable strap with my free tutorial here!
I cant wait to see all the bags! Make sure you show me yours by posting a photo to Instagram and tagging me @sewcanshe!
xoxo,

Related Posts
-
![Target Dorm Room Finds | Cute, Affordable, Essentials To Mark Off!]()
Target Dorm Room Finds | Cute, Afford...
-
![Style Guide to Western Jeans: Ringers Vs Wrangler Vs Ariat]()

Style Guide to Western Jeans: Ringers...
-
![Sleeveless Striped Maxi Dress for $27.99 (was $65.99).]()
Sleeveless Striped Maxi Dress for $27...
-
![J. Crew 50% off Swim, Slub tees and Polos, Allen Edmonds 25% off Factory 2nds, & More – The Thurs. Men’s Sales Handful]()
J. Crew 50% off Swim, Slub tees and P...


