Why DIY Home Renovation Needs a Checklist
Share
You're starting on a DIY home renovation project, which means you're already taking a significant step towards transforming your living space; however, without a detailed checklist, you're setting yourself up for potential costly mistakes, delays, and safety hazards. A checklist guarantees all necessary steps are accounted for, helping you identify potential issues before they arise, allocate resources efficiently, and maintain focus on project goals. It also facilitates thorough research on materials and labor, and assists in budgeting for unexpected costs. By having a checklist, you'll be better equipped to navigate the renovation process, and uncover the strategies that will make your project a success.
Key Takeaways
• A checklist helps identify and prioritize potential issues, ensuring a smooth DIY home renovation process.
• It enables effective resource allocation, scheduling, and budgeting, reducing the risk of costly mistakes.
• A checklist promotes thorough research, planning, and preparation, minimizing the chances of overlooked tasks and delays.
• It facilitates maintaining focus on project goals and objectives, ensuring the renovation meets the desired standards and quality.
• A checklist provides a structured approach, enhancing communication and accountability among team members, and ensuring a successful DIY home renovation project.
Essential Tools and Materials
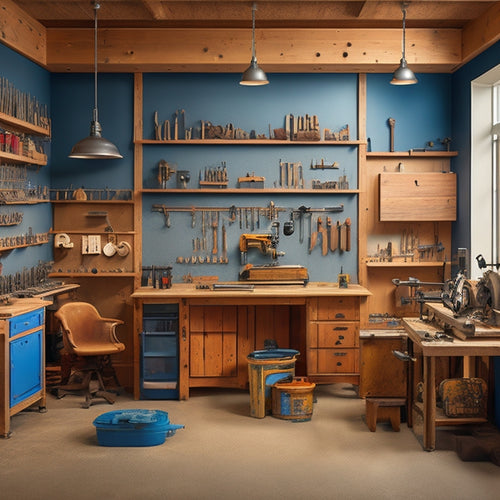
You'll need a solid arsenal of essential tools and materials to tackle your DIY home renovation project efficiently. To guarantee you're well-equipped, prioritize tool selection tips that emphasize versatility and quality.
Invest in a reliable drill, impact driver, and circular saw, as these will be your go-to tools for most tasks. Additionally, consider investing in a level, tape measure, and stud finder to ensure precise measurements and accurate installations.
When it comes to material sourcing strategies, plan ahead to avoid last-minute trips to the hardware store. Make a thorough list of the materials you'll need, and group similar items together to streamline your shopping process.
Consider buying in bulk to reduce costs and minimize waste. Don't forget to factor in the quality of materials, opting for durable, long-lasting options that will withstand the test of time.
Assessing the Block Wall Damage
With your toolkit and materials ready, now it's time to turn your attention to the block wall, carefully examining its surface to identify any signs of damage, cracks, or weaknesses that may impact your renovation plans.
You're checking for signs of wear and tear, such as cracks in the mortar, crumbling blocks, or water damage. Take note of any areas where the wall is bulging or sagging, as this could indicate structural integrity issues.
As you assess the block wall, consider the weight and stress it's under. Are there any heavy objects or shelving units that could be putting pressure on the wall? Are there any signs of water damage or leaks that could be compromising the wall's structural integrity?
Make a detailed list of any damage or weaknesses you find, including their location and severity. This will help you prioritize repairs and guarantee that your renovation plans take into account the current state of the block wall.
Safety Precautions and Gear
As you prepare to tackle the block wall renovation, it's essential that you prioritize your safety by wearing the appropriate gear and taking necessary precautions to minimize the risk of injury. You don't want to compromise your well-being or end up with a costly medical bill.
To guarantee a safe renovation process, you'll need to focus on hazard awareness and invest in personal protective equipment (PPE).
Here are some must-haves for your safety kit:
-
Hard hat: Protect your head from falling debris or collapsing structures.
-
Safety glasses: Shield your eyes from dust, flying particles, and chemical splashes.
-
Dust mask: Breathe easy and avoid inhaling hazardous materials like asbestos or silica.
- Steel-toed boots: Guard your feet from heavy objects, sharp edges, and electrical hazards.
Measuring and Marking the Area
How accurately can you measure the area to be renovated to guarantee a precise block wall installation? The answer lies in using the right measuring techniques.
Start by taking precise measurements of the room, including the length, width, and any obstructions. Use a laser level to confirm accuracy and a digital tape measure to record precise dimensions. Make note of any electrical outlets, plumbing fixtures, or other features that may impact your renovation.
Next, use marking tools to transfer your measurements to the area. A chalk line is perfect for creating straight lines, while a level confirms your marks are plumb. Use a pencil to lightly mark the area, avoiding dark marks that may be difficult to remove.
Double-check your measurements and marks to confirm accuracy, as mistakes can be costly and time-consuming to fix. By taking the time to measure and mark the area correctly, you'll set yourself up for a successful renovation and avoid potential headaches down the line.
Demolition and Debris Removal
You'll need to don protective gear, including safety glasses, gloves, and a dust mask, before tackling the demolition phase. This phase requires a systematic approach to avoid damage to surrounding structures and prevent injuries.
This phase can be intimidating, but with the right techniques and planning, you'll be able to successfully tear down what's needed to make way for your new renovation.
Here are some key considerations to keep in mind:
-
Identify load-bearing walls and consult a professional if you're unsure to avoid costly mistakes or even collapse.
-
Use the right demolition tools, such as a pry bar, hammer, or saw, to guarantee efficient and safe demolition.
-
Designate a debris disposal plan, including renting a dumpster or setting up a designated area for waste removal, to keep your workspace organized and safe.
- Develop a strategy for containing dust and debris, such as sealing off adjacent rooms or using tarps, to prevent mess and damage.
Budgeting for Unexpected Costs
As you plan your DIY home renovation, you're likely thinking about the costs you can anticipate, but it's just as important to prepare for the unexpected expenses that can arise.
You'll need to identify potential areas where costs might overrun, such as electrical or plumbing issues, and allocate a contingency fund to cover these hidden expense traps.
Hidden Expense Traps
When budgeting for your DIY home renovation, unexpected costs can quickly add up, and it's crucial to anticipate and prepare for these hidden expense traps to avoid blowing your budget. You don't want to fall prey to costly surprises that can derail your entire project.
To steer clear of these renovation pitfalls, consider the following potential hidden expense traps:
-
Structural damage: Hidden structural damage can be a major cost driver, especially if you're renovating an older home. Be prepared to budget for repairs or replacement of damaged beams, walls, or foundations.
-
Asbestos or lead removal: If your home was built before the 1980s, there's a high chance it contains asbestos or lead. Removal of these hazardous materials can be expensive, so factor it into your budget.
-
Electrical or plumbing issues: Outdated electrical or plumbing systems can be costly to repair or replace. Don't assume everything is up to code – budget for potential upgrades or repairs.
- Permitting and inspection fees: Obtaining necessary permits and passing inspections can add up quickly. Make sure you factor these fees into your budget to avoid surprise costs.
Potential Overrun Areas
During the DIY home renovation process, it is essential to identify potential overrun areas where unexpected costs can quickly escalate, and budget accordingly to minimize financial shocks. You need to be proactive in managing your project's finances to avoid going over budget.
| Potential Overrun Areas | Mitigation Strategies |
| Electrical issues | Identify potential electrical issues early and prioritize them in your project plan |
| Plumbing problems | Inspect plumbing systems before starting renovations and budget for potential repairs |
| Drywall and painting | Allow extra time and budget for drywall and painting, as these tasks can be time-consuming |
| Flooring installation | Research and budget for potential flooring installation delays |
| Permits and inspections | Factor in costs and time for permits and inspections to avoid delays |
Contingency Fund Needs
Having identified potential overrun areas, you should now allocate a portion of your budget to a contingency fund to absorb unexpected costs that may arise during the renovation process.
This fund will provide you with financial flexibility to handle emergency repairs or unexpected expenses that can derail your project.
Here are some examples of unexpected costs you should be prepared for:
-
Hidden structural damage: You may discover hidden structural damage that requires immediate attention, adding to your overall cost.
-
Material price fluctuations: Prices of materials can fluctuate, and you may need to adjust your budget to accommodate these changes.
-
Permit issues: You may encounter permit issues that require additional fees or changes to your original plans.
- Labor shortages: Labor shortages can cause delays, leading to additional costs and extending your project timeline.
Frequently Asked Questions
How Do I Handle Unexpected Structural Damage During Renovation?
When you stumble upon unexpected structural damage during renovation, don't panic.
First, stop work immediately and call a professional to assess the damage. They'll conduct a thorough structural assessment to identify the extent of the issue.
Next, work with them to develop a damage mitigation plan, prioritizing safety and minimizing further damage. This may involve temporary repairs or shoring up the structure before proceeding with the renovation.
Can I Reuse Existing Materials to Save on Renovation Costs?
You're likely aware that 75% of homeowners renovate to increase their home's value.
When it comes to reusing existing materials, you're on the right track to saving on renovation costs.
By repurposing materials like reclaimed wood, doors, and fixtures, you're not only reducing waste but also embracing cost-effective solutions and sustainable practices.
Take inventory of what you can salvage and get creative with reuse – it'll pay off in the long run.
Do I Need a Permit for a DIY Home Renovation Project?
You're about to plunge into your DIY home renovation project, but before you start, you need to determine if you need a permit.
Research your local permit requirements and renovation regulations to guarantee compliance.
Check with your local government to see if your project requires a permit, as failing to obtain one can lead to costly fines and delays.
Don't risk it – take the time to understand the regulations and obtain the necessary permits to avoid any potential issues.
How Long Does a Typical DIY Home Renovation Project Take?
You're probably wondering how long your DIY home renovation project will take. The project timeline can vary greatly, depending on the scope and complexity of the renovation.
Breaking it down into renovation phases can help you estimate the duration. Typically, planning and designing take 2-4 weeks, permitting and preparation take 2-6 weeks, and construction takes 8-16 weeks.
Be prepared for unexpected delays and plan accordingly to stay on track.
Can I Do a DIY Home Renovation Project by Myself or Do I Need Help?
When tackling a DIY home renovation, you'll need to assess your skills honestly. Can you handle electrical, plumbing, and carpentry tasks? Be realistic about your abilities to avoid costly mistakes.
Consider DIY renovation considerations like your physical strength, available time, and willingness to learn. If you're unsure, don't be afraid to ask for help. You might need a friend's expertise or professional assistance for specific tasks.
Conclusion
You've survived the chaos of demolition and the thrill of reconstruction, but without a checklist, your DIY home renovation can quickly devolve into a nightmare of delays and cost overruns.
On one hand, the freedom to create and customize is exhilarating; on the other, the risk of error and overspending is intimidating.
Stay ahead of the game with an all-encompassing checklist, ensuring that your dream renovation becomes a stunning reality, not a financial burden.
Related Posts
-

Top Tools for DIY Home Renovation Plastering Success
To achieve DIY home renovation plastering success, you'll need a range of essential tools. Start with hand tools like...
-

Renovation Tool Checklist for Smooth Finishes
When tackling a renovation project that requires a smooth finish, you'll need a thorough tool checklist to guarantee ...
-

7 Best Tool Storage Ideas for Home Renovation
When it comes to home renovation, staying organized is key to maximizing productivity and minimizing wasted time. To ...


