
7 Best Tool Storage Ideas for Home Renovation
When it comes to home renovation, staying organized is key to maximizing productivity and minimizing wasted time. To get started, consider implementing portable tool storage containers that allow for easy transport and organization by project type. Additionally, create a tool kit organization system that includes an inventory, color-coding, and clear storage bins for quick access. Don't forget to maximize your vertical storage space with wall-mounted organizers, pegboards, and ceiling racks. By implementing these tool storage ideas, you'll be well on your way to a more efficient renovation process - and with a few more insider tips, you'll be able to tackle even the most complex projects with ease.
Key Takeaways
- Use portable containers with compartments and dividers to store tools and supplies, keeping essential items accessible across different job sites.
- Organize tools by project type and function using color coding, clear storage bins, and labels to enhance organization and reduce frustration.
- Maximize vertical storage by using wall-mounted organizers, magnetic strips, and pegboards to free up floor space and reduce clutter.
- Invest in customized tool chest solutions with space allocation, custom drawer inserts, and mobile tool carts to increase productivity.
- Optimize garage storage by evaluating the layout, installing shelving units, and using pegboards to hang frequently used tools and accessories.
Stucco Finishing Tool Organization Essentials
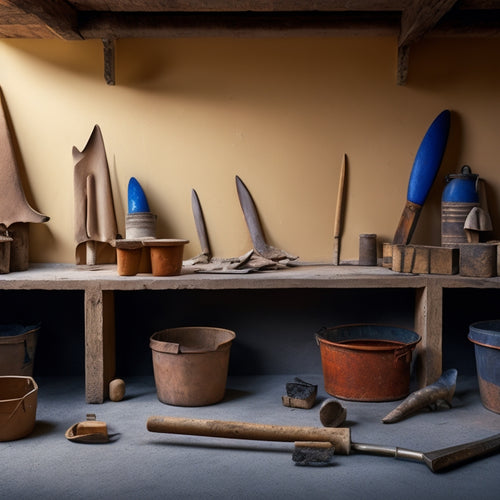
When tackling a stucco finishing project, five essential tools will be your go-to companions: a hawk, trowel, finishing float, texture sprayer, and a mixing bucket. These tools will help you achieve a smooth, durable finish, but only if you maintain them properly.
Regular tool maintenance is vital to guarantee your stucco finishing project turns out as planned. To keep your tools in top condition, clean them thoroughly after each use and store them in a dry place. Remove any dried stucco from your hawk and trowel, and wash them with soap and water. Dry them thoroughly to prevent rust.
For your finishing float, use a stiff-bristled brush to remove any stuck-on stucco. Your texture sprayer requires regular cleaning to prevent clogs, so disassemble it and soak the parts in soap and water.
Labeling and Categorizing Tool Kits
Five well-organized tool kits can make all the difference in the efficiency of your home renovation project. By labeling and categorizing your tool kits, you'll save time searching for the right tool and reduce frustration on the job site.
Start by creating a tool inventory, listing every tool you have and the kit it belongs to. This will help you identify what you need to restock or replace.
Use color coding to categorize your tool kits by function or project type. For example, you can use red labels for plumbing tools, blue for electrical tools, and green for carpentry tools. This visual system will help you quickly spot the kit you need and grab the right tools for the task at hand.
Consider using clear storage bins or containers with labels to further simplify your system. With labeled and categorized tool kits, you'll be able to tackle your home renovation project with confidence and efficiency, freeing you up to focus on the task at hand.
Utilizing Vertical Storage Spaces
You'll be surprised at how much storage space you can free up by maximizing your wall space with pegboards, hooks, and shelves.
Don't forget to optimize those often-wasted corner areas with carousels or baskets that can spin out or pull out for easy access.
Maximize Wall Space
Wall-mounted tool organizers convert empty spaces into productive storage areas, leveraging the often-wasted vertical real estate in your workshop or garage.
By utilizing wall space, you'll free up floor space, reduce clutter, and create a more organized workspace. This allows you to focus on the task at hand, rather than wasting time searching for misplaced tools.
Here are some ways to maximize wall space:
- Install magnetic strips to store metal tools, such as wrenches, pliers, and screwdrivers
- Invest in a pegboard system, which can be customized to fit your specific tool storage needs
- Use wall-mounted bins and baskets to store small items, like nuts, bolts, and screws
Optimize Corner Areas
Your workshop's most underused areas are often the corners, where tools and supplies tend to accumulate in a jumbled mess. By optimizing these areas, you can free up space and create a more organized workspace.
Corner shelving is an excellent way to make use of these often-wasted areas. You can install shelves that wrap around the corner, providing ample storage for bins, baskets, or even pegboards.
Take advantage of unused nooks by installing slide-out bins or drawers. These allow you to store small items like screws, nails, or other fasteners, keeping them within easy reach.
You can also employ corner-mounted hooks to hang items like extension cords, hoses, or even bikes.
Don't let your corners become a dumping ground for clutter. Instead, change them into functional storage spaces that make your workshop more efficient.
With a little creativity, you can turn these often-overlooked areas into useful storage solutions that give you more freedom to focus on your projects.
Use Ceiling Height
Maximizing your workshop's vertical storage spaces is key to keeping your tools and supplies organized and within reach. By utilizing your ceiling height, you can free up floor and wall space, making it easier to move around and find what you need quickly.
-
Install ceiling racks to store infrequently used items like seasonal decorations or out-of-season tools.
-
Use overhead storage bins to keep items like screws, nails, and other small parts organized and out of the way.
-
Consider investing in a ceiling-mounted fold-down worktable or shelf to provide extra workspace when needed.
Customized Tool Chest Solutions
A well-organized workshop is a productive one, and personalized tool chest solutions can be a significant turning point for home renovators. You can maximize your storage capacity by designing a custom tool chest that fits your specific needs.
Start by evaluating the types of tools you use most frequently and allocating space accordingly. Consider investing in custom drawer inserts that can be adapted to the exact dimensions of your tools, ensuring a snug fit and preventing clutter.
Mobile tool carts are another revolutionary development for home renovators. These carts provide additional storage and can be easily moved around the workshop or jobsite as needed.
Look for carts with adjustable shelves and drawers to accommodate tools of varying sizes. By investing in a personalized tool chest solution, you'll be able to quickly locate the tools you need, saving time and increasing productivity.
With a well-organized workshop, you'll be free to focus on the task at hand, rather than wasting time searching for misplaced tools.
Hanging Tool Accessories Efficiently
When hanging tool accessories, you'll want to optimize your vertical space by installing hooks, bins, and pegboards that go all the way up to the ceiling.
This will help you maximize your hook potential, allowing you to store more tools and accessories in a smaller footprint.
Optimize Vertical Space
Many homeowners underestimate the potential of their garage's vertical space, leaving precious square footage unused. You can reclaim this space by installing shelf brackets that hold bins, baskets, or even small tools. This will free up floor space and keep frequently used items within easy reach.
-
Install pegboard panels on walls or ceilings to hang tool belts, bags, and accessories.
-
Use stackable bins or shelves to store seasonal decorations, out-of-season clothing, or infrequently used tools.
-
Consider a slatwall or modular storage system for a customizable and adjustable storage solution.
Maximize Hook Potential
You've optimized your garage's vertical space, now it's time to focus on hanging tool accessories efficiently. Maximize your hook potential by categorizing tools into groups, such as hand tools, power tools, and accessories. This will help you determine the type and number of hooks you need.
Install hooks of varying sizes and types to accommodate different tools, ensuring each hook is accessible and easy to use.
Consider using a pegboard with interchangeable hooks, bins, and accessories to create a flexible and functional workspace design. This will allow you to adjust your storage setup as your tool collection evolves.
You can also repurpose items like bike hooks or screw-in hooks to create a creative storage solution for your tools.
Portable Tool Storage Containers
Portable tool storage containers are a revolutionary solution for home renovation projects, allowing you to keep essential tools and supplies within easy reach wherever you need them.
With a portable container, you can easily transport your tools from one room to another, or from one job site to another, without having to constantly gather and reorganize your supplies.
-
They're perfect for small to medium-sized projects that require a variety of tools and supplies.
-
Many portable containers feature a compact design that won't take up too much space in your workspace.
-
Look for containers made with durable materials that can withstand the rigors of heavy use and harsh job site conditions.
When choosing a portable tool storage container, consider the type of tools and supplies you need to store, as well as the size and weight of the container.
You'll also want to think about features like compartments, dividers, and latches that will help keep your tools organized and secure.
Maximizing Garage Storage Capacity
As you move from room to room or job site to job site with your portable tool storage container, you're likely to accumulate more tools and supplies that need a permanent home.
Your garage is the perfect place to create a centralized tool storage system, but it requires some strategic planning to maximize storage capacity.
Start by evaluating your garage's layout and identifying areas that can be optimized for tool storage. Consider installing garage shelving units that can hold bins, baskets, and other containers to keep small items organized. Label each container so you can quickly find what you need.
For larger items like power tools and equipment, designate a specific area for each type of tool. This will help you maintain a sense of order and prevent clutter from building up.
Invest in a pegboard and hang frequently used tools, freeing up floor space for larger items. By implementing these strategies, you'll be able to store more tools and supplies in your garage, keeping them organized and within reach when you need them.
Frequently Asked Questions
How Often Should I Clean and Maintain My Tool Storage Systems?
You should clean and maintain your tool storage systems regularly, ideally once a month, to keep them organized and functional. Create a maintenance schedule to guarantee you stick to your tool organization tips and keep your tools in top condition.
Can I Use Existing Furniture for Tool Storage With Some Modifications?
You can breathe new life into old furniture by repurposing it for tool storage with creative modifications. Consider upcycling an old dresser or bookshelf to store tools, adding dividers or hooks to maximize space and accessibility.
Are Tool Storage Systems Worth the Investment for DIY Projects?
When tackling DIY projects, you'll find that tool storage systems are worth the investment, offering cost benefits and enhancing organization efficiency, freeing you to focus on the task at hand, rather than wasting time searching for misplaced tools.
How Do I Store Tools With Cords and Hoses Efficiently?
You'll free up space and reduce tangles by implementing cord management and hose organization systems, such as cord reels, hose holders, and retractable reels, keeping your tools with cords and hoses organized and easily accessible.
Can I DIY My Own Customized Tool Storage Solutions?
You can create custom shelves and pegboard organization systems that fit your specific tool needs, saving time and space. With some DIY know-how, you'll be able to design and build a personalized storage solution that keeps your tools within easy reach.
Conclusion
You've finally made it to the end of your home renovation project! Now, it's time to put away those tools and keep them organized for the next project. Remember, a well-organized workspace is a productive one. Did you know that according to the National Association of Home Builders, homeowners who invest time in organizing their tools and materials can save up to 20% of their renovation budget? By implementing these 7 tool storage ideas, you'll be saving time and money on your next project.
Related Posts
-

What Plastering Tools Do You Need for Renovation
You'll need a range of specialized tools to tackle a plastering renovation project efficiently and effectively. Essen...
-
7 Best Plastering Bat Sizes for DIY Renovations
When tackling DIY renovations, you'll want to choose the right plastering bat size to achieve a professional-looking ...
-

Home Renovation Safety Checklist for Homeowners
As a homeowner initiating a renovation project, you know that safety should be your top priority. Start by establishi...


