Top Tools for DIY Home Renovation Plastering Success
Share
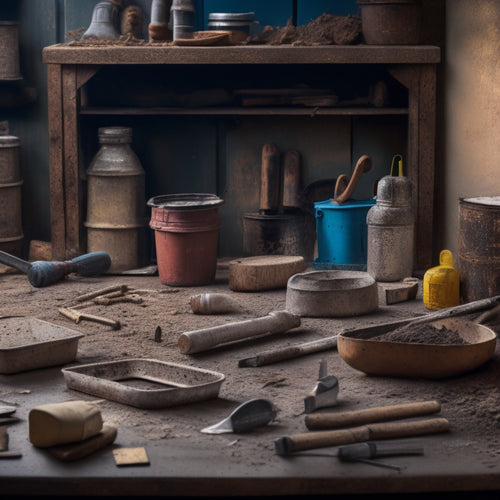
To achieve DIY home renovation plastering success, you'll need a range of essential tools. Start with hand tools like a high-quality trowel, putty knife, hawk, joint knife, and scratch awl. For smoothing and finishing, select the right trowel type and material, and use v-notched trowels, finishing blades, and blades made from stainless steel for wet applications. Don't forget mixing and applying tools, such as a mixing bucket and a plastering trowel, and advanced tools for cornice work and plaster repair. With these tools and a solid understanding of mixing, application, and finishing techniques, you'll be well on your way to achieving professional-level results - and that's just the starting point for excelling in the art of plastering.
Key Takeaways
- A high-quality trowel is essential for applying and smoothing plaster, making it a top tool for DIY plastering success.
- A putty knife, joint knife, and scratch awl are also crucial hand tools for scraping, filling, and scoring plaster effectively.
- Selecting the right type and material of trowel, as well as finishing blades, is vital for achieving a smooth and even finish.
- Mastering efficient mixing techniques, including the correct plaster-to-water ratio, is critical for strong and durable plaster application.
- Adequate safety equipment, such as protective goggles, respirator masks, and gloves, is necessary to prevent injuries and health risks during plastering.
Essential Hand Tools for Plastering
You'll need five essential hand tools to tackle most plastering tasks. These must-haves will help you achieve professional-looking results and make your DIY home renovation project a success.
First, a high-quality trowel is a must for applying and smoothing plaster. Invest in a stainless steel or carbon fiber trowel, as they're durable and resistant to rust.
Next, a putty knife is necessary for scraping and filling small areas. A hawk, a flat plate with a handle, is used to hold and transport plaster. A joint knife is used to finish joints and edges, while a scratch awl is necessary for scoring and marking plaster.
Regular tool maintenance is vital to guarantee your hand tools remain in top condition. Clean and dry your tools after each use, and store them in a dry place to prevent rust.
Mixing and Applying Plaster Efficiently
You'll get the best results from your plastering project by mixing the right ratio of plaster to water, optimizing your worksite conditions to minimize drying time, and perfecting the techniques of applying plaster smoothly and evenly.
To achieve a professional-looking finish, it's essential to understand the importance of each of these factors and how they impact the final outcome.
Mixing the Right Ratio
When tackling a plastering project, mixing the right ratio of plaster to water is essential for achieving a strong, durable, and smooth finish.
You'll want to aim for a workable consistency that's not too runny or too thick.
To get it just right, follow these guidelines:
-
Start by adding a small amount of water to the mixing bucket, then gradually add the plaster, stirring constantly to prevent lumps from forming.
-
Use a mixing stick or trowel to scrape the sides and bottom of the bucket, ensuring all ingredients are well incorporated.
-
Aim for a consistency similar to thick cream or pancake batter – it should flow easily off the mixing stick or trowel.
-
Test the mix by applying a small amount to a surface; if it holds its shape and doesn't sag, you're good to go.
-
If the mix is too runny, add a small amount of plaster and re-mix; if it's too thick, add a little more water.
Optimizing Worksite Conditions
Beyond the mixing ratio, optimizing worksite conditions is vital for efficient and effective plastering. You'll want to make certain your worksite is organized to minimize waste and maximize productivity.
Start by designating a specific area for mixing and applying plaster, keeping it clean and clear of debris. This will prevent contamination and allow you to work efficiently.
Consider lighting carefully, as it can greatly impact the quality of your work. Natural light is ideal, but if working indoors, invest in high-quality task lighting to illuminate the area. This will help you accurately gauge the consistency and color of the plaster, guaranteeing a professional finish.
Proper ventilation is also essential, as plaster can release dust and particles into the air. Open windows and doors to provide a clear path for airflow, and consider wearing a dust mask to protect yourself.
Mastering Plaster Application
Get set to tackle the most critical phase of your DIY home renovation project: perfecting plaster application. This is where your preparation and planning come together to create a flawless finish. To achieve success, you'll need to choose the right plaster type for your project and guarantee proper surface preparation.
-
Imagine a smooth, even surface, free of imperfections and ready for a durable plaster coating.
-
Envision yourself effortlessly mixing and applying plaster, with the right consistency and texture for a professional-looking finish.
-
Visualize the perfect bonding between the plaster and the substrate, guaranteeing a long-lasting and crack-resistant result.
-
Picture the satisfaction of achieving a perfectly smooth finish, with no bubbles, blisters, or unevenness.
-
See yourself confidently tackling complex plastering tasks, such as curved surfaces or intricate designs.
To make this vision a reality, focus on selecting the right plaster type for your specific project needs, whether it's a lime-based, gypsum-based, or cement-based plaster.
Then, ensure your surface is properly prepared by cleaning, patching, and priming it for ideal adhesion.
With the right tools and techniques, you'll be well on your way to perfecting plaster application and achieving a stunning, professional-quality finish.
Smoothing and Finishing Tools
You'll need to select the right trowel for your project, considering factors like blade material, size, and handle type to guarantee a smooth, even finish.
When it comes to finishing blades, you'll want to choose between options like stainless steel, carbon steel, or specialized blades designed for specific plaster types.
Trowel Selection Essentials
Selecting the right trowel for your DIY home renovation plastering project is vital, as it directly impacts the quality of your final finish.
You'll need to take into account the type of trowel and its material to achieve the desired results.
When it comes to trowel types, you'll encounter:
- V-notched trowels for applying and spreading plaster
- Square-notched trowels for creating a smooth, even finish
- Pointed trowels for detail work and corners
- Round-edged trowels for curved surfaces and arches
- Hawk trowels for holding and transferring plaster to your work area
The material of your trowel is also important. You can choose from stainless steel, aluminum, or carbon steel, each with its own strengths and weaknesses.
Stainless steel trowels are resistant to corrosion and easy to clean, while aluminum trowels are lightweight and ideal for large projects.
Carbon steel trowels offer a balance between durability and affordability.
Finishing Blade Options
As you move on to the finishing stages of your DIY home renovation plastering project, having the right finishing blade options is essential for achieving a smooth, even finish.
You'll need blades that can effectively remove excess plaster, smooth out imperfections, and leave a uniform surface.
When selecting finishing blades, consider the blade materials. Stainless steel blades are ideal for wet plaster as they resist rust and corrosion, while carbon steel blades are better suited for dry plaster applications.
You'll also need to choose the right blade shape for the task at hand. Flexible blades with rounded edges are perfect for curved surfaces, while rigid blades with flat edges are better for flat areas.
Additionally, consider the blade's width and thickness, as these factors will impact the smoothness of the finish.
With the right finishing blade, you'll be able to achieve a professional-looking result that complements your DIY home renovation project.
Specialized Tools for Cornice Work
Several specialized tools are essential for achieving professional-looking cornice work, and having them in your toolkit can make all the difference between a mediocre and exceptional finish.
When it comes to creating intricate decorative molding, you'll need the right tools to get the job done efficiently and effectively.
To master the art of cornice cutting, you'll need:
- A cornice cutter, a specialized tool designed specifically for cutting and shaping decorative molding
- A coping saw, perfect for curved cuts and intricate designs
- A combination square, ensuring accurate measurements and precise angles
- A putty knife, used for applying and smoothing out plaster and joint compound
- A miter box, helping you achieve precise miter cuts with ease
With these tools in your arsenal, you'll be well-equipped to tackle even the most complex cornice work projects, resulting in a professional-looking finish that will enhance the overall aesthetic of your DIY home renovation.
Advanced Tools for Plaster Repair
When tackling advanced plaster repair projects, you'll need a range of specialized tools to guarantee a seamless and durable finish. One essential tool is a plaster scraper, which allows you to remove old, damaged plaster and create a smooth surface for new applications.
A putty knife is also important for applying and smoothing out repair materials, such as patching compounds or joint compounds. For more intricate repairs, a plastering trowel with a curved or angled blade is necessary for achieving precise, curved surfaces.
Additionally, a hawk is a must-have for holding and carrying plastering materials, allowing you to work efficiently and effectively. To create a strong bond between old and new plaster, a bonding agent is crucial.
Safety Equipment for Plastering Projects
You've perfected your advanced plaster repair techniques and assembled the necessary specialized tools, but don't forget the most critical aspect of any DIY project: safety.
Plastering projects can be hazardous, and it's crucial to protect yourself from potential risks.
To guarantee a safe and successful project, make sure you have the following safety equipment:
- Protective goggles: shield your eyes from flying debris and dust
- Respirator mask: prevent inhalation of dust, silica, and other hazardous materials
- Gloves: protect your hands from cuts, abrasions, and skin irritation
- Steel-toed boots: safeguard your feet from heavy tools and falling objects
- Dust containment system: minimize mess and prevent airborne particles
Frequently Asked Questions
Can I Reuse Old Plaster for a New Project?
You can potentially reuse old plaster, but you'll need to assess its quality and prepare it properly to reap the plaster recycling benefits. First, inspect the old plaster for contaminants, then clean and crush it to create a usable mixture, ensuring a strong bond in your new project.
How Do I Remove Old Plaster From a Wall?
Grab your trusty medieval-style hammer, modern DIY warrior! To remove old plaster, you'll need to don protective gear, score the surface, and pry it off in small sections, taking care to avoid damaging the underlying wall, then prep the surface for new plaster with a thorough cleaning and sanding.
What Is the Ideal Temperature for Plastering?
When you're perfecting plastering techniques, you'll find that perfect temperatures range from 60°F to 75°F, as extreme temperature effects can compromise adhesion, workability, and final finish quality, so guarantee a stable environment for best results.
Can I Plaster Over a Painted Surface?
You're about to begin a plastering journey, like a skilled chef adding the final flourish to a culinary masterpiece! When plastering over a painted surface, you'll need to guarantee proper surface preparation, scraping off loose paint, and employing advanced plastering techniques to achieve a strong, durable bond.
How Long Does It Take for Plaster to Fully Dry?
You'll wait around 24 to 48 hours for plaster to fully dry, but it's essential to mention that plaster drying and curing are different; curing can take up to 28 days, so be patient and don't rush the process.
Conclusion
You've made it to the finish line! With these top tools for DIY home renovation plastering, you're well-equipped to tackle any project. Did you know that according to the National Association of Home Builders, 64% of homeowners undertake DIY projects to increase their home's value? By investing in the right tools, you'll not only achieve professional-looking results but also enhance your property's worth. Now, get out there and start plastering like a pro!
Related Posts
-

Trowel Tool Cost for DIY Home Renovation Projects
When it comes to your DIY home renovation project, you'll need to budget for a variety of trowel tools, including stu...
-

Renovation Tool Checklist for Smooth Finishes
When tackling a renovation project that requires a smooth finish, you'll need a thorough tool checklist to guarantee ...
-

Streamline Your Exterior Renovation Timeline
To streamline your exterior renovation timeline, you'll need to approach the process strategically. Start by planning...


