What Tools Do You Need for DIY Home Renovation
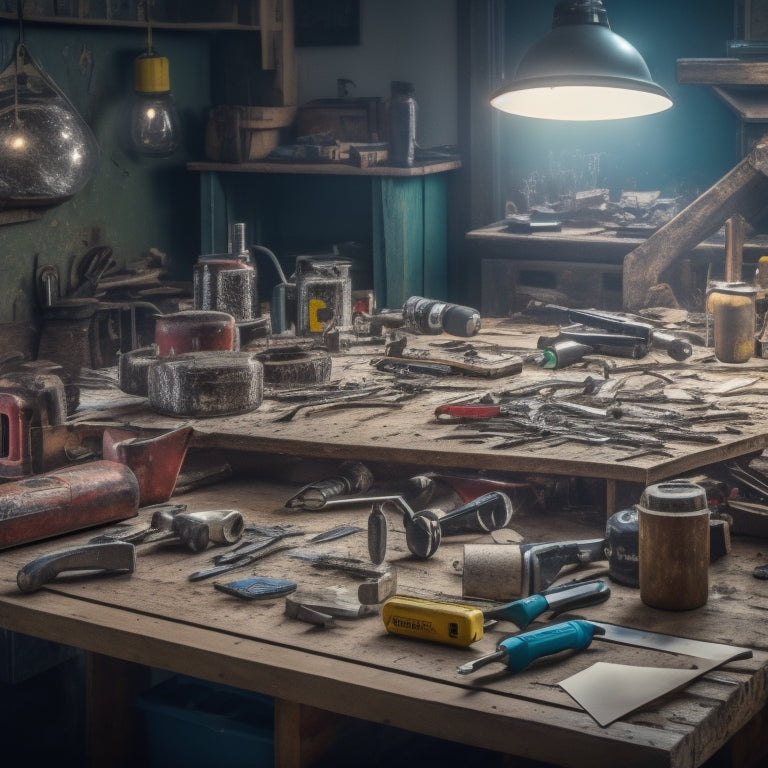
You'll need a range of essential tools to tackle a DIY home renovation project. Start with safety gear like safety goggles, protective gloves, and a hard hat to prevent injuries. Measuring and marking tools, such as tape measures and laser levels, will help you guarantee accuracy. Concrete mixing and pouring tools, including mixing buckets and trowels, are necessary for concrete work. Wall forming and shaping equipment, like wall frames and precision cutting saws, will help you create structurally sound walls. Finishing and smoothing tools, including sanding blocks and trowels, will give your renovation a polished finish. As you begin your project, you'll quickly realize that having the right tools is just the starting point.
Key Takeaways
• Safety gear, including goggles, gloves, and hard hats, is essential for protecting yourself from injury during DIY home renovation.
• Measuring and marking tools, such as tape measures, laser levels, and squares, are necessary for accurate calculations and precise cuts.
• Concrete mixing and pouring tools, including mixing buckets, trowels, and drills, are crucial for working with concrete effectively.
• Power tools, such as demolition hammers, reciprocating saws, and concrete saws, are vital for breaking up and cutting through various materials.
• Finishing and smoothing tools, including trowels, floats, and sanding blocks, are necessary for achieving a professional-looking finish in your DIY home renovation project.
Essential Safety Gear for Renovation
As you prepare to tackle your DIY home renovation project, outfit yourself with the essential safety gear to protect yourself from potential hazards and guarantee a successful, injury-free experience. Safety should always be your top priority, and having the right gear can make all the difference.
First and foremost, invest in a good pair of safety goggles. These will protect your eyes from debris, dust, and other particles that may fly around during demolition or construction.
Next, get yourself a pair of protective gloves. These won't only protect your hands from cuts and abrasions but also provide grip and traction, reducing the risk of accidents.
Additionally, consider a dust mask or respirator to prevent inhalation of harmful particles. Don't forget a hard hat and steel-toed boots for added protection.
Measuring and Marking Tools Needed
When you're tackling a DIY home renovation, accurate measurements are essential to getting the job done right.
You'll need reliable tape measures to take precise readings, ensuring your cuts are accurate and your materials are used efficiently.
Tape Measures Required
You'll need a reliable tape measure to accurately calculate distances, widths, and heights throughout your DIY home renovation project.
When it comes to tape measure types, you'll find three main options: fractional, decimal, and metric.
Fractional tape measures display measurements in feet, inches, and fractions of an inch, while decimal tape measures show exact decimal measurements. Metric tape measures display measurements in meters, centimeters, and millimeters.
For most DIY projects, a fractional tape measure will suffice. However, if you're working with precise calculations or international building codes, a decimal or metric tape measure might be necessary.
Regardless of the type, it's important to choose a tape measure with high accuracy. Look for tape measures with a high level of precision, usually specified in increments of 1/16 inch or 1 mm.
A tape measure with a high level of accuracy will guarantee that your measurements are correct, reducing the risk of errors and mistakes in your renovation project.
Marking Accurate Cuts
Accurately marking cuts relies on having the right measuring and marking tools, which guarantee precise lines and avoid costly mistakes in your DIY home renovation project. You'll need to invest in a few essential tools to guarantee cut accuracy and master various marking techniques.
Here are the must-haves for marking accurate cuts:
-
Laser level: Projects a level line or dot onto your work surface, guaranteeing straight cuts and accurate installations.
-
Square: Verifies the accuracy of your measurements and helps you create precise angles and joints.
-
Marking gauge: Allows you to make consistent, precise markings on your materials, reducing errors and waste.
- Pencils and markers: High-quality writing tools that create clear, visible marks on various surfaces, making it easier to follow your cut lines.
With these tools in your arsenal, you'll be able to execute precise cuts and avoid costly mistakes.
Concrete Mixing and Pouring Tools
When working with concrete, you'll need the right tools to mix and pour it correctly.
You'll start by selecting a sturdy mixing bucket and the necessary tools, such as a mixing stick and trowel, to guarantee a smooth consistency.
From there, you'll choose a concrete mix design that suits your project's specific needs.
Mixing Bucket and Tools
With a sturdy mixing bucket and the right tools, you can efficiently mix and pour concrete for your DIY home renovation project. The type of bucket you choose is vital, as it can affect the mixing process and quality of the concrete. You'll want a bucket that's specifically designed for mixing concrete, with a heavy-duty construction and a non-stick surface to prevent the mixture from sticking.
When it comes to mixing techniques, you'll want to use a combination of tools to achieve the right consistency.
Here are some essential tools to have:
-
Mixing trowel: A must-have for scooping and mixing concrete.
-
Drill with mixing paddle: Ideal for larger batches and achieving a smooth consistency.
-
Hand trowel: Perfect for finishing and smoothing out the concrete surface.
- Concrete rake: Useful for spreading and leveling the concrete.
Concrete Mix Design Options
You'll need to select the right concrete mix design options to guarantee your DIY home renovation project meets its unique demands, taking into account factors like compressive strength, workability, and durability.
Mix design considerations will vary depending on the specific application, such as flooring, walls, or countertops. For instance, a high-traffic area may require a mix with higher compressive strength, while a decorative feature may prioritize aesthetics over strength.
When choosing a mix design, consider the specific requirements of your project. Do you need a fast-setting mix or one with a longer workability time? Are you looking for a specific concrete color option to match your design aesthetic? From standard gray to vibrant hues, concrete color options are vast, and selecting the right one can elevate the overall look of your renovation.
Take the time to research and understand the various mix design options available. Don't hesitate to consult with a professional or seek guidance from a trusted supplier to ascertain you're selecting the best mix for your project.
Pouring and Finishing Equipment
Your concrete mix design is only as good as the tools you use to pour and finish it, so it's vital to invest in the right pouring and finishing equipment to achieve a professional-looking result.
With the right tools, you'll be able to guarantee a smooth, even finish that's free of imperfections.
Here are some essential pouring and finishing equipment you'll need:
-
Concrete trowels: These are used to spread and smooth out freshly poured concrete. Look for trowels with sturdy handles and high-quality blades that won't scratch the surface.
-
Floats: These are used to further smooth out the concrete surface, removing any air pockets or imperfections.
-
Edgers: These are used to create a clean, defined edge around the perimeter of the concrete surface.
- Curing compound applicators: These are used to apply curing compounds to the concrete surface, helping to prevent moisture loss and promote proper curing.
Wall Forming and Shaping Equipment
As you commence on your DIY home renovation journey, you'll soon realize that forming and shaping walls requires a range of specialized tools, including sturdy wall frames, precision cutting saws, and reliable fastening systems. These tools will help you create walls that aren't only structurally sound but also visually appealing.
When it comes to wall insulation techniques, you'll need a foam insulation gun to apply spray foam insulation, a staple gun for fiberglass batts, and a utility knife for cutting insulation materials to size.
For drywall installation tips, invest in a drywall saw or utility knife for cutting drywall, a drywall hammer for tapping panels into place, and a joint compound applicator for finishing seams.
Additionally, a level and straightedge will guarantee your walls are plumb and straight, while a laser level will help you achieve precise angles and alignments. Don't forget a stud finder to locate wall studs, making it easier to hang heavy objects or install shelves.
With these essential tools, you'll be well-equipped to tackle wall forming and shaping tasks with confidence, resulting in professional-looking walls that will enhance the overall aesthetic of your renovated space.
Finishing and Smoothing Tools Required
With your walls formed and shaped, it's time to focus on the finer details, and that's where finishing and smoothing tools come into play, helping you achieve a polished, professional-looking finish. These tools will enable you to refine your work, ensuring a seamless blend of functionality and aesthetics.
To get started, you'll need the following essential finishing and smoothing tools:
-
Sanding blocks: For smoothing out rough surfaces and achieving a uniform finish.
-
Trowels: For applying and spreading materials like joint compound, plaster, or adhesive.
-
Putty knives: For filling in gaps, holes, and imperfections, and for scraping off excess material.
- Orbital sanders: For efficient and effective sanding, especially when working with large surfaces.
Mastering various smoothing techniques and exploring different finishing options will allow you to bring your DIY home renovation project to life.
Reinforcement and Anchoring Systems
You'll need to install reinforcement and anchoring systems to guarantee that your walls, floors, and ceilings can withstand the stresses and loads of daily use. These systems provide additional strength and stability to your home's structure, making certain it remains safe and secure.
When it comes to reinforcement techniques, you'll need to take into account the type of material you're working with. For example, if you're dealing with concrete, you may need to use rebar or fiber mesh to add strength. In wood-framed construction, you might use metal studs or plywood to reinforce walls and floors.
Anchoring methods are also essential, as they help to secure heavy objects, like cabinets and shelving, to walls and ceilings. You'll need to choose the right type of anchor for the job, such as toggle bolts, molly bolts, or screw anchors.
Make sure to follow the manufacturer's instructions and take into consideration the weight and size of the object you're anchoring. By using the right reinforcement and anchoring systems, you can guarantee your DIY home renovation project meets building codes and stands the test of time.
Demolition and Removal Tools Needed
After confirming your home's structure can withstand the stresses of daily use by installing reinforcement and anchoring systems, it's time to tear down the old to make way for the new. This requires the right demolition and removal tools.
You'll need to adopt safe demolition techniques to avoid damaging surrounding structures and to guarantee efficient debris removal.
Here are the essential tools you'll need for demolition and removal:
-
Demolition hammer: A heavy-duty hammer for breaking up walls, floors, and other structures.
-
Pry bars: Used for prying apart walls, floors, and ceilings, and for removing nails and other fasteners.
-
Reciprocating saw: A versatile saw for cutting through wood, metal, and other materials.
- Dust mask and safety goggles: Protect yourself from airborne debris and dust with these essential safety tools.
Remember to always follow safety guidelines and best practices when using these tools to guarantee a successful and safe demolition process.
Power Tools for Concrete Cutting
When it comes to concrete cutting, you'll need to choose the right power tools and methods to get the job done efficiently and safely.
You'll want to evaluate the type of concrete you're working with, as well as the specific task at hand, to decide between different concrete cutting methods.
Concrete Cutting Methods
Cut through concrete efficiently with the right power tools, and your DIY home renovation project will be off to a strong start. When it comes to concrete cutting methods, you have several options to choose from, each with its own advantages and limitations. Here are some common concrete cutting techniques to take into account:
-
Wet cutting: This method uses a diamond blade with water to reduce dust and debris. It's ideal for indoor projects where dust control is essential.
-
Dry cutting: This method uses a diamond blade without water, making it suitable for outdoor projects where dust isn't a concern.
-
Core drilling: This method involves drilling a hole through the concrete using a diamond-coated drill bit. It's perfect for creating precise holes for plumbing, HVAC, or electrical installations.
- Demolition sawing: This method uses a powerful saw to break up concrete into smaller pieces, making it ideal for demolition projects.
Remember to prioritize concrete cutting safety by wearing protective gear, including gloves, safety glasses, and a dust mask.
Always follow the manufacturer's instructions for your power tools, and take regular breaks to avoid fatigue. By choosing the right concrete cutting method and following safety guidelines, you'll be able to tackle your DIY project with confidence.
Concrete Saw Blades
What makes a concrete saw blade tick, and how do you choose the right one for your DIY home renovation project? A concrete saw blade is a vital component of your power tools for concrete cutting. With so many options available, selecting the right blade can be overwhelming. However, understanding the different types of concrete blades and their maintenance requirements can make all the difference.
Here's a breakdown of the most common concrete blade types and their uses:
| Blade Type | Application | Characteristics |
|---|---|---|
| Abrasive blades | General-purpose cutting, demo work | Inexpensive, high-wear rate |
| Diamond blades | Precise cutting, tile work | High-precision, long lifespan |
| Segmented blades | Heavy-duty cutting, demolition | Aggressive cutting, high-wear rate |
| Continuous rim blades | Smooth cutting, finishing work | Smooth finish, low-wear rate |
| Turbo blades | Fast cutting, heavy-duty work | Fast cutting, high-wear rate |
When it comes to blade maintenance, remember to regularly clean and inspect your blades, store them properly, and sharpen or replace them as needed. By choosing the right concrete saw blade and following proper maintenance tips, you'll be able to tackle your DIY home renovation project with confidence and precision.
Hand Tools for Concrete Finishing
As you prepare to tackle concrete finishing, you'll need a sturdy set of hand tools to achieve a smooth, even surface. Concrete finishing requires precision and patience, and the right tools can make all the difference.
Here are the essential hand tools you'll need for concrete finishing:
-
Trowel: A trowel is used to apply and smooth out concrete. Mastering trowel techniques is vital for achieving a smooth finish.
-
Float: A float is used to flatten and smooth out the concrete surface. It's essential for removing excess water and air pockets.
-
Edger: An edger is used to create a clean, defined edge around the concrete surface. It's perfect for creating a seamless shift between the concrete and adjacent surfaces.
- Sealer applicator: A sealer applicator is used to apply concrete sealers, which protect the concrete from stains and damage.
With these hand tools, you'll be well-equipped to achieve a professional-looking finish on your concrete surface. Remember to practice your trowel techniques and apply concrete sealers according to the manufacturer's instructions for best results.
Specialized Tools for Corners and Edges
You'll need specialized tools to accomplish crisp, clean edges and corners, the most challenging aspects of concrete finishing. These areas require precision and attention to detail to prevent unevenness and imperfections. To get the job done, you'll need to add the following tools to your arsenal:
| Tool | Description |
|---|---|
| Corner Chisels | Used to remove excess concrete and create a defined edge in corners. Available in various sizes and angles to suit different corner types. |
| Edge Trimmers | Designed to smooth and shape concrete edges, creating a clean and even finish. Often feature adjustable blades for customized cutting. |
| Edge Floats | Long, flat tools used to spread and level concrete along edges, guaranteeing a smooth finish. |
| Corner Floats | Curved tools that match the angle of a corner, allowing for even concrete distribution and a crisp finish. |
These specialized tools will help you accomplish professional-looking results in the most demanding areas of your concrete project. Remember to choose the right tool for the job and to follow proper techniques to guarantee a high-quality finish. With practice and patience, you'll be able to tackle even the toughest corners and edges with confidence.
Frequently Asked Questions
How Do I Dispose of Hazardous Renovation Waste Responsibly?
You'll need to identify hazardous materials like asbestos, lead paint, and chemicals, then contact local authorities for guidance on hazardous waste disposal and renovation waste management, and use designated facilities for safe drop-off.
Can I Renovate During Winter Without Damaging Materials?
When renovating during winter, you'll need to protect materials from harsh weather; invest in material storage solutions like waterproof containers and tarps, and follow winter renovation tips like scheduling deliveries during warmer parts of the day.
Do I Need a Permit for a DIY Home Renovation Project?
You'll need to determine if you require a permit for your DIY home renovation project by researching local permit requirements and renovation regulations, which vary depending on the scope and location of your project.
How Do I Protect My Floors During the Renovation Process?
You'll want to shield your floors from damage by exploring floor covering options like plastic sheets, drop cloths, or adhesive films, and don't forget to wear protective gear like knee pads and boot covers to prevent scratches.
Can I Reuse or Recycle Old Building Materials During Renovation?
"Like a medieval treasure hunter, you're on a quest to reduce waste! You can absolutely reuse or recycle old building materials during renovation by employing upcycling techniques and salvaging materials, giving new life to old gems."
Conclusion
You've made it to the final stretch of your DIY home renovation journey! As the dust settles, take a moment to admire your handiwork.
Remember, a modern-day Leonardo da Vinci like yourself needs the right tools for the job. From safety gear to specialized equipment, having the right arsenal at your disposal can make all the difference.
So, don your hard hat, grab your trusty trowel, and get ready to reveal your masterpiece to the world!
Related Posts
-
Budget-Friendly Materials for Your Home Renovation Project
As you plan your home renovation project, finding budget-friendly materials is key to turning your design vision into...
-

Affordable Plastering Tools for Home Renovation Success
You're taking the first step towards a successful home renovation by investing in the right plastering tools. Start w...
-

Renovation Tool Checklist for Smooth Finishes
When tackling a renovation project that requires a smooth finish, you'll need a thorough tool checklist to guarantee ...


