What Plastering Tools Do You Need for Renovation
Share
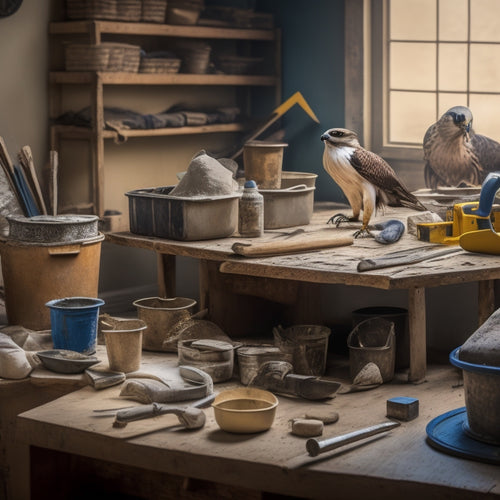
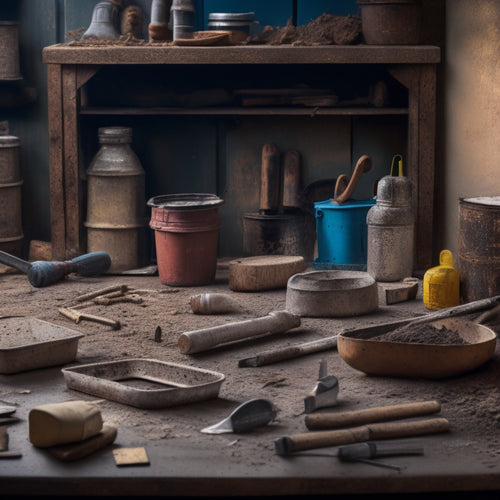
You'll need a range of specialized tools to tackle a plastering renovation project efficiently and effectively. Essential hand tools include a high-quality trowel, putty knife, hawk, mixing stick, and hawk/plasterer's board. Power tools like an angle grinder, sanding block, and polisher will help you achieve a smooth finish. Don't forget mixing and applying equipment, safety gear, and measuring and testing tools like spirit levels, plumb lines, and precision depth gauges. With these tools in your arsenal, you'll be well-equipped to take on your plastering project; and by understanding how to use them correctly, you'll reveal the secrets to a flawless finish.
Key Takeaways
- Essential hand tools for plastering include trowels, putty knives, hawks, mixing sticks, and plasterer's boards for applying and smoothing plaster.
- Power tools like angle grinders, sanding blocks, and polishers help achieve a smooth finish and prepare surfaces for finishing.
- Mixing and applying equipment like mixing drums, power mixers, and precision tools ensure accurate and efficient plastering.
- Safety gear such as safety goggles, dust masks, steel-toed boots, and protective clothing are crucial for preventing injuries and promoting overall health.
- Measuring and testing tools like spirit levels, plumb lines, and specialized tools help achieve precise measurements and a high-quality finish.
Essential Hand Tools for Plastering
What do you reach for when you're about to tackle a plastering project? You need the right hand tools to get the job done efficiently and effectively. A sturdy trowel is crucial for applying and smoothing plaster. Invest in a high-quality trowel with a comfortable grip to reduce fatigue.
A putty knife is another must-have for scraping and spreading plaster. Its flexibility allows for precise control and smooth finishing.
A hawk is also important for holding and carrying plaster. Its flat surface and straight edge enable you to scoop and pour plaster with ease.
Don't forget a mixing stick or paddle for blending plaster to the right consistency. To guarantee your tools remain in top condition, prioritize tool maintenance. Regularly clean and dry your tools to prevent rust and damage.
This will help you master various plastering techniques and achieve professional-looking results. By having these crucial hand tools and maintaining them properly, you'll be well on your way to tackling any plastering project with confidence and power.
Power Tools for Smooth Finishing
You'll achieve a smooth finish by mastering three essential power tools: an angle grinder for removing old plaster and preparing surfaces, a sanding block for feathering out edges and creating a uniform texture, and a polisher for applying a high-gloss finish.
With these tools, you'll be able to tackle a variety of renovation tasks, from repairing cracks to creating a flawless ceiling.
Angle Grinder Uses
Precision is key when it comes to achieving a smooth finish in renovation projects, and that's where angle grinders come into play.
You'll want to choose the right angle grinder type for your specific needs. There are electric, pneumatic, and cordless options, each with its own strengths and weaknesses. Electric grinders are ideal for heavy-duty tasks, while pneumatic grinders are better suited for delicate work. Cordless grinders offer maximum portability.
When using an angle grinder, you'll need to maintain it regularly to guarantee peak performance. Angle grinder maintenance involves cleaning the tool, checking the cord or battery, and replacing worn-out parts. Failure to do so can lead to reduced power and efficiency.
You'll also need to choose the right accessories, such as grinding wheels or sanding discs, to achieve the desired finish.
With the right angle grinder and proper maintenance, you'll be able to tackle a variety of tasks, from removing old plaster to smoothing out rough surfaces.
Sanding Block Benefits
When tackling renovation projects, achieving a smooth finish often requires a combination of power tools and manual techniques. Sanding blocks are an essential tool for surface preparation, helping you to achieve a high-quality finish. By using a sanding block, you can guarantee that your sandpaper stays flat and doesn't dig into the surface, resulting in uneven scratches.
Here are some benefits of using a sanding block:
-
Improved sanding techniques: A sanding block helps you to apply even pressure, guaranteeing that your sandpaper is in full contact with the surface, resulting in a smoother finish.
-
Increased efficiency: With a sanding block, you can cover larger areas faster, making the sanding process more efficient.
-
Reduced fatigue: By distributing the pressure more evenly, a sanding block reduces the strain on your hands and arms, making it easier to sand for longer periods.
- Better surface preparation: A sanding block helps to remove imperfections and creating a smooth surface, ready for painting or finishing.
Polisher Techniques Matter
With your sanding block in hand, you've smoothed out the surface. Now it's time to bring out the big guns – power tools – to take your finish to the next level. A polisher is a game-changer in surface preparation, and polishing techniques matter when it comes to achieving a flawless finish.
Start by selecting the right polishing pad for your power tool. A wool pad is ideal for removing minor imperfections, while a foam pad is better suited for more aggressive polishing.
Next, apply a polishing compound to the pad and work in small, circular motions to cover the entire surface. Apply moderate pressure, increasing as needed for tougher imperfections.
As you polish, maintain a consistent speed and pressure to avoid creating swirl marks or scratches. Regularly inspect your work and adjust your polishing techniques accordingly.
Mixing and Applying Equipment
You'll need the right mixing and applying equipment to get your plastering job done efficiently and effectively. With the correct tools, you'll be able to master various mixing techniques and applying methods to achieve a smooth, even finish.
Here's what you'll need:
-
Mixing drum: A sturdy, reliable mixing drum is crucial for combining your plastering materials. Look for one with a heavy-duty design and a capacity that suits your project's demands.
-
Power mixer: A power mixer will save you time and energy by doing the heavy work for you. Choose one with variable speed control to adapt to different mixing techniques.
-
Hawk or plasterer's board: A hawk or plasterer's board is a must-have for applying and holding your plaster. Opt for one made from durable materials and with a comfortable grip.
- Trowel: A high-quality trowel is essential for applying and smoothing out your plaster. Select one with a sturdy handle and a blade that's suitable for your specific plastering needs.
Having these essential tools at your disposal will enable you to tackle your plastering project with confidence and precision.
Safety Gear for Plasterers
Protecting yourself from the hazards of plastering is essential to avoiding injuries and ensuring a successful project. As a plasterer, you're exposed to dust, debris, and physical strain, which can lead to serious health issues if not addressed. Investing in the right safety gear is vital to mitigate these risks.
| Protective Gear | Purpose | Why You Need It |
|---|---|---|
| Safety Goggles | Protect eyes from dust and debris | Prevents eye injuries and vision loss |
| Dust Mask | Filters out dust and particles | Reduces risk of respiratory problems |
| Steel-Toed Boots | Protects feet from heavy objects | Prevents foot injuries and crush damage |
You should also consider wearing long-sleeved shirts, long pants, and a hat to prevent skin irritation and abrasions. Additionally, gloves can provide grip and protection for your hands while working with plaster. Remember, plasterer safety is not just about avoiding accidents, it's also about maintaining your overall health and wellbeing. By investing in the right protective gear, you'll be able to focus on delivering high-quality results without compromising your safety.
Measuring and Testing Tools
You'll need to verify your plastering is precise and accurate, and that's where measuring and testing tools come in.
You'll use spirit levels to guarantee your work is straight and level, accurately checking the depth of your plaster with specialized tools, and testing the flatness of surfaces to achieve a smooth finish.
Spirit Levels Ensure
Accurate measurements are essential in plastering, and spirit levels guarantee your walls, ceilings, and floors are perfectly level and plumb. You can't afford to get it wrong, as even the slightest deviation can affect the entire renovation project.
That's why you need a reliable spirit level to verify spirit level accuracy and alignment verification.
Here are the key benefits of using a spirit level:
-
Level surfaces: Verify that your walls, ceilings, and floors are perfectly level, confirming a smooth finish and even application of plaster.
-
Plumb lines: Check that your walls, corners, and edges are perfectly plumb, confirming straight lines and proper alignment.
-
Accurate measurements: Take precise measurements to validate proper fitting and installation of materials.
- Error prevention: Catch potential errors early on, saving you time, money, and frustration in the long run.
Accurate Depth Checking
When tackling a plastering project, precise depth measurement is vital to achieve a professional finish. You need to guarantee that the plaster is applied evenly and at the correct depth to avoid unevenness and weak spots. To achieve this, you'll need to employ effective depth measurement techniques.
| Tool | Description |
|---|---|
| Precision Depth Gauges | Measure depth of plaster with accuracy up to 0.1mm |
| Depth Measuring Rulers | Long, flat rulers for measuring depth in larger areas |
| Laser Levels | Project a level line to check for unevenness |
| Feeler Gauges | Thin, flexible gauges for measuring depth in tight spaces |
| Depth Stops | Attach to trowel to maintain consistent depth |
Using these tools, you can guarantee that your plaster is applied at the correct depth, giving you a strong and even finish. Remember, accurate depth measurement is vital for a professional-looking result. By investing in the right tools, you'll be able to achieve a high-quality finish that will last for years to come.
Surface Flatness Testing
Most plastering projects require a surface flatness tolerance of around 3mm to guarantee a professional finish.
You need to ascertain your surface meets these flatness standards to avoid surface imperfections that can affect the final result. To do this, you'll need the right tools for surface flatness testing.
Here are the essential tools you'll need:
-
Spirit level: A high-quality spirit level helps you identify any deviations from the horizontal or vertical plane, ensuring your surface is perfectly level.
-
Straightedge: A long, straightedge allows you to check for any deviations from a straight line, helping you detect even the slightest surface imperfections.
-
Flatness gauges: These gauges come in various sizes and help you measure the flatness of your surface, ensuring it meets the required tolerance.
- Laser level: A laser level projects a level line or plane, making it easy to identify any surface imperfections and ensure your surface is perfectly flat.
Specialized Tools for Corners
Corners, where walls meet, are notorious trouble spots in plastering projects. To tackle these areas effectively, you'll need specialized tools designed specifically for corners.
Corner trowels are a must-have for applying and smoothing out plaster in these tight spaces. Their angled blades allow for precise control and easy access to corners, making it easier to achieve a smooth finish.
Another essential tool for corners is corner beads. These are metal strips that you press into the wet plaster to create a crisp, clean edge.
They come in various sizes and are used to reinforce the plaster at the corner, preventing cracks and ensuring a strong bond. When choosing corner beads, make sure to select the right size for your project and press them firmly into the plaster to avoid air pockets.
Frequently Asked Questions
Can I Use a Putty Knife for Scraping off Old Plaster?
You can use a putty knife for scraping off old plaster, but be prepared for a tedious process. Employ gentle scraping techniques to avoid damaging the surface, and consider upgrading to a dedicated scraping tool for more efficient results.
How Do I Clean and Maintain My Plastering Tools?
Did you know 80% of tool damage occurs due to poor storage? You're preventing that by cleaning your tools regularly! Use soap and water to wipe down tools, then dry and store them in a designated area to maintain their quality.
Are There Any Eco-Friendly Alternatives to Traditional Plaster?
You're looking for an eco-friendly alternative to traditional plaster, and you'll find it in natural plaster made from sustainable materials like clay, lime, and earth oxides, offering a durable, toxin-free, and environmentally responsible solution for your renovation project.
Can I Reuse Mixed Plaster That Has Gone Hard?
You can't reuse mixed plaster that's gone hard, as its properties change irreversibly; instead, focus on perfecting your mixing techniques to minimize waste and guarantee a strong, durable finish that lasts.
Do I Need a License to Work as a Professional Plasterer?
"Practice makes perfect," so get familiar with plastering regulations! You'll need to check if your state or country requires a license to work as a professional plasterer, as professional requirements vary, ensuring you meet the necessary standards to deliver high-quality results.
Conclusion
You've got the right mix of skills and materials, now it's time to put them to work. Remember, having the right tools for the job is just as important as having the right techniques. With essential hand tools for shaping and smoothing, power tools for a fine finish, mixing and applying equipment for efficient work, safety gear for protection, measuring and testing tools for accuracy, and specialized tools for corners, you'll be well-equipped to tackle any plastering renovation project that comes your way, efficiently, effectively, and safely.
Related Posts
-

Affordable Plastering Tools for Home Renovation Success
You're taking the first step towards a successful home renovation by investing in the right plastering tools. Start w...
-

7 Smart Tool Organization Tips for Small Renovations
As you tackle your small renovation, you're likely wasting precious time searching for misplaced tools. To enhance ef...
-

Trowel Tool Cost for DIY Home Renovation Projects
When it comes to your DIY home renovation project, you'll need to budget for a variety of trowel tools, including stu...


