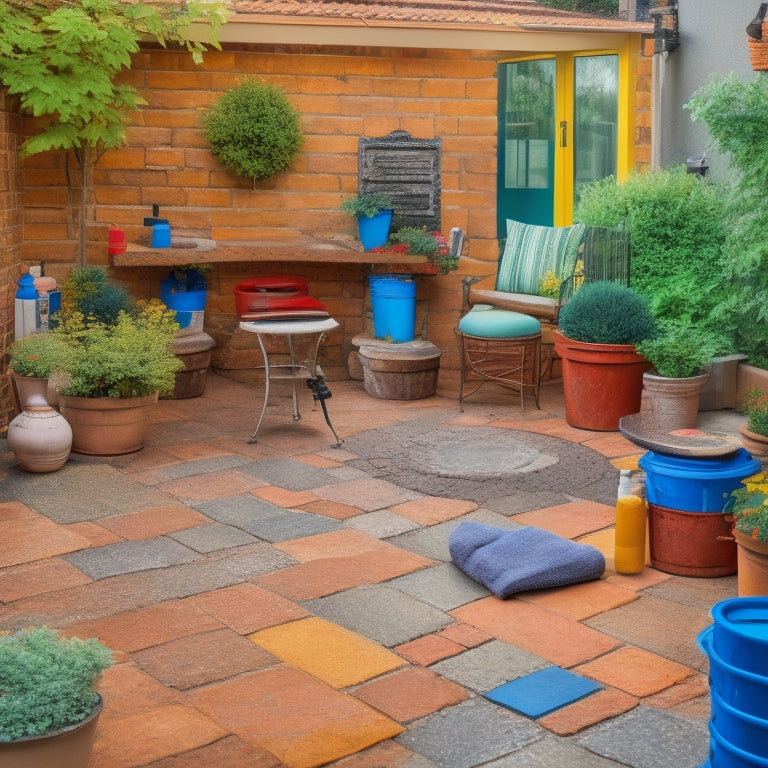
Top Patio Sealant Removal Tools for Home Renovation
When tackling patio renovation, you'll need to remove old sealant effectively. Start by choosing the right remover for your specific sealant type and ensuring surface compatibility to prevent damage. Next, explore manual removal methods with handheld tools, chemical-based solutions for stubborn sealants, or power tool options for large areas. Consider the unique challenges of cinder block patios and maintain safety precautions throughout the process. By selecting the right tools, following effective removal techniques, and maintaining a clean workspace, you'll be well on your way to a successful renovation - and with the right guidance, you'll be able to overcome even the toughest removal challenges.
Key Takeaways
• Choose a sealant remover designed for the specific type of patio sealant (silicone, acrylic, polyurethane) to ensure effective removal.
• Select manual, chemical-based, or power tool options based on the size of the project, sealant type, and surface material to minimize damage.
• Use tools specifically designed for removal, such as putty knives or scrapers with replaceable blades, to scrape off old sealant effectively.
• Wear protective gear, including eyewear, masks, and gloves, to prevent injury and skin irritation when using chemical-based removers.
• Test removal techniques on a small, inconspicuous area first to ensure the chosen method is safe and effective for the patio surface.
Choosing the Right Sealant Remover
When selecting a sealant remover, you'll need to take into consideration the type of patio sealant you're working with, as different removers are formulated to tackle specific types of sealants.
For instance, if you're dealing with a silicone-based sealant, you'll require a remover that's specifically designed to break down silicone's strong molecular bonds. On the other hand, if you're working with an acrylic or polyurethane-based sealant, a different type of remover will be necessary.
It's also essential to evaluate the surface compatibility of the remover. You wouldn't want to use a product that damages or discolors your patio's surface, whether it's concrete, stone, or wood.
Make sure to choose a remover that's safe for your specific surface type. Additionally, check the remover's compatibility with the sealant type to guarantee effective removal.
Sealant Removal Tool Options
When it comes to removing patio sealant, you'll find there are several tool options at your disposal.
You'll need to contemplate manual removal methods, which can be time-consuming but effective.
Additionally, chemical-based solutions can break down the sealant.
You may also want to explore power tool options, which can greatly speed up the removal process.
Manual Removal Methods
You'll find that manual removal methods offer a range of sealant removal tool options that can be effective for various patio sealant types and surfaces.
When it comes to manual scraping techniques, you'll want to evaluate using handheld tools such as putty knives, scrapers, or chisels. These tools are ideal for removing sealant from small to medium-sized areas, and can be particularly effective for removing old, dried-out sealant.
When selecting a handheld tool, assess the type of sealant you're working with, as well as the surface material. For example, a putty knife might be too aggressive for delicate surfaces, while a chisel might be better suited for removing thick, stubborn sealant.
Additionally, contemplate the level of precision you need - if you're working with intricate designs or patterns, a smaller, more precise tool might be necessary.
Manual removal methods can be time-consuming, but they offer a high degree of control and precision. By choosing the right handheld tool and technique, you can effectively remove old sealant and prepare your patio for a new application.
With patience and practice, you'll be able to achieve professional-looking results without breaking the bank.
Chemical-Based Solutions Exist
Do chemical-based solutions offer a more efficient alternative to manual removal methods for tackling stubborn patio sealants?
As you weigh your options, consider the benefits of chemical-based solutions. These products utilize specific chemical reactions to break down and dissolve patio sealants, making removal a relatively quick and easy process. When used correctly, chemical-based solutions can be highly effective, especially for large areas or thick sealant applications.
However, it's crucial to choose a product that's environmentally friendly and safe for your patio surface. Be sure to read labels carefully and follow instructions to minimize the environmental impact of these solutions. Additionally, take necessary safety precautions to protect yourself from skin and eye irritation, as well as inhalation of harmful fumes.
With the right chemical-based solution, you can achieve professional-looking results without the backbreaking labor of manual removal methods. By understanding the benefits and limitations of these products, you can make an informed decision that suits your patio renovation needs.
Power Tool Options
Your arsenal of patio sealant removal tools expands with the introduction of power tool options, which leverage mechanical force to scrape, grind, or sand away stubborn sealants. These tools are designed to increase your efficiency and precision, making the removal process less labor-intensive.
A power sander, for instance, is an excellent choice for large, flat areas. Its efficiency lies in its ability to cover a lot of ground quickly, making it ideal for removing old sealants from entire patios.
On the other hand, rotary tools offer versatility and precision, allowing you to target specific areas or remove sealants from tight spaces. With various attachments and accessories available, rotary tools can be adapted to tackle a range of removal tasks.
When selecting a power tool, consider the size and complexity of your project, as well as the type of sealant you're dealing with. By choosing the right tool for the job, you'll be able to remove patio sealants quickly and effectively, ensuring a successful renovation.
Cinder Block Patio Challenges
When working on a cinder block patio, you'll encounter unique challenges that require specialized approaches.
You'll need to prepare the block surface properly to guarantee a successful sealant removal, which involves cleaning and degreasing the surface to promote ideal bonding.
Additionally, you'll have to tackle the tricky task of removing joint sand, which can be stubborn and time-consuming.
Block Surface Preparation
Cinder block patios, in particular, pose unique challenges for block surface preparation due to their porous nature and tendency to absorb sealants deeply.
As you tackle this critical step, it's crucial to understand the specific needs of your block surface type. Are you working with smooth, split-face, or fluted blocks? Each type requires tailored surface cleaning techniques to guarantee ideal sealant removal.
For instance, smooth blocks may require a more aggressive cleaning approach, while split-face blocks may need a gentler touch to avoid damaging their textured surface. Fluted blocks, on the other hand, may require specialized cleaning products to effectively remove dirt and debris from their grooved surface.
To achieve a successful sealant removal, you'll need to choose the right cleaning tools and techniques for your specific block surface. This might involve using pressure washers, scrub brushes, or chemical cleaners.
Joint Sand Removal
One of the most challenging tasks in patio restoration, joint sand removal, requires meticulous attention to detail to avoid damaging the surrounding blocks. You'll need to carefully extract the old sand without compromising the joint integrity, making it an essential step in preparing your patio for sealant removal and eventual sand replacement.
To achieve this, you'll need the right tools and techniques. Here's a comparison of some popular joint sand removal methods:
| Method | Effectiveness | Difficulty Level | Time Required |
|---|---|---|---|
| Wire brushing | 6/10 | 4/10 | 2-3 hours |
| Pressure washing | 8/10 | 6/10 | 1-2 hours |
| Chemical dissolution | 9/10 | 7/10 | 3-4 hours |
| Manual excavation | 5/10 | 8/10 | 4-5 hours |
As you can see, each method has its pros and cons. By choosing the right approach for your patio, you'll be able to efficiently remove the old sand and guarantee a successful sealant removal process. Remember, patience and attention to detail are key to maintaining the structural integrity of your cinder block patio during this critical step.
Removing Old Sealant Effectively
You'll need to scrape off the old sealant using a tool that's specifically designed for the task, as ordinary cleaners and solvents often can't break down the tough, dried-on residue. This is especially important when dealing with patio surface types that have a strong sealant adhesion, such as concrete or natural stone.
To remove the old sealant effectively, follow these steps:
-
Choose the right scraper: Select a tool with a sturdy blade that can withstand the tough sealant. A putty knife or a scraper with a replaceable blade is ideal.
-
Scrape in the right direction: Always scrape in the direction of the joints, not against them. This will help prevent damaging the surrounding surface.
-
Apply moderate pressure: Don't press too hard, as this can push the sealant further into the joints. Instead, apply moderate pressure and work your way along the joint.
Remember to work methodically and patiently, as removing old sealant can be a time-consuming process.
With the right tools and techniques, you'll be able to remove the old sealant effectively and prepare your patio for a new coat of sealant.
Safety Precautions and Gear
Removing old patio sealant can be a hazardous process, so it's crucial that you wear protective gear and take necessary safety precautions to avoid injuries and exposure to harmful substances. You'll be working with chemicals, solvents, and heavy machinery, which can pose serious risks if you're not properly equipped.
First and foremost, invest in a good pair of protective eyewear. Sealant removal can generate flying debris, and you don't want to risk eye damage or even blindness. Look for goggles or glasses with impact-resistant lenses and a secure fit.
Additionally, wear a respiratory mask rated for organic vapor and particulate protection. This will shield you from inhaling harmful fumes and particles that can cause respiratory issues or other health problems. Make sure the mask fits snugly and is properly sealed to guarantee maximum protection.
Don't forget to wear long-sleeved shirts, pants, and gloves to protect your skin from chemical splashes and abrasions. A pair of sturdy boots with slip-resistant soles will also help prevent falls and injuries.
Tool Maintenance and Storage
With your safety gear in place, turn your attention to the tools that will help you tackle the patio sealant removal process, and make certain they're in top working condition by following a regular maintenance routine. This will guarantee your tools remain effective and last longer, saving you time and money in the long run.
Here are three essential tool maintenance and storage tips to keep in mind:
-
Cleanliness is key: Regularly clean your tools to prevent the buildup of sealant residue and other debris. Use a soft-bristled brush or cloth to wipe down your tools, and store them in a dry place.
-
Store tools properly: Invest in a sturdy toolbox or storage container to keep your tools organized and protected. Consider a waterproof storage solution to prevent rust and corrosion.
-
Perform routine inspections: Regularly inspect your tools for signs of wear and tear, and replace any damaged or worn-out parts. This will help prevent accidents and guarantee your tools remain in top working condition.
Sealant Removal Best Practices
When tackling patio sealant removal, it's vital to develop a strategic approach that minimizes damage to the substrate and surrounding surfaces.
You'll want to identify the type of sealant you're dealing with, as different sealant types require unique removal techniques. For instance, silicone-based sealants typically respond well to solvents, while polyurethane-based sealants may require mechanical scraping.
Before starting, make sure you've chosen a removal tool compatible with your patio's surface. You don't want to risk damaging the material or leaving behind unwanted residue. Always read the manufacturer's instructions and follow recommended surface preparation guidelines.
It's also important to test a small, inconspicuous area first to confirm the removal tool and technique won't harm the surface.
Remember to work in small sections, using a controlled and deliberate motion to avoid spreading the sealant or causing further damage. Keep the area clean and well-ventilated, and be prepared to adapt your approach as needed.
Frequently Asked Questions
Can I Use a Sealant Remover on a Newly Sealed Patio?
When you're wondering if you can use a sealant remover on a newly sealed patio, consider this: it's generally not recommended.
You've invested time and money into achieving peak sealant effectiveness, and using a remover can compromise its performance.
Instead, focus on regular patio maintenance, like cleaning and inspecting the sealant, to guarantee it lasts as long as possible.
This proactive approach will save you time and money in the long run.
How Long Does It Take for Sealant Remover to Dry Completely?
As you wait for the sealant remover to dry, imagine a veil of transparency lifting, revealing a surface reborn.
The drying time depends on sealant application, temperature, and humidity. Typically, it takes 15-30 minutes for the remover to evaporate, but it can take up to an hour in humid conditions.
Be patient, as a thorough drying process guarantees a successful sealant removal.
Are Sealant Removers Safe to Use Around Plants and Pets?
When you're about to use a sealant remover, you're likely wondering if it's safe around plants and pets.
You should know that most removers are toxic and can contaminate soil and water, harming the environment. Always check the product's label for environmental warnings and follow instructions carefully.
Look for eco-friendly alternatives with low VOCs (volatile organic compounds) to minimize sealant safety risks and environmental impact.
Can I Reuse a Sealant Remover That Has Been Opened?
You're trying to squeeze every last drop out of your sealant remover, like a chef trying to extract the last bit of flavor from a prized ingredient.
But can you reuse an opened sealant remover? It depends on proper storage.
If you've stored it in a cool, dry place, away from direct sunlight, it might still be effective.
However, the lifespan of a sealant remover is typically 6-12 months after opening.
Check the manufacturer's instructions for specific guidance.
Do I Need to Test a Sealant Remover on a Small Area First?
You're wise to wonder if you should test a sealant remover on a small area first. The answer is yes, you must.
This essential step guarantees sealant compatibility and helps you refine application techniques. By doing so, you'll avoid damaging the underlying surface or affecting the surrounding area.
Take the time to test, and you'll be confident in the remover's effectiveness and your ability to control the outcome.
Conclusion
With the right tools and techniques, removing old patio sealant is like shedding worn-out skin, revealing a fresh canvas for your renovation masterpiece.
You've now got the expertise to tackle the job like a pro, from choosing the perfect remover to storing your gear.
Remember, patience and precision are key to a successful sealant removal.
Get ready to disclose your patio's hidden beauty, and let the transformation begin!
Related Posts
-

Why Invest in Quality Plastering Tools for Renovation
When renovating, investing in quality plastering tools is essential for achieving professional-looking results and mi...
-

Protect Your Tools for Outdoor Renovation Success
To guarantee outdoor renovation success, you need to protect your tool investment by understanding warranty and suppo...
-

7 Best Tool Storage Ideas for Home Renovation
When it comes to home renovation, staying organized is key to maximizing productivity and minimizing wasted time. To ...


