
Revamping Old Tools for Planter Renovation Success
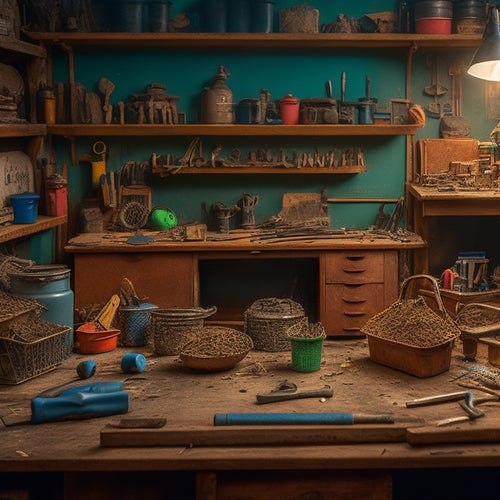
You're likely to salvage at least 60% of your old tools for planter renovation, saving you time and money by repurposing them for your project. Start by evaluating the condition of your essential tools, such as levels, hammers, and drills, to identify what can be refurbished and what needs replacement. Regular maintenance, like cleaning and calibration, can breathe new life into your trusty old gear. Inspect your safety gear, like goggles and gloves, for signs of wear and tear, and consider affordable alternatives for items that are beyond repair. By revitalizing your old tools, you'll be well on your way to a successful planter renovation, and there's more to discover to take your project to the next level.
Key Takeaways
- Regular maintenance and inspection of tools, such as leveling tools and drills, ensure precise measurements and prevent damage to planters.
- Refurbishing and cleaning tools, like mixing buckets and cinder block cleaning tools, enhance their longevity and effectiveness.
- Selecting budget-friendly tool options, such as affordable masonry saws and measuring tapes, can deliver quality performance without breaking the bank.
- Proper storage and handling of tools, like trowels and safety gear, prevent rust and damage, extending their lifespan.
- Inspecting and testing second-hand safety gear and refurbished tools before purchase ensures reliability and safety during planter renovation projects.
Tool Selection for Cinder Blocks
Selecting the right tools for working with cinder blocks is crucial to guarantee a successful planter renovation project. You'll need a combination of essential tools to ascertain your cinder block selection meets the requirements for maximum planter drainage.
First, you'll require a level to confirm the blocks are properly aligned, ensuring water flows freely through the planter. A hammer and chisel will come in handy for breaking or shaping blocks to fit your design. A trowel is necessary for applying mortar, and a jointer or pointing trowel will help you finish the joints.
A rubber mallet is useful for tapping blocks into place without damaging them. Safety goggles and gloves will protect you from debris and mortar splashes. Don't forget a mixing bucket, a shovel, and a hose for mixing and applying mortar.
When selecting cinder blocks, look for ones with minimal cracks and a consistent texture. This will ascertain they can withstand the elements and support the weight of the soil and plants.
Rating Used Trowels for Planters
When rating used trowels for planters, you'll want to assess the tool's condition, as even minor flaws can affect performance.
You'll need to distinguish between a trowel that's simply rusty and one that's badly rusted, as the latter may be beyond repair.
Additionally, consider the grip and balance of the trowel, as a comfortable, well-balanced tool will make your planter renovation tasks much easier.
Trowel Condition Matters
Frequently, a planter renovation project's success hinges on the tools used, and a trowel is often the most critical instrument in your arsenal.
You'll want to verify your trowel is in top condition to achieve professional-looking results. Trowel condition matters, and it's crucial to evaluate your trowel's state before starting your project.
You should inspect your trowel for signs of wear, such as rust, corrosion, or bent edges. If you notice any damage, consider replacing the trowel or performing trowel maintenance tasks like cleaning and sharpening.
Different trowel types, like stainless steel or carbon steel, require specific maintenance routines. Understanding the characteristics of various trowel types will help you choose the right one for your project.
For instance, stainless steel trowels are more resistant to corrosion, while carbon steel trowels are more prone to rust. By selecting the appropriate trowel and maintaining it properly, you'll be able to achieve a smooth, even finish in your planter renovation project.
Rusty Vs. Rusted
Because rusty and rusted trowels can look deceptively similar, it's essential to know the difference between these two states to accurately rate used trowels for planters.
Rusty trowels have a layer of oxidation on the surface, which can be removed with rust treatment, revealing a sound tool underneath. Rusted trowels, on the other hand, have corrosion that has penetrated deeper into the metal, weakening its structure.
You can identify rusty vs. rusted trowels by looking for:
- A reddish-brown discoloration on the surface, indicating rust
- Flaking or peeling of the metal, suggesting a deeper corrosion
- A soft, crumbly, or brittle texture, indicating structural compromise
Proper tool maintenance can prevent rust from forming in the first place. Regular cleaning and drying, storing tools in a dry place, and applying a rust-inhibiting coating can all help extend the life of your trowels.
Grip and Balance
How much control do you have over the trowel as you scoop, smooth, and shape the soil in your planter? A good grip is essential for precision and comfort. When rating used trowels for planters, pay attention to the ergonomic design and handle materials.
| Handle Material | Rating |
|---|---|
| Wooden | 4/5 (natural grip, but prone to splintering) |
| Fiberglass | 4.5/5 (lightweight, durable, and non-slip) |
| Steel | 3.5/5 (sturdy, but can be slippery when wet) |
A comfortable grip allows you to work efficiently without fatigue. Look for trowels with contoured handles that fit snugly in your hand. The material should provide a secure grip, even when your hands are wet or gloved. A well-balanced trowel also reduces strain on your wrist and forearm, making it easier to work for extended periods. By considering grip and balance, you can find a used trowel that meets your needs and helps you achieve planter renovation success.
Drills for Cinder Block Holes
Drill into cinder block with confidence using the right tools for the job. When it comes to planter renovation, having the correct drill type is essential for making precise holes in cinder blocks.
You'll want to choose a drill that's compatible with cinder block material to avoid damage or breakage.
Some key factors to evaluate when selecting a drill for cinder block holes include:
-
Hammer drills: Designed for masonry work, these drills combine rotary motion with a hammering action to effectively penetrate cinder blocks.
-
Rotary hammers: More powerful than hammer drills, rotary hammers use a piston to generate force, making them ideal for larger holes or harder materials.
-
Core drills: These drills use a hollow bit to remove a core of material, creating a clean hole with minimal damage to the surrounding area.
Second-Hand Safety Gear Reviews
When shopping for second-hand safety gear, you'll need to inspect protective gear carefully to guarantee it's still reliable.
Be cautious of hand-me-down hazards, such as worn-out gloves or cracked goggles, which can put you at risk.
Before purchasing refurbished gear, conduct thorough reliability checks to confirm it meets industry standards and will provide adequate protection during your planter renovation project.
Protective Gear Inspection
Several essential tasks precede the planter renovation process, and inspecting your protective gear is one of them.
You can't afford to overlook this vital step, as it directly impacts your safety on the job site.
When it comes to protective gear inspection, you need to be meticulous.
You'll want to examine each piece of gear, from helmets to gloves, to ascertain they're in good condition.
This involves checking for signs of wear and tear, damage, or expiration dates.
Here are some key aspects to focus on during your inspection:
-
Check the expiration dates of hard hats, respirators, and other protective gear types. Make sure they're still within their recommended lifespan.
-
Look for signs of damage, such as cracks, dents, or fraying. If you notice any damage, it's time to replace the gear.
-
Perform regular safety gear maintenance, like cleaning and storing your gear properly. This will help extend its lifespan and guarantee it remains effective.
Hand-Me-Down Hazards
Across the planter renovation landscape, second-hand safety gear has become a tempting option for many DIY enthusiasts and professionals alike, but beware: hand-me-down hazards lurk in every corner.
You may think you're getting a good deal on that used hard hat or respirator, but what you don't know about the tool's history could put you at risk.
Before accepting or purchasing second-hand safety gear, research the tool's history. Check the manufacturer's website for recall information and review maintenance records.
Look for signs of wear and tear, and inspect the gear for damage or malfunction. You should also consider the storage conditions of the gear, as exposure to extreme temperatures or humidity can compromise its integrity.
To guarantee the safety gear remains reliable, follow proper maintenance tips. Regularly clean and disinfect equipment, and store it in a dry, protected area.
Inspect your gear regularly, and replace any parts that show signs of wear. By being proactive and cautious when using second-hand safety gear, you can minimize the risks and guarantee a successful planter renovation project.
Refurbished Reliability Checks
Five essential checks can make all the difference in verifying the reliability of refurbished safety gear. When you're considering refurbished tools for your planter renovation, it's vital to guarantee they meet reliability standards.
You can't afford to compromise on safety, and these checks will give you peace of mind.
You'll want to inspect the gear for:
-
Visible signs of wear: Look for cracks, rust, or corrosion on the tools and their components. Any signs of wear can indicate a higher risk of failure.
-
Functionality testing: Put the tools through their paces to verify they're operating as they should. Check for any unusual noises, vibrations, or performance issues.
-
Certification and documentation: Verify that the refurbished tools come with the necessary certifications and documentation, such as proof of inspection and maintenance records.
Leveling Tools for Balanced Planters
You'll need the right leveling tools to guarantee your planters sit evenly and provide a stable base for your plants to thrive.
Accurate planter leveling is essential, as uneven planters can lead to waterlogging, poor drainage, and stunted plant growth. To achieve precise leveling, you'll need to calibrate your tools regularly.
Start by checking your level's accuracy against a known reference point, such as a precision-machined surface or a calibrated laser level. Next, adjust your level's vials or sensors to confirm they're reading correctly.
For planter leveling, a torpedo level or a digital level with a remote sensor is ideal, as they allow for precise measurements and versatility. When using a digital level, make sure to follow the manufacturer's calibration instructions to verify accurate readings.
Refurbishing Old Mixing Buckets
With old mixing buckets collecting dust in the garage or shed, it's time to breathe new life into them by refurbishing them for planter renovation. You can give your planters a sturdy foundation by revamping these trusty tools.
When refurbishing your mixing buckets, consider the materials they're made of. Plastic buckets are lightweight and easy to clean, while metal buckets are more durable and can withstand heavy mixing.
Wooden buckets, on the other hand, add a touch of rustic charm to your planters.
To get the most out of your refurbished buckets, perfect your mixing techniques:
- Start with a clean bucket to prevent contamination of your soil mix.
- Add ingredients in the right order, usually starting with the dry components.
- Mix with a gentle, sweeping motion to avoid compacting the soil.
Finding Affordable Masonry Saws
A masonry saw is an indispensable tool for any planter renovation project, as it allows you to cut through concrete, brick, and stone with ease.
When finding an affordable masonry saw, you'll encounter various types, including electric, gas-powered, and hydraulic models. Each type has its advantages, so consider your specific needs and project requirements. Electric saws are ideal for small to medium-sized projects, while gas-powered saws are better suited for larger, more demanding tasks. Hydraulic saws offer precision and control, but are often more expensive.
Regardless of the type you choose, proper saw blade maintenance is vital for peak performance and longevity. Regularly clean your saw blade to prevent dust and debris buildup, and replace it when necessary. A dull blade can lead to reduced cutting efficiency, increased wear on the saw, and even safety hazards.
Look for affordable saws from reputable manufacturers, and consider purchasing a refurbished or used saw if budget constraints are a concern. With the right masonry saw and proper maintenance, you'll be well-equipped to tackle your planter renovation project with confidence.
Evaluating Used Safety Goggles
When it comes to protecting your eyes during planter renovation, safety goggles are an essential tool. You can't afford to compromise on your eye safety, especially when working with power tools or handling hazardous materials.
Evaluating used safety goggles requires careful attention to detail. Here are some key factors to take into account:
-
Safety features: Check for features such as splash protection, anti-fog coating, and ventilation to guarantee the goggles provide adequate protection.
-
Lens clarity: Inspect the lenses for scratches, cracks, or cloudiness that could obstruct your vision.
-
Comfort and fit: Try on the goggles to make sure of a comfortable, snug fit that won't slip or fall off during use.
Cinder Block Planter Cleaning Tools
You've got your safety goggles ready, now it's time to get your cinder block planter sparkling clean. Effective cleaning tools are essential for planter maintenance, and the right solutions can make all the difference.
| Cleaning Tool | Description |
|---|---|
| Wire brush | Removes dirt, grime, and old planting material from cinder block crevices |
| Mild detergent | Gentle cleaning solution for removing dirt and debris without damaging plant life |
| Pressure washer | Powerful tool for blasting away stubborn stains and dirt buildup |
When choosing a cleaning solution, consider the type of plants you'll be using in your planter. If you're working with delicate flowers or herbs, a mild detergent may be the best option. For tougher stains, a pressure washer can be effective. Remember to always test a small area of the planter first to confirm the cleaning solution or tool won't damage the cinder block. By investing in the right cleaning tools, you'll be able to maintain a clean and healthy environment for your plants to thrive.
Budget-Friendly Measuring Tapes
You'll find that selecting the right measuring tape is vital for accurate planters renovations, and it's important to balance cost with functionality.
When choosing a budget-friendly option, consider the tape's durability and resistance to wear and tear, as a low-cost tape that breaks easily can end up costing you more in the long run.
Measuring Tape Selection
With your planter renovation project underway, selecting the right measuring tape is vital to guaranteeing accurate measurements. The wrong tape can lead to errors, wasted materials, and costly rework.
As you're working on a budget, it's important to find a tape that balances affordability with tape accuracy.
When choosing a measuring tape, consider the following factors:
-
Length and width: Confirm the tape is long enough to measure your planter's dimensions and wide enough to provide a stable, accurate reading.
-
Material and durability: Opt for a tape made from durable materials that can withstand outdoor conditions and rough handling.
-
Measuring techniques: Consider a tape with advanced features like fractional readings or digital displays to simplify your measuring techniques.
Cost-Effective Options
Selecting a measuring tape that fits your budget is a key aspect of planter renovation, as it allows you to allocate more resources to other important aspects of the project. When it comes to DIY planter upgrades, every dollar counts, and investing in a budget-friendly measuring tape can make a significant difference.
You don't have to break the bank to get a reliable measuring tape. Look for options that offer a good balance of quality and affordability. You can opt for a fiberglass or plastic tape, which are generally cheaper than their metal counterparts.
Additionally, consider a 12-foot or 16-foot tape, as they're often more affordable than longer tapes.
When making budget tool swaps, prioritize the features that matter most to your project. If you're working with smaller planters, a shorter tape might suffice. If you're working with multiple planters, consider a tape with a more durable blade or an ergonomic design.
Tape Durability Matters
Your measuring tape's durability is essential to the success of your planter renovation project. A sturdy tape can withstand the rigors of frequent use, harsh weather conditions, and rough handling, ensuring accurate measurements every time.
On the other hand, a flimsy tape can lead to errors, rework, and costly mistakes.
When selecting a budget-friendly measuring tape, consider the following factors:
-
Tape types: Fiberglass tapes are ideal for outdoor use, while nylon-coated tapes are perfect for indoor applications. Steel tapes are heavy-duty and suitable for heavy construction projects.
-
Tape applications: Will you be measuring compact spaces or long distances? Choose a tape with an appropriate length and width to suit your project's requirements.
-
Environmental factors: If you'll be working in wet or humid conditions, look for tapes with water-resistant coatings or corrosion-resistant materials.
Frequently Asked Questions
Can I Use a Hammer Drill for Concrete Planters?
You can definitely use a hammer drill for concrete planters, as it's ideal for drilling into thick, hard materials; its powerful rotary hammer action and specialized bits will help you efficiently create holes for drainage or anchoring systems.
How Do I Remove Old Mortar From Trowel Surfaces?
Sweep away stubborn mortar remnants from trowel surfaces by scrubbing with stiff-bristled brushes, then switch to steel wool for a smooth finish; finally, wipe clean with a damp cloth to reveal a refreshed tool, ready for renewed renovation rigor.
Are Masonry Saws Suitable for Cutting Porcelain Tiles?
You'll find that masonry saws are suitable for cutting porcelain tiles, thanks to their durability, but it's essential to choose the right type, such as a diamond blade or tile saw, to guarantee a precise cut without damaging the tile.
Can I Reuse Old Mixing Bucket Liners for Planters?
You're likely aware that 75% of plastic waste isn't recycled; upcycling gardening is a great way to reduce waste. When reusing old mixing bucket liners for planters, consider liner durability - will it withstand soil moisture and UV exposure?
Do I Need a Laser Level for Small Planter Projects?
You don't necessarily need a laser level for small planter projects, but using one can guarantee precise leveling, saving you time and frustration; master leveling techniques, like checking grades and using string lines, to achieve professional-looking results.
Conclusion
You've made it! You're now a master of planter renovation, equipped with the most fantastic, extraordinary, and unbelievable tools to transform those cinder blocks into stunning planters! Your drill is whirring, your trowel is scooping, and your safety goggles are gleaming. You're a force to be reckoned with, ready to tackle even the most intimidating planter projects. With your arsenal of revamped old tools, the possibilities are endless, and your planters will be the envy of the neighborhood!
Related Posts
-

Why Invest in Quality Plastering Tools for Renovation
When renovating, investing in quality plastering tools is essential for achieving professional-looking results and mi...
-
Why Tool Exchange Matters in Home Renovation
You rely on a well-maintained tool belt to complete home renovation projects efficiently, and having access to the ri...
-

Streamline Your Exterior Renovation Timeline
To streamline your exterior renovation timeline, you'll need to approach the process strategically. Start by planning...
