Renovate Your Wall in 7 Easy Steps
You're about to transform your wall from dull and damaged to vibrant and restored, and the best part is that it can be achieved in just 7 easy steps. Start by preparing your wall for renovation, inspecting for damage, and gathering essential tools. Next, remove old mortar and debris, and clean the surface to guarantee a smooth canvas. Then, mix and apply new mortar, laying new blocks and grouting in small sections. After that, point and finish the joints, and finally, seal and protect your wall with a durable sealant. As you commence this renovation journey, every step will reveal a more beautiful, stronger wall - and there's more to discover ahead.
Key Takeaways
• Inspect the wall for damage, clean the surface, and identify electrical outlets or switches for relocation or replacement before renovation.
• Remove old mortar using a hammer and chisel, grinder, or chemical solution, and wear a dust mask for protection against debris.
• Prepare the surface by assessing its type, removing loose material, and ensuring it's clean and clear for renovation.
• Apply new mortar in small sections, spreading it evenly, and use a level to confirm even application for a professional finish.
• Select the right block type, align the first block carefully, and apply mortar evenly with a trowel for each block during the laying process.
Prepare the Wall for Renovation
What's hiding behind your old wall - outdated wiring, water damage, or hidden structural issues - that you'll need to uncover before you can start renovating? To guarantee a successful renovation, you'll need to prepare your wall properly.
Start by inspecting the wall for any signs of damage or wear. Look for cracks, holes, or water stains that may indicate deeper problems.
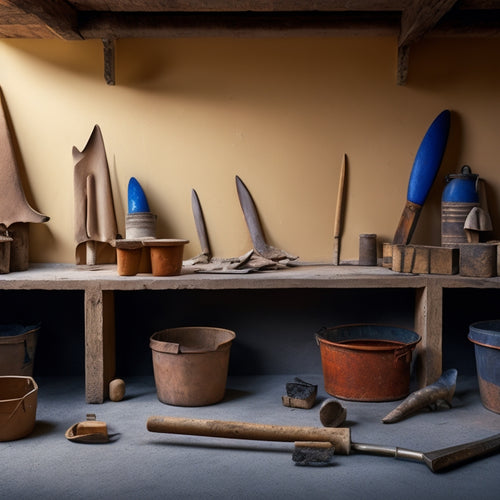
Next, gather your essential tools, including a hammer, screwdriver, pliers, and a level. These will help you assess the wall's structural integrity and make any necessary repairs. Take note of any electrical outlets or switches that will need to be relocated or replaced.
Now, it's time to clean the wall surface. Remove any dirt, grime, or old adhesives that may be clinging to the surface. This will give you a smooth canvas to work with.
Remove Old Mortar and Debris
As you stand before your wall, you're faced with a tangled mess of crumbling mortar and debris.
It's time to wipe the slate clean, and you'll need to decide how to remove the old mortar - will you use a hammer and chisel, a grinder, or a chemical solution?
With the right techniques, you'll be able to clear the debris and reveal a smooth, even surface, ready for its new makeover.
Old Mortar Removal Methods
With a sturdy scraper or chisel in hand, you'll begin removing old mortar by gently prying it away from the wall, working from the top down to avoid spreading debris. This careful approach will help you maintain control and precision throughout the process. As you scrape, you'll notice the old mortar crumbling away, revealing the underlying surface. Be patient and methodical, as this step requires finesse rather than brute force.
Traditional techniques often rely on manual labor, but modern tools can make the process more efficient. Consider using a hammer drill with a chisel bit or a rotary hammer to speed up the removal process. These tools will help you remove the old mortar quickly and effectively, giving you a solid foundation for your renovation.
As you work, take care to avoid damaging the surrounding surface, and use a dust mask to protect yourself from the debris. With the right tools and techniques, you'll be able to remove the old mortar with ease, paving the way for a successful renovation.
Debris Clearing Techniques
How do you plan to tackle the mountain of debris left behind after removing the old mortar, now that you're faced with a wall covered in dust, dirt, and crumbling remnants?
It's time to get hands-on with debris clearing techniques to guarantee a smooth renovation process. Effective debris management is vital to prevent damage to your surrounding area and maintain a safe working environment.
Here are some essential debris clearing techniques to keep in mind:
-
Sweep or vacuum the entire wall to remove loose dust and dirt.
-
Use a wire brush or scrubber to remove stubborn mortar residue.
-
Wipe down the wall with a damp cloth to remove any remaining dust or debris.
-
Set up a debris disposal system, such as a dumpster or designated trash area, to keep the workspace organized.
-
Consider using a dustless sanding system or vacuum-equipped power tools to minimize airborne particles.
Surface Preparation Essentials
You're now faced with a wall stripped of its old mortar, exposing the raw surface that's ready for renovation.
First, you must tackle the remnants of the old mortar and debris that still cling to the surface. This essential step will guarantee a solid foundation for your new renovation.
Take a close look at the wall's surface types - is it smooth, rough, or textured? This will determine the best approach for removing the old mortar and debris.
For rough or textured wall surfaces, use a stiff-bristled brush or a wire scrubber to dislodge stubborn particles.
For smooth surfaces, a gentle scrub with a soft-bristled brush or a damp cloth should suffice.
As you work, pay attention to the wall textures, taking care not to scratch or damage the surface. Remove any loose material, and then vacuum or sweep away the debris.
With the surface clean and clear, you're one step closer to achieving a beautifully renovated wall that's strong, durable, and looks amazing.
Clean and Repair Block Damage
As you inspect your wall, take a closer look at each block, searching for cracks, chips, or crumbling edges.
You'll need to assess the extent of the damage to determine the best course of action, so carefully examine each block, making note of any weaknesses.
With a clear picture of the damage, you can start removing loose debris and preparing the surface for repair.
Block Damage Assessment
Inspect the damaged blocks closely, scrutinizing every crack, chip, and crumbling edge to identify the extent of the damage and determine the best course of action for repair.
You're not just looking for obvious signs of damage, but also subtle hints that could indicate deeper problems. Take note of the type of block you're working with, as different materials require unique approaches to repair.
Some common signs of block damage include:
-
Cracks that spread like veins across the surface
-
Chips that expose the underlying material
-
Crumbling edges that threaten to disintegrate
-
Discoloration or staining that hints at water damage
-
Loose or missing mortar that compromises the structure
As you assess the damage, think about how you can prevent similar problems in the future.
Consider the environmental factors that contributed to the damage, such as exposure to weather or moisture. By understanding the root cause of the issue, you can take steps to mitigate it and guarantee your newly renovated wall stands the test of time.
Remove Loose Debris
With gloved hands, carefully sweep away loose debris, from crumbling mortar to fragmented block pieces, to expose the full extent of the damage and prepare the surface for repair.
As you remove the debris, take note of any areas where the block is severely damaged or crumbling, as these will require extra attention during the repair process. Use a stiff-bristled brush or a whisk broom to sweep away the loose material, working from the top of the wall down to prevent any debris from falling onto areas you've already cleaned.
As you collect the debris, make sure to dispose of it properly to avoid any safety hazards. Wear a dust mask to protect yourself from inhaling any particles, and consider wearing safety goggles to shield your eyes from any flying debris.
Take your time and work methodically, ensuring that you've removed all loose material before moving on to the next step. By taking the time to thoroughly clean and prepare the surface, you'll set yourself up for a successful repair and a beautifully renovated wall.
Mix and Apply New Mortar
You're standing in front of your wall, trowel in hand, ready to merge old and new by applying a fresh layer of mortar that will seamlessly blend with the existing structure. This vital step requires attention to detail and the right techniques to achieve a professional-looking finish.
To mix and apply new mortar like a pro, remember these essential tips:
-
Use a mixing bucket and a mixing stick to combine the mortar mix with water, following the manufacturer's instructions for the ideal consistency.
-
Add a bonding agent to the mix to guarantee a strong bond between the old and new mortar.
-
Hold your trowel at a 45-degree angle to scoop up the right amount of mortar for each application.
-
Apply the mortar in small sections, spreading it evenly with your trowel to cover the entire area.
-
Use a level to confirm the mortar is applied straight and level, avoiding any unevenness or bulges.
With these mortar mixing techniques and mortar application tools in your arsenal, you'll be able to achieve a smooth, even finish that will make your renovated wall look like new.
Lay New Blocks and Grout
As you prepare to lay new blocks, envision the transformed wall taking shape, its fresh layers blending seamlessly with the old. Begin by setting the first block into place, carefully aligning it with the surrounding structure.
Choose the right block type for your project, considering factors like texture, color, and size to guarantee a cohesive look. You may opt for concrete blocks for a modern, industrial feel or brick blocks for a classic, timeless appearance.
As you lay each block, apply a layer of mortar, spreading it evenly with a trowel. Use a level to guarantee the blocks are straight and a string line to keep them aligned. For corners, use a combination of full and half blocks to maintain the pattern.
Once you've laid all the blocks, it's time to grout. Select a grout that complements the color of your blocks and mortar, and apply it to the joints using a grout float. Work in small sections, cleaning excess grout as you go to prevent it from hardening.
With each block and layer of grout, your wall renovation is taking shape, and you're one step closer to a stunning, professional-looking finish.
Point and Finish the Joints
Point and Finish the Joints
Now, armed with a pointing trowel, you'll precision-fill the gaps between blocks, meticulously pressing grout into the joints to create a seamless, uniform finish. This vital step requires attention to detail and a steady hand, but the payoff is well worth the effort.
To master joint finishing techniques, follow these essential steps:
-
Hold the trowel at a 45-degree angle to the joint, applying gentle to moderate pressure.
-
Fill the joint completely, making sure to press the grout firmly into the gap.
-
Use a damp cloth to wipe away excess grout, feathering it out towards the edges.
-
Allow the grout to set for 10-15 minutes before using a joint compound application tool to smooth out the surface.
-
Finally, use a clean, dry cloth to buff the joint, removing any excess grout haze and revealing a crisp, clean finish.
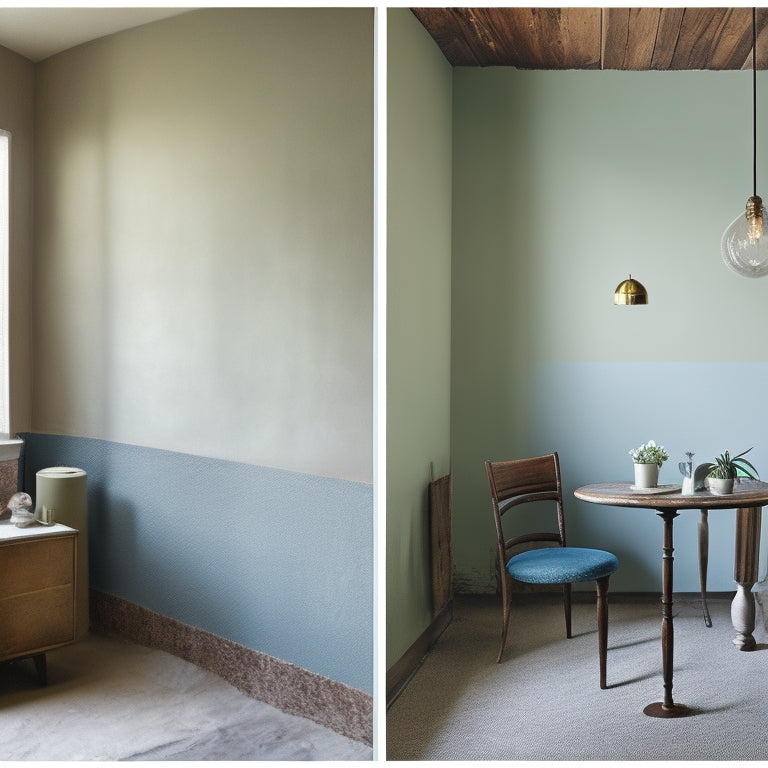
Seal and Protect the Wall
With your newly finished joints in place, the next essential step is to shield your wall from the elements and daily wear by applying a protective sealant that will lock in its beauty and durability.
Imagine a strong, impermeable barrier that repels water, UV rays, and scratches, preserving your wall's vibrant colors and textures. To achieve this, you'll need to master various wall sealing techniques.
Choose a high-quality sealant that suits your wall type, whether it's acrylic, silicone, or epoxy-based. Apply a thin, even layer using a roller or brush, working from the top down to prevent drips.
Ascertain the surface is clean, dry, and free of dust or debris. For added protection, consider applying a second coat or using a specialized protective coating. This will provide an extra layer of defense against the elements and enhance your wall's appearance.
Frequently Asked Questions
Can I Renovate My Wall if It's Load-Bearing?
When you're thinking of renovating, you're probably wondering, 'Can I touch that wall?'
But, if it's load-bearing, you'll need to exercise caution. You see, load-bearing walls are essential to your home's structural integrity.
Before making any moves, you'll need to assess the wall's role in holding up the roof, floors, and ceilings.
If you're unsure, consult a pro to guarantee your renovation dreams don't turn into a structural nightmare. Better safe than sorry, right?
How Do I Match the Color of New Mortar to the Old?
Imagine you're a master painter, blending colors to revive a faded masterpiece.
Matching the color of new mortar to the old is an art form. You'll need to analyze the original mortar type - was it lime-based, cement-based, or a mix?
Then, create a color palette by mixing and matching hues until you find the perfect shade.
Don't be afraid to experiment, adding a dash of this or that until the new mortar harmonizes with the old, like a symphony of color and texture.
What Safety Gear Do I Need to Wear During Renovation?
As you immerse yourself in renovation mode, don't forget to prioritize your safety!
You'll need to wear essential gear to protect yourself from potential hazards.
First, slip on those safety goggles to shield your eyes from debris and dust.
Then, strap on a dust mask to filter out airborne particles.
This dynamic duo will be your best friends throughout the renovation process, ensuring you stay focused and healthy.
Can I Use Old Blocks or Do I Need to Buy New Ones?
You're building a foundation, brick by brick, and wondering if old blocks will cut it.
Think of it like a recipe: old blocks are like inherited cookbooks - they hold secrets, but may lack vital updates.
While they can save you money and add character, make certain they're sturdy and compatible with new materials.
Sourcing tips: inspect for cracks, check local classifieds, and consider repurposing from demolished structures.
How Long Does It Take for the New Mortar to Fully Dry?
As you carefully lay the new blocks, you're probably wondering how long it'll take for the mortar to fully dry.
The drying time depends on moisture levels in the air and the type of mortar you're using. Typically, it takes anywhere from 24 to 48 hours for the mortar to set, but it can take up to a week for it to fully harden.
You'll know it's dry when it's no longer sticky to the touch and has a uniform color.
Conclusion
As you stand back to admire your handiwork, the transformed wall rises like a phoenix from the ashes, its renewed beauty a proof of your DIY prowess.
The once-dreary surface now shines like the Parthenon's marble facade, its crisp lines and vibrant hues a symphony of texture and color.
Your renovation odyssey may have been a journey of sweat and toil, but the result is a masterpiece that would make even the great Vitruvius proud.
Related Posts
-

Top Tools for DIY Home Renovation Plastering Success
To achieve DIY home renovation plastering success, you'll need a range of essential tools. Start with hand tools like...
-

7 Patio Safety Tips for DIY Renovation Projects
As you begin your DIY patio renovation project, prioritize safety by evaluating the worksite for tripping hazards and...
-
7 Best Plastering Bat Sizes for DIY Renovations
When tackling DIY renovations, you'll want to choose the right plastering bat size to achieve a professional-looking ...


