Organize Your Tools for a Smooth Renovation
Share
You'll save time and reduce stress by organizing your tools strategically. Designate a central hub for your tools, and categorize them by frequency of use, storing daily tools at eye level and occasional tools in designated areas. Utilize vertical space with shelving and pegboards, and label each station clearly. Implement a tool maintenance plan to prevent failures, and consider investing in multi-functional tools to streamline your collection. By following these steps, you'll be well on your way to a smooth renovation - and there are even more ways to optimize your tool organization system, including regular audits and purging unused tools.
Key Takeaways
• Designate a central tool hub with shelving, cabinets, and hooks to maximize storage capacity and accessibility.
• Categorize tools into daily, occasional, and rare use to optimize storage and allocation of space.
• Utilize vertical storage with shelving, hooks, and pegboards to maximize wall space and free up floor space.
• Establish a labeling system with clear signs and visual cues to facilitate easy navigation and tool identification.
• Schedule regular tool audits to maintain organization, replace worn-out tools, and eliminate duplicates.
Designate a Central Tool Hub
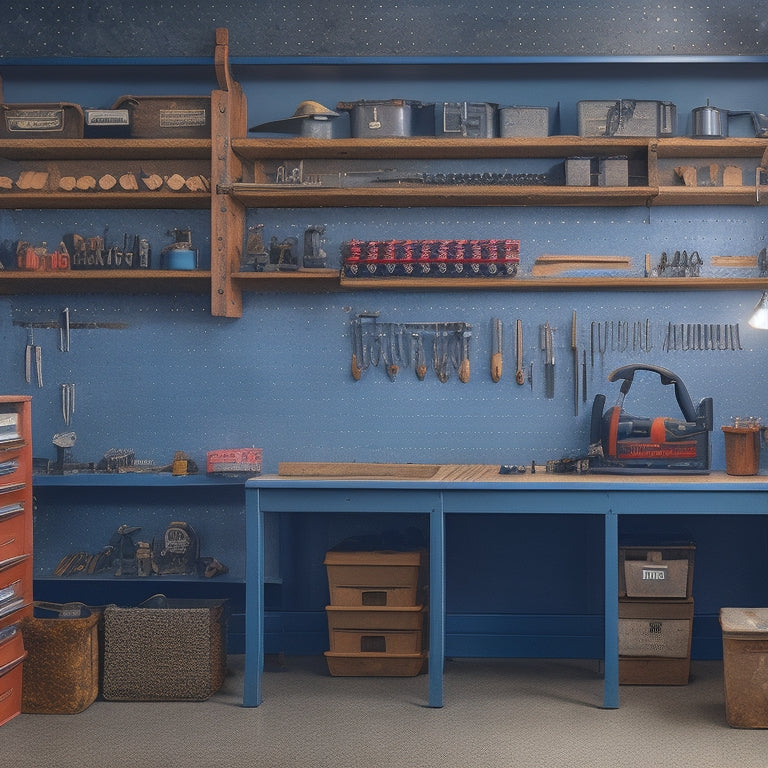
Designate a specific area, such as a garage or shed, as your central tool hub to keep all your tools and equipment organized and within easy reach. This dedicated space will improve your tool organization and boost workspace efficiency. You'll save time searching for misplaced tools and reduce frustration when working on renovation projects.
Choose a location that's easily accessible and protected from the elements. Consider the size of your tool collection and the frequency of use when selecting a hub.
Install shelving, cabinets, or hooks to maximize storage capacity and keep frequently used tools at eye level. Label each storage compartment to guarantee you can quickly find what you need.
Purge Unused and Broken Tools
Now that you've designated a central tool hub, it's time to take stock of what's inside.
You'll need to identify the tools that are no longer serving a purpose or are beyond repair, and separate them from the ones you'll be keeping.
Toolbox Clean-Out Essentials
Clear out your toolbox by sorting tools into three piles: keep, donate/sell, and discard, to tackle the first step in organizing your tools for renovation.
Be honest with yourself - when was the last time you used that rusty old wrench? If it's been years, it's probably safe to get rid of it. As you sort, consider the tools you use regularly and those that are still in good condition. These will go in the 'keep' pile. Tools that are still functional but no longer needed can be donated or sold. This will help declutter your toolbox and make some extra space (and cash).
In the 'discard' pile, include any tools that are broken beyond repair or are no longer useful. Don't be tempted to hold onto something 'just in case' - if it's not serving a purpose, it's taking up valuable space in your toolbox.
Broken Items Identification
Identify broken tools by examining each item in your toolbox for signs of wear, rust, or damage, and be ruthless about getting rid of anything that's beyond repair.
Take the time to inspect each tool, looking for cracks, corrosion, or broken parts. Be honest with yourself – if a tool is no longer functional or can't be repaired, it's time to let it go.
Conduct a damage assessment for each tool, considering the cost of repair versus replacement. If the cost of repair is close to the cost of a new tool, it's likely more cost-effective to replace it.
Don't hold onto tools that are no longer serving you; it's better to invest in new, reliable tools that will get the job done efficiently.
Categorize Tools by Frequency
You'll find it efficient to separate your tools into three categories based on how frequently you use them: daily, occasional, and rare. This categorization is an essential organization strategy that helps you prioritize and manage your tools effectively.
By grouping your tools according to their frequency of use, you'll be able to quickly identify which tools you need immediate access to and which ones can be stored away.
Daily tools, such as hammers and screwdrivers, should be easily accessible and stored in a convenient location.
Occasional tools, like saws and drills, can be stored in a designated area, but still within reach.
Rare tools, like specialized equipment, can be stored in a more remote area or even off-site.
This categorization system guarantees that you're not wasting time searching for tools or dealing with clutter.
Assign a Home for Each Tool
Every tool deserves a designated spot, ensuring that it's returned to its assigned home after use, thereby maintaining a clutter-free workspace and saving you time and frustration. This is where effective tool organization strategies come into play.
By assigning a home for each tool, you'll create a sense of belonging for your tools, making it easier to find what you need when you need it. Start by evaluating your tool storage solutions and identifying the most accessible and convenient locations for your frequently used tools.
Consider the size and shape of each tool and allocate space accordingly. For instance, larger tools like drills and saws can be stored in designated bins or on pegboards, while smaller tools like screwdrivers and pliers can be organized in toolboxes or on magnetic strips.
Utilize Vertical Storage Space
When you're renovating, you'll quickly realize that floor space is a luxury you can't afford.
That's why you'll want to make the most of your walls by maximizing their storage potential.
Maximize Wall Space
By installing shelving, hooks, or pegboards on walls, you can effectively capitalize on often-wasted vertical storage space and keep frequently used tools within easy reach. This is especially useful for heavy or bulky items that you don't want cluttering up your workbench or floor.
Consider wall-mounted racks for storing larger tools like power saws or drills, while pegboards can be used to hang smaller items like wrenches, pliers, and screwdrivers.
Pegboard organization is key to maximizing wall space. Start by grouping similar tools together, such as all your hand tools or all your fasteners.
Then, assign a specific spot on the pegboard for each tool, so you can easily find what you need when you need it. Use hooks, bins, and trays to create separate storage compartments and keep your tools organized.
Optimize Shelf Layout
You can further capitalize on vertical storage space by enhancing your shelf layout to accommodate tools of varying sizes and frequencies of use. By doing so, you'll create a more efficient and accessible storage system.
Start by categorizing your tools into groups based on their size, frequency of use, and type. This will help you determine the best shelf spacing for each group. For instance, you can place frequently used tools on lower shelves for easy access, while less frequently used tools can be stored on higher or lower shelves.
To maximize tool accessibility, consider using adjustable shelves or baskets with dividers to separate tools within each group. This will prevent tools from getting jumbled together and make it easier to find what you need quickly.
Additionally, label each shelf or basket so you can quickly identify what's stored there. By enhancing your shelf layout, you'll be able to find the tools you need in no time, saving you time and frustration during your renovation project.
With a well-organized shelf layout, you'll be able to focus on getting the job done efficiently and effectively.
Hang Heavy Items
Your tool collection likely includes heavy items like power saws, drills, and sanders that are cumbersome to store on shelves, so consider hanging them to free up valuable floor and shelf space. This won't only declutter your workspace but also make it easier to access the tools you need.
When it comes to heavy item storage, you'll want to invest in secure hanging solutions that can hold the weight of your equipment. Look for sturdy hooks, bins, and brackets specifically designed for heavy-duty tools.
Consider installing a pegboard on a wall or the back of a door, where you can hang tools within easy reach. You can also use overhead storage racks or bins to store bulky items like ladders or compressors.
Label and Sign Tool Stations
Creating a visual system of labels and signs at each tool station helps to establish a sense of order and efficiency, allowing you to quickly identify the tools you need. This system also enables you to maintain a clean and organized workspace, which is essential for a smooth renovation process.
By labeling each tool station, you can reap several benefits, including reduced downtime, increased productivity, and improved team collaboration.
To get the most out of your tool station labeling, consider using clear and concise labeling techniques. For instance, you can use color-coded labels to categorize tools by type or function. You can also use signs to indicate the specific tools stored at each station, making it easier for you and your team to find what you need quickly.
Additionally, consider adding visual cues, such as arrows or icons, to direct users to the correct tool or station. By implementing a well-designed labeling system, you'll be able to work more efficiently and effectively, ensuring a successful renovation project.
Implement a Tool Maintenance Plan
A well-maintained toolset is essential to the success of your renovation project, and a proactive maintenance plan helps prevent tool failure, reduces downtime, and saves you money in the long run.
To implement an effective tool maintenance plan, you'll need to prioritize tool care and create a schedule that works for you. Start by identifying the tools that require regular maintenance, such as power tools and equipment with moving parts.
Next, determine how often each tool needs to be serviced, whether it's daily, weekly, or monthly. Create a maintenance schedule that outlines the tasks and frequencies for each tool. This will help you stay on track and guarantee that your tools are always in good working condition.
Additionally, set aside time for deep cleaning and inspection of your tools to catch any potential issues before they become major problems.
Invest in Multi-Functional Tools
By investing in multi-functional tools, you can greatly reduce the number of tools you need to buy, store, and maintain, freeing up space and resources for your renovation project.
This approach allows you to streamline your tool collection, making it easier to find what you need when you need it. Multi-functional tools offer numerous benefits, including increased tool versatility and reduced clutter in your workspace. For instance, a cordless drill with interchangeable bits can replace multiple drills and drivers, saving you time and money.
When selecting multi-functional tools, consider the specific needs of your renovation project. Look for tools that can perform multiple tasks, such as a circular saw that can also be used as a jigsaw or a reciprocating saw.
Additionally, consider the quality and durability of the tool, as well as its compatibility with other tools in your collection. By investing in high-quality, multi-functional tools, you can guarantee a smooth and efficient renovation process, while also building a tool collection that will serve you well for years to come.
Schedule Regular Tool Audits
Regular tool audits help you stay on top of your tool collection, guaranteeing that every item is in good working condition, accounted for, and easily accessible when you need it.
By scheduling regular tool audits, you'll reap several benefits, including reduced downtime, improved productivity, and cost savings. A tool audit allows you to identify and replace worn-out or damaged tools, preventing them from causing project delays. It also helps you detect and eliminate tool duplication, freeing up storage space and reducing clutter.
To make the most of your tool audits, develop a tool inventory strategy that works for you. This might involve categorizing tools by type, frequency of use, or project-specific needs.
You can also use a tool tracking system, such as a spreadsheet or mobile app, to keep tabs on your inventory. By staying organized and on top of your tool collection, you'll be better equipped to tackle your renovation project with confidence and efficiency.
Frequently Asked Questions
How Do I Handle Tools That Require Special Storage Conditions?
When dealing with tools that require special storage conditions, you'll need to prioritize their climate control.
Identify tools that need specific temperature, humidity, or light conditions to prevent damage or degradation.
Designate a dedicated area for these tools, using climate-controlled storage units or shelving with protective covers.
Label each item clearly, so you can quickly locate and store them properly, ensuring they're ready for your next project.
What if I Have Limited Space for My Tool Organization System?
You're trying to fit a puzzle into a tiny box - your tool collection into limited space.
Don't worry, you can still create a harmonious system.
Opt for compact storage containers and vertical solutions like wall-mounted shelves or pegboards to maximize your space.
Invest in multi-functional tools and consider a tool chest with dividers to keep everything organized and within reach.
Can I Still Use Old Tools With Worn-Out Handles or Grips?
You're wondering if you can still use those old tools with worn-out handles or grips. Honestly, it's not the best idea.
Safety concerns come into play when handles are slippery or grips are compromised, increasing the risk of accidents.
Furthermore, tool performance suffers when handles are worn, leading to fatigue and decreased precision.
It's time to reflect on upgrading or refurbishing your tools to guarantee a safe and efficient workflow.
Are There Any Specific Tools That Should Never Be Shared?
'When in Rome, do as the Romans do' - and in the world of tools, that means respecting personal tool hygiene.
You should never share certain tools that come into contact with your skin or bodily fluids, like nail sets, wire cutters, or pliers with worn grips.
It's all about tool sharing etiquette.
Keep your personal tools, well, personal, to avoid cross-contamination and maintain a clean, healthy workspace.
How Often Should I Back up My Tool Inventory List?
You should back up your tool inventory list regularly to guarantee you're always on top of your tools.
Aim for a weekly or bi-weekly frequency, depending on how frequently you update your inventory.
Consider using cloud-based backup methods, like Google Drive or Dropbox, for easy access and automatic syncing across devices.
This way, you'll always have a current record of your tools, even in case of an emergency or unexpected loss.
Conclusion
By implementing these tool organization strategies, you'll be able to tackle your renovation project with ease.
For instance, Sarah, a DIY enthusiast, increased her productivity by 30% after organizing her tools according to frequency of use. She designated a central hub in her garage and assigned a home for each tool, freeing up valuable time to focus on the renovation itself.
With a well-organized toolbox, you'll be able to stay on track and get the job done efficiently.
Related Posts
-

5-Step Subfloor Prep Checklist for a Smooth Renovation
You can guarantee a smooth renovation by following a 5-step subfloor prep checklist. First, assess the current subflo...
-

What Plastering Tools Do You Need for Renovation
You'll need a range of specialized tools to tackle a plastering renovation project efficiently and effectively. Essen...
-

7 Best Plastering Bat Sizes for DIY Renovations
When tackling DIY renovations, you'll want to choose the right plastering bat size to achieve a professional-looking ...


