Essential Sets for Home Renovation Masonry Success
Share
When tackling a home renovation project that involves masonry, you'll need the right essentials to guarantee success. A thorough concrete block tool set featuring a level, trowel, and jointer is vital for professional results. Don't forget to establish a regular maintenance schedule to keep your tools in top condition. Additionally, prioritize safety with essential equipment like hard hats, safety glasses, and dust masks. A well-prepared site and detailed project plan will also set you up for success. By covering these bases, you'll be well on your way to achieving a solid foundation for your masonry work, and there's further to explore to take your skills to the next level.
Key Takeaways
• Essential tool sets for masonry include a level, trowel, and jointer, accommodating various block types and featuring rust-resistant materials.
• Proper tool maintenance involves regular cleaning, sharpening, and lubrication to ensure effectiveness and extend tool lifespan.
• Safety equipment, including hard hats, safety glasses, and dust masks, is crucial for protecting masons from hazards on site.
• Thorough project preparation involves creating a detailed plan, obtaining necessary permits, and inspecting materials to ensure a solid foundation.
• Mastering advanced masonry techniques, such as tuck-pointing, bricklaying patterns, and curved brickwork, can elevate the quality and aesthetic appeal of masonry projects.
Best Concrete Block Tool Sets
Selecting the right concrete block tool set is essential to achieving professional-looking results and avoiding costly mistakes. Equipping yourself with an extensive set that includes a level, trowel, and jointer is critical.
You'll be working with various concrete block types, such as standard, insulated, and decorative blocks, each requiring specific tools and techniques. A thorough tool set should feature a level to guarantee accurate block alignment, a trowel for applying and spreading mortar, and a jointer for finishing and sealing joints.
When choosing a tool set, consider the features that matter most to your project. Look for a set that includes a sturdy, rust-resistant trowel with a comfortable grip, a level with adjustable vials for precise measurements, and a jointer with interchangeable blades for different joint sizes.
Additionally, consider a set with a carrying case or storage container to keep your tools organized and within reach. With the right tool set, you'll be well-equipped to tackle any concrete block project, from foundation walls to decorative accents, and achieve professional-looking results that will make you proud.
Concrete Block Tool Maintenance Schedule
As you work on your concrete block project, you'll want to make certain your tools are always in top condition.
To keep your tools performing at their best, you'll need to establish a regular maintenance schedule that includes cleaning and storing them properly, regularly sharpening blades, and lubricating moving parts.
Clean and Store Tools
You'll typically clean and store your concrete block tools daily, or at the very least, after each project, to prevent damage and maintain their effectiveness.
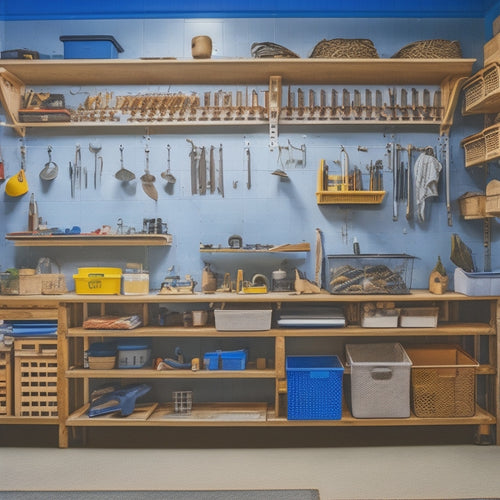
This habit is essential, as it guarantees your tools remain in top condition and ready for the next task. A well-organized workspace is key to efficient tool storage. Invest in storage solutions like toolboxes, chests, or pegboards to keep your tools within easy reach. Label each storage unit so you can quickly identify where everything goes. This will save you time and frustration when searching for a specific tool.
When cleaning your tools, use a soft-bristled brush to remove any debris or mortar. For tougher grime, mix baking soda and water to create a paste, and gently scrub the affected area. Rinse thoroughly with water and dry with a lint-free cloth to prevent rust.
Regularly Sharpen Blades
With your tools clean and stored, turn your attention to maintaining their cutting performance by regularly sharpening your blades, a task that should be incorporated into your concrete block tool maintenance schedule to guarantee excellent results.
You know the drill - dull blades lead to subpar cuts, wasted time, and a whole lot of frustration. To avoid this, you'll want to sharpen your blades every 1-3 months, depending on usage.
When it comes to blade sharpening techniques, you've got a few options: manual sharpening with a diamond stone, electric sharpening with a bench grinder, or sending them out to a pro. No matter the method, make sure you're using ideal blade materials that can withstand the wear and tear.
High-carbon steel and tungsten carbide are exceptional choices. Remember, a sharp blade is a happy blade - and a happy blade means precise cuts, reduced wear on your tools, and a job well done.
Lubricate Moving Parts
Lubricate Moving Parts
Regular lubrication of moving parts in your concrete block tools guarantees smooth operation, reduces wear and tear, and prevents costly repairs down the line. You don't want your tools to seize up in the middle of a project, leaving you frustrated and stuck. By incorporating tool lubrication techniques into your maintenance best practices, you'll make sure your tools are always ready to go.
Here are some key areas to focus on:
-
Pneumatic tools: Check and lubricate air compressor fittings, hoses, and tool connections regularly.
-
Mechanical tools: Apply lubricant to pivot points, gears, and bearings to keep them running smoothly.
-
Hand tools: Keep tool handles and moving parts well-lubricated to prevent rust and corrosion.
-
Chain saws: Lubricate chain bars and saw chains to reduce wear and improve performance.
-
Mixer and pump components: Regularly lubricate mixer drums, paddles, and pump cylinders to prevent wear and tear.
Essential Masonry Safety Equipment
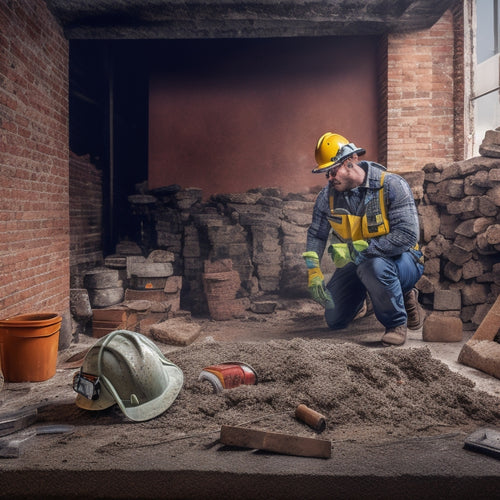
Wearing personal protective equipment (PPE) is essential when working with masonry, as it shields you from hazardous materials and prevents injuries. You don't want to be that person who ends up with a face full of cement or a broken toe from a dropped brick. Trust us, it's not a good look.
Here's a rundown of the essential masonry safety gear you'll need:
| Masonry Safety Gear | Why You Need It |
|---|---|
| Hard hat | Protects your head from falling objects and debris |
| Safety glasses | Shields your eyes from flying particles and chemicals |
| Dust mask | Prevents inhalation of harmful dust and particles |
| Steel-toed boots | Safeguards your toes from heavy objects and tools |
Investing in this personal protective equipment may seem like a hassle, but it's worth it to avoid costly medical bills and lost productivity. Plus, you'll be able to focus on the fun part – transforming your space into a stunning oasis. So, gear up and get ready to tackle that masonry project with confidence!
Common Concrete Block Mistakes
You can avoid costly rework and guarantee a sturdy structure by recognizing and correcting common concrete block mistakes that can compromise the integrity of your masonry project.
Don't let your hard work crumble (literally!) due to these easily avoidable errors.
Here are some common concrete block mistakes to watch out for:
Insufficient block insulation: Failing to properly insulate your concrete blocks can lead to heat loss, moisture issues, and even structural damage. Make sure to follow block insulation tips to keep your walls warm and dry.
Inadequate concrete curing techniques: Improper concrete curing can cause weak spots, cracks, and discoloration. Use the right concrete curing techniques to guarantee a strong and durable finish.
Inconsistent block laying: Uneven or crooked block laying can throw off your entire structure. Take your time and guarantee each block is level and plumb.
Inadequate joint filling: Leaving joints unfilled or underfilled can lead to water seepage and structural weakness. Fill those joints like your project depends on it (because it does!).
Ignoring manufacturer instructions: Don't assume you know better than the manufacturer. Follow their instructions for block installation, curing, and maintenance to avoid costly mistakes.
Masonry Work Preparation Essentials
Before commencing your masonry project, five essential preparation steps must be taken to secure a solid foundation and a successful outcome. You wouldn't build a house on shaky ground, would you? Similarly, you can't expect a flawless masonry project without proper prep work.
First, you need to plan your project meticulously. This means creating a detailed scope of work, setting realistic timelines, and allocating resources efficiently.
Next, ascertain you have the necessary permits and licenses in place. Don't risk getting caught in a paperwork nightmare!
Third, prepare your site by clearing debris, marking boundaries, and leveling the ground. A clean slate is essential for masonry work efficiency.
Fourth, gather all necessary materials and tools, and inspect them for quality and functionality. You don't want to be stuck with subpar materials mid-project.
Advanced Masonry Techniques to Master
Mastering advanced masonry techniques calls for honing precision skills, starting with tuck-pointing, an essential process that involves removing and replacing deteriorated mortar from between masonry units to restore structural integrity and visual appeal. You'll need to develop a keen eye for detail to guarantee a seamless blend of old and new mortar.
Next, it's time to experiment with intricate bricklaying patterns, such as the classic Flemish bond or the more complex herringbone design. Don't be afraid to get creative and add your personal touch to the project!
Here are some advanced techniques to add to your masonry toolkit:
-
Advanced mortar mixing: Learn to mix mortar that's both strong and workable, with the perfect balance of cement, sand, and water.
-
Curved brickwork: Master the art of building curved walls and arches that add a touch of elegance to any room.
-
Masonry carving: Release your inner artist and learn to carve intricate designs and patterns into stone or brick.
-
Structural reinforcement: Understand how to integrate reinforcing materials, such as rebar and fiber mesh, to add strength to your masonry structures.
-
Masonry restoration: Develop the skills to restore historic buildings and preserve their original charm and character.
Frequently Asked Questions
What Is the Ideal Curing Time for Freshly Laid Concrete Blocks?
You're wondering what the ideal curing time is for those freshly laid concrete blocks, huh?
Well, let me tell you - it's essential to get it right! The curing process is where the magic happens, and it directly impacts block durability.
You've got a few curing methods to choose from, like misting, covering, or applying a curing compound.
Generally, you're looking at 24-48 hours for the initial set, then 7-14 days for the final cure.
Don't rush it, friend - patience is key to strong, long-lasting blocks!
Can I Reuse Old Mortar for New Masonry Projects?
So, you're wondering if you can reuse old mortar for new masonry projects? Here's the deal: mortar composition is key, and its longevity is directly tied to its quality.
If your old mortar has been exposed to the elements or has broken down, it's best to start fresh. You don't want to risk compromising your new project's structural integrity.
Trust us, it's better to mix a new batch than to gamble with subpar mortar. Start fresh, and your walls will thank you!
How Do I Remove Stubborn Mortar Stains From My Tools?
You've finally finished that masonry project, but now your tools are caked with stubborn mortar stains.
Don't worry, it's not a permanent marriage! You can divorce those stains with the right mortar cleaning techniques.
Start by soaking your tools in water and then scrub them with a wire brush. For tougher stains, mix baking soda and water to create a paste, and let it sit before rinsing.
Are All Concrete Blocks Suitable for Outdoor Use?
When it comes to outdoor use, not all concrete blocks are created equal.
You'll want to choose blocks with weather resistance in mind, especially if you're building in areas with harsh climates.
Look for blocks with built-in insulation, like those with hollow cores or specialized coatings, to keep the elements at bay.
Don't get left high and dry - select blocks that can withstand the great outdoors, and your outdoor project will be a solid success!
Can I Mix and Match Different Concrete Block Brands?
You're wondering if you can mix and match different concrete block brands? Well, here's the deal: it's not as simple as grabbing blocks from different manufacturers and hoping for the best.
Brand compatibility is key to guaranteeing block performance. You need to take into account factors like compressive strength, texture, and color to guarantee a cohesive look.
If you're not careful, your wall might end up looking like a mismatched puzzle. So, do your research and choose brands that play nice together – your wall (and your sanity) will thank you!
Conclusion
You've made it to the final stage of your masonry journey!
With the right tools, safety gear, and techniques, you're ready to tackle any concrete block project.
Did you know that, on average, a well-planned masonry project can increase a home's value by up to 10%?
Now, go ahead and put your new skills to the test.
Remember to maintain your tools, prep your workspace, and master those advanced techniques to guarantee a successful renovation that will leave your neighbors in awe.
Related Posts
-

7 Must-Have Safety Gears for Brick Wall Renovation
When renovating a brick wall, you'll face a multitude of hazards, making it essential to wear and use the right safet...
-

Why Exterior Wall Renovation Requires a Plan
You're about to commence a complex and potentially costly project when you decide to renovate your exterior walls, an...
-

7 Best Tool Storage Ideas for Home Renovation
When it comes to home renovation, staying organized is key to maximizing productivity and minimizing wasted time. To ...


