Budget-Friendly Tools for DIY Home Renovation Projects
When it comes to DIY home renovation projects, you don't have to break the bank on tools. Start with essential hand tools like hammers, tape measures, and screwdrivers, and consider renting power tools like cordless drills for one-time uses. For specific tasks, look for affordable alternatives to specialized tools, and explore community resources for tool borrowing or volunteer assistance. With some planning and creativity, you can stay within budget and still get the job done efficiently. From tool maintenance to concrete block cutting techniques, there are many ways to save without sacrificing quality - and you're about to discover them.
Key Takeaways
• Renting tools from local hardware stores or equipment rental shops can reduce costs, especially for one-time projects.
• Explore community resources for tool borrowing or volunteer assistance to save on tool purchases.
• Consider affordable multi-use tools that serve various functions instead of specialized tools.
• Look for budget-friendly alternatives to expensive tools, such as DIY versions or second-hand options.
• Utilize tool libraries or sharing programs to access tools without the need for purchase, contributing to cost savings.
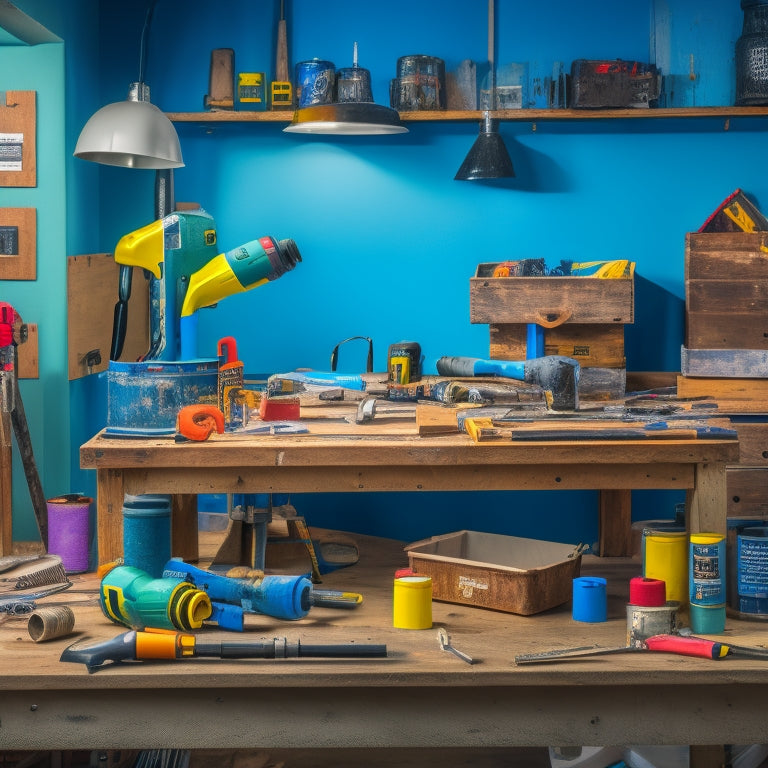
Essential Tools for DIY Renovations
As you commence your DIY home renovation journey, having the right tools can make all the difference between a successful project and a costly disaster.
You'll need a well-stocked arsenal to tackle various tasks efficiently. To guarantee you're prepared, follow these tool selection tips: prioritize essential toolkits, consider the project's scope, and don't skimp on quality.
Invest in a solid foundation of hand tools, including a hammer, tape measure, level, pliers, and screwdrivers. A cordless drill and impact driver will also become your new best friends.
Don't overlook the importance of safety gear, such as gloves, goggles, and a dust mask. For more specific tasks, like tiling or drywall installation, acquire specialized tools as needed.
Budgeting for Concrete Block Projects
Set a realistic budget for your concrete block project by factoring in the cost of materials, labor, and any necessary permits or inspections. To stay within your means, consider the following budget-friendly strategies:
-
Opt for cost-effective materials: Choose concrete blocks that are locally sourced and in stock to reduce transportation costs and lead times.
-
Plan your layout carefully: Minimize waste by calculating the exact number of blocks you'll need and arranging them to maximize their use.
-
Use budget-friendly binding methods: Instead of using expensive mortar, consider using a cost-effective alternative like surface-bonding cement.
- DIY when possible: Take on tasks like mixing and laying blocks yourself to reduce labor costs, but be sure to follow safety guidelines and best practices.
Tool Maintenance for Concrete Block Use
You'll extend the lifespan of your tools and guarantee they remain in top condition for your concrete block project by following a regular maintenance routine. This is especially vital when working with concrete, as the abrasive nature of the material can quickly wear down your tools.
To prevent tool rust, make it a habit to clean your tools thoroughly after each use, removing any concrete residue or debris. Apply a rust-inhibiting coating or oil to metal surfaces, and store them in a dry place.
Establish a maintenance schedule to regularly inspect and sharpen your tools, replacing worn-out parts as needed. This won't only save you money in the long run but also make certain your tools are always ready for the task at hand.
Concrete Block Cutting Techniques
With your tools in top condition, it's significant to focus on the precision cutting techniques required to shape concrete blocks into the desired forms for your project. Mastering these techniques will guarantee clean cuts, reduced waste, and a professional finish.
When working with concrete blocks, it's important to understand the different cutting methods and block types to achieve the best results.
Here are four key concrete block cutting techniques to keep in mind:
-
Score and Snap: Use a utility knife or block splitter to score the block, then snap it along the scored line. Ideal for straight cuts in standard blocks.
-
Wet Sawing: Employ a wet saw or masonry saw to make precise cuts in larger blocks or those with complex shapes. This method reduces dust and prevents overheating.
-
Dry Cutting: Use a dry-cutting saw or grinder to make quick cuts in smaller blocks or for rough shaping. Be cautious of dust inhalation and wear protective gear.
- Nipping: Utilize nippers or bolt cutters to remove small pieces of concrete or trim excess material from cut blocks.
Mixing and Pouring Concrete Effectively
Now that you've mastered concrete block cutting techniques, it's essential to mix and pour concrete effectively to achieve a strong, durable foundation for your project. Proper mixing techniques guarantee a consistent, strong concrete mix, while correct pouring methods prevent defects and guarantee a smooth finish.
Here are some key mixing and pouring tips to keep in mind:
| Mixing Techniques | Pouring Methods | Tips |
|---|---|---|
| Use a power mixer or mixing stick | Pour in sections, filling each form fully | Avoid over-mixing, which weakens concrete |
| Add water gradually, mixing thoroughly | Vibrate or tap forms to remove air pockets | Use a level to guarantee even pouring |
| Mix to the recommended consistency | Finish with a trowel or screed for a smooth surface | Avoid pouring in extreme temperatures |
Safety Precautions for DIY Renovations
As you start your DIY renovation project, remember that safety should always be your top priority.
You'll need to gear up with the right protective equipment, be aware of potential hazards, and have a plan in place in case of emergencies.
Protective Gear Essentials
You'll considerably reduce the risk of injury by wearing essential protective gear, including safety glasses, gloves, and a dust mask, during DIY renovation projects. As you tackle various tasks, from demolition to finishing touches, your safety gear will be your best friend.
Here are some must-haves to include in your protective equipment arsenal:
-
Safety glasses: Protect your eyes from debris, dust, and chemical splashes with shatter-resistant lenses and frames.
-
Gloves: Choose heavy-duty, puncture-resistant gloves to shield your hands from cuts, abrasions, and blisters.
-
Dust mask: Breathe easy with a mask that filters out dust, particles, and other airborne contaminants.
- Steel-toed boots: Wear sturdy, slip-resistant boots with steel toes to safeguard your feet from heavy objects and sharp edges.
Hazards to Watch For
Your DIY renovation project is fraught with hidden dangers, from exposed wiring to toxic substances, that can quickly turn a dream project into a nightmare if you're not vigilant.
As you demolish and rebuild, you'll encounter hazards that can put your health and safety at risk. One of the most critical hazards to watch for is chemical exposure. Be cautious when working with chemicals, such as adhesives, paints, and solvents, and always follow the manufacturer's instructions.
Make certain you wear protective gear, including gloves, goggles, and a mask, to prevent skin contact and inhalation of toxic fumes.
Another hazard to take into account is structural stability. Before making any major changes, assess the structural integrity of your home to avoid collapse or damage.
Check for signs of water damage, termite infestation, or foundation cracks, and consult a professional if you're unsure. Don't take shortcuts or ignore warning signs – it's better to be safe than sorry.
Emergency Preparedness Plans
Having taken steps to identify and mitigate hazards, it's equally important to prepare for unexpected emergencies that may arise during your DIY renovation project. You never know when a situation might spiral out of control, and being prepared can make all the difference.
To guarantee disaster readiness, make sure you have the following emergency supplies on hand:
-
First aid kit: A well-stocked first aid kit can help you respond to minor injuries, such as cuts and scrapes.
-
Fire extinguisher: A fire extinguisher can help put out small fires before they spread, giving you time to evacuate the area.
-
Flashlight and batteries: In case of a power outage, a flashlight can provide essential lighting, and spare batteries can keep it running.
- Phone charger and backup power source: A phone charger and backup power source, such as a portable generator or battery pack, can help you stay connected and receive important updates during an emergency.
Affordable Alternatives to Specialized Tools
With a plethora of specialized tools on the market, it's easy to get caught up in thinking you need the latest and greatest gadgets to tackle your DIY home renovation project. But, let's face it, those high-tech tools can break the bank!
Luckily, there are affordable alternatives that can get the job done without sacrificing quality. One option is tool rental. Instead of buying an expensive tool you'll only use once, consider renting it from a local hardware store or equipment rental shop. This way, you'll have access to the tool you need without the hefty price tag.
Additionally, many communities offer resources that can help you borrow tools or even find volunteers to lend a hand. Check out local community centers, libraries, or online forums to see what's available in your area.
Upcycling Old Tools for New Projects
Five old tools collecting dust in your garage can be repurposed into something entirely new and functional for your DIY home renovation project. Don't toss them just yet! With a little creativity, you can breathe new life into these old tools.
Tool restoration is an art that requires patience, but the results are well worth it. By upcycling your old tools, you'll not only save money but also reduce waste and create unique pieces that'll make your project stand out.
Here are some ideas to get you started:
-
Old screwdrivers become plant labels: Write the plant's name on the handle, and you've got a rustic label that adds character to your garden.
-
Rusty old wrenches become coat hooks: Clean and mount them on a wooden board for a functional piece of art.
-
Broken tile nippers become DIY jewelry: Transform them into unique earrings or pendants with a little creativity and some wire wrapping skills.
- Vintage hammers become bookends: Paint and decorate them to add a touch of industrial chic to your bookshelf.
With creative repurposing, the possibilities are endless. So, take a closer look at those old tools and see what new life you can give them.
DIY Tool Storage and Organization
Now that you've breathed new life into old tools, it's time to get them organized and stored efficiently to confirm your DIY home renovation project runs smoothly. A well-organized tool collection saves you time, reduces frustration, and increases productivity.
Start by categorizing your tools into groups, such as carpentry, electrical, and plumbing. This will help you determine the storage solutions you need.
Invest in a tool organization system, like a pegboard or a modular storage cabinet, to keep frequently used tools within easy reach. Label each storage compartment to confirm you can quickly find what you need.
Consider a portable tool chest or toolbox for on-the-go projects. For smaller items, use dividers or bins to keep them organized and prevent clutter.
Remember, a well-organized workspace is a safe workspace, so take the time to implement a tool organization system that works for you.
With these storage solutions in place, you'll be able to focus on the fun part – bringing your DIY home renovation project to life!
Frequently Asked Questions
Can I Use DIY Tools for Large-Scale Commercial Renovation Projects?
When tackling large-scale commercial renovation projects, you'll quickly realize that DIY tool limitations become a major concern.
While DIY tools are perfect for small-scale projects, they often lack the precision, power, and durability required for commercial projects.
You'll need to evaluate the scale, complexity, and safety requirements of your project, and invest in heavy-duty, commercial-grade tools that can handle the demands of a large-scale renovation.
How Do I Dispose of Old or Broken Tools Responsibly?
You're like a master chef, sorting through the kitchen junk drawer - except instead of utensils, you're dealing with old or broken tools.
Don't toss them carelessly! You'll want to dispose of them responsibly.
Look for local recycling programs that accept metal and electronic waste.
Alternatively, consider tool donation to organizations that support DIY initiatives or vocational training.
Give your old tools a new life, and clear your conscience - and your workshop - at the same time.
Are There Any DIY Tools Suitable for Users With Disabilities?
When tackling DIY projects, you'll be glad to know that adaptive tools are designed with accessibility in mind.
Look for ergonomic designs that cater to your specific needs, such as grip-enhancing handles or angled tool heads.
These innovative tools can help you work comfortably and efficiently, regardless of your abilities.
Can I Rent or Borrow DIY Tools Instead of Buying Them?
Are you tired of breaking the bank on DIY tools you'll only use once? You're not alone!
Instead of buying, consider renting or borrowing tools. Look into local tool rental options, like equipment rental stores or online platforms that connect you with tool owners.
You can also borrow from friends, family, or neighbors who've the tools you need.
With these strategies, you'll save money and reduce clutter in your workshop.
Do DIY Tools Come With Warranties or Guarantees?
When you buy DIY tools, you're probably wondering if they come with warranties or guarantees.
The good news is, many reputable brands offer warranty coverage, ensuring tool reliability and protecting your investment.
You'll typically find a warranty period ranging from 1-5 years, depending on the manufacturer and tool type.
Be sure to read the fine print and register your tool to activate the warranty, so you're covered in case anything goes wrong.
Conclusion
You've made it! You're now a DIY home renovation master, armed with the knowledge of budget-friendly tools and techniques to tackle even the most intimidating concrete block projects.
You've saved a small fortune by upcycling old tools and finding affordable alternatives to specialized ones.
Your garage is now a tidy tool paradise, and you're ready to take on the world - or at least your next renovation project!
Related Posts
-

5 Best Home Renovation Project Timeline Checklists
You're looking for a clear understanding of the timeline for your home renovation project. A good place to start is w...
-

Stucco Tool Kit Checklist for Home Renovation
You'll need a thorough stucco tool kit to guarantee a successful home renovation, as the right tools can make all the...
-

Top 3 Tools to Buy for Stucco Renovation
You'll need the right tools to guarantee a successful stucco renovation, and it all starts with three essential items...


