
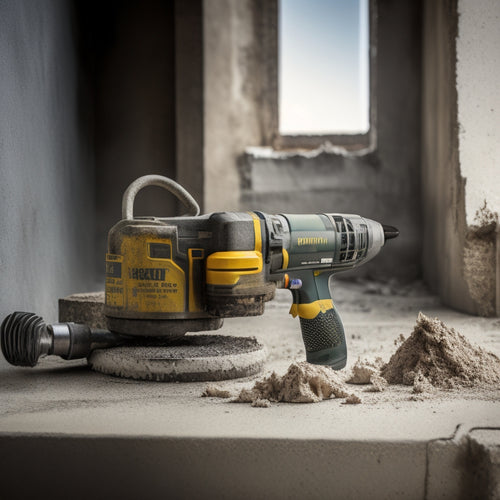
3 Must-Have Tools for Plaster Renovation Success
When tackling a plaster renovation, you'll need the right tools to guarantee success and safety. First, invest in essential safety equipment like a dust mask, safety goggles, and gloves to protect yourself from airborne particles and debris. Next, arm yourself with hand tools like a hawk, trowel, and flexible blade for smooth, even finishes. Finally, consider power tools like a rotary hammer, reciprocating saw, or angle grinder for efficient plaster removal. By equipping yourself with these must-haves, you'll be well on your way to a successful renovation - but the key to perfection lies in mastering their proper use.
Key Takeaways
- A dust mask with an FFP2 or FFP3 rating is essential for protecting against airborne particles during plaster renovation.
- A hawk is crucial for holding plaster while applying, ensuring a smooth and even finish.
- A flexible blade trowel provides a smooth finish and is ideal for accessing corners and edges with curved or angled blades.
- A rotary hammer is a must-have power tool for breaking thick plaster efficiently and safely.
- Safety goggles with a wraparound design and anti-fog coating are vital for protecting eyes from debris during plaster renovation tasks.
Essential Plastering Safety Equipment
When working with plaster, you'll need to wear vital safety equipment to protect yourself from dust, debris, and other hazards, including a dust mask, safety goggles, and gloves. This gear will safeguard your health and well-being, giving you the freedom to focus on your renovation project without worrying about potential risks.
A plaster mask, also known as a dust mask, is an important piece of safety equipment. It filters out airborne particles, preventing them from entering your lungs. Look for a mask with a high filtration efficiency, such as a FFP2 or FFP3 rating.
Safety goggles, on the other hand, protect your eyes from flying debris and dust. Choose goggles with a wraparound design and anti-fog coating to guarantee clear visibility.
Gloves are also vital for protecting your hands from cuts, abrasions, and exposure to plaster. Opt for durable, puncture-resistant gloves with a grip to prevent dropping tools.
Hand Tools for Smoothing Plaster
To achieve a smooth, professional finish, you'll need to equip yourself with the right hand tools for smoothing plaster, including a hawk, trowel, and rubbing block. These essential tools will help you master various plaster finishing techniques and achieve a high-quality finish.
When it comes to selecting the right trowel, keep in mind the following trowel selection tips:
-
Choose a trowel with a comfortable grip and balanced weight for maximum control.
-
Select a trowel with a flexible blade for smooth, even finishes.
-
Consider a trowel with a curved or angled blade for easier access to corners and edges.
-
Opt for a trowel with a stainless steel or carbon steel blade for durability and rust-resistance.
-
Confirm the trowel is the right size for the job, taking into account the size of the area and the type of plaster being applied.
With the right hand tools, you'll be free to focus on the artistic aspect of plastering, creating beautiful, smooth finishes that showcase your skill and craftsmanship.
Power Tools for Plaster Removal
You'll need to use specialized power tools for efficient plaster removal, which involves cutting, grinding, or chiseling the old plaster to prepare the surface for renovation. Power tool efficiency is vital in plaster removal techniques, as it saves time and energy.
For instance, a rotary hammer is ideal for breaking up thick plaster, while a reciprocating saw is perfect for cutting through wooden lath or metal mesh. An angle grinder, on the other hand, is great for smoothing out rough edges and feathering the surrounding area.
When choosing power tools for plaster removal, consider the surface area to be covered, the type of plaster, and the desired level of finish. It's also important to wear protective gear, such as safety glasses, gloves, and a dust mask, to prevent injury and exposure to dust.
Additionally, make sure to use the right bits and blades for the job, as this will guarantee peak performance and longevity of your power tools.
Frequently Asked Questions
How to Handle Plaster Dust in HVAC Systems?
When dealing with plaster dust in HVAC systems, you'll want to take a proactive approach to prevent damage and maintain indoor air quality.
First, you'll need to turn off the HVAC system to prevent dust circulation.
Then, use specialized HVAC cleaning techniques to remove dust and debris from ducts, vents, and components.
Implementing effective plaster dust management strategies, such as using HEPA filters and sealing ducts, will also help minimize dust contamination.
What Are the Signs of Asbestos in Old Plaster?
You're about to uncover a million-dollar secret: identifying asbestos in old plaster is essential to avoiding a world of trouble!
When inspecting old plaster, look for signs of wear, water damage, or previous repairs.
Check for unusual textures, discoloration, or crumbling.
Don't take chances - asbestos testing is a must to mitigate health risks.
If you suspect asbestos, seal off the area and call a pro to guarantee your freedom from contamination.
Can I Reuse Old Plaster for New Renovation?
When reusing old plaster for your renovation, you're not only reducing waste but also preserving a piece of history.
You can explore plaster recycling benefits by repurposing original materials, maintaining the integrity of your building's character.
By salvaging old plaster, you can incorporate old plaster techniques into your new design, creating a unique fusion of past and present.
This approach allows you to break free from standardized renovation methods and infuse your project with individuality.
How to Minimize Mess During Plaster Renovation?
When tackling a plaster renovation, you'll want to contain the chaos by covering surfaces with protective coverings - think of it as a 'mess insurance policy.'
Don't let the dust settle, literally. Use drop cloths, plastic sheets, and tape to seal off areas you're not working on.
This will make for an efficient cleanup, freeing you from tedious scrubbing and allowing you to focus on the renovation itself.
What Is the Best Way to Dispose of Old Plaster?
When disposing of old plaster, you'll want to take into account environmental considerations to minimize your ecological footprint.
First, check local disposal regulations to see if there are specific guidelines for plaster waste. You may need to separate it from other materials or take it to a designated facility.
Think about partnering with a contractor who uses eco-friendly practices or look into recycling options for the plaster.
Proper disposal guarantees a cleaner environment and a clear conscience.
Conclusion
You'll be a plaster renovation rockstar with these three must-have tools in your arsenal.
Without them, you're doomed to a world of dusty despair, endless mess, and mediocre results.
But with the right safety gear, hand tools for smoothing plaster, and power tools for removal, you'll be well on your way to achieving flawless finishes and making your renovation dreams a reality.
Your clients will be green with envy - or should we say, plaster-perfectly happy!
Related Posts
-
Top Drill for Concrete Wall Renovation
When choosing the top drill for your concrete wall renovation, you'll want to prioritize key features like drill powe...
-

Why Do Cinder Block Wall Renovations Cost So Much
You're likely surprised by the high cost estimate for your cinder block wall renovation project, but it's driven by s...
-

3 Beginner-Friendly Tools for Plaster Renovation Success
You'll be glad to know that the three essential tools you need for a successful plaster renovation are the same ones ...


