
Budget-Friendly Plastering Supplies for Home Renovation
By strategically selecting affordable plastering supplies, you can cut costs without sacrificing quality, reducing your overall project expense by up to 30%. Invest in essential tools like sturdy trowels, durable putty knives, and specialized tools to enhance efficiency. Opt for cost-effective plaster mix options, such as USG Sheetrock or Lafarge Plaster, and consider DIY blends for custom results. Explore affordable plasterboard types, including moisture-resistant and soundproof options, and look for discounted taping knives and joint compound alternatives. With the right materials and tools, you'll be well on your way to a successful, budget-friendly plastering project, and discovering more tips and tricks can further optimize your renovation.
Key Takeaways
- Use cost-effective plaster mix options like USG Sheetrock or DAP Plaster, and consider DIY blends with eco-friendly ingredients.
- Invest in essential plastering tools like sturdy trowels, durable putty knives, and joint knives to ensure smooth application and finishing.
- Choose the right type of plasterboard for the job, such as standard, moisture-resistant, fire-resistant, soundproof, or flexible board, to save on unnecessary costs.
- Opt for discounted or second-hand materials, and consider buying in bulk to reduce costs and support local suppliers.
- Use budget-friendly installation and fixing methods like direct fixing, screws, or adhesives to save time and money on labor costs.
Essential Plastering Tools on a Budget
When you're on a budget, investing in the right plastering tools can make all the difference in achieving a professional-looking finish without breaking the bank. You don't need to sacrifice quality for affordability, but rather, focus on the essentials that'll get the job done.
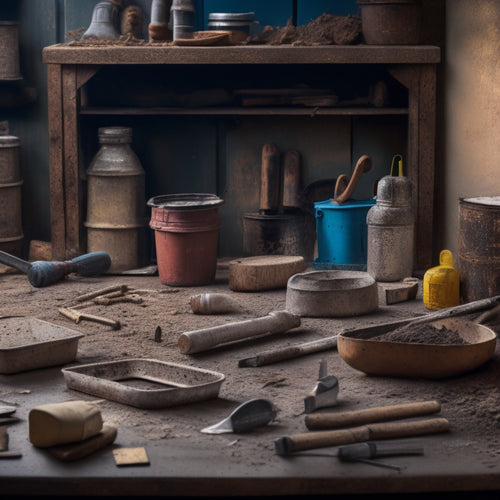
A sturdy trowel is a must-have for any plastering project. Look for one with a durable blade and comfortable grip to guarantee smooth, even application. A putty knife is another versatile tool that'll help you scrape, spread, and smooth out plaster with ease.
Investing in a few specialized tools, like a hawk and a joint knife, will also elevate your plastering techniques. A hawk helps you carry and apply plaster efficiently, while a joint knife is perfect for finishing joints and corners.
Don't forget about tool maintenance – regular cleaning and storage will extend the life of your tools and prevent damage. By prioritizing these essential tools, you'll be well on your way to achieving a professional-looking finish without blowing your budget.
With the right tools and a bit of practice, you'll be a plastering pro in no time!
Affordable Plaster Mix Options
When you're looking to save money on plastering supplies, you'll want to explore affordable plaster mix options that won't compromise on quality.
You can start by experimenting with different mix ratio options to find the perfect blend for your project, and then investigate cost-effective brands that offer reliable performance at a lower cost.
Additionally, you may consider creating your own DIY plaster blends using readily available materials to further reduce expenses.
Mix Ratio Options
You're likely aware that getting the right mix ratio is vital for achieving a strong, durable, and long-lasting plaster. But, let's face it, it's not always easy to get it just right. That's why understanding mix ratio guidelines is fundamental.
Typically, a mix ratio of 1 part cement to 2-3 parts sand is a good starting point. However, this can vary depending on the type of plaster you're using and the specific project requirements.
To guarantee peak mixing techniques, make sure to follow a few key steps. First, measure your ingredients carefully to avoid any discrepancies.
Next, mix the dry ingredients together before slowly adding water. Be careful not to add too much water, as this can lead to a weak and crumbly plaster.
Finally, mix the ingredients until they're smooth and consistent, but avoid over-mixing, which can also compromise the plaster's strength.
Cost-Effective Brands
Now that you've mastered the art of achieving the perfect mix ratio, it's time to explore cost-effective brands that offer affordable plaster mix options. You don't have to break the bank to get high-quality plastering supplies. Look for brands that offer affordable paint and budget-friendly alternatives without compromising on quality.
Here's a comparison of popular cost-effective brands:
| Brand | Price Range |
|---|---|
| USG Sheetrock | $10 - $25 per bag |
| Lafarge Plaster | $12 - $30 per bag |
| DAP Plaster | $8 - $20 per bag |
| Quikrete | $15 - $35 per bag |
| Gold Bond | $10 - $25 per bag |
When choosing a brand, consider factors like coverage area, durability, and ease of application. Keep in mind that while cheaper options might seem appealing, they might not provide the same level of quality as more expensive brands. Balance your budget with your needs, and don't be afraid to experiment with different brands to find the one that works best for you. With these cost-effective options, you can achieve professional-looking results without burning a hole in your pocket.
DIY Plaster Blends
Mixing your own plaster blend can be a cost-effective way to achieve the perfect consistency and texture for your project.
By controlling the ratio of ingredients, you can create a custom blend that suits your specific needs. For an eco-friendly option, consider using natural plaster ingredients like lime putty, sand, and water. You can also experiment with other natural additives like clay, straw, or hemp fibers to create a unique texture and finish.
When creating your DIY plaster blend, it's crucial to follow a precise recipe to guarantee consistent results. Start by mixing the dry ingredients together, then gradually add water until you achieve the desired consistency.
Be careful not to overmix, as this can lead to a weak and brittle plaster.
Some popular DIY plaster blend recipes include a simple lime putty and sand mix, or a more complex blend incorporating clay and natural fibers.
Whichever recipe you choose, make sure to test it on a small scale before applying it to your entire project.
With a little experimentation and patience, you can create a high-quality, eco-friendly plaster that fits your budget and meets your project's needs.
Cheap Plasterboard for Walls
When selecting cheap plasterboard for walls, you'll encounter various types, including standard, fire-resistant, and moisture-resistant options, each suited for specific applications.
You'll want to balance cost-effectiveness with performance, considering factors like thickness, density, and surface finish.
Types of Plasterboard
Your walls deserve the best, and that's where choosing the right type of plasterboard comes in. With so many drywall types to choose from, it can be overwhelming. But don't worry, we have everything you need!
Here's a breakdown of the most common types of plasterboard:
| Type | Description | Uses |
|---|---|---|
| Standard | General-purpose board for interior walls and ceilings | Residential and commercial construction |
| Moisture-Resistant | Water-resistant board for areas prone to moisture | Bathrooms, kitchens, and laundry rooms |
| Fire-Resistant | Board with added fire-resistant properties | Areas requiring fire-resistant materials, such as garages and hallways |
| Soundproof | Board designed to reduce noise levels | Home theaters, music rooms, and bedrooms |
| Flexible | Board that can be bent for curved surfaces | Architectural features, such as archways and columns |
When selecting a gypsum board, consider the specific needs of your project. Are you building a bathroom or kitchen? Moisture-resistant board might be the way to go. Need to reduce noise levels in your home theater? Soundproof board is your best bet. With the right type of plasterboard, you'll be well on your way to creating a beautiful and functional space.
Cost-Effective Options
Choosing the right type of plasterboard is only half the battle - you also need to contemplate your budget. You don't have to break the bank to get quality plasterboard for your walls. Look for cost-effective options that won't compromise on performance.
Opt for sustainable materials that are eco-friendly and locally sourced. This not only reduces your carbon footprint but also supports your local economy.
Consider purchasing plasterboard from local suppliers who offer competitive pricing without sacrificing quality. You can also explore second-hand or reclaimed plasterboard options, which can be a cheaper alternative. Just verify they meet the necessary building standards and regulations.
When comparing prices, don't forget to factor in the cost of delivery, handling, and storage. Buying in bulk can also help you negotiate a better deal with your supplier.
Easy Installation Methods
Direct fixing methods eliminate the need for fiddly battens, allowing you to get your plasterboard up quickly and efficiently. This means you can skip the tedious step of installing battens and get straight to fixing your plasterboard. But what are the best direct fixing methods for your budget-friendly plastering project?
| Fixing Method | Advantages | Disadvantages |
|---|---|---|
| Screws | Fast and easy, low cost | Can be visible, may require additional finishing |
| Nails | Inexpensive, easy to use | Can split plasterboard, may require additional finishing |
| Adhesives | No visible fixings, strong bond | Can be messy, requires surface preparation |
| Drywall anchors | Strong hold, easy to use | May require additional finishing, can be visible |
| Plasterboard clips | Fast and easy, low cost | May require additional finishing, can be visible |
When choosing a direct fixing method, remember to prioritize surface preparation to guarantee a strong bond between the plasterboard and the wall. By selecting the right fixing method for your project, you'll be able to achieve a smooth, professional finish without breaking the bank.
Discounted Taping Knives Available
Pick up a taping knife at a fraction of the cost with our discounted range, perfect for smoothing out joint compound on drywall or plaster.
You won't have to break the bank to get the job done. Our discounted taping knives are ideal for DIY enthusiasts and professionals alike, offering excellent quality at unbeatable prices.
-
Flex-Head Taping Knives: Perfect for tight spaces and corners, these knives feature a flexible head that adjusts to any angle.
-
Rigid Taping Knives: Ideal for large, flat areas, these knives provide a sturdy, straight edge for smooth finishing.
-
Angled Taping Knives: With their 45-degree angle, these knives are perfect for creating seamless joints and corners.
- Budget Brands: We offer discounted taping knives from trusted brands like Hyde, Purdy, and more, so you can get the quality you need without the hefty price tag.
With our discounted taping knives, you'll be able to tackle any plastering project with confidence and precision.
Whether you're a seasoned pro or a DIY newbie, our budget-friendly options have got you covered.
Inexpensive Joint Compound Alternatives
When working on a budget, you'll want to explore alternative joint compound options to save money without sacrificing quality.
Consider using a mud pan as a cost-effective way to mix and apply compound, or create your own DIY spackling mix using household ingredients.
Additionally, you can opt for cheap premix brands that still offer reliable performance at a lower price point.
Mud Pan Options
Frequently, you'll find yourself reaching for a mud pan to apply and smooth out joint compound, but did you know there are alternative options that can help you save money without sacrificing quality?
When it comes to choosing the right mud pan, you'll want to take into account factors like size, material, and features.
Here are some budget-friendly mud pan options to take into account:
-
Ergonomic Plastic Mudpans: These pans are designed for comfort and grip, reducing fatigue during long projects. Plus, they're often cheaper than metal alternatives.
-
Metal Mud Pans with Non-Stick Coating: These pans are durable and easy to clean, making them a great option for frequent users.
-
Compact Mud Pan Sizes: Smaller pans are perfect for small projects or tight spaces, and they're often more affordable than larger pans.
- Budget Mud Pans with Basic Features: If you're on a tight budget, think about a basic mud pan with minimal features. You can still get the job done without breaking the bank.
DIY Spackling Mix
Your joint compound expenses can add up quickly, especially on large projects.
But, with a DIY spackling mix, you can save a pretty penny without sacrificing quality. Mixing your own spackle allows you to customize the consistency and texture to suit your specific needs.
For a basic homemade spackle, combine 1 part water with 2 parts white glue and 3 parts joint compound powder. Mix well until you get a smooth, lump-free consistency. If you're looking for a more textured finish, experiment with different ratios of powder to water or add some sand or silica for added grit.
When it comes to application, use your DIY spackling mix just like you'd store-bought joint compound. Apply a thin layer, smooth it out, and let it dry before sanding.
For more advanced texture techniques, try using a putty knife or trowel to create unique patterns or designs. With a little practice, you'll be a pro at creating professional-looking finishes without breaking the bank.
Plus, you'll have the satisfaction of knowing you did it yourself – and saved some cash in the process.
Cheap Premix Brands
Premix joint compounds can be a cost-effective alternative to traditional joint compounds, offering similar performance at a lower price point.
You'll be pleased to know that you don't have to break the bank to get a quality premix.
Here are some affordable premix brands you should consider:
-
DAP: Known for their affordable and reliable joint compounds, DAP offers a range of premix products suitable for various applications.
-
USG: USG's premix joint compounds are a popular choice among DIYers and professionals alike, offering excellent performance at a lower cost.
-
Sheetrock: Sheetrock's premix products are designed for ease of use and offer a smooth finish, making them perfect for beginners and experts.
- Gold Bond: Gold Bond's affordable premix joint compounds are a great option for those on a tight budget, without compromising on quality.
When shopping for a premix brand, make sure to read the labels and look for certifications from reputable organizations.
A good premix should be easy to mix, have minimal shrinkage, and provide a smooth finish.
Budget-Friendly Sanding Blocks
Efficiency is key when it comes to plastering, and having the right tools can make all the difference. When it comes to sanding, you'll want to invest in budget-friendly sanding blocks that won't break the bank.
You'll be surprised at how much of a difference the right block can make in your sanding techniques. Look for blocks made from durable materials like foam or rubber, which can withstand the wear and tear of frequent use.
When choosing a sanding block, consider the type of plastering project you're working on. For example, if you're working with rough surfaces, you'll want a block with a coarse grit to help smooth out the surface.
For finer finishes, opt for a block with a higher grit. Don't be afraid to experiment with different block materials and grits to find the perfect combination for your project.
Plastering Mesh for Less Money
The right plastering mesh can provide a strong, durable bond between the plaster and the surface, but it doesn't have to break the bank.
You don't need to sacrifice quality for cost; instead, focus on choosing the right mesh for your project.
When selecting a plastering mesh, consider the following benefits:
-
Improved adhesion: Plastering mesh helps create a strong bond between the plaster and the surface, reducing the risk of cracks and delamination.
-
Increased durability: The mesh adds strength to the plaster, making it more resistant to impact and wear.
-
Reduced shrinkage: The mesh helps to control shrinkage, ensuring a smooth, even finish.
- Cost-effective: By choosing the right mesh, you can save money on materials and labor costs in the long run.
Low-Cost Plaster Finishing Tools
You'll be amazed at how much money you can save on plaster finishing tools without sacrificing quality.
With a little creativity and resourcefulness, you can achieve professional-looking results without breaking the bank. For instance, instead of investing in expensive trowels, consider using a putty knife or a joint knife to apply and smooth out plaster. These tools aren't only cheaper but also versatile enough to be used for other tasks.
When it comes to plaster finishing techniques, using a hawk and trowel combo can help you achieve a smooth, even finish. Look for budget-friendly options made from durable materials like stainless steel or high-carbon steel.
Additionally, invest in a good quality finishing float, which can help you achieve a smooth, lump-free finish. By following these budget plastering tips, you can save money on plaster finishing tools without compromising on quality.
With a little practice and patience, you'll be a pro at plastering in no time!
Economical Plastering Accessories
Beyond the domain of plaster finishing tools, there exist a multitude of economical plastering accessories that can further stretch your budget without compromising on quality.
You're not just limited to the essentials; these accessories can elevate your plastering techniques and make your budget renovations a whole lot smoother.
-
Plastering hawk: A must-have for any serious plasterer, this tool allows you to hold and carry plaster with ease, reducing mess and waste.
-
Mixing buckets: Invest in a few sturdy, heavy-duty buckets to mix and store your plaster. They're a no-brainer for any DIY enthusiast.
-
Plastering trowel cases: Protect your investment by storing your trowels in a dedicated case. It's a small price to pay for extending the life of your tools.
- Dust masks: Don't compromise your health for the sake of a renovation. Pick up a few dust masks to keep you breathing easy while you work.
DIY Plastering on a Shoestring
With plastering supplies in check, it's time to get your hands dirty and tackle that DIY project on a shoestring budget.
Now, you're probably thinking, "How do I achieve professional-looking results without breaking the bank?" Fear not, friend! With the right plastering techniques and renovation tips, you'll be well on your way to a successful DIY plastering project.
First, prep that wall like it's your job (because, well, it kind of is). Clean, sand, and prime the surface to guarantee a strong bond between the old and new plaster.
Next, mix your plaster according to the manufacturer's instructions – don't overmix, or you'll end up with a batch that's as useful as a chocolate teapot.
Apply the plaster in thin layers, using a putty knife or trowel to spread it evenly.
And remember, patience is key: let each layer dry completely before applying the next.
Frequently Asked Questions
Can I Use a Regular Knife Instead of a Taping Knife for Jointing?
You can try using a regular knife, but trust us, you'll struggle to achieve a smooth finish. Invest in a taping knife - its flexibility and curved blade make it perfect for feathering joint compound and creating seamless joints.
How Do I Prevent Mold Growth on Plastered Walls in Humid Areas?
Welcome to the humid jungle, where mold growth is the ultimate party crasher! To keep the fun at bay, you'll want to add mold-resistant additives to your plaster mix and master ventilation techniques, ensuring air flows freely and moisture doesn't get stuck in the walls.
Are There Any Eco-Friendly Plastering Supply Options Available?
You're on the hunt for eco-friendly plastering supplies! Yes, you can find sustainable materials like hemp, lime, and natural additives like plant-based fibers, which not only reduce your carbon footprint but also create a healthier indoor environment.
Can I Reuse Leftover Plaster Mix From a Previous Project?
You're tempted to revive last season's leftover plaster mix, but don't let project waste haunt you - its potency dwindles over time, and reused mix can lead to weak bonds, cracks, and a renovation nightmare, so it's best to start fresh.
What Safety Gear Is Essential for DIY Plastering Projects?
When you're about to plunge into DIY plastering, don't forget to suit up! You'll need a safety checklist that includes goggles, a dust mask, and gloves to protect yourself from those messy plastering techniques and potential hazards.
Conclusion
You've reached the final coat of your plastering project, and with these budget-friendly supplies, you've saved enough to add a fresh splash of paint to the walls. Your wallet, once a barren desert, is now a lush oasis, thanks to the affordable options you've discovered. As you step back to admire your handiwork, remember that a smooth finish isn't just about the plaster – it's about the financial freedom to pursue your next renovation dream.
Related Posts
-

What to Inspect When Buying Used Renovation Tools
When buying used renovation tools, you need to scrutinize every detail to avoid costly mistakes. Inspect for rust and...
-
Trowel Tool Cost for DIY Home Renovation Projects
When it comes to your DIY home renovation project, you'll need to budget for a variety of trowel tools, including stu...
-
7 Best Tool Storage Ideas for Home Renovation
When it comes to home renovation, staying organized is key to maximizing productivity and minimizing wasted time. To ...
