Budget-Friendly Plastering Essentials for Home Renovation
When renovating your home on a budget, investing in the right plastering essentials is vital. Start with quality, affordable tools like a dust mask, safety goggles, and a sturdy trowel, available at local hardware stores or online. For efficient application, prioritize a mixing bucket, putty knife, and essential tools like trowels, hawks, and floats. Next, choose the right plastering material, such as cement-based, lime-based, or gypsum-based, and follow manufacturer's instructions for ideal mixing. By understanding these basics, you'll be well on your way to a successful, cost-effective plastering project, and uncovering more tips and techniques to elevate your renovation results.
Key Takeaways
• Invest in essential tools like dust masks, safety goggles, and trowels to ensure a safe and efficient plastering process.
• Choose affordable materials like cement-based, lime-based, or gypsum-based plaster suitable for your project's requirements.
• Apply cost-effective techniques like using a putty knife to scrape excess plaster and mixing your own plaster to reduce costs.
• Select the right plastering mesh for reinforcement, considering factors like durability, flexibility, and crack prevention.
• Organize your tools and materials efficiently to minimize clutter, reduce frustration, and enhance workflow.
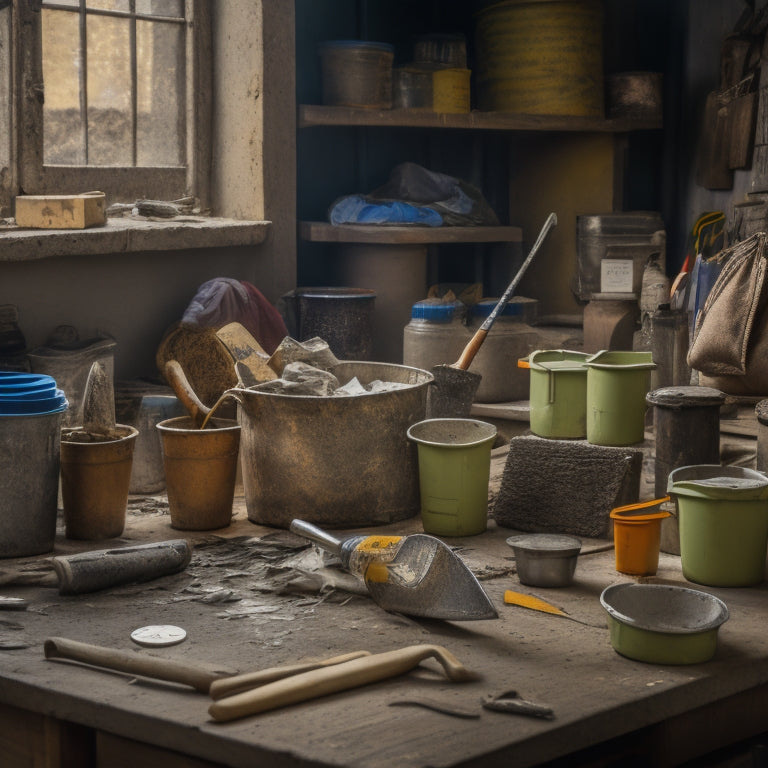
Essential Plastering Tools on a Limited Budget
You'll need a range of essential tools to get started with plastering, even on a limited budget, and fortunately, you can acquire the must-haves without breaking the bank. Don't worry, you won't have to mortgage your house to get the necessary gear.
First and foremost, prioritize plastering safety by investing in a good quality dust mask, safety goggles, and gloves. These will protect you from inhaling pesky plaster particles and save your skin from harsh chemicals.
Next, focus on the basics: a sturdy trowel, a mixing bucket, and a putty knife. These will be your new best friends during the plastering process.
Remember, tool maintenance is key to extending the life of your equipment. Clean and store your tools properly after each use to prevent rust and damage.
You can find affordable options at your local hardware store or online. By having these essential tools in your arsenal, you'll be well on your way to a successful and safe plastering experience.
Affordable Materials for Concrete Plaster
When it comes to concrete plaster, selecting the right materials is vital, and fortunately, there are affordable options available that won't compromise on quality. As you navigate the world of concrete plaster, you'll encounter various types, each with its unique characteristics and uses.
Here are three common concrete plaster types, their advantages, and ideal applications:
| Concrete Plaster Type | Advantages | Ideal Application |
|---|---|---|
| Cement-based plaster | High strength, durability, and resistance to water and weather | Exterior walls, foundations, and high-traffic areas |
| Lime-based plaster | Breathability, flexibility, and eco-friendliness | Interior walls, ceilings, and historic restorations |
| Gypsum-based plaster | Fire-resistance, soundproofing, and ease of application | Drywall, ceiling, and partition constructions |
When it comes to mixing techniques, it's imperative to follow the manufacturer's instructions and maintain the best water-to-cement ratio. Remember, the key to achieving a strong and durable concrete plaster is to mix it just right – not too wet, not too dry. With these affordable materials and techniques, you'll be well on your way to a successful home renovation project that won't break the bank.
DIY Plastering Equipment Must-Haves
Now that you've selected the right concrete plaster for your project, it's time to assemble the necessary tools to guarantee a smooth and efficient application process. You don't want to be stuck halfway through the job, scrambling for the right equipment. Trust us, it's not a fun feeling!
To ascertain a successful DIY plastering experience, you'll need these essential tools:
-
Plastering trowel: This is your go-to tool for applying and smoothing out the plaster. Invest in a good-quality trowel that feels comfortable in your hand.
-
Mixing bucket and paddle: You'll need a sturdy bucket to mix your plaster, and a paddle to get the job done efficiently. Don't skimp on quality here - you don't want your paddle breaking mid-mix!
-
Safety goggles and mask: Plastering safety is no joke! Protect yourself from flying debris and inhaling dust with the right safety gear.
With these must-haves in your toolkit, you'll be well on your way to mastering plastering techniques and achieving a professional-looking finish.
Happy plastering!
Budget-Friendly Plastering Accessories
When you're working on a plastering project, you'll need more than just the basics to get the job done.
You'll require a range of accessories that won't break the bank, and that's where budget-friendly plastering accessories come in.
You'll want to take into account essential plastering tools, plastering mesh options, and DIY plastering essentials to guarantee a successful and cost-effective project.
Essential Plastering Tools
What sets a professional plasterer apart from a DIY enthusiast is their arsenal of specialized tools, which you can assemble without breaking the bank.
As you immerse yourself in the world of plastering, you'll realize that having the right tools is vital for achieving smooth, even surfaces. With a little investment, you can master various plastering techniques and guarantee proper surface preparation.
Here are the must-haves in your toolkit:
-
Trowel: A sturdy, high-quality trowel is essential for applying and smoothing plaster. Look for one with a comfortable grip and a rust-resistant blade.
-
Hawk: A hawk is a rectangular tool used to hold and carry plaster. It's a game-changer for efficient application and reduces mess.
-
Float: A float is used to smooth out the plaster once it's been applied. Opt for a foam or rubber float for a smooth, bubble-free finish.
With these essentials, you'll be well on your way to achieving professional-looking results without breaking the bank.
Plastering Mesh Options
You'll need to reinforce your plastering projects with a reliable mesh option to prevent cracks and guarantee durability. Think of it as insurance for your walls – you don't want to risk them crumbling under the pressure!
There are several mesh types to choose from, each with its unique benefits. The most popular ones are self-furring, woven, and fiberglass meshes. Self-furring meshes have small protrusions that help the plaster adhere better, while woven meshes provide extra strength and flexibility. Fiberglass meshes, on the other hand, are ideal for high-traffic areas or exterior projects.
When selecting a mesh, consider the specific requirements of your project. For instance, if you're working on a curved surface, a flexible mesh might be the way to go. Regardless of the type, a good mesh will provide superior strength, reduce shrinkage, and minimize the risk of cracks.
DIY Plastering Essentials
Beyond mesh, a set of budget-friendly plastering accessories is essential to achieving a professional-looking finish without breaking the bank. As a DIY enthusiast, you'll want to guarantee you have the right tools to get the job done efficiently and safely.
When it comes to plastering safety, don't skimp on the essentials. Here are three must-haves to add to your toolkit:
-
Dust mask: Keep those pesky plaster particles out of your lungs with a reliable dust mask. Trust us, your respiratory system will thank you.
-
Steel trowel: A sturdy steel trowel is your best friend when it comes to applying and smoothing out plaster. Look for one with a comfortable grip to reduce fatigue.
-
Plastering hawk: This handy tool helps you carry and apply plaster with ease, saving you time and energy.
With these budget-friendly plastering accessories, you'll be well on your way to mastering plastering techniques like a pro. Remember, safety should always be your top priority, so don't compromise on quality when it comes to your tools.
Happy renovating!
Cost-Effective Plastering Techniques
Employing efficient application methods and strategic material selection can greatly reduce plastering costs without compromising the quality of the final product. By adopting these cost-saving techniques, you'll be able to create a stunning, professional-looking finish without breaking the bank.
Here are some plastering tips to get you started:
| Technique | Cost Savings | Quality Impact |
|---|---|---|
| Using a putty knife to scrape off excess plaster | 10-15% | No impact on quality |
| Applying a scratch coat before the finish coat | 5-10% | Improved finish quality |
| Mixing your own plaster instead of buying pre-mixed | 20-25% | No impact on quality |
Efficient Plastering Tool Storage
When it comes to efficient plastering, organizing your toolbox is essential, as a cluttered workspace can lead to lost time and decreased productivity. You don't want to waste precious minutes searching for that one specific trowel or scraper. Trust us, it's a plastering nightmare!
To avoid this, invest in some clever tool organization and storage solutions. Here are three must-haves to get you started:
-
Toolboxes with dividers: Keep your tools separated and easy to find with customizable dividers.
-
Pegboards with hooks: Hang your frequently used tools on pegboards with hooks, keeping them within arm's reach.
-
Stackable storage bins: Store your less-used tools and materials in labeled, stackable bins to maximize your workspace.
Frequently Asked Questions
Can I Use a Regular Drill for Mixing Plaster?
You're wondering if your trusty drill can handle mixing plaster? Well, technically, you can use a regular drill, but it's not the best choice.
Plaster mixing techniques require a lot of torque, and standard drills mightn't provide enough oomph. You'll end up with a lumpy mess or, worse, a burned-out drill.
Opt for a heavy-duty drill or a dedicated mixing drill with a paddle bit – your plaster (and drill) will thank you!
How Do I Fix a Hole in the Plastered Wall?
You've got a hole in your wall, huh? Don't worry, it's an easy fix!
For common plaster repairs like this, you'll need to master some basic plaster patching techniques.
Start by cleaning the area around the hole, then apply a layer of joint compound.
Let it dry, sand it smooth, and voilà! Your wall's looking good as new.
Just remember, it's all about the prep work and patience – and don't overmix that compound, or you'll end up with a bigger mess on your hands!
Is It Necessary to Prime the Surface Before Plastering?
You're wondering if priming is a must before plastering.
Well, let's get straight to it - priming is like the secret ingredient in your favorite recipe. It guarantees a strong bond between the old surface and new plaster, reducing the risk of peeling or flaking.
Proper surface preparation is key, and priming is an essential step. It'll save you time and hassle in the long run, trust us!
Can I Plaster Over Existing Paint or Wallpaper?
You're wondering if you can just plaster over that existing paint or wallpaper, huh?
Well, let's get real, that's a recipe for disaster!
You'll need to prep that surface like a pro. Remove that old paint or paper using some serious paint removal methods - we're talking sanding, scraping, or even chemical stripping.
Then, it's time for some plaster preparation techniques, like cleaning and degreasing.
Trust us, it's worth the extra effort to guarantee a smooth, long-lasting finish.
How Long Does It Take for Plaster to Fully Dry and Harden?
You're waiting for your plaster to dry, feeling like a chef waiting for the perfect soufflé to rise.
But, unlike a soufflé, plaster drying times aren't always predictable. It can take anywhere from 24 hours to several weeks for plaster to fully dry and harden, depending on factors affecting drying, such as temperature, humidity, and thickness of application.
Be patient, and don't rush the process – you want a strong, durable finish, not a cracked, crumbly mess.
Conclusion
As you wrap up your plastering project, you're left with a sense of accomplishment and a beautifully renovated space.
But the real question is, did you have to break the bank to get there?
With these budget-friendly plastering essentials, the answer is a resounding no.
From essential tools to cost-effective techniques, you've got the know-how to tackle your next project without sacrificing quality or your wallet.
Can you imagine the possibilities with a little creativity and a lot of savings?
Related Posts
-

Affordable Plastering Tools for Home Renovation Success
You're taking the first step towards a successful home renovation by investing in the right plastering tools. Start w...
-

7 Best Tool Storage Ideas for Home Renovation
When it comes to home renovation, staying organized is key to maximizing productivity and minimizing wasted time. To ...
-

Top 3 Tools to Buy for Stucco Renovation
You'll need the right tools to guarantee a successful stucco renovation, and it all starts with three essential items...


