Block Laying Techniques for Home Renovation Success
Share
As you prepare to lay cinder blocks for your home renovation project, you'll need to guarantee you have the right tools, materials, and techniques. Start by choosing the right cinder block type and preparing the site by evaluating soil conditions, clearing debris, and compacting the ground. Next, lay the foundation course accurately, followed by building the wall, applying mortar, and incorporating design patterns. With careful attention to detail and a solid understanding of these techniques, you'll be well on your way to a sturdy, long-lasting structure - and with the right guidance, you can reveal the full potential of your project.
Key Takeaways
• Choose the right cinder block type and mortar mix suitable for your project needs and local building regulations.
• Ensure site preparation through soil assessment, clearance, and compaction to prevent settlement issues and erosion.
• Lay the foundation course accurately using a spirit level, string lines, and stakes to establish a level and plumb wall.
• Apply mortar correctly using a pointing trowel, fill gaps firmly, and monitor curing time to guarantee wall strength and durability.
• Finish the wall with proper techniques, including excess mortar removal, curing compound application, and surface smoothing for a strong and visually appealing structure.
Essential Cinder Block Laying Tools
Before you begin laying cinder blocks, gather the essential tools of the trade, including a spirit level, a trowel, a jointer, and a string line, to guarantee your project gets off to a strong start.
These tools will help you achieve a level, plumb, and straight wall.
Don't forget to choose the right type of cinder block for your project, as different types have varying strengths and uses.
For instance, you may need solid blocks for load-bearing walls or hollow blocks for non-load bearing walls.
Preparing the Site and Soil
As you prepare to lay blocks for your home renovation, you'll need to guarantee the site and soil are ready.
You'll need to assess the soil's condition, clear the site of debris and obstacles, and check the ground's stability to guarantee a solid foundation.
Soil Condition Assessment
You need to assess the soil condition on your renovation site to determine its load-bearing capacity and potential settlement issues. This vital step guarantees your block laying project's success.
Start by identifying the soil type, as it affects the foundation's stability. Common soil types include clay, silt, sand, and loam. Each has unique characteristics that impact its load-bearing capacity. For instance, clay soil is prone to shrinkage, while sandy soil is more susceptible to erosion.
Next, inspect the soil's compaction level. Compaction techniques, such as plate compactors or hand tamperers, help increase the soil's density, reducing settlement issues. Check for any signs of soil instability, like cracks or unevenness.
Take note of the soil's moisture content, as excess water can weaken its load-bearing capacity. By understanding your soil condition, you can design a suitable foundation that meets your renovation project's demands.
Site Clearance Methods
With your soil condition assessment complete, it's time to prepare the site and soil for block laying by clearing the area of debris, vegetation, and other obstacles. This vital step in site preparation guarantees a smooth and even surface for your block foundation.
Start by removing any debris, such as rocks, twigs, and broken glass, that could interfere with your block laying process. Next, clear the area of any vegetation, including grass, weeds, and trees, using a combination of manual labor and machinery if necessary. Don't forget to remove any roots that could compromise the stability of your foundation.
Debris removal is a critical aspect of site preparation, as it prevents damage to your blocks and guarantees a solid bond between the blocks and the soil.
Once you've cleared the area, use a rake or shovel to level the ground and create a smooth surface. Finally, compact the soil using a hand tamper or plate compactor to create a solid base for your block foundation.
Ground Stability Checks
Ground stability checks involve inspecting the site for signs of settlement, subsidence, or erosion, which can compromise the structural integrity of your block foundation if left unchecked. You'll want to assess the ground composition and identify any potential issues before laying the first block.
Start by visually examining the site for any signs of movement or cracks in the existing structures or pavement. Next, check the soil types and their properties, as certain types like clay or silt can be prone to settlement or erosion.
You may need to conduct further tests, such as digging trial pits or boreholes, to gather more information about the soil's condition. It's also critical to check for any underground services, like pipes or cables, that could impact your foundation.
Laying the Foundation Course
As you begin laying the foundation course, you'll need to guarantee the site is prepared correctly.
You'll start by checking the trench excavation is accurate and the ground is level, then move on to laying the first blocks properly.
Course Preparation Essentials
What's the most critical step in preparing a course for block laying, and why is it essential to get it right from the start? It's ensuring you have the right materials and a solid plan in place. This sets the foundation for a successful project, and any mistakes can be costly and time-consuming to fix later on.
Here are the essential elements to focus on during course preparation:
| Element | Description | Importance |
|---|---|---|
| Material Selection | Choose blocks that match your design and meet local building codes | High |
| Project Timeline | Create a realistic schedule to avoid delays and setbacks | Medium |
| Site Preparation | Clear the area of debris and level the ground | High |
Foundation Trench Excavation
You'll typically begin foundation trench excavation by marking out the trench's centerline, carefully referencing your project plan to confirm accurate alignment and dimensions.
Next, you'll establish the trench's boundaries using stakes and string lines, making sure they're level and plumb.
Before breaking ground, it's vital to assess the soil conditions and adjust your excavation strategy accordingly. For instance, if you're dealing with unstable or rocky soil, you may need to use specialized equipment or hand-digging techniques to maintain excavation safety.
As you start digging, pay close attention to the trench depth, regularly checking your progress against your project plan. It's important to achieve the correct depth to guarantee your foundation course is level and even.
Remember to also take regular breaks to inspect the trench's walls and floor for signs of instability or weakness, making any necessary adjustments to prevent collapse.
Laying First Blocks Properly
With the foundation trench excavation complete, you're ready to start laying the foundation course, beginning with the first blocks that will set the stage for your home renovation project. It's essential to get this step right, as it'll determine the stability and alignment of your entire structure.
Start by identifying the corner blocks, which will serve as reference points for the rest of your foundation. Place them carefully, ensuring they're level and aligned with the surrounding terrain. Use a spirit level and string lines to guarantee accurate block alignment techniques. For corner block placement, make sure to stagger the joints to create a strong bond between blocks.
Next, lay the remaining blocks, working your way outward from the corners. Use a rubber mallet to tap each block into place, ensuring a snug fit. Check the alignment regularly, making adjustments as needed.
Building the Cinder Block Wall
Begin by preparing the site where you'll build the cinder block wall, verifying it's level, clean, and free of debris. This is vital to guarantee a solid foundation for your wall.
Next, lay a layer of compacted gravel or sand to provide drainage and prevent settling.
Now, start building your wall by laying the first course of blocks, making sure to stagger the joints between blocks.
As you build, incorporate block insulation methods, such as foam inserts or fiberglass batts, to improve energy efficiency.
Don't forget to include structural reinforcement techniques, like rebar or fiber mesh, to add strength and stability to your wall.
Use a level to verify the blocks are straight, and a string line to keep the courses aligned.
Work methodically, course by course, to build a strong and durable wall.
Remember to check your level and plumb frequently to avoid errors.
Mortar Mixing and Application
Mixing mortar to the right consistency and applying it correctly is essential to holding your cinder block wall together and guaranteeing its structural integrity. You'll need to choose the right type of mortar for your project, considering factors like compressive strength, workability, and durability. For most cinder block walls, a type S or N mortar is suitable.
When it comes to mixing, you'll need to follow the correct ratio of cement to sand to water. A general mixing ratio is 1 part cement to 2-3 parts sand to 0.5-1 part water. However, this may vary depending on the specific mortar type and your project's requirements. Make sure to mix the ingredients in a clean, dry bucket, and avoid over-mixing, which can lead to a weak and brittle mortar.
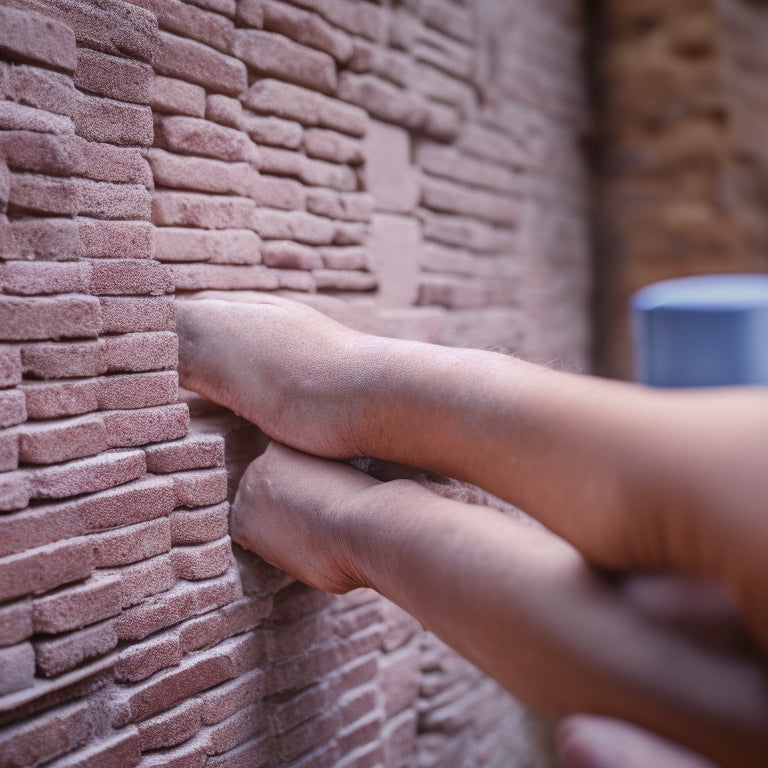
Apply the mixed mortar to the cinder blocks using a pointing trowel, holding it at a 45-degree angle. Press the mortar firmly into the gaps between the blocks, making sure to fill them completely. Use a level to guarantee the blocks are aligned properly, and use a spirit level to check for plumbness.
Block Laying Pattern and Design
As you prepare to lay your cinder blocks, consider the pattern and design you'll use, since it will greatly impact the structural integrity, aesthetic appeal, and overall success of your project.
The block design aesthetics you choose won't only affect how your wall looks but also its stability. A well-planned pattern can distribute weight evenly, reducing the risk of cracks and weaknesses.
You can choose from various creative block patterns, such as the running bond, stack bond, or basket weave. Each pattern has its advantages and challenges. For instance, the running bond pattern is strong and easy to lay, but it can be less visually appealing. On the other hand, the basket weave pattern adds a decorative touch, but it requires more skill and attention to detail.
When selecting a pattern, consider the purpose of your wall, the type of blocks you're using, and your level of expertise.
Take your time to plan and visualize the design before you start laying the blocks. With a clear plan, you'll be able to achieve a sturdy and attractive wall that meets your needs and enhances your home's curb appeal.
Finishing and Curing the Blocks
You'll need to finish and cure your blocks properly to confirm they reach their maximum strength and durability. This involves applying the right block finishing techniques to achieve a smooth, even surface.
Start by removing any excess mortar from the blocks using a jointer or a trowel. Then, use a level to ascertain the blocks are perfectly aligned and plumb. Next, apply a layer of curing compound to the blocks, following the manufacturer's instructions. This will help retain moisture and promote proper curing.
When it comes to curing techniques, it's crucial to keep the blocks moist for at least 24 hours. You can do this by spraying them with water or covering them with a damp cloth. Avoid direct sunlight and extreme temperatures, as these can cause the blocks to dry out too quickly.
Frequently Asked Questions
Can I Use Cinder Blocks for a Load-Bearing Wall Structure?
You're wondering if cinder blocks are a good choice for a load-bearing wall structure.
While cinder blocks have advantages like being cost-effective and easy to work with, they may not be the best option for load-bearing walls.
You need to take into account the weight and stress they'll be under, as cinder blocks can be prone to crumbling and may not provide enough structural integrity.
It's essential to weigh the pros and cons before making a decision.
How Do I Prevent Efflorescence on My Cinder Block Walls?
Imagine a thousand tiny crystals bursting forth from your cinder block walls like a geological wonder - that's efflorescence! It's a real concern, but you can prevent it.
First, make sure your blocks are dry and free of excess moisture, as efflorescence is often caused by water seepage.
Then, apply a waterproofing agent to the blocks and mortar.
Finally, seal your walls with a breathable coating to keep moisture out.
Are There Any Alternatives to Traditional Mortar for Cinder Blocks?
You're considering alternatives to traditional mortar for your cinder block walls. You've got options!
Polymer adhesives, for instance, offer improved durability and water resistance.
Alternative binders like lime-based or epoxy-based mortars can also provide enhanced performance.
When choosing, think about your project's specific needs, such as exposure to weather or structural demands.
Research and testing will help you find the best fit for your walls.
Can I Paint or Stain Cinder Blocks to Match My Home's Exterior?
Did you know that over 60% of homeowners consider exterior appearance when renovating? You're likely one of them!
Painting or staining cinder blocks can totally transform their aesthetics to match your home's exterior. To achieve a seamless look, make sure you prime the blocks first, then choose a color that complements your home's existing palette.
You can also use a specialized masonry paint or stain to guarantee durability. With the right preparation and products, you'll be thrilled with the result!
Do I Need to Seal My Cinder Block Walls for Waterproofing?
You're wondering if you need to seal your cinder block walls for waterproofing. The answer is yes, you should.
Unsealed cinder blocks can absorb moisture, leading to damage and mold.
Consider adding cinder block insulation and a moisture barrier to prevent water seepage.
You can choose from various moisture barrier options, such as waterproofing membranes or coatings.
Conclusion
As you put the final block in place, take a step back and admire your handiwork - a sturdy, attractive wall that's the backbone of your home renovation.
You've navigated the twists and turns of block laying like a pro, from prep to finish.
Your hard work will pay off in a safe, durable, and beautiful space that's all yours.
Now, grab a well-deserved break and bask in the satisfaction of a job well done!
Related Posts
-

Top Tools for DIY Home Renovation Plastering Success
To achieve DIY home renovation plastering success, you'll need a range of essential tools. Start with hand tools like...
-

Crack Repair Inspection Checklist for Home Renovation
When creating a crack repair inspection checklist for your home renovation project, you'll want to identify crack typ...
-

Budget-Friendly Materials for Your Home Renovation Needs
As you initiate your home renovation, you're enthusiastic to find budget-friendly materials that fit your vision with...


