
7-Step Guide to Renovating Your Garage on a Budget
You're about to transform your cluttered garage into a functional and organized space without breaking the bank, and these 7 steps will guide you through the process from evaluation to decoration. Start by evaluating your garage's condition, identifying safety concerns and prioritizing repairs. Next, create a budget and plan, defining your renovation goals and categorizing must-haves, nice-to-haves, and luxuries. Then, plunge into the demolition and cleanup phase, removing unwanted items and disposing of hazardous waste. From there, you'll install new flooring and walls, add insulation and drywall, and incorporate functional storage solutions and enhanced lighting. Now that you've got the basics covered, get ready to add those final decorative touches that'll make your new garage shine.
Key Takeaways
• Assess your garage's condition to identify safety concerns, prioritize repairs, and inform renovation decisions.
• Create a budget and plan, allocating 10-20% for unexpected expenses, to ensure effective resource allocation.
• Remove unwanted items, sort, and dispose of hazardous waste properly to clear the workspace for renovation.
• Choose flooring and wall materials that balance durability and cost, measuring accurately to avoid waste during installation.
• Allocate funds to essential elements like insulation, drywall, and functional storage solutions before adding decorative touches.
Assessing Your Garage's Condition
Take stock of your garage's current state by walking through it and making a mental (or written) note of what's working and what's not, from the condition of the floors and walls to the functionality of the lighting and electrical outlets.
This assessment will help you identify areas that need attention, ensuring your garage renovation stays on track and on budget.
Pay particular attention to garage safety concerns, such as tripping hazards, exposed wiring, or unstable shelving.
Also, evaluate the structural integrity of your garage, checking for cracks in the foundation, walls, or ceiling, as well as signs of water damage or pest infestation.
Don't forget to inspect the garage door and opener, ensuring they're functioning smoothly and safely.
By taking a thorough inventory of your garage's condition, you'll be able to prioritize repairs and make informed decisions about what needs to be replaced or upgraded.
This vital step will lay the groundwork for a successful and stress-free renovation.
Creating a Budget and Plan
Now that you've assessed your garage's condition, it's time to define your renovation goals and establish a budget.
You'll need to set financial targets and prioritize what needs to be done, so you can allocate your resources effectively.
Set Financial Goals
How much are you willing to invest in your garage renovation, and what do you expect to achieve with that budget? Setting financial goals is a vital step in the renovation process. It's important to determine how much you can afford to spend and what you want to achieve with that amount.
Start by considering your must-haves, nice-to-haves, and luxuries. Be realistic about what you can accomplish within your budget.
Effective financial planning involves budget tracking, which helps you stay on top of your expenses. Create a detailed breakdown of your costs, including materials, labor, and permits. Consider allocating 10-20% of your budget for unexpected expenses.
Prioritize your spending based on your goals and needs. Remember, it's better to have a smaller, well-executed renovation than a grand plan that exceeds your budget.
Prioritize Renovation Needs
Identify your garage's most pressing needs by categorizing them into essential repairs, functional upgrades, and aesthetic enhancements, and then allocate your budget accordingly. This will help you focus on the most critical areas that require attention, ensuring you're getting the most bang for your buck.
Here are some key areas to prioritize:
-
Essential Repairs: Address any structural issues, leaks, or safety hazards that need immediate attention. This includes fixing broken windows, repairing damaged walls, or replacing a worn-out garage door.
-
Functional Upgrades: Improve the functionality of your garage by adding storage solutions, installing shelving, or upgrading your lighting. This will enhance your garage's space utilization and make it more efficient.
-
Aesthetic Enhancements: Focus on cosmetic improvements, such as painting the walls, installing new flooring, or adding decorative elements. This will give your garage a fresh look and provide design inspiration for future projects.
- Space Optimization: Consider how you can optimize your garage's layout to maximize space. This might involve rearranging your storage, installing a slatwall, or incorporating a workbench.
Demolition and Cleanup Phase
Now that you've got a solid plan in place, it's time to get your hands dirty and start the demolition and cleanup phase of your garage renovation.
You'll need to remove all the unwanted items that are cluttering up the space and clear the workspace to make way for the renovations to come.
Remove Unwanted Items
You'll likely be surprised at the amount of clutter that's accumulated in your garage over the years, and tackling it head-on is the first step in this renovation process. It's crucial to separate the items you want to keep from those you can donate, recycle, or discard. Be ruthless – if you haven't used it in the past year, it's likely you won't miss it.
Here are some tips to help you remove unwanted items:
-
Sort items into categories: Divide items into groups like 'keep,' 'donate,' 'recycle,' and 'discard' to make the process more manageable.
-
Explore donation options: Consider donating gently used items to local charities or thrift stores. You can also claim a tax deduction for your donations.
-
Follow recycling tips: Check with your local recycling program to see what materials they accept. You can recycle items like old batteries, cardboard, and metal scraps.
- Be mindful of hazardous waste: Properly dispose of hazardous materials like paint, solvents, and chemicals at designated facilities.
Clear the Workspace
With your garage decluttered, it's time to roll up your sleeves and tackle the demolition and cleanup phase, where you'll strip the space down to its bare bones. This stage is vital for a successful renovation, as it sets the foundation for your new garage.
Start by removing any remaining items, including old shelving, cabinets, and flooring. Take down any light fixtures, ceiling fans, and outlets to guarantee a safe working environment.
Next, give the space a thorough cleaning, sweeping and vacuuming the floor to remove any debris or dust. This will help prevent damage to your new flooring and give you a clean slate to work with.
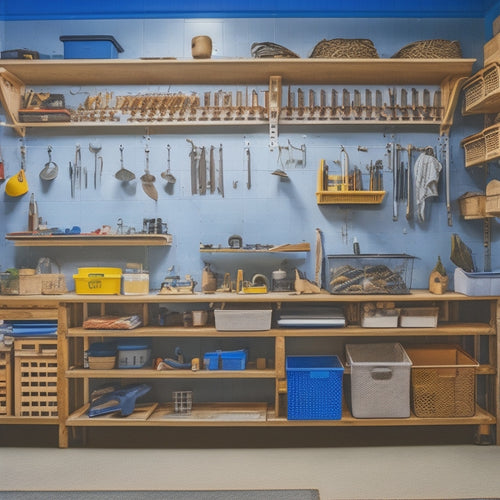
Don't forget to organize your tools and materials, storing them in a designated area to maintain a clutter-free workspace. Consider investing in tool storage solutions, such as pegboards or tool chests, to keep your workspace organized and efficient.
Installing New Flooring and Walls
By tearing out the old flooring and walls, you're creating a blank canvas that allows you to reimagine the space and inject new life into your garage.
Now, it's time to install new flooring and walls that not only look great but also fit your budget.
When it comes to flooring options, consider the following:
-
Epoxy-coated concrete: A cost-effective and durable option that's perfect for garages.
-
Vinyl flooring: Affordable, easy to install, and resistant to moisture and scratches.
-
Ceramic tiles: A stylish option that's easy to clean and maintain.
- Interlocking floor tiles: A versatile and budget-friendly option that's perfect for DIY enthusiasts.
For wall materials, choose from a variety of options such as drywall, plywood, or MDF.
Consider factors like durability, moisture resistance, and cost when making your decision.
Remember to measure your space accurately and plan your installation carefully to avoid waste and minimize costs.
With the right flooring and walls, you'll be one step closer to creating a garage that's both functional and visually appealing.
Adding Insulation and Drywall
Insulation and drywall are essential components of a garage renovation, and now that you've got your flooring and walls in place, it's time to add these critical elements to guarantee a comfortable and energy-efficient space.
When it comes to insulation, you've got several options to choose from, each with its own benefits and drawbacks. Here's a breakdown of some common insulation types:
| Insulation Type | R-Value | Cost |
|---|---|---|
| Fiberglass Batts | 3.5-4.5 | $0.50-$1.50/sqft |
| Cellulose Insulation | 3.5-4.5 | $1.00-$2.50/sqft |
| Spray Foam Insulation | 6.0-7.0 | $2.00-$5.00/sqft |
| Reflective Insulation | 2.0-3.0 | $0.25-$1.00/sqft |
| Rigid Foam Insulation | 4.0-6.0 | $1.50-$3.50/sqft |
Once you've chosen your insulation, it's time to move on to drywall installation. Make sure to measure your walls carefully and cut your drywall sheets accordingly. Use drywall screws to secure the sheets to the studs, and don't forget to add joint compound to cover any seams or imperfections. With these elements in place, you'll be well on your way to a cozy and energy-efficient garage.
Final Touches and Decorations
You're now ready to put the finishing touches on your garage renovation by adding decorations and accessories that reflect your personal style and make the space truly functional. This is where you get to have some fun and add those decorative accents that make the space feel like your own.
Here are some ideas to contemplate:
-
Add functional storage: Install shelving units, cabinets, or pegboards to keep your tools and equipment organized and within reach.
-
Incorporate lighting: Add task lighting, such as under-cabinet lights or LED strips, to illuminate work areas and create ambiance.
-
Bring in color: Add a statement wall or incorporate colorful accessories, like bins or baskets, to add visual interest to the space.
- Add a personal touch: Hang a few favorite pieces of art or install a motivational quote to make the space feel more personal.
Frequently Asked Questions
Can I Renovate My Garage Without Professional Help?
You can definitely renovate your garage without professional help, tackling DIY projects like painting, organizing, and installing budget-friendly upgrades like shelving and lighting to create a functional space that suits your needs.
How Do I Handle Asbestos or Lead Paint in My Garage?
'When dealing with asbestos or lead paint in your garage, you'll need to prioritize safety. Start by hiring a pro for asbestos testing and lead paint removal to guarantee a safe renovation process.'
Do I Need a Permit to Renovate My Garage?
"Did you know 80% of garage renovations require permits? You'll likely need one, so research local building regulations to determine if your garage renovation permits are necessary, and avoid costly fines."
Can I Reuse Old Materials From My Garage Renovation?
You can definitely breathe new life into old materials from your garage renovation, exploring upcycling possibilities to reduce waste and incorporate cost-saving strategies, giving your project an eco-friendly and budget-friendly spin.
How Long Will My Garage Renovation Project Take?
As you commence your garage renovation journey, you're likely wondering how long the transformation will take. Crafting a detailed garage design and realistic renovation timeline will be your roadmap to success, helping you navigate the twists and turns ahead.
Conclusion
You've made it! You've transformed your garage from a cluttered cave to a sparkling sanctuary.
And the best part? You did it without breaking the bank!
By following these 7 steps, you've saved thousands of dollars and still ended up with a garage that's the envy of the neighborhood.
You've proven that with a little elbow grease and some smart planning, you can turn even the most mundane space into a showstopper.
Pat yourself on the back – you've earned it!
Related Posts
-

Why Do Cinder Block Wall Renovations Cost So Much
You're likely surprised by the high cost estimate for your cinder block wall renovation project, but it's driven by s...
-

What to Look for in Pneumatic Renovation Tools
When selecting pneumatic renovation tools, you'll want to take into account several key factors to guarantee optimal ...
-
7 Best Tool Storage Ideas for Home Renovation
When it comes to home renovation, staying organized is key to maximizing productivity and minimizing wasted time. To ...
