
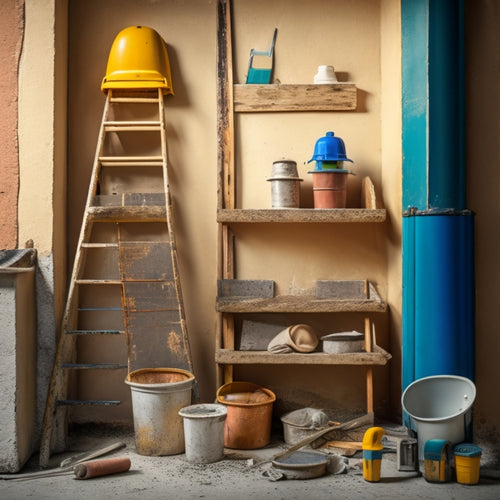
7 Best DIY Plastering Tools for Home Renovation
When tackling a home renovation project, you'll need the right DIY plastering tools to achieve professional-looking results. Start with a reliable plastering trowel, a right-sized mixing bucket and drill, and a sturdy hawk for holding and carrying plaster. Don't forget level and straightedge tools, a finishing trowel, and a putty knife for edge work. Finally, prioritize safety with essential gear like safety glasses and a dust mask. With these 7 essential tools, you'll be well-equipped to tackle your project. Now, get ready to master the techniques and nuances of each tool to take your plastering skills to the next level.
Key Takeaways
- Essential DIY plastering tools include a plastering trowel, mixing bucket and drill, hawk, level and straightedge tools, finishing trowel, putty knife, and safety gear.
- Choose high-quality tools made of durable materials, such as high-carbon or stainless steel, to ensure a smooth and professional finish.
- Mastering basic techniques, such as mixing, scooping, and spreading, is crucial for achieving a high-quality plaster finish.
- The right-sized mixing bucket and drill are necessary for creating a consistent plaster mix, with a capacity of 12-18 gallons and a drill bit diameter of at least 1/2 inch.
- Safety gear, including safety glasses and dust masks, is essential for protecting yourself from debris and dust during the plastering process.
Essential Plastering Trowel for Beginners
When you're new to plastering, a reliable trowel is your most trusted companion, and selecting the right one can make all the difference in the quality of your work. As a beginner, you'll want a trowel that's easy to handle and can help you master the basic plastering techniques.
Look for a trowel with a comfortable grip and a flexible blade made from high-carbon steel or stainless steel. These materials will allow for smooth, even application and reduce the risk of scratches on your surface.
When choosing the right trowel size, consider the area you're working on. A 12-inch trowel is ideal for small to medium-sized projects, while a 14-inch or 16-inch trowel is better suited for larger areas.
As a beginner, it's crucial to practice your strokes and angles to achieve a smooth finish. Start with small sections and work your way up, using gentle, sweeping motions to spread the plaster evenly.
With the right trowel and some practice, you'll be well on your way to mastering the art of plastering.
Must-Have Mixing Bucket and Drill
You'll need a mixing bucket that's the right size for your project, as a bucket that's too small will lead to inadequate mixing, while one that's too large will be cumbersome to handle.
Your drill, coupled with the right drill bit, will be instrumental in achieving a smooth, consistent mix.
Bucket Size Matters
With a plastering project, having the right-sized mixing bucket is essential to achieving a smooth, consistent finish.
You'll want to choose a bucket that's large enough to hold the required amount of plaster, but not so large that it becomes unwieldy. A bucket capacity between 12-18 gallons is ideal for most DIY projects.
When selecting a bucket, consider the material it's made of. A heavy-duty, thick-walled bucket made from high-quality plastic or metal is durable and can withstand the rigors of mixing and transporting plaster.
Look for a bucket with a sturdy handle and a non-slip bottom to prevent accidents. Additionally, a bucket with measurement markings can help you accurately measure your plaster and water mixture.
Drill Bit Selection
Having assembled your trusty mixing bucket, it's time to pair it with a drill capable of handling the demands of plaster mixing.
You'll need a drill with a robust motor and variable speed control to tackle thick, heavy plaster mixes. Now, let's focus on drill bit selection. You'll need bits that can withstand the abrasive nature of plaster and its additives.
There are two primary drill bit types for plaster mixing: spiral and paddle bits. Spiral bits are ideal for mixing small to medium-sized batches, while paddle bits are better suited for larger quantities.
When it comes to drill bit materials, you have two options: steel and carbide-tipped. Steel bits are more affordable but may wear down quickly, whereas carbide-tipped bits are more durable and resistant to wear.
Choose a drill bit that's at least 1/2 inch in diameter to guarantee efficient mixing. A hex shank or SDS shank is essential for a secure connection to your drill.
With the right drill and drill bit combination, you'll be able to mix plaster efficiently and effectively, guaranteeing a successful home renovation project.
Mixing Techniques
Now that you've selected the right drill and drill bit, it's time to focus on the mixing techniques that'll help you achieve a smooth, consistent plaster mix. Proper mixing is essential to achieving the desired consistency, and it all starts with a must-have mixing bucket.
Look for a bucket with a sturdy handle, rugged construction, and a capacity that can hold at least 5 gallons of mix. This will give you enough room to mix large batches without worrying about overflow.
When it comes to mixing, use your drill to combine the plaster and water in a figure-eight pattern. Start at the bottom of the bucket and work your way up, making sure to scrape the sides and bottom of the bucket to incorporate all ingredients.
Avoid overmixing, as this can lead to a weak, porous finish. Instead, aim for a mixing consistency that's similar to thick cream. Stop mixing when the plaster reaches this stage, and you're ready to apply it to your wall.
Hawk for Holding and Carrying Plaster
You'll need a reliable hawk to hold and carry plaster, and a good one should feature a sturdy design, a comfortable handle, and a flat, smooth surface for easy plaster manipulation.
The handle's design is essential, as it affects your grip and control when working with heavy loads of plaster.
With the right hawk, you'll be able to efficiently carry and apply plaster, making the entire process smoother and more efficient.
Plaster Hawk Features
The plaster hawk's rectangular or square frame, typically made of metal or wood, provides a sturdy platform for holding and carrying plaster.
You'll find that the frame's material affects the hawk's overall durability and weight. Metal frames are more durable but heavier, while wooden frames are lighter but more prone to wear.
When choosing a plaster hawk, consider the materials used in its construction. A hawk with a rust-resistant metal frame or a wood frame treated with a protective coating will require less maintenance.
You'll spend less time cleaning and more time working on your project. Regularly inspect your hawk for signs of wear, such as rust or cracks, and address them promptly to extend its lifespan.
Proper hawk maintenance is essential to guarantee it remains a reliable tool in your DIY arsenal. By selecting a high-quality plaster hawk and performing regular upkeep, you'll be able to tackle your home renovation projects with confidence.
Easy Plaster Manipulation
With a reliable plaster hawk in hand, you can focus on the task of manipulating plaster with ease. The hawk's design allows you to scoop, carry, and dump plaster with precision, giving you better control over the application process. This means you can focus on mastering plaster texture techniques, such as creating smooth, even surfaces or adding decorative textures to your walls.
To get the most out of your plaster hawk, consider the following tips for applying plaster evenly:
| Technique | Description | Benefits |
|---|---|---|
| Scooping | Hold the hawk at a 45-degree angle to scoop up the right amount of plaster. | Reduces waste, guarantees consistent application |
| Carrying | Hold the hawk close to your body to prevent spills and drips. | Keeps your work area clean, reduces mess |
| Dumping | Hold the hawk at a 90-degree angle to dump plaster onto the wall. | Allows for precise application, reduces waste |
| Spreading | Use the hawk to spread plaster evenly across the wall. | Guarantees a smooth, consistent finish |
Hawk Handle Design
From the onset, a well-designed hawk handle is essential for efficient plastering, as it allows you to maintain a firm grip while scooping, carrying, and dumping plaster. You need a handle that provides ideal hawk grip comfort, reducing fatigue and strain on your hands and wrists.
Look for hawk handle materials that are durable, resistant to wear and tear, and can withstand the rigors of frequent use. A handle made from high-quality materials like fiberglass, aluminum, or wood guarantees a secure grip, even when your hands are wet or covered in plaster.
When choosing a hawk handle, consider the ergonomics of the design. A contoured handle that fits comfortably in your hand allows for better control and maneuverability. You should be able to easily rotate the hawk without straining your wrist or forearm.
Additionally, a handle with a textured surface or non-slip coating provides added grip security. By selecting a hawk handle that meets these criteria, you'll be able to work efficiently and effectively, achieving professional-looking results in your DIY plastering project.
Level and Straightedge Tools Needed
How accurately can you guarantee your plastering project's success without the right level and straightedge tools? These essential tools guarantee your walls are plumb, straight, and level, providing a solid foundation for your plastering project.
You'll need the following level and straightedge tools to get the job done:
-
Laser Level: Provides a precise, level line for aligning your plastering work.
-
Torpedo Level: A compact, accurate level for checking small areas and tight spaces.
-
Straightedge with Aluminum Edge: A durable, rust-resistant straightedge for creating sharp, clean lines.
- Fiberglass Straightedge: A lightweight, flexible straightedge for working with curved or irregular surfaces.
Investing in high-quality level and straightedge tools will save you time, reduce errors, and produce professional-looking results.
Don't compromise on the accuracy and precision your project demands – choose the right level and straightedge tools to guarantee a successful DIY plastering project.
Finishing Trowel for Smooth Finish
At least 90% of a successful plastering project's final appearance depends on a smooth, even finish, and that's where a finishing trowel comes in. You'll use this tool to refine your plastering techniques, creating a flawless surface that's free of imperfections. A high-quality finishing trowel is designed for precision, with a flexible blade that allows for subtle adjustments and a comfortable grip that reduces fatigue.
When selecting a finishing trowel, look for one made from durable materials that can withstand the rigors of plastering. Stainless steel or high-carbon steel blades are ideal, as they resist corrosion and maintain their shape over time.
To get the most out of your finishing trowel, practice various finishing techniques, such as sweeping, feathering, and floating. Regular trowel maintenance is also essential, as a clean, rust-free blade guarantees a smooth finish. Clean your trowel after each use, and apply a rust inhibitor to prevent corrosion.
Putty Knife for Edge Work Details
As you've refined your plastering techniques with the finishing trowel, it's time to focus on the finer details, where a putty knife becomes an indispensable tool. This versatile tool is designed for edge work, allowing you to precision-craft corners, edges, and other intricate areas.
When it comes to putty knife types, you'll want to choose the right one for your specific edge work techniques. Here are some key considerations:
-
Flexibility: A flexible putty knife is ideal for curved edges and corners, while a stiffer knife is better suited for sharp, clean lines.
-
Blade width: A narrower blade is perfect for tight spaces, while a wider blade covers more surface area.
-
Material: Stainless steel or high-carbon steel blades are durable and resistant to rust, while plastic or rubber blades are better for delicate or drywall work.
- Handle comfort: A comfortable, ergonomic handle reduces fatigue and improves control.
With the right putty knife, you'll be able to achieve professional-looking results in even the most challenging edge work areas.
Safety Glasses and Dust Mask Essentials
Your DIY plastering project is generating dust and debris by the minute, and it's vital to protect yourself from airborne particles and flying objects. You don't want to compromise your vision or respiratory health, so investing in safety gear is a must.
Safety glasses are a top priority, as they'll shield your eyes from debris and dust. Look for glasses with anti-fog lenses and a comfortable, snug fit.
A dust mask is another essential, providing dust protection by filtering out 99.97% of particles as small as 0.3 microns. Opt for a mask with an exhale valve to reduce moisture buildup and guarantee a comfortable fit.
Don't settle for cheap, flimsy options – invest in high-quality safety gear that'll last throughout your project. Remember, your safety is paramount, and these essentials will give you the peace of mind to focus on getting the job done.
Frequently Asked Questions
Can I Use a Regular Drill for Mixing Plaster?
You can use a regular drill for mixing plaster, but it's not ideal; consider a heavy-duty drill or a mixing paddle with a low-speed, high-torque drill for efficient plaster mixing techniques and to avoid lumps.
How Do I Clean and Maintain My Plastering Tools?
When you're done plastering, you'll want to clean and maintain your tools by washing them with soap and water, drying thoroughly, and storing them in a dry place, like a tool storage box, to prevent rust and prolong their lifespan.
What Is the Ideal Temperature for Plastering a Room?
When you're plastering a room, you'll want to maintain an ideal temperature between 50°F and 70°F (10°C and 21°C) to guarantee ideal plastering techniques, as extreme temperatures can negatively impact the drying process and overall finish.
Do I Need to Prime the Surface Before Applying Plaster?
You'll want to prime the surface before applying plaster to guarantee a strong bond and prevent peeling; proper surface preparation and primer benefits include increased adhesion, reduced porosity, and a smoother finish, ultimately saving you time and effort.
Can I Plaster Over Existing Wallpaper or Paint?
You'll need to assess the surface before applying plaster; if the wallpaper is loose or peeling, remove it using steamer or scoring methods, then guarantee a strong bond with proper plaster adhesion techniques to avoid future cracks.
Conclusion
You've got the essentials to tackle your DIY plastering project. Don't let the fear of inexperience hold you back - with these 7 must-have tools, you'll be well on your way to achieving professional-looking results. Remember, practice makes perfect, and with these tools, you'll be able to learn and improve as you go. So, get started, and don't be afraid to get a little messy - it's all part of the process!
Related Posts
-

Top Tools for DIY Home Renovation Plastering Success
To achieve DIY home renovation plastering success, you'll need a range of essential tools. Start with hand tools like...
-
7 Crucial Tools for a Successful Stucco Renovation
To guarantee a successful stucco renovation, you'll need a range of essential tools. First, invest in a stucco mixer ...
-

Top 3 Tools to Buy for Stucco Renovation
You'll need the right tools to guarantee a successful stucco renovation, and it all starts with three essential items...


