
3 Must-Have Tools for DIY Plaster Wall Renovation
You'll need a trio of specialized tools to achieve a professional-looking finish when renovating a plaster wall. A high-quality trowel is essential for holding and spreading generous amounts of compound, while a plaster mixer guarantees a consistent, lump-free mix. A non-stick mixing bucket simplifies the cleanup process and prevents plaster from sticking. With these three must-have tools, you'll be well on your way to a smooth finish - and understanding how to use them effectively is just the beginning of achieving a flawless, professional-looking plaster wall renovation.
Key Takeaways
• A high-quality trowel is essential for holding and spreading generous amounts of compound, reducing fatigue with its ergonomic handle.
• A plaster mixer is a must-have for creating a consistent, lump-free mix, with its high-torque and variable-speed capabilities.
• A mixing bucket with a non-stick coating simplifies the cleanup process and prevents plaster from sticking.
• A putty knife and joint knife are necessary for applying and smoothing plaster, helping to achieve a professional finish.
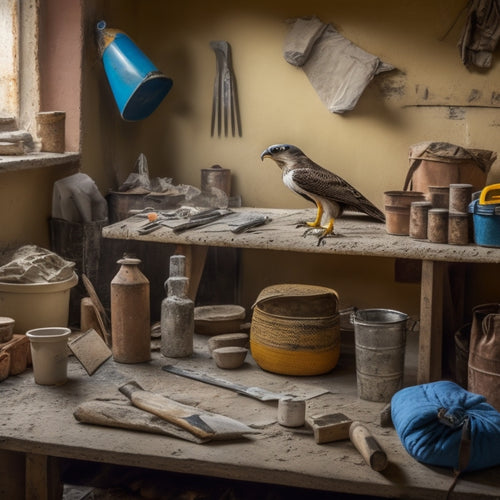
• A hawk is useful for holding and transporting plaster, making it an ideal complement to other essential tools for effective application.
Essential Tools for Smooth Finish
You'll need a set of essential tools to achieve a smooth finish on your plaster wall renovation, starting with a high-quality trowel that can hold and spread a generous amount of compound. Mastering trowel techniques is vital, as it allows you to apply the perfect amount of pressure and control the flow of plaster. A sturdy, ergonomic handle and a well-balanced blade will make your job easier and reduce fatigue.
Next, you'll need a reliable plaster mixer to create a consistent, lump-free mix. A high-torque, variable-speed mixer is ideal for handling thick plaster mixes. Invest in a mixing bucket with a non-stick coating to prevent plaster from sticking and make cleanup a breeze.
To guarantee a smooth finish, you'll also need a putty knife, joint knife, and a hawk for holding and transporting plaster. Don't forget a mixing stick and a clean water source for mixing and cleaning.
With these essential tools at your disposal, you'll be well on your way to achieving a professional-looking finish on your plaster wall renovation.
Scraping and Sanding Made Easy
With the essential tools for a smooth finish in hand, scraping and sanding become manageable tasks, thanks to specialized tools designed to streamline the process.
You'll find that using the right scraping techniques makes all the difference. For instance, a putty knife is perfect for removing loose debris and old adhesive, while a scraper with a curved blade is ideal for tackling stubborn imperfections.
When it comes to sanding, you'll want to employ sanding methods that guarantee a smooth, even finish. A sanding block with a coarse grit sandpaper is great for rough-sanding, while a dustless sanding system helps minimize mess and cleanup.
As you work, remember to always sand in a circular motion, applying gentle pressure to avoid creating scratches or swirl marks.
Finishing Touches With Precision
To achieve a flawless finish, apply a coat of joint compound to the sanded surface, feathering it out towards the edges to create a seamless blend with the surrounding plaster. This step is essential in ensuring a smooth, even texture application.
Using a putty knife, spread the compound evenly, holding it at a 45-degree angle to prevent buildup.
Next, use a trowel to create the desired texture. For a smooth finish, use long, sweeping strokes, while for a more textured look, use shorter, more deliberate strokes. If necessary, use repair techniques such as applying additional coats of joint compound or sanding to achieve the desired texture.
Once you're satisfied with the texture, allow the compound to dry completely before applying a second coat. This will help to further blend the repaired area with the surrounding plaster.
Remember to work patiently and methodically, as a flawless finish requires attention to detail and precision.
With practice and the right tools, you'll be able to achieve professional-looking results that will elevate your DIY plaster wall renovation project.
Frequently Asked Questions
Can I Use a Regular Vacuum for Plaster Dust Cleanup?
When tackling plaster dust cleanup, you'll want to choose the right vacuum for the job. A regular vacuum won't cut it, as it can spread the fine dust particles around, making a mess worse.
Instead, opt for a vacuum specifically designed for dust collection, like a HEPA-filter vacuum or a shop vacuum with a dust-collection attachment.
These vacuum types are built to handle the fine, powdery nature of plaster dust, ensuring a more efficient and effective cleanup.
How Do I Protect My Floors From Plaster Damage?
You've heard the myth that a single speck of plaster can ruin your floors, but is it true? Yes, it's a nightmare waiting to happen!
To protect your floors from plaster damage, you'll need to cover them thoroughly. Don't rely on cheap floor coverings that can tear easily. Instead, invest in heavy-duty drop cloths that can withstand the mess.
Secure them tightly to the floor to prevent any plaster from seeping underneath. Trust us, it's worth the extra effort to avoid a costly floor renovation down the line.
Are Respirators Necessary for DIY Plaster Renovation?
When working with plaster, you're exposing yourself to hazardous dust and particles.
You're at risk of inhaling silica, which can lead to serious health risks like silicosis and lung cancer.
Using a respirator is a must to protect yourself.
You'll need a respirator with a HEPA filter or an N95 rating to filter out 99.97% of airborne particles.
Don't skip this essential safety gear - your health depends on it.
Can I Reuse Old Plaster or Must I Replace It Entirely?
When deciding whether to reuse or replace old plaster, you'll need to assess its condition.
If the damage is limited, you can try plaster repair techniques like patching or refloating.
However, if the plaster is crumbling or water-damaged, it's best to replace it entirely.
Consider exploring plaster recycling methods to minimize waste.
Do I Need to Prime the Wall Before Applying New Plaster?
You're wondering if you need to prime the wall before applying new plaster. Absolutely, you do!
Proper surface preparation guarantees a strong bond between the old surface and new plaster.
You'll need to create a suitable substrate for plaster bonding. This involves cleaning, patching, and priming the wall to ensure a durable, long-lasting finish.
Don't skip this vital step – it's essential for a successful renovation.
Conclusion
As you hold the final result of your DIY plaster wall renovation, the fruits of your labor shine like a polished gem.
With these three must-have tools, you've conquered the chaos of scraping and sanding, and precision has been your guiding light.
Your wall now radiates a smooth, flawless finish, a tribute to your perseverance and skill.
You've transformed a rough, crumbling surface into a work of art, ready to be admired and cherished.
Related Posts
-
Top Tools for DIY Home Renovation Plastering Success
To achieve DIY home renovation plastering success, you'll need a range of essential tools. Start with hand tools like...
-
Why Use Concrete Blocks in Home Renovation
You're considering using concrete blocks in your home renovation, and for good reason: they offer a unique combinatio...
-

Why Delay Your Renovation With Poor Tool Management
You're likely unaware that poor tool management is a leading cause of renovation delays, and it's not just about havi...
