3 DIY Tool Storage Ideas for Home Renovation
Share
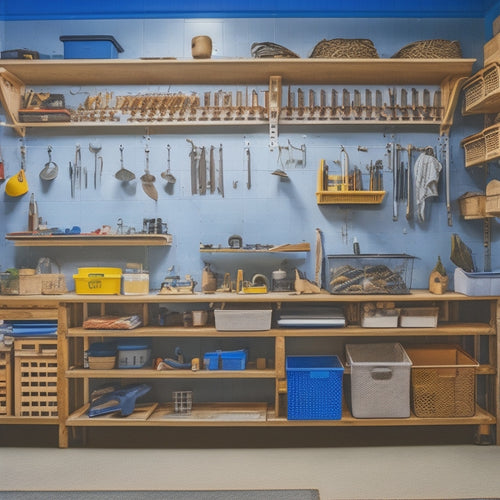
As you tackle your home renovation project, you'll want to create a functional and stylish workspace. Consider three DIY tool storage ideas to keep your tools within easy reach. First, build a concrete block shelving system, which offers an industrial-chic design and durability to support heavy tools. Next, organize your tools using blocks, grouping similar tools together and arranging them according to your workflow. Finally, create a block-based toolbox station with designated areas for frequently used tools, ensuring they're easily visible and accessible. By implementing these ideas, you'll be well on your way to a clutter-free workspace that boosts your productivity and sets you up for success.
Key Takeaways
• Utilize concrete blocks to create a shelving system for heavy tools and machinery, adding an industrial-chic touch to your workshop or garage.
• Organize tools by grouping similar items together, arranging blocks according to workflow, and using creative stacking to maximize storage space.
• Designate a central toolbox station using blocks, with vertical stacks for pliers, horizontal rows for screwdrivers, and pyramid formations for hammers.
• Create a customized tool storage system by easily adding or removing blocks as storage needs change, ensuring a tidy and professional-looking workspace.
• Enhance project efficiency and enjoyment by maintaining an accessible and well-organized toolbox station with tools easily visible and retrievable.
Concrete Block Shelving System
Build your own industrial-chic shelving system using concrete blocks, which can be repurposed from old construction sites or purchased at a low cost from a hardware store, to create a sturdy and space-saving storage solution for your DIY tools and equipment.
You'll love the block aesthetics, which add a rugged touch to your workshop or garage. Plus, the concrete durability guarantees your shelving system can withstand the weight of your heavy tools and machinery.
To get started, gather your concrete blocks and arrange them in a configuration that suits your storage needs. You can stack them horizontally or vertically, depending on the type of tools you need to store.
Add some wooden planks or metal rods to create shelves, and you're good to go! The best part? This shelving system is highly customizable, so you can easily add or remove blocks as your storage needs change.
With a little creativity, you can create a functional and stylish storage solution that'll make your DIY projects a whole lot easier.
Tool Organization Using Blocks
Now that you've created your concrete block shelving system, it's time to take your tool organization to the next level by using those blocks to categorize and store your tools in a way that makes sense for your workflow.
You've got the foundation, now it's time to build a system that's both functional and visually appealing. Start by grouping similar tools together, like all your drill bits or wrenches, and assign a block to each category.
Then, arrange the blocks in a way that mirrors your workflow, so the tools you use most frequently are front and center. Don't be afraid to get creative with your block stacking - you can create a tower of blocks for smaller items or use a single block as a station for larger tools.
The key is to create a block arrangement that makes sense for you and your work style. By doing so, you'll be able to find what you need in a snap, and your workspace will look like a pro's.
Block-Based Toolbox Station
Block-Based Toolbox Station
You'll create a block-based toolbox station by designating a central block as a hub for your most-used tools, such as pliers, screwdrivers, and hammers, and arranging them in a way that allows for easy access and visibility. This setup will become your go-to spot for any project, making you the master of your domain (or at least, your workshop). To take it to the next level, consider these block arrangements for your toolbox design:
| Block Arrangement | Tool Category | Benefits |
|---|---|---|
| Vertical Stack | Pliers, Wrenches | Maximizes storage, easy to scan |
| Horizontal Row | Screwdrivers, Bits | Organizes similar tools, quick grab |
| Pyramid Formation | Hammers, Mallets | Visible, accessible, and fun |
When designing your block-based toolbox station, remember to leave some breathing room between blocks for easy tool retrieval and to prevent clutter buildup. With this setup, you'll be whipping up DIY projects like a pro (or at least, with a lot less frustration). Happy building!
Frequently Asked Questions
How Can I Protect My Tools From Rust in Outdoor Storage?
Rust, the ultimate party crasher!
You're wise to wonder how to keep it away from your precious tools in outdoor storage.
First, dry them thoroughly after use and apply a rust-inhibiting coating. Store them in airtight containers or bags, and consider adding silica gel packs to absorb moisture.
Regular outdoor maintenance, like cleaning and lubricating, will also keep rust at bay.
Are DIY Tool Storage Ideas Suitable for Small Workshops?
Ah, thou modern-day Renaissance person, thou askest if DIY tool storage ideas are suitable for thy humble abode's workshop?
Fear not, for compact storage and mobile solutions shall be thy trusty sidekicks!
With a dash of creativity, thou canst conjure up a storage system that's as functional as it's fabulous.
Think pegboards, stackable bins, and tool carts on wheels - thy tools shall be organized, rust-free, and at thy beck and call!
Can I Use Reclaimed Wood for Building Tool Storage?
You're thinking of getting creative with reclaimed wood for your tool storage, eh? That's a brilliant idea!
Using reclaimed wood benefits the environment, and it's a fantastic way to practice sustainable building. Plus, it adds a touch of rustic charm to your workshop.
Just make certain to disinfect and refinish the wood properly to guarantee it's safe and durable.
With a little TLC, you'll be storing your tools in style while saving the planet - talk about a win-win!
How Do I Label My Tools for Easy Identification?
You're a master of tool organization, but labeling them is where the magic happens!
You'll be thrilled to know that labeling techniques are a breeze. Simply grab a label maker, and get creative with font styles and colors.
You can also use paint or stickers for a more rustic look.
Add a dash of humor by labeling your most-used tools with funny nicknames - 'Drill-icious' or 'Saw-some' anyone?
Are There Any Tool Storage Ideas for Limited Wall Space?
You're like a master chef in a tiny kitchen - every inch counts!
When it comes to maximizing limited wall space, think vertically.
Install magnetic strips to hold small tools like screwdrivers and pliers, keeping them within easy reach.
For larger items, consider vertical shelving units that can be mounted on the wall, providing ample storage without taking up valuable floor space.
Conclusion
As you stand in your newly organized workspace, surrounded by the fruits of your labor, you can't help but notice the sense of satisfaction that comes with a job well done.
The concrete blocks, once a mess of clutter, now stand tall, holding your tools with precision and purpose.
It's as if the blocks themselves have been transformed, their rough edges smoothed by the order and functionality they now bring to your space.
Related Posts
-

7 Crucial Tools for a Successful Stucco Renovation
To guarantee a successful stucco renovation, you'll need a range of essential tools. First, invest in a stucco mixer ...
-

DIY Plastering Supply Checklist for Home Renovation
To tackle a DIY plastering project for your home renovation, you'll need a solid checklist of supplies. Start with es...
-

7 Best Tool Storage Ideas for Home Renovation
When it comes to home renovation, staying organized is key to maximizing productivity and minimizing wasted time. To ...


