
10 Best Ways to Clean Finishing Tools After Renovation
You'll want to clean your finishing tools after a renovation to prevent damage, rust, and costly replacements. Start by removing excess stucco and debris, then soak tools in warm water to loosen residue. Next, use a mild dish soap solution and a soft-bristled brush to scrub away dirt and grime. Rinse tools thoroughly and dry them with a microfiber cloth to prevent water spots and rust. Additionally, clean tool edges with a wire brush, sanitize with white vinegar, and apply a rust-inhibiting spray coating. Finally, store clean tools properly to maintain their performance and extend their lifespan - and by following these steps, you'll be well on your way to excelling in the art of tool maintenance.
Key Takeaways
- Remove excess stucco and debris immediately after use to prevent hardening and clogging of tools.
- Soak tools in warm water with mild dish soap to loosen stucco residue and aid in effective cleaning.
- Use a soft-bristled brush to scrub tools, focusing on edges and corners where debris accumulates most.
- Dry tools thoroughly with a microfiber cloth to prevent water spots and rust, and apply a rust-inhibiting spray coating for added protection.
- Store tools properly in designated areas with protective cases or covers, and schedule regular maintenance to inspect and clean tools.
Remove Excess Stucco and Debris
Remove Excess Stucco and Debris
Scrape off excess stucco and debris from your finishing tools immediately after use to prevent them from hardening. This vital step in stucco removal guarantees your tools remain in good condition, saving you time and money in the long run.
Failing to do so can lead to clogged tools, reducing their effectiveness and requiring more extensive cleaning or even replacement.
When managing debris, prioritize organization and efficiency. Designate a specific area for debris collection, making it easier to dispose of waste and preventing it from spreading to other areas.
Regularly clean your workspace to prevent debris buildup, reducing the risk of accidents and allowing you to focus on the task at hand. Effective debris management is fundamental for a successful renovation project.
Soak Tools in Warm Water
Soaking your tools in warm water is the next vital step in cleaning them, allowing any remaining stucco residue to loosen its grip. This process is essential in effective tool maintenance, as it helps prevent damage and guarantees your tools remain in good condition for future projects.
Fill a large container or bucket with enough warm water to submerge your tools, making certain they're fully covered. Let them soak for at least 30 minutes to an hour, depending on the amount of residue. This will give the water time to penetrate the stucco, making it easier to remove.
Avoid using hot water, as it can cause metal tools to warp or become discolored. Additionally, refrain from using harsh cleaning solutions at this stage, as they can damage the tools' finishes.
Use Mild Dish Soap Solution
You'll want to mix a mild dish soap with warm water to create a solution that effectively cleans your finishing tools without damaging their surfaces.
The ideal ratio is typically one tablespoon of soap per quart of water.
Apply this solution to the tool surfaces, working it into a lather to lift dirt and grime.
Soap and Water Mix
With a gentle yet effective approach, a soap and water mix is a great way to clean your finishing tools. When combining soap and water, you'll want to choose a mild dish soap that's free of harsh chemicals and abrasives. The soap properties you're looking for should be gentle on your tools' surfaces while still effectively breaking down dirt and grime.
Mix 1-2 teaspoons of soap with 1 gallon of warm water, with a temperature between 90°F and 100°F. This will create an effective cleaning solution that won't damage your tools. Avoid using hot water, as it can cause soap to lather excessively, making it difficult to rinse your tools thoroughly.
Dip a soft-bristled brush into the soap and water mix, and gently scrub your finishing tools. Work from top to bottom to prevent dirt and debris from spreading to clean areas.
Be sure to rinse your tools thoroughly with clean water to remove any soap residue.
Cleaning Tool Surfaces
Cleaning Tool Surfaces (Use Mild Dish Soap Solution)
You'll want to clean your tool surfaces to maintain their quality and extend their lifespan. Mix 1 tablespoon of mild dish soap with 1 gallon of warm water. Dip a soft-bristled brush or a clean cloth into the solution, wring it out thoroughly, and wipe down the tool surfaces. This will remove any dirt, grime, or residue that may have accumulated during the renovation project.
Pay particular attention to areas with moving parts, such as hinges or pivot points, as these tend to collect debris. Gently scrub any stubborn spots, then rinse the tool with clean water to remove any soap residue.
Dry the tool with a clean towel to prevent water spots. Regular tool maintenance is essential for surface protection and overall performance.
Scrub Tools With Soft Brush
Scrub Tools With Soft Brush
Frequently, a soft-bristled brush is the perfect tool for gently scrubbing away stubborn debris from your finishing tools. This gentle scrubbing action helps to dislodge dirt and grime that can affect the performance and longevity of your tools.
When scrubbing, focus on areas with heavy buildup, such as the tool's edges, crevices, and surfaces that come into contact with materials.
Here are some key areas to focus on when scrubbing your tools with a soft-bristle brush:
-
Edges and corners: Pay special attention to these areas, as they tend to accumulate the most debris.
-
Crevices and grooves: Use the soft bristles to gently sweep away dirt and grime that can hide in these small spaces.
-
Surfaces in contact with materials: Clean the surfaces that come into contact with wood, metal, or other materials to prevent cross-contamination.
- Handles and grips: Don't forget to clean the handles and grips, where dirt and grime can accumulate and affect your grip.
Rinse With Clean Water Thoroughly
You'll want to rinse your finishing tools thoroughly with clean water to remove any debris and grime that's still clinging to them.
This step is essential, as it helps wash away residue completely, ensuring your tools are free from any remaining contaminants.
Remove Debris and Grime
How thoroughly have you inspected your finishing tools lately?
It's vital to remove debris and grime from your tools to maintain their performance and extend their lifespan. Regular cleaning frequency is important for effective tool maintenance.
To remove debris and grime, follow these steps:
-
Rinse with clean water: Start by rinsing your tools with clean water to loosen any large debris.
-
Use a soft-bristled brush: Gently scrub your tools with a soft-bristled brush to remove any stubborn grime.
-
Soak in a mild detergent: Soak your tools in a mild detergent solution to break down any tough grime.
- Dry with a clean cloth: Dry your tools with a clean cloth to prevent water spots and rust.
Wash Away Residue Completely
Your tool's cleanliness depends on a thorough rinsing, which sets the stage for the entire cleaning process. This step is vital in effective cleaning strategies, as it removes any remaining debris and grime that could interfere with subsequent cleaning products.
When rinsing your finishing tools, use clean water and make certain to submerge them completely. Hold them under running water or soak them in a bucket for several minutes to loosen any stubborn residue.
Agitate the tools gently to dislodge any remaining particles. For tools with small crevices or intricate designs, use a soft-bristled brush to reach into tight spaces. Rinse the tools until the water runs clear, indicating that you've removed all residue.
This thorough rinsing guarantees that your tools are ready for the next step in the cleaning process. By following this tool maintenance tip, you'll be able to achieve a deeper clean and extend the lifespan of your finishing tools.
Dry Tools With Microfiber Cloth
Cleaning finishing tools is only half the battle; drying them properly is essential to prevent water spots and rust.
After washing away residue, you need to dry your tools thoroughly to maintain their quality and extend their lifespan.
Microfiber cloths are an excellent choice for drying finishing tools. They offer several benefits, including:
-
Lint-free: Microfiber cloths won't leave behind fibers or residue, ensuring your tools remain clean and free of contaminants.
-
Gentle on surfaces: Microfiber cloths are soft and won't scratch or damage your tools' surfaces.
-
Highly absorbent: Microfiber cloths can absorb large amounts of water, making them ideal for drying tools.
- Quick drying: Microfiber cloths dry quickly, reducing the risk of water spots and rust.
Clean Tool Edges With Wire Brush
A wire brush is an important tool for maintaining the quality of your finishing tools, particularly when it comes to removing residue and debris from edges. You'll find that it's an effective edge cleaning method for scraping off dried materials, such as wood filler, caulk, or paint.
To use a wire brush, hold it at a 45-degree angle and gently sweep it across the tool's edge, working from one end to the other. Apply gentle to moderate pressure, depending on the type of residue you're dealing with. This technique helps prevent scratches and guarantees a smooth finish.
When using wire brush techniques, it's vital to choose the right brush for the job. A brush with stiff bristles is ideal for removing heavy buildup, while a softer-bristled brush is better suited for more delicate tools.
Regularly cleaning your tool edges with a wire brush will extend their lifespan and maintain their performance. By incorporating this edge cleaning method into your routine, you'll save time and effort in the long run.
Sanitize Tools With White Vinegar
To prevent the spread of contaminants and bacteria, sanitize your finishing tools regularly with white vinegar. This natural and non-toxic agent is an effective way to maintain tool hygiene and prevent the growth of microorganisms.
Vinegar benefits include its ability to dissolve mineral deposits, remove dirt and grime, and neutralize alkalinity.
Here's how to sanitize your tools with white vinegar:
-
Soak tools in a vinegar solution: Mix 1 part white vinegar with 2 parts water in a container. Soak your tools for 10-15 minutes to allow the solution to penetrate and break down any contaminants.
-
Scrub tools with a soft brush: Use a soft-bristled brush to gently scrub the tools, paying attention to any areas with heavy buildup.
-
Rinse tools thoroughly: Rinse your tools with clean water to remove any remaining vinegar solution.
- Dry tools to prevent rust: Dry your tools with a clean towel to prevent rust and corrosion.
Apply Rust-Inhibiting Spray Coating
Beyond sanitizing, applying a rust-inhibiting spray coating provides an added layer of protection for your finishing tools. This vital step guarantees rust prevention and prolongs the lifespan of your tools. When choosing a rust-inhibiting spray, select one specifically designed for metal tools to assure peak protection.
Before spray application, verify your tools are completely dry and free of debris. Hold the can 6-8 inches away from the tool's surface and apply a thin, even coat. Make certain to cover all metal surfaces, including hinges, screws, and handles. Avoid over-spraying, as excess coating can attract dust and dirt.
Allow the coating to dry completely according to the manufacturer's instructions, usually within 15-30 minutes. Once dry, your tools are protected from rust and corrosion, giving you peace of mind and freedom to focus on your next project.
Regularly applying a rust-inhibiting spray coating will maintain your tools' performance and extend their lifespan, saving you time and money in the long run.
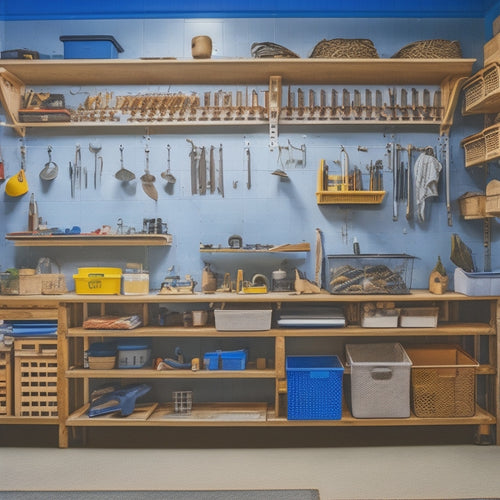
Store Clean Tools Properly
With your finishing tools now sanitized and protected with a rust-inhibiting spray coating, it's essential to store them properly to maintain their cleanliness and prevent damage.
You've invested time and effort into cleaning your finishing tools, so don't let them get damaged or rusty due to poor storage.
Here's how to store them properly:
-
Designate a tool storage area: Allocate a specific area for your finishing tools, keeping them organized and easily accessible.
-
Use protective cases or covers: Store each tool in its protective case or cover to shield it from dust, moisture, and other environmental factors.
-
Label and categorize tools: Label each tool and categorize them by type or function, making it easier to find what you need when you need it.
- Schedule regular tool maintenance: Create a maintenance schedule to regularly inspect and clean your tools, ensuring they remain in good condition.
Frequently Asked Questions
Can I Use Harsh Chemicals to Clean Finishing Tools?
You shouldn't use harsh chemicals to clean finishing tools, as they can damage tool material, causing corrosion or degradation; instead, opt for gentle cleaners that secure tool material compatibility, preserving your investment and assuring peak performance.
How Long Should I Soak Tools in Warm Water?
You'll get the best cleaning results by soaking tools in warm water, around 100°F to 110°F, for 15 to 30 minutes, depending on the level of grime, allowing for effective loosening of debris without damaging the tools.
Are Microfiber Cloths Reusable for Tool Drying?
As you emerge from the renovation battlefield, you're left wondering: can microfiber cloths ride again? Yes, they can! With proper microfiber maintenance, you'll find these heroes reusable for tool drying, employing gentle drying techniques to preserve their absorbency and extend their lifespan.
Can I Use a Wire Brush on All Tool Edges?
When tackling tool maintenance, you'll find that using a wire brush on all tool edges isn't always the best cleaning technique; reserve it for rugged tools, as it can damage finer edges, and instead opt for gentle methods to preserve your tools' integrity.
Do I Need to Clean Finishing Tools After Every Use?
You'd be crazy to skip cleaning your finishing tools after every use - it's like throwing cash down the drain! Proper tool maintenance demands regular cleaning techniques to prevent rust, damage, and subpar performance, giving you the freedom to tackle any project with confidence.
Conclusion
By following these 10 best ways to clean finishing tools after renovation, you'll be able to breathe new life into them. Remember, "a clean tool is a happy tool" - and a well-maintained one is a productive one. By taking the time to properly clean and care for your tools, you'll avoid rust and corrosion, ensuring they remain sharp and effective for your next project. Now, get back to work with your sparkling clean tools and tackle that to-do list with confidence!
Related Posts
-

Why Renovation Waste Disposal Harms the Environment
When you undertake a renovation project, you're contributing to a staggering problem: renovation waste disposal, whic...
-

Affordable Plastering Tools for Home Renovation Success
You're taking the first step towards a successful home renovation by investing in the right plastering tools. Start w...
-
7 Best Tool Storage Ideas for Home Renovation
When it comes to home renovation, staying organized is key to maximizing productivity and minimizing wasted time. To ...
