10 Best DIY Crack Repair Kits for Renovation
When tackling renovation projects, you need reliable DIY crack repair kits that can effectively address cracks in various materials, from concrete and wood to metal, providing strong, long-lasting bonds and seals that can withstand the elements and heavy use. You'll find top-rated epoxy injection kits, fast-drying polyurethane solutions, and best acrylic crack fillers suitable for specific repair needs. High-strength concrete bonding agents, easy-to-use silicone sealants, and durable polyurea coatings solutions also offer exceptional durability and water resistance. Explore the right combination of products and techniques to guarantee your renovation project's success and discover what else you need to know to get it done right.
Key Takeaways
• Top-rated epoxy injection kits from reputable manufacturers like Sika, Loctite, and 3M offer strong, long-lasting bonds for concrete, wood, and metal.
• Fast-drying polyurethane solutions and acrylic crack fillers enable quick repair completion and minimize downtime, ideal for time-sensitive renovation projects.
• High-strength concrete bonding agents provide exceptional tensile and compressive strength for anchoring new concrete to existing substrates.
• Easy-to-use silicone sealants and advanced epoxy crack repair systems offer superior durability and resistance to water and chemicals.
• Durable polyurea coatings solutions provide a robust, abrasion-resistant barrier for concrete surfaces, effective in high-traffic areas susceptible to wear and tear.
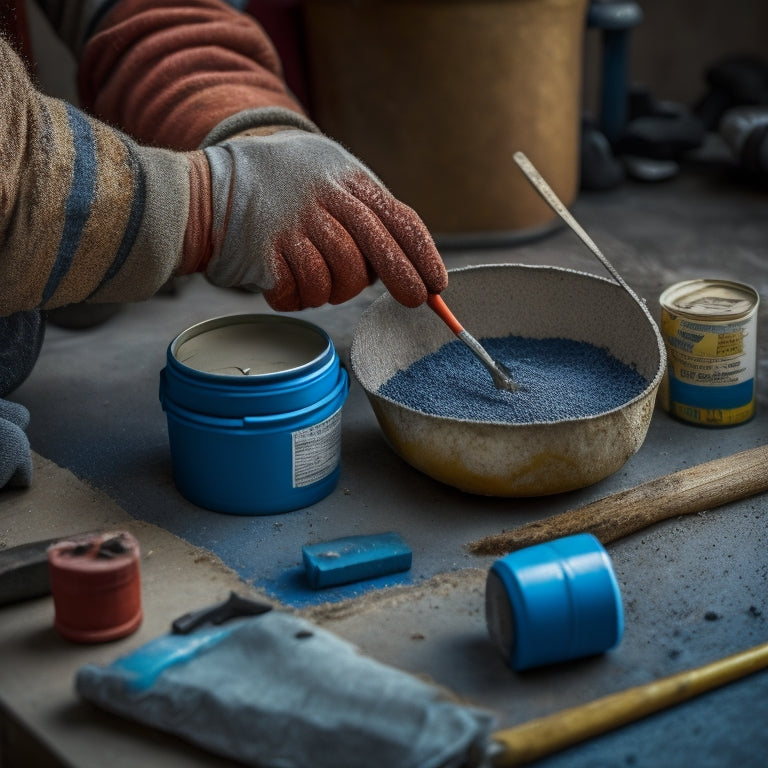
Top-Rated Epoxy Injection Kits
When tackling complex crack repairs, you'll want to rely on top-rated epoxy injection kits that provide a strong, long-lasting bond, such as those from reputable manufacturers like Sika, Loctite, and 3M. These kits typically include a high-strength epoxy resin, a precision injector, and injection ports.
To achieve ideal results, it's crucial to master epoxy application techniques, including surface preparation, mixing, and injection. Proper surface preparation involves cleaning and degreasing the crack to guarantee a strong bond.
Next, you'll need to mix the epoxy resin according to the manufacturer's instructions and inject it into the crack using the precision injector. By following these steps, you can reap the epoxy repair benefits, including a durable, watertight seal and restored structural integrity.
Additionally, epoxy injection kits can be used to repair cracks in a variety of materials, including concrete, wood, and metal. With the right kit and techniques, you can confidently tackle even the most challenging crack repair projects.
Fast-Drying Polyurethane Solutions
When you're working with fast-drying polyurethane solutions, you'll need to take into account the polyurethane formula options that best suit your specific repair project.
You'll also want to factor in the drying time, which can vary greatly depending on the ambient temperature, humidity, and thickness of the polyurethane application.
Polyurethane Formula Options
You'll find that polyurethane formula options for fast-drying crack repair solutions typically fall into one of two categories: low-viscosity, rapid-cure formulas or high-viscosity, high-strength formulas, each with its own set of benefits and application considerations.
Low-viscosity formulas offer several advantages, including:
-
Easy injection: Their thin consistency allows for easy injection into narrow cracks, making them ideal for hairline fractures.
-
Fast flow: They flow quickly through the crack, guaranteeing a thorough fill and minimizing the risk of air pockets.
-
Rapid cure: These formulas typically cure within minutes, allowing you to complete the repair process quickly.
- Minimal shrinkage: They exhibit minimal shrinkage, reducing the likelihood of further crack formation.
When selecting a polyurethane formula, consider the specific requirements of your project.
If you need to fill narrow cracks quickly, a low-viscosity formula might be the best choice.
However, if you're dealing with larger cracks or require exceptional strength, a high-viscosity formula could be more suitable.
Regardless of your choice, proper application techniques are essential to guarantee a successful repair.
Drying Time Factors
As you work with fast-drying polyurethane solutions, you'll notice that the drying time is critical to achieving a successful repair. Fast-drying polyurethane solutions rely on a combination of catalysts, solvents, and resin chemistry to achieve rapid curing, with the drying time ultimately dependent on factors such as temperature, humidity, and substrate porosity.
Temperature effects play a significant role in the drying process. Higher temperatures can accelerate the curing process, while lower temperatures can slow it down. For instance, a temperature increase of 10°C can reduce the drying time by half. It's important to confirm the substrate is at the recommended temperature range to achieve the best curing.
Humidity considerations are also important. High humidity can slow down the drying process, as the moisture in the air can react with the polyurethane, delaying its curing. It's recommended to apply the solution in a dry, well-ventilated area to minimize humidity effects.
Best Acrylic Crack Fillers
When selecting the best acrylic crack fillers for your DIY renovation project, you'll want to focus on formulas that offer fast drying times, flexible filling compounds, and low-shrinkage solutions.
These key characteristics will guarantee that your repairs are durable, long-lasting, and resistant to further cracking.
Fast Drying Formulas
How quickly do you need to get your renovation project back on track, and is a delay of even a few hours unacceptable? When time is of the essence, fast-drying formulas are the way to go. These acrylic crack fillers are designed to dry rapidly, allowing you to get back to work sooner.
To guarantee a successful and efficient repair, follow these essential tips:
-
Prepare the surface: Clean and degrease the area to guarantee a strong bond between the filler and the surface.
-
Apply thin layers: Thin layers dry faster and reduce the risk of shrinkage.
-
Use quick application techniques: Work in small sections, and use a putty knife or trowel to spread the filler evenly.
- Work in a well-ventilated area: Good airflow helps the filler dry faster and reduces the risk of solvent entrapment.
Flexible Filling Compounds
By opting for flexible filling compounds, you'll guarantee that your DIY crack repair kit can effectively accommodate substrate movement and seasonal expansions, thereby creating a durable, long-lasting seal.
These compounds are designed to absorb movement and vibrations, ensuring a strong bond between the crack filler and the surrounding substrate.
When selecting a flexible filling compound, consider the application techniques required. Look for products that can be easily mixed and applied using a caulk gun or trowel.
Performance comparisons between different products will also help you make an informed decision. For instance, some flexible fillers may offer superior adhesion to concrete or masonry, while others may excel with regard to flexibility or paintability.
Additionally, consider the filler's viscosity, as this will impact its flowability and ability to fill narrow cracks.
Low-Shrinkage Solutions
You'll want to pair your flexible filling compound with a low-shrinkage solution, such as an acrylic crack filler, to minimize the risk of further damage and secure a strong, long-lasting bond.
Acrylic crack fillers are ideal for low viscosity applications, where shrinkage prevention is essential. They provide a strong, flexible bond that resists cracking and shrinking, making them perfect for filling cracks in concrete, wood, and metal.
When selecting an acrylic crack filler, consider the following key characteristics:
-
Low shrinkage rate: Look for products with a shrinkage rate of less than 1% to secure a strong, long-lasting bond.
-
High flexibility: Choose a filler that can accommodate movement and vibrations without cracking or breaking.
-
Excellent adhesion: Opt for a product with strong bonding properties to secure a lasting repair.
- UV resistance: Select a filler that resists UV degradation to maintain its performance over time.
High-Strength Concrete Bonding Agents
What sets high-strength concrete bonding agents apart from their standard counterparts is their exceptional tensile and compressive strength, allowing them to effectively anchor new concrete to existing substrates.
These advanced agents guarantee a strong, durable bond between old and new concrete, making them ideal for structural repairs and renovations. When selecting a high-strength concrete bonding agent, you'll want to reflect on the specific application and substrate type. For instance, epoxy-based agents are well-suited for bonding concrete to steel or other metal surfaces, while polyurethane-based agents are better suited for bonding concrete to concrete.
To achieve ideal results, it's essential to follow proper concrete adhesion techniques, including thorough surface preparation methods. This includes cleaning the substrate to remove dirt, oil, and other contaminants, as well as roughening the surface to create a strong mechanical bond.
Easy-to-Use Silicone Sealants
When you're working with easy-to-use silicone sealants, you'll appreciate their fast-drying formulas that allow you to get the job done quickly.
These sealants are also designed for flexible joint filling, making them ideal for areas that are prone to movement or vibration.
Fast Drying Formulas
Fast-drying formulas, typically in the form of easy-to-use silicone sealants, provide a reliable solution for crack repair, allowing renovation projects to progress rapidly without sacrificing bond strength or durability.
When you're working on a tight deadline, these formulas are a game-changer. They enable you to complete crack repairs quickly, without compromising on quality.
To get the most out of fast-drying formulas, it's crucial to focus on proper surface preparation and application techniques. Here are some key considerations to keep in mind:
-
Cleanliness matters: Verify the crack is free from dirt, oil, and other contaminants to secure a strong bond.
-
Prepare the surface: Use a wire brush or sandpaper to roughen the surface, promoting better adhesion.
-
Apply the right amount: Use the recommended amount of sealant to avoid excess material that can compromise the bond.
- Follow instructions: Pay attention to the manufacturer's instructions for application, curing times, and any specific requirements for the formula.
Flexible Joint Filling
You'll find that flexible joint filling with easy-to-use silicone sealants is an ideal solution for cracks that are subject to movement or vibration, as these formulas accommodate dynamic stress without compromising their bonding performance. This is particularly important for achieving joint stability, as cracks can propagate quickly if not addressed promptly. By using silicone sealants, you can guarantee that the crack is filled and stabilized, preventing further damage.
Here's a comparison of some popular silicone sealants for flexible joint filling:
| Product | Movement Accommodation | Adhesion Strength | Curing Time |
|---|---|---|---|
| SikaBond | Up to 25% | 300 psi | 24 hours |
| Loctite PL | Up to 30% | 250 psi | 12 hours |
| GE Silicone II | Up to 20% | 200 psi | 48 hours |
| DAP Alex Plus | Up to 15% | 150 psi | 24 hours |
When selecting a silicone sealant, consider the level of movement accommodation and adhesion strength required for your specific project. By choosing the right product, you can guarantee effective crack prevention and maintain joint stability over time.
Weather Resistant Bonds
For exterior crack repair applications exposed to harsh environmental conditions, easy-to-use silicone sealants are formulated to deliver weather-resistant bonds that can withstand extreme temperatures, UV radiation, and moisture exposure.
As you select a DIY crack repair kit, consider the importance of weather resistance techniques in ensuring the bond's durability.
When it comes to weather-resistant bonds, several factors contribute to their durability. These include:
-
Adhesion: The sealant's ability to form a strong bond with the substrate, even in the presence of moisture.
-
Flexibility: The capacity to accommodate thermal expansion and contraction without compromising the bond.
-
Chemical Resistance: The sealant's ability to withstand exposure to harsh chemicals, such as saltwater or acid rain.
- UV Stability: The sealant's resistance to degradation caused by prolonged exposure to UV radiation.
Advanced Epoxy Crack Repair Systems
Advanced epoxy crack repair systems utilize specialized resins and hardeners that, when mixed and applied correctly, form a strong, long-lasting bond with the surrounding concrete, effectively sealing the crack and preventing further damage.
As you explore these systems, you'll find that they offer superior crack repair benefits, including enhanced durability and resistance to water, chemicals, and thermal fluctuations.
To achieve ideal results, it's crucial to master epoxy application techniques, such as proper surface preparation, precise mixing ratios, and controlled injection pressures.
You'll need to verify the crack is clean and dry, and that the epoxy is injected at the correct rate to fill the crack completely.
By following these guidelines, you can trust that the epoxy will penetrate deeply into the crack, creating a strong, flexible bond that will withstand the test of time.
With advanced epoxy crack repair systems, you can confidently tackle complex renovation projects, knowing that your repairs will last for years to come.
Durable Polyurea Coatings Solutions
By applying durable polyurea coatings, contractors can achieve a robust, abrasion-resistant barrier that shields concrete surfaces from environmental stressors and potential damage. These coatings are particularly effective in high-traffic areas, such as industrial floors, parking garages, and bridges, where concrete is exposed to heavy wear and tear.
When selecting a polyurea coating, you'll want to take into account the specific demands of your project.
Here are some key benefits to look for:
-
UV resistance: Confirm the coating can withstand prolonged exposure to sunlight without degrading or discoloring.
-
Chemical resistance: Choose a coating that can resist corrosive substances, such as oil, gasoline, or salt.
-
Impact resistance: Select a coating that can absorb impacts without cracking or shattering.
- Adhesion strength: Opt for a coating with strong bonding properties to confirm a long-lasting, durable finish.
Fast-Setting Concrete Patching Compounds
You can effectively address cracks and spalls in concrete surfaces with fast-setting concrete patching compounds, which offer a rapid solution for returning damaged areas to service. These compounds typically set within 15-30 minutes, allowing you to complete repairs quickly and efficiently.
To guarantee a strong and durable bond, it's crucial to follow proper application techniques and surface preparation guidelines. Before applying the patching compound, make sure the surface is clean, dry, and free of oil, grease, or other contaminants. Use a wire brush or broom to remove any loose debris, and then vacuum the area to guarantee a dust-free surface.
Next, mix the compound according to the manufacturer's instructions, and apply it to the damaged area using a putty knife or trowel. Press the compound firmly into the crack or spall, feathering it out towards the edges to create a smooth, even finish.
Ultimate Waterproofing Solutions
When it comes to preventing water infiltration and guaranteeing the long-term durability of your concrete structures, incorporating ultimate waterproofing solutions into your renovation plan is vital. You can't afford to overlook the importance of a reliable waterproofing system, as it protects your concrete from damage caused by water, salt, and other corrosive substances.
To achieve ultimate waterproofing, you'll need to focus on the following key areas:
-
Surface preparation: Confirm the surface is clean, dry, and free of contaminants. This step is essential in creating a strong bond between the concrete and the waterproofing material.
-
Moisture barrier: Install a high-quality moisture barrier to prevent water from seeping into the concrete. This can be in the form of a liquid-applied membrane or a sheet-applied membrane.
-
Drainage system: Implement a proper drainage system to direct water away from the concrete structure. This can include installing a French drain or a drainage mat.
- Joint sealing: Seal all joints and cracks to prevent water from entering the concrete. Use a high-performance sealant that can withstand harsh weather conditions and heavy traffic.
Long-Lasting Concrete Sealers
In addition to a robust waterproofing system, applying a long-lasting concrete sealer can further enhance the durability of your concrete structure by providing an extra layer of protection against water, stains, and abrasion. This is especially important for high-traffic areas or surfaces exposed to harsh environmental conditions. When selecting a concrete sealer, look for products that offer excellent resistance to water, oil, and chemicals, as well as UV stability to prevent discoloration.
To guarantee a successful application, you'll need to prepare the surface properly. This involves cleaning the concrete thoroughly to remove dirt, oil, and other contaminants that might interfere with the sealer's adhesion. You may also need to repair any cracks or defects before applying the sealer.
When it comes to application techniques, you can choose from various methods, including spraying, rolling, or brushing. Be sure to follow the manufacturer's instructions and take necessary safety precautions, such as wearing protective gear and working in a well-ventilated area.
Frequently Asked Questions
Can I Use a DIY Crack Repair Kit on Vertical Surfaces?
When tackling cracks on vertical surfaces, you'll need to adapt your approach.
Start by ensuring proper vertical surface preparation, cleaning the area thoroughly and removing any debris.
Then, choose a crack repair technique suitable for vertical applications, such as a polyurethane-based injection system or an epoxy-based patching compound.
Be prepared to work from the bottom up to prevent drips and runs, and follow the manufacturer's instructions for best results.
Are DIY Crack Repair Kits Suitable for Hairline Cracks?
Imagine a delicate spider's web - that's what a hairline crack looks like.
When dealing with these tiny fissures, you'll need a repair kit that's equally precise.
Look for kits that specialize in hairline crack techniques, as they'll provide the right materials for a seamless fix.
Confirm the kit's material is compatible with your surface, whether it's concrete, drywall, or stucco.
With the right tools and techniques, you'll weave a repair that's almost invisible.
Can I Paint Over a Repaired Crack With a DIY Kit?
When you're ready to paint over a repaired crack, you'll need to verify proper crack preparation techniques to guarantee a seamless finish.
First, lightly sand the repaired area to create a smooth surface.
Then, consider paint compatibility considerations, such as the type of paint you'll be using and its adhesion properties.
Once you've prepared the surface, you can confidently apply a coat of paint, knowing the repaired crack will remain hidden.
How Long Does It Take for a DIY Crack Repair to Fully Cure?
As you wait for your DIY crack repair to set, you're probably wondering, 'Will it ever be rock-solid again?'
The answer lies in the curing time, which can vary depending on the type of epoxy or polyurethane-based kit you're using. Generally, it can take anywhere from a few hours to several days for the repair to fully cure.
The key to ideal repair effectiveness is patience, as rushing the process can compromise the bond between the filler and the surrounding material.
Are DIY Crack Repair Kits Safe to Use Around Plumbing and Electrical Systems?
When working around plumbing and electrical systems, you must exercise extreme caution when using DIY crack repair kits.
Take necessary safety precautions to avoid electrical shock or water damage. Confirm you turn off the main water supply and electricity to the affected area before starting the repair.
Consider plumbing considerations, such as pipe material and water pressure, to choose the right repair kit and avoid further damage.
Conclusion
You've made it to the end of our list, but you might be thinking, 'These DIY crack repair kits sound great, but what if I'm not a seasoned pro?'
Don't worry, most of these kits come with detailed instructions and are designed for DIYers of all skill levels.
With a little patience and practice, you can achieve professional-looking results.
Remember, the key to a successful repair is proper preparation and choosing the right product for the job.
Related Posts
-

Why Invest in Quality Plastering Tools for Renovation
When renovating, investing in quality plastering tools is essential for achieving professional-looking results and mi...
-

Top 5 Plastering Tools for Small Renovation Jobs
For small renovation jobs, you'll want to start with the top 5 crucial plastering tools: a putty knife for applying a...
-

Streamline Your Exterior Renovation Timeline
To streamline your exterior renovation timeline, you'll need to approach the process strategically. Start by planning...


