
Why You Need These Crucial Planter Renovation Tools
You need these essential planter renovation tools because mediocre tools can lead to subpar results, wasted time, and even safety hazards. Without the right cutting tools, like utility knives and pruning saws, you'll struggle to trim roots and cut cinder blocks efficiently. Safety essentials, such as personal protective equipment and a well-maintained workspace, are also important to preventing injuries. Additionally, accurate measuring and marking tools guarantee precise planter dimensions, while surface preparation and cleaning tools help you achieve a strong bond between materials. With these tools, you'll be well-equipped to tackle your project; next, discover how to master the techniques that bring them all together.
Key Takeaways
• A comprehensive set of tools ensures a well-executed planter renovation, saving time and reducing the risk of costly mistakes.
• The right tools help maintain safety, preventing injuries and protecting personal well-being during the renovation process.
• Accurate measurements and precise cuts enable a professional-looking finish, increasing the planter's aesthetic appeal and value.
• Proper surface preparation and cleaning ensure a strong bond between materials, extending the planter's lifespan and durability.
• A range of smoothing and finishing tools guarantees a polished, high-quality finish, elevating the overall appearance of the renovated planter.
Selecting the Right Cutting Tools
When renovating a planter, you'll need to wield the right cutting tools to efficiently slice through worn-out liners, prune overgrown roots, and trim excess material.
It's essential to choose blades that fit your specific project needs. For instance, a utility knife with a sharp, replaceable blade is ideal for cutting through thick planter liners. Pruning saws, on the other hand, are perfect for trimming roots and thicker branches.
To optimize your cutting techniques, keep your blades clean and well-maintained. Regularly sharpen or replace dull blades to prevent them from getting stuck or breaking during use. Additionally, store your cutting tools in a dry place to prevent rust and corrosion.
By selecting the right cutting tools and maintaining them properly, you'll be able to tackle your planter renovation project with ease and precision.
With the right tools and techniques, you'll be well on your way to creating a beautiful and thriving planter garden that brings you joy and a sense of accomplishment.
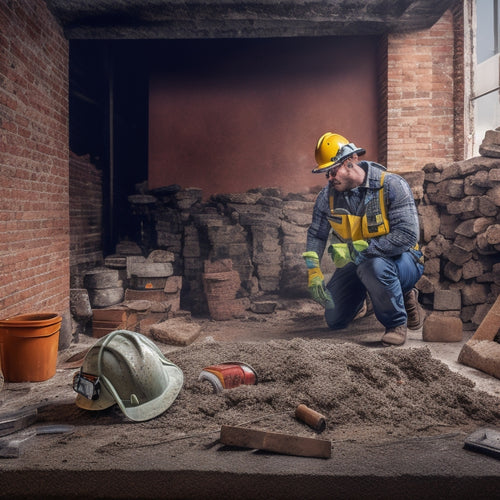
Safety Essentials for Renovation
As you commence your planter renovation, safeguarding yourself against potential hazards is essential, and that's where donning the right personal protective equipment (PPE) and taking necessary precautions come into play. You can't afford to compromise on safety, as even a minor oversight can lead to serious injuries.
Invest in fundamental safety gear, such as gloves, safety glasses, and a dust mask, to prevent exposure to hazardous materials and debris. Confirm your workspace is well-ventilated, and always maintain a tidy environment to prevent tripping hazards.
Injury prevention is key, so take regular breaks to rest your hands and eyes. When working with power tools, keep loose clothing and long hair tied back to avoid entanglement. It's also imperative to read and follow the manufacturer's instructions for each tool and material you're working with.
Don't underestimate the importance of proper footwear, either – sturdy shoes with good grip can save you from a nasty fall. By prioritizing safety, you'll be able to focus on the task at hand, confident that you're protected from harm.
Measuring and Marking Tools
When renovating a planter, you'll need to take precise measurements to guarantee a successful outcome.
You'll want to capture the planter's exact dimensions, including height, width, and depth, to create a seamless integration of new materials and design elements.
Precise Planter Dimensions
You'll need a set of reliable measuring and marking tools to accurately capture your planter's dimensions, guaranteeing a seamless renovation process. This is fundamental, as even the slightest miscalculation can throw off your entire design.
To get it right, start by measuring the planter's width, taking note of any obstructions or irregularities that may affect your renovation. Next, measure the planter depth, considering the height of any existing plants or materials you'll need to accommodate.
Using a high-quality tape measure, take precise readings to guarantee accuracy. Don't forget to account for any lip or rim on the planter, as this can impact your measurements.
Record your findings carefully, using a notation system that makes sense to you. Having a clear, accurate record of your planter's dimensions will give you the confidence to move forward with your renovation, knowing that your design will fit seamlessly.
With these precise measurements in hand, you'll be well on your way to creating a stunning, functional planter that exceeds your expectations.
Accurate Marking Techniques
By employing accurate marking techniques, you guarantee that your renovation plan is translated into reality with precision. Using tools like fine-tip markers, carpenter's pencils, and straightedges allows you to create crisp, unmistakable lines that guide your design.
These marking methods are vital for achieving a professional-looking finish and ensuring that your planter renovation turns out exactly as envisioned.
When it comes to alignment strategies, here are a few important techniques to keep in mind:
-
Use a combination of straightedges and squares to guarantee that your lines are perfectly straight and your corners are precise.
-
Create a reference point on your planter, such as a small mark or a faint line, to serve as a guide for your design.
-
Use a fine-tip marker to create delicate, precise lines that won't smudge or bleed.
- Double-check your measurements before making any cuts or marks to avoid costly mistakes.
Removing Old Mortar and Debris
Two essential tools in your arsenal for removing old mortar and debris are a hammer and chisel, which you'll use to methodically break away the existing mortar, taking care not to damage the surrounding planter material.
As you work, focus on controlled, gentle taps to avoid splintering or cracking the planter's surface. This precise approach will guarantee a clean slate for your renovation.
When it comes to mortar removal techniques, a combination of patience and persistence is key. Start by breaking away large chunks, then switch to a wire brush to sweep away smaller debris particles.
For debris disposal methods, consider designating a specific area for collecting and containing the removed material, making it easier to transport and dispose of responsibly.
As you continue to remove the old mortar and debris, take note of any areas that may require additional attention, such as cracks or weakened spots in the planter's structure.
Cutting Cinder Blocks Efficiently
Your cinder block cutting tool of choice, a masonry saw or a circular saw with a masonry blade, should be equipped with a diamond-coated blade to efficiently slice through the dense, porous material.
When it comes to cutting cinder blocks, having the right tool and technique is vital. You'll want to choose the appropriate cutting technique based on the type of cinder block you're working with. For instance, solid cinder blocks require a more aggressive cutting approach, while hollow blocks can be cut with a more gentle touch.
Here are some essential tips to keep in mind when cutting cinder blocks:
-
Always wear protective gear, including safety glasses and a dust mask, to avoid injury from flying debris.
-
Use a steady, consistent motion when cutting to avoid applying too much pressure, which can cause the block to break or crumble.
-
Keep your cutting tool well-lubricated to prevent overheating and extend its lifespan.
- Practice cutting on scrap blocks before moving on to your actual planter renovation project to get a feel for the material and refine your technique.
Smoothing Out Rough Edges
As you move forward with your planter renovation, you'll need to address those rough edges that can detract from the overall aesthetic.
To achieve a polished finish, you'll want to focus on edge sanding essentials, ensuring a seamless progression between materials.
Edge Sanding Essentials
With a planter's rough edges crying out for attention, you'll need to reach for the right edge sanding tools to smooth them out, ensuring a polished finish that's both visually appealing and safe to the touch.
To achieve this, you'll need to master edge finishing techniques that involve selecting the appropriate sanding material types for the job.
Here are the essentials you'll need to get started:
-
Fine-grit sandpaper: Ideal for smoothing out minor imperfections and creating a high-gloss finish.
-
Coarse-grit sandpaper: Perfect for tackling rougher edges and removing old finishes.
-
Sanding blocks: Useful for maintaining a consistent angle and preventing uneven sanding.
- Dustless sanding attachments: A must-have for reducing mess and improving visibility while sanding.
Rough Spot Removal
Tackle rough edges head-on by identifying the trouble spots and developing a strategy to smooth them out, guaranteeing a seamless shift from rough to refined. As you inspect your planter, pinpoint areas that need attention, taking note of uneven ridges, bumps, or scratches.
Next, gather the necessary tools, such as a rotary tool or sandpaper, to tackle the rough surface treatment. Don't be afraid to experiment with different grits and techniques to achieve the desired planter texture enhancement.
When addressing particularly stubborn spots, try using a combination of manual and power tools. For instance, use a rotary tool to remove excess material, followed by sandpaper to smooth out the area.
Remember to work progressively, starting with coarse grits and gradually moving to finer ones. As you refine the surface, regularly inspect your work to guarantee a uniform finish.
With patience and persistence, you'll transform rough, uninviting edges into silky, smooth surfaces that invite touch and exploration. By mastering rough spot removal, you'll release the full potential of your planter, creating a stunning piece that exudes sophistication and charm.
Cleaning and Preparing Surfaces
You'll need to thoroughly remove any dirt, grime, or old residue from the planter's surface to guarantee a strong bond between the old material and the new. This vital step in surface preparation will make certain that your renovation efforts aren't compromised by a weak foundation.
To achieve a clean slate, employ these essential cleaning techniques:
-
Use a wire brush or scrubber to remove loose debris and roughen the surface, creating a better bonding surface.
-
Apply a degreaser or solvent-based cleaner to dissolve and remove stubborn grime and oils.
-
Utilize a pressure washer to blast away dirt and residue, taking care not to damage the planter's material.
- Wipe down the surface with a lint-free cloth or tack cloth to remove any remaining dust or debris.
Frequently Asked Questions
Can I Use a Planter Renovation Tool on a Concrete Surface?
When you're considering a planter renovation, you're probably wondering if your chosen tool is compatible with concrete surfaces.
The good news is, many planter renovation tools are specifically designed with concrete compatibility in mind. You can confidently use them to transform your outdoor space, knowing they'll effectively tackle rough concrete surfaces.
Just be sure to check the manufacturer's guidelines to guarantee a seamless renovation process.
How Often Should I Sharpen My Cutting Tools for Optimal Performance?
Imagine a dull blade struggling to slice through a tender stem, leaving behind a ragged edge. You won't let that happen, will you?
To guarantee your cutting tools stay razor-sharp, you'll want to sharpen them regularly. Aim to sharpen your cutting tools every 1-3 months, or after every 10-15 uses, depending on the material and frequency of use.
Proper cutting tool maintenance is key to peak sharpening frequency, and it'll make all the difference in your planter renovation projects.
Are There Any Eco-Friendly Options for Cleaning and Preparing Surfaces?
You're taking the right step towards a sustainable planter renovation!
When it comes to surface preparation, you'll want to opt for eco-friendly cleaners that won't harm the environment. Look for plant-based or biodegradable options that effectively remove dirt and grime without leaving harsh chemical residues.
For a smooth finish, use a gentle scrubber or a soft-bristled brush to remove any stubborn debris.
Can I Reuse Old Mortar or Do I Need to Remove It Completely?
As you begin this planter renovation journey, you're faced with an essential question: can you reuse old mortar or does it need to be completely removed?
Like a master painter scraping off old layers to reveal a fresh canvas, you must decide whether to strip away the worn-out mortar or salvage what's left.
While reusing old mortar can save time and resources, mortar removal techniques often guarantee a stronger, more durable bond.
Weigh the mortar reuse benefits against the potential risks to create a sturdy foundation for your planter's new life.
What Is the Best Way to Store Planter Renovation Tools When Not in Use?
When you're not wielding your trusty planter renovation tools, you'll want to store them properly to maintain their quality and extend their lifespan.
Follow these tool organization tips: designate a dry, ventilated area for storage, and consider investing in storage solutions like toolboxes, bins, or hooks.
Label each container so you can easily find what you need next time.
Conclusion
As you stand back to admire your newly renovated planter, remember that the secret to a flawless finish lies in the tools you used to get there.
From cutting tools that slice through cinder blocks like butter to safety essentials that protect your hands and eyes, each tool played a vital role in bringing your vision to life.
With the right arsenal, you've transformed a dull, crumbling planter into a vibrant oasis, ready to thrive.
Related Posts
-
7 Must-Have Safety Gears for Brick Wall Renovation
When renovating a brick wall, you'll face a multitude of hazards, making it essential to wear and use the right safet...
-

5 Vital Safety Tips for DIY Renovation Success
When tackling a DIY renovation, you'll need to prioritize safety above all else. Start by protecting yourself from fl...
-

3 Best DIY Home Renovation Timelines for Success
As you tackle your DIY home renovation project, create a solid timeline by breaking it down into three phases. First,...


