Why Use These Top Plastering Tools for Renovation
Share
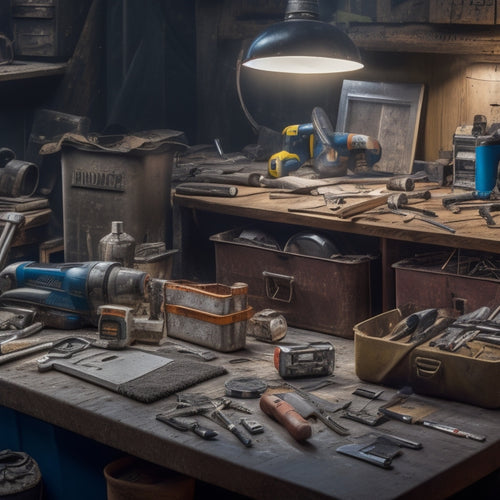
When you use the right plastering tools for renovation, you'll achieve greater control, precision, and efficiency in every stage of the process. Top tools like putty knives, hawks, and joint knives guarantee a smooth, seamless finish on your ceiling. Power trowels and mixing drills help you cover large areas quickly and consistently, while safety gear like respirator masks and steel-toed boots protect you from hazards. Mastering these tools and techniques will elevate your skills and take your renovation to the next level - and understanding the intricacies of each tool will reveal even more opportunities to perfect your craft.
Key Takeaways
• Using top plastering tools ensures a professional finish, increases efficiency, and reduces project timelines for renovation projects.
• The right tools help achieve consistent results, minimize errors, and reduce the need for costly rework and repairs.
• High-quality plastering tools withstand heavy use, require less maintenance, and provide a longer lifespan, saving time and money.
• Specialized tools, such as power trowels and mixing drills, enable plasterers to work faster and more accurately, resulting in higher-quality finishes.
• Investing in the right tools demonstrates a commitment to quality, enhances credibility, and builds trust with clients and customers in the renovation industry.
Essential Tools for Ceiling Repair
When tackling a ceiling repair, you'll need to arm yourself with the right tools to guarantee a smooth, professional-looking finish. A putty knife is a must-have for scraping off old ceiling texture and applying new plaster.
You'll also need a hawk, a flat tool used to hold and spread plaster, to achieve a consistent ceiling texture. Additionally, a trowel is essential for applying and smoothing out the plaster, allowing you to master various plastering techniques.
A joint knife will come in handy for cutting and scraping joints, ensuring a seamless finish. Don't forget a bucket and mixing stick for mixing and applying the plaster.
If you're dealing with a large ceiling, consider investing in a plastering pole, which allows you to reach high areas without the need for ladders.
With these essential tools, you'll be well-equipped to tackle your ceiling repair and achieve a finish that's both durable and visually appealing. By mastering the right techniques and using the right tools, you'll be able to create a ceiling texture that's both professional-looking and long-lasting.
Benefits of Power Trowels
You can take your plastering skills to the next level by incorporating power trowels into your arsenal, which can greatly increase efficiency and precision in applying and finishing plaster.
With a power trowel, you'll be able to cover larger areas in less time, reducing the overall duration of your project. This is especially important for large-scale renovations where time is of the essence.
Here are some key benefits of using power trowels:
-
Increased speed: Power trowels can apply and finish plaster at a much faster rate than traditional hand trowels, saving you time and effort.
-
Improved consistency: Power trowels provide a consistent finish, reducing the risk of unevenness and imperfections.
-
Enhanced control: With a power trowel, you have more control over the application and finishing process, allowing for a more precise finish.
- Reduced fatigue: Power trowels take the physical strain out of plastering, reducing fatigue and allowing you to work for longer periods without exhaustion.
Mixing Drills for Smooth Finish
When you're working with mixing drills for a smooth finish, you'll need to pay close attention to two key factors: drill bit selection and consistent mixing speed.
You'll want to choose a drill bit that's specifically designed for mixing plaster, as it will help you achieve the right consistency and texture.
Drill Bit Selection
Selecting the right drill bit is crucial for achieving a smooth finish, as it directly affects the quality of the mixed plaster. You need to choose the correct drill bit type and size to guarantee efficient mixing and a consistent texture.
When it comes to drill bit types, you have several options to take into account:
-
Masonry bits: Ideal for mixing plaster, these bits have a tungsten carbide tip that withstands the abrasive nature of plaster.
-
Steel bits: A cost-effective option, steel bits are suitable for mixing small batches of plaster.
-
Diamond-coated bits: These bits are perfect for mixing plaster with high aggregate content, as they provide a smooth finish.
- Step drill bits: These bits are versatile and can be used for mixing and drilling through various materials.
Remember to choose the right drill bit size based on the mixing drum's capacity and the type of plaster you're working with. A larger drill bit may be necessary for larger mixing drums, while smaller bits are better suited for smaller batches.
Consistent Mixing Speed
Achieving a consistent mixing speed is critical to producing a smooth, even finish, as it prevents lumps and guarantees the plaster mix reaches the ideal consistency. You know that a uniform mix is essential for a professional-looking finish, and that's where mixing drills come in. These tools allow you to master your mixing techniques and maintain speed control, ensuring a consistent outcome.
When selecting a mixing drill, look for one with variable speed control. This feature enables you to adjust the mixing speed to suit the specific plaster mix you're working with.
For instance, you may need a slower speed for thicker mixes and a faster speed for thinner ones. By having control over the mixing speed, you can achieve the perfect consistency every time.
Importance of Joint Knives
You rely heavily on joint knives to create clean, precise joints that withstand the test of time, making them an indispensable tool in your plastering arsenal. Mastering joint knife techniques is vital for achieving professional-looking results. The right joint knife materials can make all the difference in the quality of your work.
Here are some key aspects to take into account when selecting and using joint knives:
-
Choose the right material: Joint knives come in various materials, including stainless steel, high-carbon steel, and titanium. Each material has its strengths and weaknesses, so select one that suits your project's demands.
-
Select the correct size: Joint knives come in different sizes, and using the wrong size can lead to subpar results. Confirm you choose a knife that matches the joint's width.
-
Maintain your joint knife: Regularly clean and sharpen your joint knife to maintain its performance and extend its lifespan.
- Practice joint knife techniques: Develop your skills in using joint knives by practicing different techniques, such as applying even pressure and using the correct angle.
Role of Plastering Hammers
Your plastering hammer is an extension of your arm, delivering precise blows to shape and smooth plaster surfaces with ease.
As you master various plastering techniques, you'll find that the right hammer type can make all the difference. A claw hammer, for instance, is ideal for general-purpose plastering, while a lump hammer is better suited for heavier, more intense work. When it comes to finishing and detailing, a smaller, lighter hammer like a cross-peen or ball-peen is perfect for adding those subtle touches.
Regardless of the hammer type, it's crucial to maintain control and precision. A good plastering hammer should balance comfortably in your hand, allowing you to strike with confidence and accuracy.
By choosing the right hammer for the job, you'll be able to execute your plastering techniques with finesse, resulting in a professional-looking finish.
Don't underestimate the role of your plastering hammer – it's an important tool that can elevate your work from mediocre to exceptional.
Best Taping Knives for Corners
When you're working on corners, mastering the right taping techniques is essential for a seamless finish.
You'll need to select a taping knife that's specifically designed for corner work, considering factors like flexibility, blade angle, and handle ergonomics.
Corner Taping Techniques
Mastering corner taping techniques, particularly with the right taping knives, is essential for achieving seamless joints and a professional finish in drywall renovation projects.
You'll want to focus on perfecting your corner alignment to guarantee a strong bond between the drywall sheets. To achieve this, you'll need to develop a few key taping techniques.
Here are some tips to get you started:
-
Press firmly: Apply even pressure to the knife as you tape the corner, making sure to press the tape firmly onto the drywall.
-
Use a smooth motion: Move the knife in a smooth, continuous motion to avoid air pockets and uneven application.
-
Keep it clean: Confirm the corner is free of dust and debris to promote a strong bond between the tape and drywall.
- Check your angle: Verify that the tape is applied at a 45-degree angle to the corner, guaranteeing a strong and durable joint.
Knife Selection Criteria
Selecting the right taping knife for corner work is crucial, as it directly impacts the quality of the joint and the overall finish of your drywall renovation project.
You'll want to reflect on two primary factors: knife types and blade materials. There are three main types of taping knives: corner knives, angle knives, and flat knives.
Corner knives are specifically designed for tight spaces and precise cuts, making them ideal for corner work. Angle knives are versatile and suitable for both corner and flat applications. Flat knives are best suited for large, flat areas.
When it comes to blade materials, you'll typically choose between stainless steel, high-carbon steel, or titanium.
Stainless steel blades are resistant to rust and corrosion, while high-carbon steel blades offer exceptional durability and flexibility. Titanium blades are lightweight, yet strong, and provide superior rust resistance.
Reflect on the specific demands of your project and choose a knife that meets those needs. By selecting the right taping knife, you'll achieve professional-looking results and guarantee a strong, long-lasting joint.
Ceiling Plastering Safety Gear
You'll need a combination of personal protective equipment (PPE) and specialized gear to safeguard yourself and guarantee a successful ceiling plastering project.
Ceiling plastering can be a hazardous task, with dust, debris, and chemicals posing significant risks to your health and safety. To mitigate these risks, it's crucial to invest in the right safety gear.
Here are some must-haves for your ceiling plastering project:
-
Safety goggles: Protect your eyes from dust, debris, and chemical splashes with a good pair of safety goggles.
-
Respirator masks: Prevent inhalation of dust and other airborne contaminants with a respirator mask that fits snugly over your nose and mouth.
-
Dust-resistant coveralls: Keep your clothes clean and protect your skin from dust and debris with dust-resistant coveralls.
- Steel-toed boots: Ensure your feet are protected from heavy objects and tools with steel-toed boots.
Efficient Use of Putty Knives
With a putty knife in hand, you're ready to tackle the crucial task of applying and smoothing plaster, but first, you need to understand the ideal techniques for holding and maneuvering this essential tool. A well-held putty knife allows for precise control and efficient application, guaranteeing a smooth finish.
| Putty Knife Techniques | Benefits | Tips |
|---|---|---|
| Hold the knife at a 20-30° angle | Better control and precision | Apply gentle pressure, increasing as needed |
| Use long, smooth strokes | Even application and reduced fatigue | Keep the knife clean and dry |
| Apply putty in thin layers | Easier to smooth and reduces waste | Hold the knife flat for broad areas |
Mastering these putty knife techniques will elevate your plastering skills and guarantee a professional finish. By following these putty application tips, you'll achieve a smooth, even surface that requires minimal sanding. Remember to maintain a firm grip, use the correct angle, and apply gentle pressure to achieve the best results. With practice, you'll become proficient in handling a putty knife, and your renovation projects will benefit from your newfound expertise.
Finishing With Sanding Blocks
As the plaster dries, attention turns to refining the surface, and that's where sanding blocks come into play, allowing you to precision-craft a flawless finish.
You'll use these blocks to master various sanding techniques, from coarse to fine, to achieve a smooth, even surface.
When selecting sanding blocks, consider the block materials that best suit your project. You'll find blocks made from foam, rubber, and wood, each with its own strengths.
Some key factors to keep in mind when working with sanding blocks include:
-
Choosing the right grit sandpaper for the job, ranging from coarse 80-grit to fine 220-grit.
-
Using light, even pressure to avoid creating scratches or swirl marks.
-
Working in small, circular motions to maintain control and prevent unevenness.
- Regularly cleaning the block to prevent clogging and maintain its effectiveness.
Tool Maintenance for Plastering
Proper tool maintenance is vital to extending the lifespan of your plastering tools and guaranteeing they continue to perform at their best. You can't afford to neglect your tools, as it'll cost you time and money in the long run.
Start by implementing a routine cleaning schedule for your tools. After each use, wipe them down with a dry cloth to remove any debris or plaster residue. For more thorough cleaning, use a mild detergent and water. Regular cleaning will prevent rust and corrosion from setting in.
When you're not using your tools, store them in a dry, protected area. Tool storage is essential in maintaining their condition. Consider investing in a tool chest or cabinet with individual compartments to keep your tools organized and easy to access. This will also help prevent accidental damage.
Frequently Asked Questions
Can I Use a Power Trowel for Small-Scale Plastering Projects?
You're wondering if a power trowel is suitable for small-scale plastering projects. The answer is yes, it can be a great option.
A power trowel's benefits include increased efficiency, allowing you to complete tasks faster and with less fatigue.
For small projects, its precision and control guarantee a smooth finish.
You'll appreciate the time-saving aspect, as it helps you achieve professional results quickly, making it an excellent choice for small-scale plastering jobs.
How Often Should I Clean My Plastering Tools to Prevent Rust?
You should clean your plastering tools daily to prevent rust. A regular cleaning frequency is vital, especially after working with wet plaster.
Rust can set in quickly, so it's important to wipe down your tools with a dry cloth and store them in a dry place.
For more thorough cleaning, use a wire brush and mild detergent to remove any stubborn plaster residue.
Are Putty Knives Suitable for Applying Joint Compound to Drywall?
You're wondering if putty knives are suitable for applying joint compound to drywall. The answer is yes, but it depends on the type of putty knife you're using.
A stiff-blade putty knife is ideal for scraping and applying joint compound, while a flexible-blade one is better for feathering and smoothing.
When applying joint compound, hold the putty knife at a 45-degree angle and spread it evenly, using long, smooth strokes to achieve a seamless finish.
Can I Use a Plastering Hammer for Demolition Work?
You're wondering if you can use a plastering hammer for demolition work.
The answer is yes, but with caution. A plastering hammer's weighted head and curved claw are suitable for light demolition techniques, like breaking up small areas of plaster or drywall.
However, it's not ideal for heavy-duty demolition. You'll want to reserve it for more precise, controlled work, and opt for a heavier hammer or other specialized tools for more extensive demo projects.
Do I Need to Wear a Mask When Sanding Plaster?
Are you ready to breathe in a cloud of plaster dust? Probably not.
When sanding plaster, it's essential you wear a mask to protect yourself from inhaling those pesky particles. Don't risk respiratory issues!
Invest in a high-quality dust mask or respirator to safeguard your health.
Master proper sanding techniques and prioritize health precautions to guarantee a safe, successful renovation.
Conclusion
You've made it to the final coat of your plastering project, and it's time to reflect on the importance of using the right tools for the job.
With the top plastering tools in your arsenal, you've guaranteed a professional finish and saved yourself time and frustration.
Did you know that a staggering 75% of renovation projects are delayed due to inadequate tooling?
By investing in the essentials, you've dodged that bullet and can take pride in a job well done.
Related Posts
-

Smart Guide to Buying Second-Hand Renovation Tools
When buying second-hand renovation tools, you'll want to set clear renovation goals and a realistic budget to priorit...
-

Affordable Plastering Tools for Home Renovation Success
You're taking the first step towards a successful home renovation by investing in the right plastering tools. Start w...
-

Budget-Friendly Materials for Your Home Renovation Needs
As you initiate your home renovation, you're enthusiastic to find budget-friendly materials that fit your vision with...


