
Why Stucco Renovation Demands a Thorough Checklist
As you prepare for your stucco renovation project, it's vital to understand that cracking, water damage, and structural issues can lead to severe consequences if not addressed properly. A thorough checklist is essential to identify and prioritize repairs, ensuring a successful and long-lasting outcome. You'll need to assess stucco damage severity, inspect for hidden structural issues, and employ essential tools and safety precautions. By doing so, you'll be able to effectively remove old stucco layers, prepare surfaces for repair, and apply new stucco coatings. Now, it's time to take the next step and investigate the critical components of a stucco renovation project.
Key Takeaways
- A thorough checklist ensures that underlying structural issues, like water damage and cracks, are identified and addressed to prevent future problems.
- It helps to prioritize repairs based on severity, ensuring that critical issues are tackled first to maintain stucco integrity.
- A checklist guides the selection and use of essential tools and safety equipment, reducing the risk of accidents and injuries.
- It facilitates a systematic approach to surface preparation, damage assessment, and stucco removal, ensuring a strong foundation for new coatings.
- A thorough checklist enables a comprehensive final inspection, guaranteeing a high-quality stucco renovation that meets aesthetic and functional standards.
Understanding Cracked Stucco Problems
Many stucco-clad homes exhibit telltale signs of distress, and cracked stucco is often the most visible indication of a deeper issue. You may notice cracks in the stucco ranging from fine hairlines to wide, gaping fissures. These cracks can be a sign of water infiltration, structural damage, or poor installation.
It's crucial to identify the root cause of the problem to determine the most effective repair techniques. You'll need to assess the extent of the damage, checking for signs of water damage, mold, or structural weakness.
Are the cracks limited to a specific area, or are they widespread? Are there any signs of efflorescence, which can indicate water seepage? You may need to perform tests, such as a water absorption test, to determine the stucco's porosity and absorption rate.
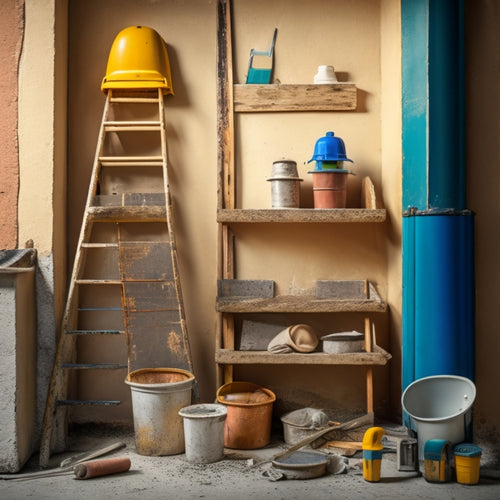
Essential Tools for Stucco Renovation
As you prepare to tackle your stucco renovation project, having the right tools at your disposal is crucial to achieving professional-looking results.
You'll need to invest in tools that will help you efficiently remove old stucco, prepare the surface, and apply new stucco materials.
-
Power tools: A rotary hammer, angle grinder, and circular saw will help you remove old stucco and prepare the surface for new application.
-
Hand tools: Trowels, putty knives, and joint knives are necessary for applying and smoothing out new stucco materials.
-
Measuring and testing tools: A level, stud finder, and moisture meter will guarantee that your renovation is accurate and meets building codes.
- Safety equipment: A dust mask, safety glasses, and gloves will protect you from the hazards associated with stucco renovation.
Safety Precautions for Renovators
You're about to immerse yourself in the stucco renovation process, but before you start, it's vital to prioritize your safety. Renovating stucco can be hazardous, and neglecting safety precautions can lead to serious injuries or even fatalities.
Wearing protective gear is essential for safeguarding yourself from potential risks. Confirm you have a hard hat, safety glasses, gloves, and a dust mask to prevent exposure to airborne particles and debris.
Additionally, wear long-sleeved shirts, pants, and steel-toed boots to protect your skin and feet from cuts, abrasions, and heavy objects.
To maintain worksite safety, establish a clean and organized workspace. Remove any tripping hazards, and verify that the area is well-ventilated to prevent the accumulation of dust and fumes.
Designate a specific area for storing tools and materials to prevent clutter and obstructions. By taking these precautions, you can greatly reduce the risk of accidents and guarantee a successful stucco renovation project.
Assessing Stucco Damage Severity
You'll need to evaluate the extent of damage to your stucco exterior by looking for signs of water damage, such as discoloration, warping, or soft spots.
Additionally, you should inspect for hidden structural issues, like cracks in the foundation or walls, which can compromise the integrity of your building.
A thorough assessment of these factors will help you determine the scope of your renovation project.
Signs of Water Damage
Water spots, discoloration, and crumbling stucco are all telltale signs that water has infiltrated your exterior facade.
As you assess the severity of stucco damage, it's crucial to identify the signs of water damage to develop effective prevention strategies.
You should look for:
-
Discoloration: Unusual stains or discoloration on the stucco surface, which can indicate water seepage behind the stucco.
-
Water spots: Circular stains or rings on the stucco, often accompanied by efflorescence (salt deposits) or mineral deposits.
-
Crumbling or soft stucco: Areas where the stucco has become soft, crumbly, or is falling off, indicating significant moisture intrusion.
- Bulging or warped stucco: Stucco that's bulging or warped, suggesting water accumulation behind the stucco, which can lead to more severe damage.
Identifying these signs of water damage allows you to pinpoint areas where moisture intrusion has occurred, enabling you to develop targeted prevention strategies to mitigate future damage.
Hidden Structural Issues
Beyond the visible signs of water damage, it's essential to inspect for hidden structural issues that can have a significant impact on the integrity of your stucco exterior.
You'll need to identify any concealed problems that could compromise the structural integrity of your building. Start by checking for signs of hidden leaks, such as water spots on walls or ceilings, musty odors, or warping of wood components. Inspect the walls, windows, and doors for cracks, gaps, or other openings that could allow water to seep in.
Next, examine the flashing around windows, doors, and roof junctions to guarantee it's securely attached and functioning properly.
Check the condition of the stucco itself, looking for cracks, crumbling, or delamination. You should also inspect the underlying substrate, such as plywood or oriented strand board (OSB), for signs of water damage or rot.
Identifying and addressing these hidden structural issues is vital to guaranteeing the long-term durability and safety of your stucco exterior.
Removing Old Stucco Layers
Demolition day has finally arrived, marking the beginning of your stucco renovation expedition.
It's time to remove the old stucco layers, an essential step that demands attention to detail and the right techniques.
You'll need to employ effective stucco removal techniques to avoid damaging the underlying structure.
Here are some vital steps to follow:
-
Protect surrounding areas: Cover adjacent surfaces, including windows, doors, and landscaping, to prevent damage from debris and dust.
-
Remove siding and trim: Take out the old siding and trim to expose the underlying stucco, making it easier to access and remove.
-
Apply a release agent: Spray a release agent to help loosen the old stucco, making it easier to remove without damaging the substrate.
- Dispose of old stucco: Properly dispose of the old stucco, following local regulations and guidelines for hazardous waste disposal.
Preparing Surfaces for Repair
You'll need to thoroughly clean the surface of dirt and debris to guarantee a solid bond between the new stucco and the substrate.
Next, inspect the surface for damage areas, such as cracks or holes, which must be addressed before applying new stucco.
Clean Dirt and Debris
Most stucco surfaces accumulate a significant amount of dirt and debris over time, which must be removed before repairs can begin. This is an essential step in preparing your surface for repair, as any dirt or debris left behind can compromise the bond between the old stucco and the new repair material.
You'll need to employ various cleaning techniques to remove dirt and debris effectively. Here are some steps to follow:
-
Power washing: Use a pressure washer to remove loose dirt and debris, but be cautious not to damage the stucco surface.
-
Hand scrubbing: Use a stiff-bristled brush or scrubber to remove stubborn dirt and grime.
-
Debris removal: Use a putty knife or scraper to remove loose stucco, old caulk, or other debris.
- Final cleaning: Use a damp cloth or sponge to wipe away any remaining dirt or debris.
Inspect for Damage Areas
With the surface clean, your attention turns to identifying areas that require repair. This stucco inspection is a vital step in the renovation process, as it allows you to conduct an extensive damage assessment.
Start by visually examining the stucco surface, looking for signs of cracking, crumbling, or water damage. Check for areas where the stucco has separated from the substrate or is bulging outward.
Next, use a hammer or scratch awl to sound out the stucco, listening for hollow sounds that may indicate delamination or voids behind the stucco. This will help you identify areas where the stucco has debonded from the substrate or where there's water intrusion.
Make note of all the areas that require repair, taking photos and measurements to document the damage. This information will be essential for creating a thorough repair plan and ensuring that all necessary repairs are made.
Applying New Stucco Coatings
As the surface preparation is complete, applying new stucco coatings becomes the next critical step in the renovation process.
You must guarantee that the new coatings are applied correctly to achieve a durable and long-lasting finish.
When applying new stucco coatings, you'll want to employ stucco application techniques that prioritize even coverage and adequate thickness. This will help prevent future cracks and damage.
Here are some key considerations for applying new stucco coatings:
-
Base coat application: Confirm the base coat is applied evenly and at the recommended thickness to provide a solid foundation for the finish coat.
-
Finish coat selection: Choose a finish coat that suits your climate and desired aesthetic, and apply it according to the manufacturer's instructions.
-
Moisture management: Ascertain the stucco system is designed to manage moisture effectively, preventing water ingress and damage.
- Curing and finishing: Allow the stucco to cure properly, and apply a finish treatment to enhance its durability and appearance.
Final Inspection and Touch-ups
You've successfully applied new stucco coatings, and now it's time to verify that the renovation meets your standards. Conduct a thorough final walkthrough to confirm every aspect of the project is up to par. This quality assurance process is essential in identifying any defects or areas that require touch-ups.
As you inspect the stucco, look for any cracks, blisters, or unevenness in the finish. Check the color and texture, making certain they match the original specifications.
Verify that all joints, including those around windows and doors, are properly sealed. Inspect the flashing and weep screeds to ascertain they're functioning correctly.
Take note of any imperfections you find and address them promptly. This may involve reapplying stucco, repairing joints, or sealing gaps.
Don't consider the project complete until you're satisfied that every detail meets your quality standards. A careful final inspection will guarantee a durable, long-lasting stucco renovation that will withstand the test of time.
Frequently Asked Questions
Can I Renovate Stucco Myself or Do I Need a Professional?
When considering a stucco renovation, you'll weigh DIY possibilities, but remember to prioritize Safety precautions, as improper techniques can lead to structural damage; unless you're experienced, it's best to hire a professional to guarantee a secure, long-lasting result.
How Long Does a Typical Stucco Renovation Project Take to Complete?
You'll likely spend 2-6 months on a stucco renovation project, depending on the scope and complexity, which affects stucco durability; a realistic renovation timeline considers factors like material sourcing, labor, and weather conditions.
Are Stucco Renovation Costs Tax-Deductible as Home Improvement Expenses?
You'll be pleased to know that stucco renovation costs can be tax-deductible as home improvement expenses, but you'll need to keep careful records, as the IRS allows deductions for capital improvements that increase your home's value, not mere repairs.
Will Stucco Renovation Affect My Home's Insurance Premiums?
When you renovate your stucco, you'll need to reassess your insurance coverage, as renovation risks can impact premiums; consult your insurer to determine if your policy will increase, decrease, or remain unchanged, ensuring you're adequately protected during and after the renovation process.
Can I Customize Stucco Colors and Textures to Match My Home's Style?
You can choose from a vast array of stucco color options, from soft earth tones to bold brights, and customize texture application, from smooth to rough, to seamlessly match your home's unique style and design flair.
Conclusion
As you complete your stucco renovation, remember that attention to detail is vital. You've assessed damage, removed old layers, and applied new coatings, but a thorough final inspection is imperative. In fact, according to the International Association of Certified Home Inspectors, stucco-related issues account for 80% of all claims against builders. Don't let your renovation become a statistic - take the time to guarantee a flawless finish.
Related Posts
-
7 Crucial Tools for a Successful Stucco Renovation
To guarantee a successful stucco renovation, you'll need a range of essential tools. First, invest in a stucco mixer ...
-

3 Best DIY Home Renovation Timelines for Success
As you tackle your DIY home renovation project, create a solid timeline by breaking it down into three phases. First,...
-

Stucco Patching Material Checklist for Home Renovation
You'll need a range of essential tools, including a putty knife, wire brush, hawk or flat trowel, level, and straight...


