
Why Proper Tool Care Matters for Home Renovations
You'll save time and money on your home renovation projects by adopting a few simple habits to properly care for your tools. Regular maintenance extends tool lifespan and performance, and prevents rust and corrosion. Allocate time each week or month to inspect your tools, clean them immediately after use, and store them in a dry, clean area away from direct sunlight. By doing so, you'll maintain tool performance, prevent injuries, and avoid costly repairs and replacements. Now that you know why proper tool care matters, learn how to develop a consistent care routine that fits your needs and takes your home renovation projects to the next level.
Key Takeaways
• Regular tool maintenance extends lifespan, performance, and saves time and money in the long run.
• Cleaning tools immediately after use prevents rust and corrosion, maintaining performance and longevity.
• Proper storage and organization enhance efficiency, prevent damage, and ensure quick identification of tools.
• Regular inspections and repairs prevent injuries, identify damage, and decide between repair or replacement.
• Consistent upkeep and lubrication of tools maintain their longevity, avoiding costly repairs and replacements.
Masonry Tool Maintenance 101
When you're working with masonry tools, regular maintenance is vital to extend their lifespan and guarantee they continue to perform at their best.
You've invested in a range of masonry tool types, from trowels to levels, and it's essential to care for them properly.
Proper tool usage is key to maintaining their condition. For instance, always store your trowels with the blade facing down to prevent rust and damage. Keep your hammer handles clean and dry to prevent splintering.
Regularly inspect your tools for signs of wear, such as worn-out handles or loose joints, and address them promptly. Lubricate moving parts, like the pivot points on your level, to facilitate smooth operation.
By following these simple yet vital steps, you'll be able to enjoy peak performance from your masonry tools and avoid costly replacements.
Cleaning Cinder Block Tools
You'll want to give your cinder block tools some extra attention after each use, as the rough, porous nature of cinder blocks can leave behind stubborn residue that's tough to remove if left to dry. This residue can affect tool performance and make future cleaning tasks even more challenging.
To prevent this, make it a habit to clean your tools immediately after use.
Here are some tips to help you with cinder block cleaning:
-
Use a stiff-bristled brush or wire scrubber to remove loose debris and residue from the tool's surface.
-
Mix a solution of warm water and mild detergent, and use it to soak the tool for about 30 minutes. This will help loosen any stubborn residue.
-
Use a clean, dry cloth to wipe down the tool and remove any remaining residue or moisture. This will help prevent rust and keep your tools in top condition.
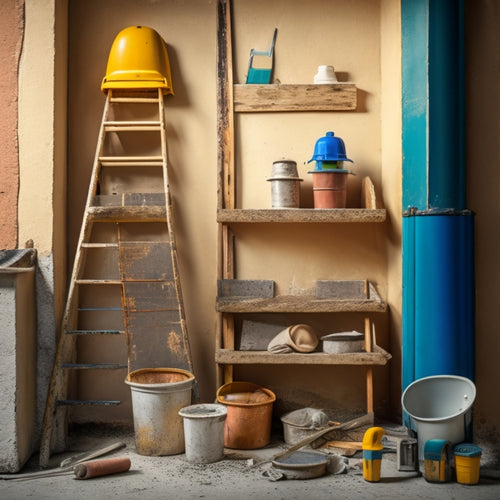
Storing Trowels and Floats
Storing your trowels and floats properly is crucial to maintaining their quality and extending their lifespan. When you're done using them, don't just throw them in a corner or leave them scattered around the job site. Take the time to organize and store them correctly.
For trowel organization, consider investing in a tool organizer or a designated trowel holder. This will keep them upright, preventing damage to the blades and handles. You can also store them in a dry, clean area, away from direct sunlight.
For float protection, wrap them individually in a soft cloth or plastic wrap to prevent scratching and chipping. Store them in a protective case or a sturdy box to prevent damage during transport. When storing, make certain they're completely dry to prevent water spots.
A well-organized and protected storage system will guarantee your trowels and floats remain in top condition, ready for the next project. By taking these simple steps, you'll be able to work more efficiently and effectively, and your tools will thank you.
Preventing Rust and Damage
As you continue to work on your home renovation project, you'll want to make certain you're taking steps to prevent rust and damage to your tools.
Rust can quickly render your tools useless, and damaged tools can lead to subpar results and even safety hazards.
Rust Prevention Methods
What's the most effective way to prevent rust from forming on your tools and equipment during home renovations?
As you work on your project, you're constantly exposing your tools to moisture, humidity, and other environmental factors that can cause rust. To combat this, you need to take proactive measures to prevent rust from forming in the first place.
Here are three effective rust prevention methods to implement:
-
Apply rust-resistant coatings to your tools and equipment. These coatings create a barrier between the metal and the environment, preventing moisture from seeping in and causing rust.
-
Implement moisture control measures in your workspace. This can include using desiccant packets, silica gel, or dehumidifiers to keep the air dry and reduce the risk of rust.
-
Store your tools and equipment in a dry, well-ventilated area. Avoid storing them in cramped, humid environments like basements or attics, and instead opt for a clean, dry space like a garage or shed.
Cleanliness Is Key
You can greatly extend the lifespan of your tools and equipment by regularly wiping them down with a dry cloth or brush to remove dirt, grime, and other contaminants that can accelerate rust and damage.
This simple cleaning technique is essential in preventing rust and damage, and it's a habit you should develop as part of your tool care routine.
When you're done using your tools, take a few minutes to wipe them down before storing them in your tool organization system. This will help prevent moisture and debris from accumulating and causing damage.
Additionally, make it a habit to clean your tools after each use, especially if you've been working with materials that can leave behind residue, such as sawdust or drywall compound.
Tool Inspection Best Practices
Before starting your renovation project, take the time to thoroughly examine each tool, checking for signs of wear, rust, or damage that could affect its performance or safety. This vital step guarantees that your tools are in good working condition, reducing the risk of accidents and subpar results.
Conducting regular safety inspections helps you identify potential hazards and prevents tool-related injuries. When inspecting your tools, pay attention to:
-
Loose or worn-out handles: Make sure handles are securely attached and not slippery, as this can cause accidents.
-
Dull or damaged cutting edges: Blunt or damaged cutting edges can lead to poor performance and increased effort, which may result in fatigue and injuries.
-
Electrical components: Check for frayed cords, exposed wiring, or faulty switches, which can cause electrical shocks or fires.
Repairing Damaged Masonry Tools
Damaged masonry tools can often be salvaged with some TLC, saving you the cost and hassle of replacing them, so tackle those repairs head-on. Start by identifying the extent of the damage and determining if it's worth repairing or if you need to explore tool replacement options.
If the damage is minor, such as a loose handle or rusty surface, you can likely fix it yourself with some basic maintenance. For more extensive damage, consider consulting a professional or investing in masonry tool upgrades to improve their performance and extend their lifespan.
When repairing damaged tools, be certain to follow proper safety protocols to avoid injury or further damage. Clean and disinfect the tool, then assess the damage and develop a plan of attack.
You may need to replace worn or broken parts, re-sharpen blades, or re-apply protective coatings. By taking the time to repair your damaged masonry tools, you'll not only save money but also guarantee you're working with reliable, high-quality tools that will get the job done efficiently and effectively.
Extending Tool Lifespan Tips
When you're working on a home renovation project, you're probably focused on getting the job done quickly and efficiently.
However, taking the time to properly care for your tools can save you time and money in the long run by extending their lifespan.
Clean and Store Properly
Clean your tools thoroughly after each use, wiping them down with a dry cloth to remove dirt, grime, and other debris that can corrode or damage the surfaces.
This habit will help prevent rust, corrosion, and other forms of damage that can shorten your tools' lifespan. For tougher messes, use gentle cleaning solutions specifically designed for tools, and avoid harsh chemicals that can strip away protective coatings.
When it comes to storage, you'll want to keep your tools organized and easily accessible.
Here are some tips to help you achieve ideal tool organization:
-
Store tools in a dry, cool place, away from direct sunlight and moisture.
-
Use toolboxes, chests, or pegboards to keep tools categorized and within reach.
-
Label each storage compartment or section, so you can quickly find what you need.
Regular Maintenance Schedule
Set aside a specific time each week or month to inspect and maintain your tools, checking for signs of wear, rust, or corrosion, and addressing any issues promptly to prevent them from becoming major problems. This regular maintenance schedule is essential for extending tool longevity and guaranteeing they remain in prime condition. By staying on top of maintenance, you'll avoid costly repairs and replacements, and guarantee your tools continue to perform at peak efficiency.
Here's a sample maintenance checklist to get you started:
| Tool | Maintenance Task |
|---|---|
| Power tools | Check cord integrity, clean air vents, and lubricate moving parts |
| Hand tools | Inspect for rust, clean and oil hinges, and sharpen blades |
| Fasteners | Clean and lubricate threads, and inspect for signs of wear |
| Measuring tools | Calibrate and clean lenses, and inspect for damage |
| Safety gear | Inspect for damage, clean and store properly, and replace worn parts |
Inspect Tools Daily
You can greatly extend the lifespan of your tools by incorporating daily inspections into your routine, catching potential issues before they become major problems that require costly repairs or replacements.
By setting aside a few minutes each day to inspect your tools, you'll be able to identify and address minor issues before they escalate.
Here's a daily checklist to get you started:
-
Cleanliness: Wipe down tools to remove dirt, dust, and debris that can accumulate and cause damage.
-
Functionality: Test tools to verify they're working properly and efficiently. Check for any signs of wear or malfunction.
-
Storage: Verify that tools are stored correctly, guaranteeing they're protected from environmental factors and potential damage.
Frequently Asked Questions
Can I Use Bleach to Clean My Masonry Tools?
Don't reach for bleach to clean your masonry tools!
Bleach can corrode metal and damage tool handles. Instead, opt for a gentle soap and warm water to remove dirt and grime.
For tougher messes, try a bleach alternative like trisodium phosphate (TSP) or a tool-specific cleaner.
Regular tool maintenance is key to extending their lifespan and ensuring peak performance.
How Often Should I Sharpen My Trowel Edge?
You're a master chef in the kitchen of construction, and your trowel is the trusty knife that needs regular honing.
To keep your trowel edge razor-sharp, sharpen it every 1-3 months, depending on usage. Regular trowel maintenance is key to smooth finishes and efficient work.
Set a reminder to inspect and sharpen your trowel edge frequently, and you'll be serving up professional-grade results in no time.
Are Silicone-Based Lubricants Safe for Masonry Tools?
When it comes to your masonry tools, you're right to wonder if silicone-based lubricants are safe to use.
The good news is that silicone's non-reactive properties make it an excellent choice for lubrication.
Silicone-based lubricants provide effective rust protection and reduce friction, allowing your tools to glide smoothly over surfaces.
Plus, they won't contaminate or damage your materials.
Can I Store My Masonry Tools in a Humid Environment?
It's ironic you're wondering about storing your masonry tools in a humid environment, because it's exactly what you shouldn't do.
Humidity can cause rust and corrosion, weakening your tools over time.
When storing your masonry tools, you'll want to keep them in a dry, well-ventilated area.
Consider using a rust-inhibiting coating or silica gel packets to absorb moisture.
Proper masonry tool storage will save you from frequent replacements and guarantee your tools remain in top condition.
Do I Need to Clean My Tools After Each Use?
You should always clean your tools after each use to prevent rust, dirt, and debris buildup.
Develop a tool maintenance routine that includes wiping down tools with a dry cloth and applying a rust-inhibiting lubricant.
For more thorough cleaning, use gentle cleaning techniques like soap and water or a mild solvent.
This habit will extend the life of your tools and guarantee they're ready for the next project.
Conclusion
As you wrap up your home renovation, remember that proper tool care is the unsung hero behind a successful project.
By following these simple yet essential steps, you'll not only save time and money but also guarantee your tools remain your trusted allies for future endeavors.
Don't let neglect be the wrecking ball that destroys your toolkit - instead, be the master builder who crafts a legacy of well-maintained, high-performing tools.
Related Posts
-
7 Crucial Tools for a Successful Stucco Renovation
To guarantee a successful stucco renovation, you'll need a range of essential tools. First, invest in a stucco mixer ...
-

7 Patio Safety Tips for DIY Renovation Projects
As you begin your DIY patio renovation project, prioritize safety by evaluating the worksite for tripping hazards and...
-

Stucco Tool Kit Checklist for Home Renovation
You'll need a thorough stucco tool kit to guarantee a successful home renovation, as the right tools can make all the...


