
Why Disorganized Tools Stall Home Renovation Progress
You're probably wasting more time searching for tools than actually using them, and that's why your home renovation project is stalled. Disorganized tools lead to lost productivity, increased frustration, and a slower pace. When you can't find what you need, you're forced to pause, compromise, or even redo work, setting you back considerably. By implementing an efficient tool organization system, you can reclaim that lost time and get back on track. From labeled tool stations to vertical storage solutions, there are many strategies to optimize your tool access and essentials – and by applying them, you'll be amazed at how quickly your renovation progress takes off.
Key Takeaways
- Disorganized tools lead to wasted time searching for misplaced items, delaying project timelines and increasing labor costs.
- Inefficient tool storage systems cause cluttered workspaces, hindering workflow and creating safety hazards.
- Poor tool labeling and categorization make it difficult to identify and access necessary tools, slowing down renovation progress.
- Inadequate designated tool stations and zones result in tools being misplaced or lost, further delaying projects.
- Inefficient use of storage space, including vertical storage and wall-mounted solutions, contributes to clutter and disorganization.
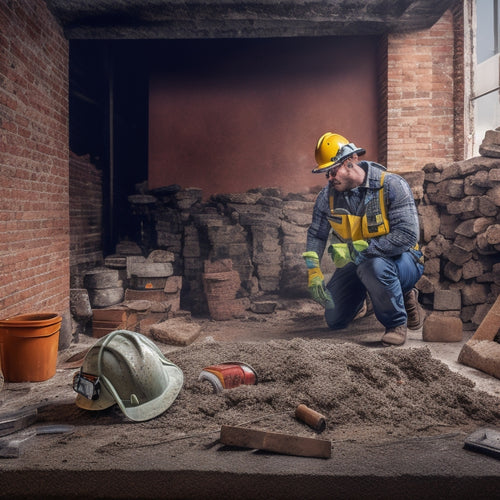
Precast Cement Block Storage Hacks
How can you maximize the storage potential of your precast cement blocks? By leveraging their durability and versatility, you can create efficient storage solutions that save time and space.
One key advantage of precast cement blocks is their weather resistance, making them ideal for outdoor storage. To optimize storage, consider stacking methods that allow for easy access and minimize damage to the blocks. This can be achieved by stacking them in a staggered pattern, alternating the direction of the blocks to prevent them from toppling over.
When planning your project, keep in mind the cost efficiency of precast cement blocks, which can be reused and repurposed multiple times. By incorporating these blocks into your storage solutions, you can reduce waste and minimize the need for new materials.
Effective project planning and clever stacking methods can help you get the most out of your precast cement blocks, ensuring a successful and stress-free renovation project.
Labeling Tools for Easy Access
You'll save time and frustration by implementing a labeling system that assigns Tool Category Labels to specific storage bins or shelves, allowing you to quickly identify where each tool is stored.
Consider adding a Color-Coded Organization system, where similar tools or categories are assigned a specific color, making it easy to spot what you need at a glance.
Tool Category Labels
By categorizing tools into labeled groups, homeowners can instantly locate the right tool for the task at hand, saving essential time and reducing frustration during home renovation projects.
This simple yet effective tool management strategy streamlines your workflow, allowing you to focus on the task at hand.
Labeling tools within categories, such as "electrical," "painting," or "plumbing," enables swift tool identification. This method also helps maintain a sense of organization, making it easier to put tools back in their designated place after use.
Additionally, implementing tool category labels encourages tool maintenance tips, such as regularly cleaning and inspecting tools, which prolongs their lifespan and guarantees peak performance.
To take your tool organization to the next level, consider implementing a standardized tool identification method.
This could include assigning a specific color or symbol to each category, making it even easier to find the right tool when you need it.
Color-Coded Organization
A color-coded organization system takes tool categorization to the next level, allowing you to identify and access the right tools instantly. By assigning a specific color to each tool category, you create a visual hierarchy that streamlines your workflow.
This system not only adds a touch of color significance to your tool collection but also enhances the visual appeal of your workspace.
Here are three ways a color-coded organization system benefits your home renovation project:
-
Reduced Search Time: With a quick glance, you can spot the tool you need, saving precious time that would be wasted searching through a disorganized mess.
-
Improved Tool Maintenance: A color-coded system helps you keep track of tool condition, making it easier to identify which tools need cleaning, maintenance, or replacement.
-
Enhanced Collaboration: When working with a team, a color-coded system guarantees that everyone knows exactly where to find the tools they need, reducing confusion and miscommunication.
Designated Tool Stations
In the heart of your home renovation workspace, designated tool stations serve as a guide of efficiency, directing you to the tools you need in a flash. By assigning a specific spot for each tool, you'll reduce the time spent searching for them, increasing your workspace efficiency.
This approach also promotes tool accessibility, allowing you to focus on the task at hand rather than wasting time and energy on tool hunts.
Label each station clearly, so you can quickly identify where everything is. This is especially important for frequently used tools, like hammers, drills, and saws.
Consider grouping similar tools together, such as all your electrical tools in one station, to further streamline your workflow.
As you work, make sure to return tools to their designated stations to maintain the organization and keep your workspace clutter-free.
Customized Tool Chest Organization
You're taking your tool organization to the next level by customizing your tool chest.
To maximize efficiency, you'll need a solid tool placement strategy, an ideal storage layout, and personalized drawer dividers that cater to your specific needs.
Tool Placement Strategy
Optimize your tool chest organization by assigning a designated spot for each tool, making it easier to find what you need when you need it. This tool placement strategy guarantees that your workspace remains clutter-free, and you can focus on the renovation task at hand.
By implementing a well-thought-out tool placement strategy, you'll experience significant improvements in tool accessibility and workspace efficiency.
Here's how:
-
Reduced search time: With each tool in its assigned spot, you'll spend less time searching for the right tool, and more time getting the job done.
-
Improved workflow: An organized tool chest helps you stay focused on the task, reducing distractions and increasing your overall productivity.
-
Enhanced safety: A clutter-free workspace reduces the risk of accidents and injuries, creating a safer environment for you and your team.
Optimal Storage Layout
About 75% of your tool chest's storage capacity is often wasted due to inefficient storage layouts. This is a major contributor to disorganization, which can notably slow down your home renovation progress. To maximize tool accessibility and storage efficiency, you need to design an ideal storage layout for your tool chest.
Start by categorizing your tools into groups, such as hand tools, power tools, and fasteners. Within each group, arrange tools by frequency of use, with the most frequently used tools placed in easy-to-reach locations.
Consider the "golden zone" – the area between your waist and shoulder height – where you can store your most-used tools for quick access.
When organizing your tool chest, think vertically. Use stackable bins, baskets, or shelves to enhance storage capacity. Label each compartment to help you and others quickly identify where tools are stored.
Personalized Drawer Dividers
The tool chest's compartments and drawers can be further optimized with personalized drawer dividers, taking your customized organization to the next level.
By incorporating dividers that are customized to your specific needs, you can guarantee that every tool has its own designated space, making it easier to find what you need when you need it. This level of customization not only saves you time but also reduces frustration and increases productivity.
To get the most out of your personalized drawer dividers, consider the following:
-
Custom sizing: Measure your tools and dividers accurately to guarantee a snug fit that prevents movement and damage.
-
Material choices: Select materials that are durable, easy to clean, and resistant to moisture and corrosion.
-
Tool categorization: Organize your tools by category or project type to streamline your workflow and reduce clutter.
Utilizing Vertical Storage Space
Many homeowners struggle with cluttered workspaces and disorganized tools, but you can reclaim your garage or workshop by maximizing a often-overlooked resource: your walls. By utilizing vertical storage space, you'll free up floor space and keep your tools within easy reach.
Start by evaluating your wall space and identifying areas where you can install wall mounted solutions. Look for sturdy walls that can support the weight of your tools and supplies.
Next, consider the types of tools you need to store. Do you have long-handled tools like rakes and shovels? Vertical shelving with hooks or a pegboard can keep them organized.
For smaller items like nuts and bolts, consider installing a wall-mounted cabinet or bins. Label each bin so you can quickly find what you need.
Finally, don't forget about the space above your workbench. Install a shelving unit or a magnetic strip to store frequently used tools, keeping them close at hand.
Portable Tool Kit Essentials
Five essential tools should always be within arm's reach in your portable tool kit, whether you're working on a renovation project or tackling a quick repair.
This guarantees you're not wasting time searching for what you need, and you can focus on getting the job done efficiently.
To maximize tool portability solutions, consider including the following essentials in your kit:
-
Multitool: A multitool can help with various tasks, from cutting to tightening, and its compact size makes it easy to carry around.
-
Tape measure: A tape measure is a must-have for any renovation project, and having it in your portable kit guarantees you can take quick measurements whenever needed.
-
Level: A level helps you confirm your work is accurate and straight, which is essential for a professional-looking finish.
Designated Zones for Tool Categories
About a dozen tools are scattered around your workspace, making it difficult to find what you need when you need it. This disorganization isn't only frustrating but also slows down your renovation progress.
To combat this, create designated zones for tool categories. Divide your workspace into zones, such as a drill zone, a saw zone, and a measurement zone. Within each zone, store tools and accessories that belong to that category.
This organization system offers several tool zone benefits. For instance, it reduces the time spent searching for tools, allowing you to focus on the task at hand. Additionally, it prevents tools from getting lost or damaged, and it helps maintain an efficient workspace.
Frequently Asked Questions
How Do I Maintain Organization Once the Renovation Is Complete?
To maintain organization after the renovation, you'll create a tool inventory and store items in designated areas, referencing your renovation checklist to guarantee everything has a home, making it easy to find what you need when you need it.
Can I Use Old Furniture to Store Tools and Materials?
Like a skilled puzzle solver, you can repurpose old furniture into clever storage solutions, breathing new life into worn pieces while corralling tools and materials with creative flair, maximizing space and efficiency in your renovation workflow.
What Is the Ideal Temperature for Tool Storage?
You'll want to store your tools in a space with a consistent temperature between 60-70°F (15-21°C) to prevent temperature fluctuations, and maintain humidity control to prevent rust and corrosion, ensuring your tools remain in top condition.
How Do I Organize Small Parts and Accessories Effectively?
You'll effectively organize small parts and accessories by using storage bins with clear labeling systems, allowing you to quickly identify and access what you need, saving time and reducing frustration in your renovation project.
Are There Any Tool Storage Solutions for Limited Mobility Individuals?
You'll find adaptive storage solutions designed for limited mobility individuals, offering mobility-friendly features like adjustable shelves, ergonomic handles, and easy-to-reach compartments, ensuring you can access tools effortlessly and efficiently, without straining or struggling.
Conclusion
You've invested time and money into your home renovation, but disorganized tools are holding you back. Don't let cluttered workspaces and wasted time stall your progress. By implementing simple storage hacks, labeling tools, and utilizing vertical space, you'll work more efficiently. For instance, a homeowner in Denver altered their garage into an organized workshop by installing customized tool chests and designating zones for specific tool categories, saving 30 minutes of search time per day. Get back on track and finish your project with ease.
Related Posts
-
7 Must-Have Safety Gears for Brick Wall Renovation
When renovating a brick wall, you'll face a multitude of hazards, making it essential to wear and use the right safet...
-

DIY Plastering Supply Checklist for Home Renovation
To tackle a DIY plastering project for your home renovation, you'll need a solid checklist of supplies. Start with es...
-

What to Look for in Pneumatic Renovation Tools
When selecting pneumatic renovation tools, you'll want to take into account several key factors to guarantee optimal ...


