
What's the Cost of Your Home Renovation Project
When calculating the cost of your home renovation project, several factors come into play. You'll need to evaluate material costs, such as the type of plaster and additional materials like sand and lime, as well as labor costs, whether you're doing it yourself or hiring a professional. Prepare surfaces for plastering by cleaning, repairing, and priming, and don't forget essential tools like hawk or plastering trowels. Room size, complexity, and renovation style also impact costs, and you'll need to budget for removing old plaster, if necessary. By factoring in these considerations, you'll get a better estimate of your project's total cost - and understanding these details will help you navigate the process ahead.
Key Takeaways
• Calculate material costs by considering type of plaster, wastage, and additional materials like sand, lime, and bonding agents.
• Labor costs vary depending on the number of workers, expertise level, and removal techniques, with DIY projects requiring accurate hour tracking.
• Preparation and tool quality impact the overall finish, with essential tools including hawks, floats, taping knives, and sandpaper.
• Project complexity and size affect costs, with larger rooms, unusual shapes, and renovation styles increasing complexity and required precision.
• A contingency fund is crucial for absorbing unexpected expenses, minimizing delays, and ensuring project completion within budget and schedule.
Calculating Plastering Material Costs
To accurately estimate plastering material costs, you'll need to calculate the total square footage of the walls and ceilings that require plastering. This involves measuring the length and width of each surface, taking into account any obstructions or cutouts, and adding up the total area.
Once you have this figure, you can start considering the type of plaster you'll need. Different plaster types, such as lime-based, gypsum-based, or cement-based, have varying costs per square foot. You'll also need to factor in material wastage, which can range from 10% to 20% depending on the complexity of the job and your level of expertise.
To minimize wastage, it's crucial to accurately calculate the amount of plaster required and order accordingly. You should also consider the cost of any additional materials, such as sand, lime, or bonding agents, that may be required for the job.
Labor Costs for DIY Projects
You'll need to factor in your own labor costs when tackling a DIY plastering project, as the time and effort you invest will directly impact the overall cost of the renovation.
As a DIY enthusiast, it's important to acknowledge the value of your time and energy. Calculate your labor costs by tracking the number of hours spent on the project and multiplying it by your desired hourly wage. This will give you a more accurate estimate of the project's total cost.
To minimize labor costs, employ labor-saving techniques such as creating a detailed project schedule, preparing all necessary materials beforehand, and working efficiently.
Additionally, consider budgeting strategies like allocating a contingency fund for unexpected expenses or dividing the project into smaller, manageable tasks to reduce the overall workload.
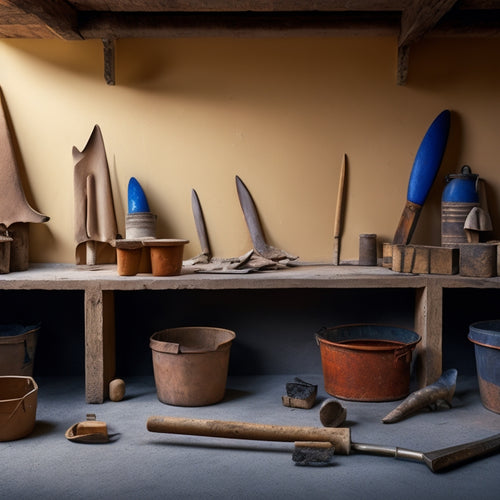
Essential Tools for Plastering
What essential tools do you need to guarantee a successful plastering project, and how do they impact the overall quality of the finish? To achieve a professional-looking result, you'll need the right tools for the job. Here are the essential tools you'll need:
-
Hawk or plastering trowel: A sturdy, well-balanced hawk is vital for scooping and spreading plaster evenly. Its curved shape allows you to hold a large amount of plaster, making the application process more efficient.
-
Plastering float: A float helps to smooth out the plaster, removing any excess material and creating a uniform finish. Its flat surface also enables you to apply pressure, ensuring a strong bond between the plaster and the wall.
-
Taping knife or joint knife: A taping knife is used to apply and smooth out joint compound, ensuring a seamless finish. Its flexible blade allows for precise control, making it ideal for tight spaces.
- Sandpaper or sanding block: After the plaster has dried, a sanding block or sandpaper helps to smooth out any imperfections, creating a surface ready for painting or further decoration.
Room Size and Complexity Factors
Your room's size and complexity greatly influence the cost and duration of your plastering project, as larger areas require more materials and labor, while intricate designs or unusual shapes demand specialized skills and techniques.
When calculating the cost, consider the room dimensions: a larger room means more surface area to plaster, which increases material costs. Additionally, the renovation style you choose will impact the complexity of the project. For instance, a modern, sleek design might require more precise measurements and specialized tools, driving up labor costs.
The complexity of the room's design also affects the project's duration. Unusual shapes, such as curved walls or ceilings, require more time and expertise to plaster correctly. You may need to hire a specialized contractor or invest in custom tools to achieve the desired look.
Moreover, the number of corners, edges, and surfaces to be plastered also increases the project's complexity. By understanding the room's size and complexity factors, you can better estimate the cost and duration of your plastering project, ensuring a successful and stress-free renovation.
Removing Old Plaster Costs
Removing old plaster is a labor-intensive process that drives up costs, especially when dealing with multi-layered or damaged plaster, which can add $2 to $5 per square foot to your overall renovation expenses. As you plan your renovation project, it's crucial to factor in the costs associated with plaster removal.
Here are some key considerations to keep in mind:
-
Plaster removal techniques: The method used to remove the plaster can greatly impact the cost. For instance, using a chemical-based solution can be more expensive than manual removal.
-
Disposal expenses: You'll need to budget for the disposal of the removed plaster, which can range from $50 to $200, depending on the quantity and disposal method.
-
Labor costs: The number of workers required to complete the job, as well as their level of expertise, will influence the overall cost.
- Debris protection: You may need to invest in protective gear and tarps to contain the mess and prevent damage to surrounding areas.
Preparing Surfaces for Plaster
Before applying new plaster, you must verify the underlying surface is properly prepared by cleaning, repairing, and priming it to guarantee a strong bond and a durable finish. This essential step guarantees the plaster adheres correctly, reducing the risk of cracks and other defects. Effective surface preparation techniques involve identifying and addressing any imperfections, such as holes or uneven areas, and applying a suitable primer to create an ideal bonding surface.
| Surface Imperfection | Preparation Technique | Primer Type |
|---|---|---|
| Holes or cracks | Fill with joint compound and sand smooth | Acrylic or polymer-modified |
| Uneven surface | Apply a bonding agent and sand to smooth | Epoxy-based or urethane-modified |
| Peeling paint | Scrape off old paint, sand, and apply a primer | Water-based or oil-based |
Additional Finishing Touches
Once you've applied the final coat of plaster, you'll need to add additional finishing touches to achieve a smooth, polished finish. This is where you get to release your creativity and add those extra details that make your renovation project truly stand out.
Here are some essential finishing touches to take into account:
-
Sand and polish: Use progressively finer grits of sandpaper to smooth out the plaster, followed by a polishing compound to remove any remaining imperfections.
-
Paint options: Choose from a range of paint finishes, from matte to high-gloss, and think about decorative techniques like ragging or sponging to add texture and visual interest.
-
Trim and molding: Install new trim and molding to cover any gaps or joints, and add a touch of elegance to your walls and ceilings.
- Final fixtures: Install light fixtures, switch plates, and outlet covers to complete the look and guarantee everything is functional and safe.
Contingency Funds for Emergencies
As you finalize your home renovation budget, it is crucial to set aside a contingency fund to cover unexpected emergencies that can derail your project's timeline and blow your budget. Emergency expenses can arise from unforeseen structural damage, material shortages, or labor disputes. Without a contingency fund, these unexpected costs can throw your entire project off track.
| Emergency Scenario | Average Cost |
| Structural damage repair | $5,000 - $10,000 |
| Electrical or plumbing rework | $2,000 - $5,000 |
| Material delivery delays | $1,000 - $3,000 |
| Labor dispute resolution | $5,000 - $10,000 |
When planning your budget, consider allocating 10-20% of your total project cost to a contingency fund. This will provide a financial safety net to absorb unexpected expenses, ensuring your project stays on track and within budget. By factoring in emergency expenses, you'll be better equipped to handle the unexpected and avoid costly delays. Effective budget planning and a well-funded contingency fund will give you the power to navigate any renovation challenges that come your way.
Frequently Asked Questions
Can I Reuse Old Plastering Materials to Save Money?
You're considering reusing old plastering materials to cut costs, but it's vital to assess their condition first.
Inspect the materials for signs of damage, contamination, or deterioration. If they're still in good shape, you might be able to reuse them, but it's important to follow proper plastering techniques to maintain a strong bond.
However, sourcing new materials might be a better option, as it assures quality and avoids potential risks.
How Do I Handle Permits and Inspections for My Project?
You're steering the renovation journey like a conductor leading an orchestra - every step requires harmony and precision.
When it comes to permits and inspections, you'll need to synchronize with local authorities. Start by submitting a detailed permit application, outlining your project's scope and timeline.
Be prepared to meet inspection requirements, which may include multiple site visits and compliance checks. Stay organized, and you'll hit all the right notes.
What Safety Precautions Should I Take When Plastering?
When you're plastering, you'll want to prioritize safety to avoid injuries and costly mistakes.
Start by wearing essential safety gear like gloves, goggles, and a dust mask to protect yourself from debris and airborne particles.
Mastering proper plastering techniques is also vital, so practice mixing and applying the plaster to achieve a smooth finish.
Additionally, guarantee good ventilation and a clean workspace to minimize hazards and optimize results.
Can I Plaster Over Existing Drywall or Paneling?
When considering plastering over existing drywall or paneling, you'll need to assess the surface's condition first. Make certain it's clean, dry, and free of old adhesive or paint.
For drywall, scrape off any loose debris and sand it smooth. Then, apply a bonding agent to create a solid base for plastering.
With paneling, you may need to install a layer of drywall first.
Proper drywall preparation and plastering techniques will guarantee a strong, durable finish.
How Long Does It Take to Complete a Typical Plastering Project?
You're wondering how long it takes to complete a typical plastering project.
The answer depends on the complexity of the job, the size of the area, and the plastering techniques you choose.
Generally, a small to medium-sized project with basic techniques can take around 3-5 days.
However, larger projects or those requiring more advanced techniques can stretch to 7-10 days or even several weeks.
You'll need to factor in preparation, application, and drying time to create a realistic project timeline.
Conclusion
As you tally up the costs of your home renovation project, remember that every detail adds up like bricks in a wall - each one building upon the last to create a sturdy foundation for your budget.
From plastering materials to labor costs, every factor must be accounted for to avoid costly surprises down the line.
With a solid plan and contingency fund in place, you'll be well-equipped to handle any unexpected expenses that come your way.
Related Posts
-

5 Must-Have Plastering Tools for Safe Renovation
You'll need a range of essential tools to tackle your plastering project safely. Invest in a variety of trowels, incl...
-

DIY Plastering Supply Checklist for Home Renovation
To tackle a DIY plastering project for your home renovation, you'll need a solid checklist of supplies. Start with es...
-
7 Best Plastering Bat Sizes for DIY Renovations
When tackling DIY renovations, you'll want to choose the right plastering bat size to achieve a professional-looking ...


