What You Need for a Successful Block Renovation
Share
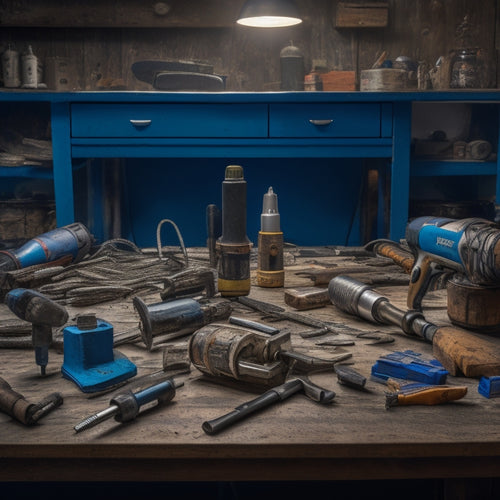
To guarantee a successful block renovation, you'll need a range of essential tools and materials. Start with safety equipment like hard hats, safety glasses, and ear protection to prevent accidents. Heavy-duty demolition tools like jackhammers and wrecking bars will be necessary for teardowns. For cutting cinder blocks, you'll require diamond blades, masonry saws, and reciprocating saws. Don't forget mixing and mortar application tools, block laying and alignment tools, and pointing and grouting equipment. Additionally, invest in cleaning and preparation tools, structural reinforcement materials, and specialized cinder block saws. As you commence your project, these essentials will be vital for achieving a structurally sound and visually appealing outcome, and understanding how to use them will be key to revealing your renovation's full potential.
Key Takeaways
• Ensure essential safety equipment, including hard hats, safety glasses, and steel-capped boots, to prevent accidents and injuries.
• Use heavy-duty demolition tools, such as jackhammers and wrecking bars, to efficiently remove existing structures and prepare for renovation.
• Select the right cinder block cutting tools, including diamond blades and masonry saws, to make precise cuts and fit blocks snugly together.
• Prepare and apply mortar correctly, following mixing ratios and application techniques, to create strong bonds between blocks.
• Utilize specialized tools, such as spirit levels and pointing trowels, to achieve accurate block laying and alignment for a professional finish.
Essential Safety Equipment Needs
Before commencing a block renovation, ascertain you have the following essential safety equipment to protect yourself from potential hazards.
You'll need a thorough array of protective gear to guarantee site safety. Start with a sturdy hard hat to shield your head from falling debris or tools.
Safety glasses or goggles will safeguard your eyes from dust, chemicals, or other airborne particles.
Ear protection, such as earplugs or earmuffs, will prevent hearing damage from loud machinery or power tools.
A dust mask or respirator will filter out hazardous airborne particles, while steel-capped boots will protect your feet from heavy objects or sharp edges.
Don't forget to wear high-visibility vests or clothing to increase your visibility on site.
Finally, invest in a pair of durable gloves to provide grip, protection, and comfort.
By wearing this essential safety equipment, you'll greatly reduce the risk of injury and guarantee a safe working environment.
Heavy-Duty Demolition Tools Required
You'll need to bring out the big guns for the heavy-duty demolition tasks ahead, including tearing down walls and demolishing floors and ceilings.
These tasks require specialized tools that can handle the intense force and resistance you'll encounter.
Your arsenal should include powerful tools like jackhammers, wrecking bars, and reciprocating saws to guarantee you can efficiently dismantle the existing structure.
Tearing Down Walls
With your hard hat securely fastened and safety goggles in place, grab your trusty reciprocating saw or demolition hammer and prepare to tackle the wall demolition process, starting with the most substantial obstacles.
You'll need to identify load-bearing walls, as these require special attention to avoid compromising the structural integrity of the building. Check your renovation permits to confirm you're not violating any regulations.
Next, assess the wall design to determine the best approach for demolition. Are there any electrical or plumbing fixtures that need to be disconnected or removed? Take note of any hidden wires, pipes, or ductwork that could be damaged during the process.
As you begin tearing down walls, start with the topmost sections, working your way down to avoid debris accumulation. Use your demolition tools to break through drywall, plaster, or other materials, taking care not to damage adjacent structures.
Remove any remaining debris, and inspect the area for any hidden hazards. With each wall section removed, you'll be one step closer to realizing your block renovation vision.
Demolishing Floor and Ceiling
As you shift your attention to the floor and ceiling, the sheer scale of destruction required to clear the way for your block renovation demands an arsenal of heavy-duty demolition tools, capable of pulverizing concrete, snapping steel beams, and reducing stubborn flooring materials to rubble.
You'll need to employ specialized floor removal techniques to tackle the various flooring types, from ceramic tiles to hardwood planks. For instance, you might use a rotary hammer to break up concrete or a pry bar to pry up wooden planks.
When it comes to ceiling demolition strategies, you'll need to navigate a complex web of electrical wiring, plumbing, and ductwork. A reciprocating saw or a demolition hammer can help you tackle these obstacles.
Don't forget to wear protective gear, including gloves, safety glasses, and a dust mask, to shield yourself from the debris and dust that will inevitably follow.
Cinder Block Cutting Essentials
When you're about to cut cinder blocks, you'll need to contemplate the block's size and how it will affect your cutting strategy.
You'll also have to choose the right cutting tool for the job, whether it's a circular saw, a masonry blade, or a demolition hammer.
Block Size Considerations
Determine the ideal block size for your renovation project by calculating the number of blocks required to complete each course, taking into account the wall's length, height, and any obstructions or openings.
You'll need to take into account block dimensions, including length, width, and height, to guarantee a snug fit and minimize cutting. Load considerations are also essential, as you'll need to verify the blocks can support the weight of the structure and any additional loads, such as roofing or flooring materials.
Visualize the wall's layout, taking note of corners, curves, and any irregularities that may affect block placement.
You may need to adjust block sizes or use specialized blocks, such as corner blocks or bullnose blocks, to accommodate these features. By carefully planning your block layout, you can minimize waste, reduce labor costs, and guarantee a sturdy, long-lasting structure.
Remember to consult local building codes and regulations, as well as manufacturer guidelines, to verify your block selection meets all necessary requirements.
With careful planning and attention to detail, you can create a strong, durable foundation for your renovation project.
Cutting Tool Options
With precision-cut blocks vital to a successful renovation, you'll need to select the right cutting tool from a variety of options, each designed to make clean, accurate cuts in cinder blocks.
You can choose from diamond blades, masonry saws, and reciprocating saws, each with its own strengths and weaknesses. Diamond blades, for instance, are ideal for making precise cuts and can be used with a wet or dry cutting technique.
Masonry saws, on the other hand, are better suited for cutting larger blocks and can be used with a variety of cutting techniques, from slow and steady to fast and aggressive.
Regardless of the tool you choose, proper tool maintenance is essential to guarantee clean cuts and extend the life of your equipment. Regularly clean and inspect your tools, and store them in a dry place to prevent corrosion.
Safety Precautions Needed
As you prepare to cut cinder blocks, don your personal protective equipment (PPE), including safety glasses, a dust mask, and gloves, to shield yourself from the hazards of flying debris and airborne particles. This is vital to guarantee your safety and well-being throughout the renovation process.
Here are three essential safety precautions to keep in mind:
-
Clear the area: Make sure the work zone is free from obstacles and tripping hazards to prevent accidents and injuries.
-
Establish emergency procedures: Identify the nearest first aid kit, fire extinguisher, and emergency exit routes in case of an unexpected incident.
-
Stay alert and focused: Avoid distractions, take regular breaks, and maintain a steady pace to prevent fatigue and mistakes.
Mixing and Mortar Application
You'll need to accurately proportion and mix the mortar components to achieve a workable, consistent batch that adheres well to the block and fills gaps effectively. This involves selecting the right mortar type for your block renovation, whether it's type S, N, or M, each suited for specific applications and environmental conditions.
Once you've chosen the right mortar, it's crucial to follow the manufacturer's instructions for mixing, as the ratio of cement to sand to water can greatly impact the final product's performance.
When it comes to application techniques, you'll want to use a level, notched trowel to spread the mortar evenly onto the block, holding the trowel at a 45-degree angle. This guarantees a consistent, 1/2-inch thick layer that allows for proper adhesion and gap filling.
As you lay the blocks, use a gentle twisting motion to remove excess mortar, and use a damp cloth to wipe away any spills or smudges.
Block Laying and Alignment Tools
To guarantee precise block placement and maintain a level, plumb structure, you're going to need a set of specialized tools, including a spirit level, straightedge, and line and pin system.
These tools will help you master the art of block laying and alignment, assuring your walls are straight and your corners are square.
Here are the essential tools you'll need to get it right:
-
Spirit Level: This tool assures your blocks are perfectly horizontal and vertical, preventing deviations that can compromise the entire structure.
-
Straightedge: A long, straight ruler helps you draw accurate lines and maintain a consistent block pattern, keeping your walls looking sharp and professional.
-
Line and Pin System: This system allows you to create a precise grid, guiding your block laying techniques and alignment strategies for a flawless finish.
Pointing and Grouting Tools Needed
With your blocks perfectly laid and aligned, it's time to focus on the crucial step of pointing and grouting, which requires a specific set of tools to guarantee a strong, durable bond between the blocks. To achieve professional-looking results, you'll need the right tools for the job.
For pointing, you'll need a pointing trowel, which is used to fill gaps between blocks with mortar. A grout float is also essential for spreading and smoothing grout between the blocks. You'll also require a grout sponge for cleaning excess grout and a grout finishing tool for creating a smooth, even finish.
When it comes to grouting methods, you can choose from various techniques, such as bucket mixing or using a grout mixer. For pointing techniques, you can opt for the 'buttering' method, where you apply mortar to the block before laying, or the 'slot' method, where you fill the gap between blocks with mortar after laying.
Cleaning and Preparation Tools
Before applying mortar or grout, remove dirt, debris, and excess material from the blocks' surfaces using a stiff-bristled brush or a wire scrub brush to guarantee a strong bond. This vital step guarantees a clean slate for your renovation project.
You'll want to add these essential cleaning and preparation tools to your checklist:
-
Stiff-bristled brush: Perfect for sweeping away loose debris and dirt from the block surfaces.
-
Wire scrub brush: Ideal for tackling tougher grime and stains, guaranteeing a thorough clean.
-
Dustpan and broom: For efficiently collecting and disposing of debris, keeping your workspace tidy.
These cleaning supplies will help you prepare your blocks for renovation, guaranteeing a strong and durable bond between the blocks and mortar or grout.
Structural Reinforcement Materials
You'll need to incorporate structural reinforcement materials into your block renovation to confirm the integrity and stability of your structure, particularly in areas subjected to heavy loads or stress. This is vital to guarantee your building can withstand external forces like wind, earthquakes, or weight from above. To achieve this, you'll need to select the right materials and apply effective reinforcement techniques.
When it comes to material selection, you'll want to evaluate options like rebar, fiber mesh, or even advanced materials like carbon fiber. Each has its strengths and weaknesses, so it's important to choose the one that best suits your project's specific needs. For instance, rebar is ideal for high-stress areas, while fiber mesh provides a more uniform distribution of force.
Proper application is just as important as material selection. You'll need to confirm that your chosen material is correctly positioned and secured to maximize its effectiveness. This may involve anchoring rebar to the foundation or carefully laying out fiber mesh to prevent wrinkles or tears.
Specialized Cinder Block Saws
To accurately cut and shape cinder blocks, which are critical components of your renovation, you'll need to employ specialized saws designed specifically for this task. Cinder blocks offer numerous benefits, including durability, resistance to weathering, and versatility in construction. However, they require unique cutting techniques to reveal their full potential.
To master the art of cutting cinder blocks, consider investing in the following specialized saws:
-
Masonry saws: These saws are designed to cut through dense materials like cinder blocks, using a diamond-edged blade to make precise cuts.
-
Wet saws: Wet saws use a rotating blade and a water-cooling system to reduce dust and prevent overheating, making them ideal for cutting cinder blocks.
-
Dry saws: Dry saws are lightweight and portable, making them perfect for smaller renovation projects or when working in confined spaces.
Frequently Asked Questions
Can I Reuse Old Mortar and Mix It With New Materials?
Can you reuse old mortar and mix it with new materials? Honestly, it's not recommended.
Old mortar's properties, like its binding strength, may have degraded over time. When you mix it with new materials, you risk compromising the entire structure's integrity.
Instead, focus on mastering advanced mixing techniques to achieve a consistent, high-quality blend. This guarantees a strong, reliable bond between your blocks.
How Do I Ensure Proper Drainage in My Block Renovation?
As you plan your block renovation, consider the importance of proper drainage.
Take, for instance, the case of a homeowner in Seattle who neglected to install a proper drainage system, resulting in water accumulation that compromised the structural integrity of their walls.
To avoid this, you'll want to explore drainage solutions that prioritize water management.
Install a French drain, for example, which redirects water away from your foundation, ensuring a dry and stable structure.
Are There Specific Codes for Residential Block Renovations?
As you immerse yourself in your block renovation, you'll need to navigate specific codes to guarantee compliance.
You'll require building permits, which involve meeting safety regulations set by your local authorities.
These codes dictate everything from structural integrity to electrical installations.
Can I Perform a Block Renovation Without a Professional Contractor?
Can you tackle a block renovation on your own? While it's possible, you'll need to be comfortable with DIY techniques and accurate cost estimation.
Visualize the project's scope, and consider your skills and time commitment. Without a professional contractor, you'll be responsible for ensuring compliance with local codes and regulations.
Be prepared to invest time in planning, permitting, and execution, or risk costly mistakes and delays.
How Long Does a Typical Block Renovation Project Take to Complete?
Oh, you think you're a renovation rockstar, ready to tackle that block renovation like a pro?
Newsflash: it's not a weekend DIY project! A typical block renovation takes months, not days.
You'll need to estimate a realistic timeline, breaking it down into project phases: demo, design, permits, construction, and final inspections.
Don't even think about moving in until the dust settles – literally.
Conclusion
As you stand back to admire your newly renovated block structure, the sweat-drenched satisfaction is palpable.
Coincidentally, the very tools that once lay scattered around you now gather dust, a proof of a job well done.
The hum of the cinder block saw still echoes in your mind, a reminder of the precision and care that went into every cut, every layer, every carefully placed block.
Your hard work has paid off, and the result is a masterpiece of structural integrity and visual appeal.
Related Posts
-

Why Invest in Quality Plastering Tools for Renovation
When renovating, investing in quality plastering tools is essential for achieving professional-looking results and mi...
-

7 Best Home Renovation Project Checklists With Timelines
You're about to initiate a home renovation project, and establishing a clear plan with timelines is vital to staying ...
-

What to Look for in Pneumatic Renovation Tools
When selecting pneumatic renovation tools, you'll want to take into account several key factors to guarantee optimal ...


