What Tools Do I Need for Ceiling Renovation
Share
You'll need a range of tools to tackle a ceiling renovation project safely and effectively. Essential safety gear includes a hard hat, safety goggles, dust mask, gloves, and steel-toed boots. Measuring and marking tools, like a tape measure and laser level, guarantee accuracy. Cutting and scraping tools, such as a ceiling scraper and utility knife, help remove old materials. Sanding and smoothening tools, including sandpaper and electric sanders, prepare the surface for finishing. Plastering, painting, and finishing tools, as well as ladders and scaffolding, are also necessary. With the right tools, you'll be well-equipped to transform your ceiling - and that's just the starting point for a successful renovation.
Key Takeaways
• Essential safety gear includes hard hats, safety goggles, dust masks, gloves, and steel-toed boots to prevent injuries.
• Measuring and marking tools like measuring tapes, marking systems, and laser levels ensure accurate calculations and precise markings.
• Cutting and scraping tools such as ceiling scrapers, utility knives, and putty knives are necessary for removing old materials and debris.
• Sanding and smoothening tools like sandpaper, electric sanders, and grit comparison charts help achieve a smooth finish.
• Additional tools like ladders, scaffolding, paintbrushes, and cleaning equipment are required for a successful ceiling renovation project.
Essential Safety Gear for Ceiling Work
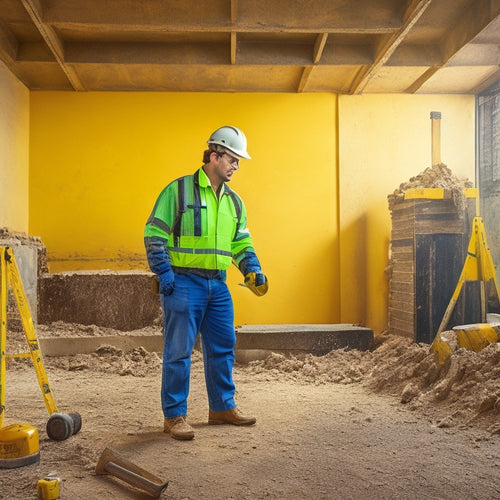
When tackling a ceiling renovation, you'll need to wear essential safety gear to protect yourself from falling debris, dust, and other hazards. A hard hat is a must-have to prevent head injuries from falling objects or debris.
Additionally, safety goggles will shield your eyes from dust, drywall particles, and other airborne contaminants. You'll also need a dust mask or respirator to prevent inhaling harmful particles that can cause respiratory issues.
Don't forget to wear gloves to protect your hands from cuts, abrasions, and drywall dust. A long-sleeved shirt, pants, and closed-toe shoes will further minimize skin exposure. Steel-toed boots are also recommended to protect your feet from heavy objects.
It's vital to wear this safety gear consistently throughout the renovation process to guarantee your protection. Remember, safety should always be your top priority when working on a ceiling renovation project.
Measuring and Marking Tools Required
When you're renovating a ceiling, accurate measurements are vital to guarantee a professional-looking finish.
You'll need a reliable measuring tape to take precise readings, and you'll want to develop a system for marking those measurements clearly on the ceiling.
Measuring Tape Uses
You'll rely heavily on a measuring tape to gather accurate dimensions of your ceiling, as it's essential for calculating material quantities and identifying potential installation challenges.
To get the most out of your tape measure, it's important to master effective tape measure techniques. This includes taking precise readings, using the correct units of measurement, and accounting for any obstacles or irregularities in the ceiling. Regular measuring tape maintenance is also essential to guarantee accuracy. Check your tape regularly for worn or damaged edges, and clean it periodically to prevent dirt and debris buildup.
When taking measurements, make sure to hold the tape level and secure it firmly to the surface. Use the correct extension or lock mechanism to prevent the tape from retracting or slipping during use.
Additionally, consider investing in a high-quality tape measure with a sturdy design and clear markings to minimize errors. By following these best practices, you'll be able to gather accurate measurements and set yourself up for a successful ceiling renovation.
Accurate Marking Tips
With precise measurements in hand, make certain to transfer them accurately to the ceiling using a high-visibility marker and a straightedge. This guarantees that your marks are clear, legible, and correctly aligned. This is essential, as inaccurate marks can lead to costly mistakes and rework.
When marking the ceiling, employ effective marking techniques, such as using a laser level to create a precise reference line. This will help you achieve accurate alignment and guarantee that your marks are straight and level. Additionally, consider using alignment strategies like snapping a chalk line or creating a grid pattern to guide your marks.
Remember to always mark the ceiling in a well-lit area, and use a marker that provides high-contrast visibility. Avoid marking over existing textures or patterns, as this can make your marks difficult to read.
Cutting and Scraping Ceiling Tools
For efficient ceiling renovation, equip yourself with the right cutting and scraping tools to tackle stubborn textures, old adhesives, and deteriorated materials. You'll need a reliable ceiling scraper to remove old paint, texture, and adhesives. Mastering ceiling scraper techniques is essential to avoid damaging the ceiling surface. Always maintain a firm grip and apply gentle pressure, working in small sections to maintain control.
When it comes to cutting tools, prioritize safety above all. Wear protective gear, including gloves, safety glasses, and a dust mask, to minimize exposure to debris and dust. Make certain your cutting tool is properly maintained, with sharp blades and a secure grip.
Cutting tool safety is paramount, as a careless mistake can lead to accidents and injuries. Use a utility knife or a reciprocating saw for precise cuts, and a putty knife for scraping and removing old materials.
With the right cutting and scraping tools, you'll be well-equipped to tackle even the most challenging ceiling renovation projects.
Sanding and Smoothening Tools Needed
When you're ready to smooth out your ceiling, you'll need to choose the right sanding and smoothening tools for the job.
You'll want to select sandpaper with the appropriate grit level, which can range from coarse to fine, depending on the surface you're working with.
Next, you'll need to decide on an electric sander type, such as a belt sander or orbital sander, to efficiently remove imperfections and achieve a uniform finish.
Sandpaper Grit Options
You'll need to select the right sandpaper grit to achieve a smooth, even finish on your ceiling, as the wrong choice can lead to scratches, swirls, or unevenness.
When it comes to sandpaper types, you'll encounter various grit options, each designed for specific tasks. Coarse grits (80-100) are ideal for removing old textures, rough surfaces, or heavy sanding. Medium grits (120-150) are suitable for general sanding and smoothing, while fine grits (220-240) are perfect for final sanding and polishing.
For a ceiling renovation, you'll likely need a combination of these grits. Start with a coarse grit to remove any imperfections, then progress to medium and fine grits for a progressively smoother finish.
A grit comparison chart can help you determine the best sequence for your specific project. Remember, it's important to work progressively through the grits, as skipping a step can lead to unevenness or scratches.
Electric Sander Types
Selecting the right electric sander type is essential to efficiently sand and smooth your ceiling, as different models are designed to tackle specific tasks and surface types. You'll need to take into account the size, shape, and material of your ceiling, as well as the level of sanding required.
There are several sander types to choose from, each suited for specific tasks. Belt sanders are ideal for large, flat areas and are effective for removing old finishes and sanding down rough wood.
Orbital sanders, also known as random orbit sanders, are perfect for smaller areas and are great for sanding curved or irregular surfaces. Detail sanders, with their small, triangular heads, are designed for tight spaces and delicate work.
You'll also find angle sanders, which are ideal for sanding corners and edges. When choosing an electric sander, take into account the power, speed, and ergonomic design to guarantee you can work efficiently and comfortably.
With the right sander type, you'll be able to achieve a smooth, even finish on your ceiling.
Plastering and Skimming Essentials
Proper preparation and attention to detail are essential as you tackle the plastering and skimming phase of your ceiling renovation project.
You'll need a solid understanding of plaster mixing and skimming techniques to achieve a smooth, even finish. Start by gathering the necessary tools, including a mixing bucket, trowel, and hawk.
For plaster mixing, use a ratio of 1 part cement to 2 parts sand, and add water gradually until you reach the desired consistency.
When it comes to skimming, master the 'fetch and spread' technique, where you scoop up a small amount of plaster with your trowel and spread it evenly across the ceiling. Work in sections, using long, smooth strokes to cover the entire area.
As you gain confidence, you can experiment with different skimming techniques, such as the 'circle and sweep' or 'V-pattern' methods.
Remember to clean your tools frequently and keep the area well-ventilated to avoid inhaling dust and plaster particles.
With practice and patience, you'll achieve a professional-looking finish that sets the stage for the rest of your ceiling renovation project.
Painting and Finishing Tools List
With your newly plastered and skimmed ceiling serving as a pristine canvas, gather the necessary painting and finishing tools to bring your design vision to life. You'll need a range of tools to achieve the perfect finish.
Start with high-quality paintbrushes in various sizes to tackle edges, corners, and large surfaces. Invest in a paint roller extension pole and microfiber roller covers for efficient coverage. Don't forget a paint tray and liner for mess-free painting.
Choose the right paint type for your ceiling, whether it's flat, eggshell, satin, or semi-gloss. Consider the finish techniques you want to achieve, such as texture, stenciling, or faux finishing. You may need specialized tools like texturing guns, stencil brushes, or faux finishing combs.
Add a putty knife for filling small imperfections and a sanding block for smooth finishes. Finally, have a clean, lint-free cloth on hand for wiping down surfaces and removing dust.
With these painting and finishing tools, you'll be well-equipped to transform your ceiling into a stunning focal point.
Ladders and Scaffolding Requirements
Your ceiling renovation project demands reliable access to high and hard-to-reach areas, making ladders and scaffolding essential components of your toolkit.
You'll need to choose the right ladder type for the task at hand, considering factors like weight capacity, material, and height. For instance, step ladders are ideal for low-to-medium height tasks, while extension ladders are better suited for taller areas.
When it comes to scaffolding, safety should be your top priority. Here are some key considerations:
-
Scaffolding safety: Confirm your scaffolding is sturdy, level, and securely anchored to the wall or floor to prevent collapse or shifting.
-
Ladder stability: Always maintain three points of contact with the ladder, whether it's two hands and one foot or two feet and one hand.
-
Height restrictions: Never lean over the side of the ladder or scaffold to reach for something – instead, move the ladder to a position that allows you to work comfortably within your reach.
Miscellaneous Tools for Cleanup
Efficiency demands that you arm yourself with the right miscellaneous tools for cleanup to tackle dust, debris, and other remnants of your ceiling renovation project. You'll need these tools to implement effective cleanup techniques and guarantee proper disposal methods. Don't underestimate the importance of a thorough cleanup, as it's vital for a successful renovation.
Here are some essential miscellaneous tools for cleanup:
| Tool | Description |
|---|---|
| Vacuum Cleaner | Powerful suction for dust and debris removal |
| Dustpan and Brush | Efficient sweeping and collection of debris |
| Trash Bags | Heavy-duty bags for containing and disposing of waste |
With these tools, you'll be well-equipped to handle the cleanup process. Remember to always follow proper disposal methods and safety protocols to avoid accidents and injuries. By incorporating these tools into your ceiling renovation project, you'll guarantee a smooth and successful outcome.
Frequently Asked Questions
Can I Reuse Old Ceiling Materials or Do I Need New Ones?
When deciding whether to reuse old ceiling materials, you'll need to contemplate the type of material and its condition.
For instance, if you have asbestos-containing ceiling tiles, it's best to replace them due to safety concerns.
Conduct a renovation cost analysis to weigh the costs of new materials against the potential risks of reusing old ones.
If your ceiling material is still in good condition, reusing it might be a cost-effective option.
However, if it's damaged or outdated, it's better to opt for new materials to guarantee a safe and efficient renovation.
How Do I Handle Asbestos or Lead-Based Paint During Renovation?
You're tackling a ceiling renovation, but first, you need to address potential hazards.
If you suspect asbestos or lead-based paint, don't risk exposure. You must test for asbestos and consider lead remediation.
Hire a certified professional for asbestos testing, and if positive, contain the area.
For lead, follow EPA guidelines for safe removal.
Don't take shortcuts - your health depends on it.
What's the Best Way to Minimize Ceiling Dust and Debris?
When tackling a ceiling renovation, you'll want to prioritize dust control and debris management to avoid a messy nightmare.
You'll need to seal off the area with plastic sheets, cover floors and furniture, and use a vacuum with a HEPA filter to minimize airborne particles.
Additionally, use a dust-containment system or a debris chute to direct dust and debris away from the work area, ensuring a cleaner and safer renovation process.
Can a DIYER Complete a Ceiling Renovation Without Professional Help?
You're wondering if you can tackle a DIY ceiling renovation on your own. The answer is yes, but it's essential to have the right skills and renovation tools.
If you're comfortable with drywall installation, taping, and finishing, you can save money and achieve professional-looking results.
However, if you're not experienced with ceiling work, it's recommended to seek professional help to avoid costly mistakes and guarantee a safe, successful project.
How Long Does a Typical Ceiling Renovation Project Take to Complete?
You'll be waiting an eternity for the perfect ceiling, but let's get real - a typical ceiling renovation project takes around 3-6 weeks to complete, depending on the scope.
Break it down into manageable project phases, and you'll be done in no time. The renovation timeline can be divided into prep, demo, installation, and finishing touches.
Stay focused, and you'll be enjoying your new ceiling in a flash!
Conclusion
You've gathered all the necessary tools for your ceiling renovation project. Now, you're ready to tackle the task with confidence.
You've got the essential safety gear to protect yourself,
the measuring and marking tools to guarantee accuracy,
the cutting and scraping tools to remove old material,
the sanding and smoothening tools to create a smooth surface,
the plastering and skimming essentials to apply new layers,
the painting and finishing tools to add the final touches,
and the ladders and scaffolding to access high areas.
Related Posts
-

Top Drill for Concrete Wall Renovation
When choosing the top drill for your concrete wall renovation, you'll want to prioritize key features like drill powe...
-

5 Vital Safety Tips for DIY Renovation Success
When tackling a DIY renovation, you'll need to prioritize safety above all else. Start by protecting yourself from fl...
-

7 Best Plastering Bat Sizes for DIY Renovations
When tackling DIY renovations, you'll want to choose the right plastering bat size to achieve a professional-looking ...


