What Bucket Size Is Best for Home Renovation
Share
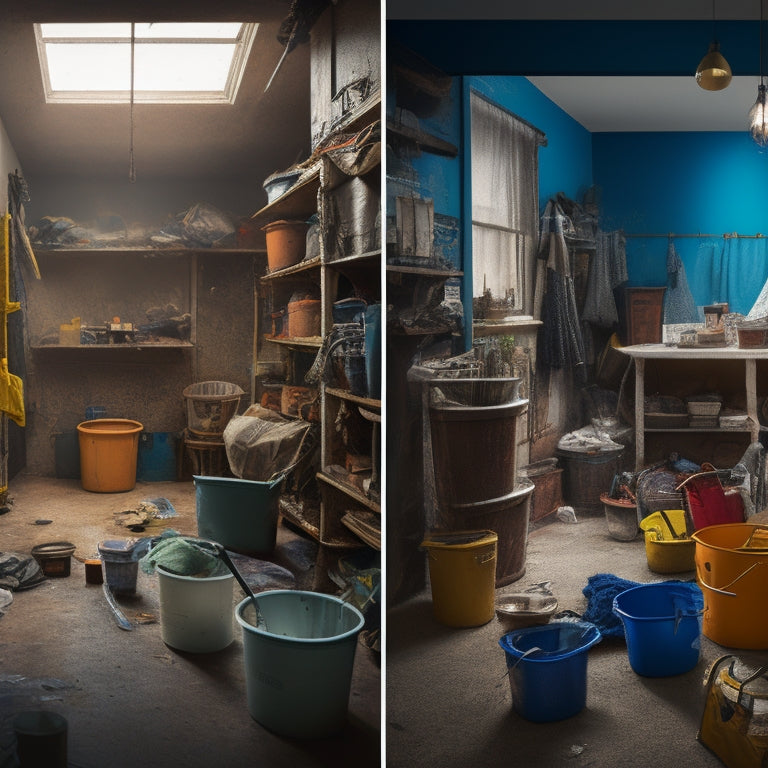
When choosing a bucket for your home renovation project, you'll want to select a size that matches the scale of your project for efficient cleanup and ideal material handling. A bucket that's too small will lead to frequent emptying, slowing you down, while one that's too large will waste space and resources. Consider the volume of debris and cleanup frequency to determine the best size. Typically, 2-3 gallon buckets are suitable for general-purpose tasks, but you may need smaller or larger sizes depending on your specific needs. By selecting the right bucket size, you'll be able to stay on track and uncover more opportunities to streamline your project.
Key Takeaways
• For home renovation, choose a bucket size that matches project scale to ensure efficient cleanup and minimize waste.
• 2-3 gallon buckets are ideal for general-purpose tasks and small batches, while 5-gallon buckets are better for bulk materials.
• Consider the volume of debris and cleanup frequency when selecting a bucket size to optimize project efficiency.
• Small buckets (1-5 gallons) are perfect for confined areas, providing precision and control while reducing tripping hazards.
• Selecting the right bucket size reduces labor costs, project timelines, and material damage, making it a crucial decision for home renovation.
Choosing the Right Bucket Size
When tackling a home renovation project, you'll need to select a bucket size that accurately matches the scale of your task to guarantee efficient cleanup and minimize waste. A bucket that's too small will lead to frequent emptying, slowing down your project timeline and increasing labor costs. On the other hand, a bucket that's too large will result in wasted space and resources.
The bucket size impact on your project timeline can't be overstated. A well-chosen bucket size guarantees that you can complete tasks quickly and efficiently, without interruptions.
It's crucial to take into account the volume of debris generated by your project and the frequency of cleanup. A larger bucket may be necessary for projects involving heavy demolition or large-scale renovations.
Best Concrete Bucket Size for Wall Construction
You'll need a concrete bucket size that can handle the high volume of debris generated by wall construction, which typically involves heavy concrete demolition and disposal. For this, you'll want to opt for a larger concrete bucket size, typically ranging from 5-10 gallons. This size can efficiently manage the large amounts of debris, reducing the number of trips needed to dispose of the waste.
When it comes to wall construction techniques, you'll often employ methods like pouring concrete for foundation walls, building block walls, or constructing insulated concrete forms (ICFs). In these cases, you'll need a concrete bucket that can withstand the rigors of heavy use and constant filling and emptying. Look for concrete bucket types made from heavy-duty materials, such as steel or fiberglass, which can withstand the weight and abrasion of concrete and debris.
A larger concrete bucket size will also allow you to work more efficiently, as you'll be able to transport more material at once, reducing labor time and increasing productivity. By choosing the right concrete bucket size for wall construction, you'll be able to tackle your project with confidence and efficiency.
Mixing Large Quantities of Concrete
When you're working on a large-scale renovation project, you'll likely need to mix massive quantities of concrete.
To guarantee you're getting the right consistency and strength, you'll need to master concrete mixing ratios and batch size calculations.
Concrete Mixing Ratios
To achieve a consistent and strong concrete mix, you need to maintain a precise ratio of cement, sand, and aggregate, as even slight variations can greatly impact the final product's quality and durability. When mixing large quantities of concrete, it's vital to understand the different concrete types and their corresponding mixing ratios.
Here's a general guide to concrete mixing ratios for various concrete types:
| Concrete Type | Cement (kg) | Sand (kg) | Aggregate (kg) |
|---|---|---|---|
| General Purpose | 1 | 2 | 4 |
| High Strength | 1 | 1.5 | 3 |
| Waterproof | 1 | 2.5 | 5 |
| Fiber Reinforced | 1 | 2 | 3.5 |
| Fast Setting | 1 | 1 | 2 |
Remember to adjust these ratios based on your specific mixing techniques and the type of cement you're using. It's also vital to follow the manufacturer's instructions for the cement and any additives you're using. By maintaining the right mixing ratio, you'll guarantee a strong and durable concrete structure that meets your project's requirements.
Batch Size Calculations
Calculating the ideal batch size is essential for mixing large quantities of concrete, as it directly impacts the efficiency of your project and the quality of the final product.
You'll want to optimize your batch size to minimize material waste and reduce the number of batches you need to mix. To do this, you'll need to take into account the volume of concrete required for your project, the capacity of your mixing equipment, and the labor resources available.
When calculating your batch size, start by determining the total volume of concrete needed for your project.
Then, divide that number by the capacity of your mixing equipment to find the ideal batch size. For example, if you need 10 cubic feet of concrete and your mixer can handle 2 cubic feet at a time, your ideal batch size would be 5 batches.
By optimizing your batch size, you'll reduce material waste and guarantee that you have enough labor resources to complete each batch efficiently.
This will help you stay on schedule and within budget, making your project a success.
Standard Bucket Sizes for Builders
As you plan your home renovation project, you need to evaluate the standard bucket sizes that builders use to guarantee you're working efficiently.
You'll want to choose a bucket capacity that meets your material handling needs, whether you're mixing small batches of concrete or hauling heavy debris.
Bucket Capacity Options
You'll typically find standard bucket sizes for builders ranging from 1-5 gallons, with 2-3 gallon buckets being the most commonly used for general-purpose tasks. These mid-range buckets offer a good balance between capacity and portability.
When choosing the right bucket size, consider the bucket weight and how it will affect your workflow. A heavier bucket can be cumbersome, especially when working on upper floors or ladders. On the other hand, a larger bucket may be more convenient for mixing and storing materials, but it may be too heavy to lift when full.
Bucket shapes also play an essential role in determining the best size for your needs. Square or rectangular buckets with flat bottoms are ideal for mixing and storing materials, while round buckets with curved sides are better suited for scooping and pouring.
You may also come across buckets with ergonomic handles, which can reduce fatigue and improve grip. By considering these factors, you can select the right bucket size and shape to optimize your home renovation workflow.
Material Handling Needs
When handling materials for your home renovation, pick a bucket size that matches the volume of the materials you need to transport, store, or mix, as this will directly impact your workflow efficiency. A bucket that's too small will lead to frequent refills, slowing you down, while one that's too large may be cumbersome to handle.
Standard bucket sizes for builders, such as 2, 3, 4, or 5-gallon buckets, cater to various material handling needs.
For instance, a 2-gallon bucket is ideal for mixing small batches of adhesives or patching compounds, whereas a 5-gallon bucket is better suited for storing and transporting bulkier materials like drywall screws or paint cans.
When it comes to material storage solutions, consider the size and shape of the materials you need to store. For example, long, thin items like pipes or lumber may require a longer, narrower bucket, while bulkier items like sand or gravel may need a larger, more robust bucket.
Job Site Efficiency
Optimizing job site efficiency relies on selecting standard bucket sizes that streamline tasks, reduce labor, and minimize waste. Builders often favor 2, 3, 4, or 5-gallon buckets for their versatility and convenience.
When you choose the right bucket size, you can optimize your site layout and workflow, ensuring that materials are easily accessible and reducing the time spent searching for tools or supplies. This, in turn, enables you to complete tasks more efficiently, reducing labor costs and project timelines.
By standardizing your bucket sizes, you can also minimize waste and reduce the risk of material damage or loss. For instance, using 2-gallon buckets for small tasks and 5-gallon buckets for larger tasks can help you allocate resources more effectively.
Small Buckets for Tight Spaces
In tight spaces, small buckets with capacities ranging from 1-5 gallons are ideal for containing debris and messes, allowing you to work efficiently without sacrificing precious floor space.
These compact buckets provide excellent maneuverability, making it easy to navigate through narrow corridors and confined areas. You can place them in compact storage spaces, such as under sinks or in tight corners, keeping them out of the way until you need them.
When working in cramped quarters, every inch counts, and small buckets help you make the most of the available space. They're perfect for collecting dust, debris, and other materials generated during renovation projects.
With a small bucket, you can focus on the task at hand without worrying about tripping over a large, cumbersome container. By choosing the right bucket size for your tight space, you'll be able to work more efficiently and effectively, saving you time and energy in the long run.
Measuring Concrete for Wall Footings
You'll need to accurately measure the concrete required for wall footings to confirm a solid foundation. This means calculating the volume of each footing based on the wall's length, thickness, and height.
To do this, you'll need to determine the footing depth, which typically ranges from 12 to 18 inches. Next, calculate the volume of each footing in cubic feet by multiplying the length, width, and height of the footing. For example, a 10-foot long, 1-foot wide, and 1.5-foot deep footing would require approximately 15 cubic feet of concrete.
When selecting a concrete type, consider factors such as compressive strength, workability, and finishability. Common concrete types for wall footings include ready-mix, high-strength, and fiber-reinforced concrete.
Be sure to choose a concrete type that meets the structural requirements of your project. By accurately measuring the concrete required for wall footings and selecting the right concrete type, you'll confirm a solid foundation for your home renovation project.
Bucket Material and Durability
When it comes to selecting the right bucket for your home renovation project, the material and durability of the bucket play an essential role in ensuring efficient and safe concrete mixing and transport. You want a bucket that can withstand the rigors of repeated use, exposure to harsh weather conditions, and contact with abrasive materials.
The table below compares the properties of three common bucket materials:
| Material | Bucket Longevity | Material Resistance |
|---|---|---|
| Steel | High | Excellent (resists rust, corrosion) |
| Plastic | Medium | Good (resists cracks, fading) |
| Fiberglass | Low | Fair (prone to cracks, brittleness) |
As you can see, steel buckets offer the best combination of longevity and material resistance, making them an excellent choice for heavy-duty concrete mixing and transport. While plastic buckets are a close second, fiberglass buckets may not be the best option due to their limited lifespan and susceptibility to damage.
When choosing a bucket, consider the demands of your project and the level of durability you need. A high-quality bucket made from the right material will save you time, money, and hassle in the long run.
Calculating Bucket Size Needs
Accurately calculating your bucket size needs is essential to efficiently managing your home renovation project, and it starts with determining the volume of concrete required for each task.
You'll need to take into account the size of the areas you're working on, as well as the thickness of the concrete or mortar you're applying. For example, if you're laying tile, you'll need to calculate the volume of mortar needed to cover the entire surface.
To do this, measure the length, width, and height of the area, and multiply these values together to get the total volume. Then, take into account the coverage rate of the mortar or concrete, which can usually be found on the manufacturer's instructions.
Divide the total volume by the coverage rate to get the total amount of material needed. Once you have this figure, you can determine the ideal bucket volume for your renovation projects.
Remember to also take into account the number of workers on site and the pace of the project. This will help you determine how many buckets you'll need to have on hand to keep the project moving smoothly.
Convenience Vs. Cost Considerations
With your bucket size needs calculated, the next step is to weigh the convenience of having multiple buckets on hand against the cost of purchasing and storing them.
You'll need to evaluate the convenience factors that come with having multiple buckets, such as reduced downtime and increased productivity. Having multiple buckets means you can continue working uninterrupted, as you won't have to wait for a single bucket to be cleaned and refilled. However, this convenience comes at a cost. Purchasing and storing multiple buckets can be expensive, which may not be cost-efficient for your project.
To strike a balance, assess the frequency of use and the importance of each task. If a particular task requires a specific bucket size and is used frequently, it may be worth investing in multiple buckets.
On the other hand, if a task is infrequent or can be adapted to use a different bucket size, it may be more cost-efficient to use a single bucket. By weighing these factors, you can make an informed decision that balances convenience and cost efficiency.
Frequently Asked Questions
Can I Use a Bucket With a Broken Handle for Heavy Loads?
You shouldn't use a bucket with a broken handle for heavy loads, as it's a safety hazard. Instead, consider bucket alternatives or handle repairs to guarantee a sturdy grip and prevent accidents.
How Often Should I Clean My Bucket to Maintain Its Durability?
Did you know that 80% of bucket failures are due to poor maintenance? You should clean your bucket daily, or at least every 3-4 uses, to maintain its durability; incorporate these bucket maintenance tips into your cleaning frequency to extend its lifespan.
Are There Any Bucket Size Regulations for Commercial Construction Sites?
You'll find that commercial construction sites adhere to strict bucket size standards, as outlined in construction safety guidelines, ensuring worker safety and efficient material handling, so it's crucial to familiarize yourself with these regulations.
Can I Use a Bucket With Rust for Mixing and Pouring Concrete?
As you gaze into the rusty bucket, imagine the corrosive effects on your freshly mixed concrete. Don't risk it! Opt for a rust-resistant bucket, ensuring rust prevention and a smooth concrete mixing experience.
Do I Need a Special Bucket for Mixing and Pouring Epoxy?
When mixing and pouring epoxy, you'll need a dedicated bucket to prevent contamination. Choose a clean, rust-free container and follow epoxy mixing techniques and pouring epoxy tips to guarantee a successful, bubble-free application.
Conclusion
You've got your calculations down, and your bucket size needs are clear.
But before you start hauling concrete, ask yourself: are you prepared to lift and maneuver your buckets efficiently?
With the right bucket size, you'll save time, energy, and potentially costly mistakes.
So, what're you waiting for? Get the right bucket for the job and start building with confidence!
Related Posts
-

Why Home Renovators Need Smart Tool Storage Now
You need a smart tool storage system that streamlines your workflow, reduces clutter, and protects your investments b...
-

Top 3 Insurance Options for Home Renovation
When renovating your home, you need specialized insurance coverage to protect your finances from unexpected setbacks ...
-

Stucco Patching Material Checklist for Home Renovation
You'll need a range of essential tools, including a putty knife, wire brush, hawk or flat trowel, level, and straight...


