
What Are the Best Tools for Wall Renovation
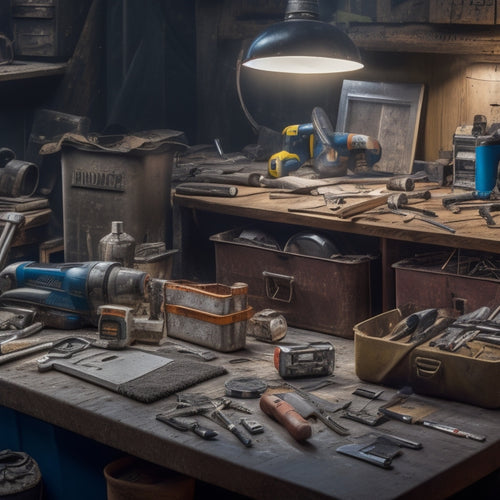
When tackling a wall renovation project, you'll need a range of specialized tools to guarantee a smooth, efficient, and safe process. For preparation, invest in a dust mask, safety goggles, pry bar, scraper, and level and stud finder. For exterior wall plaster, high-quality trowels, pointing trowels, and finishing trowels are essential. Efficient plaster mixing equipment, including a high-capacity electric mixer and adjustable speed and direction controls, will also be necessary. Additionally, outstanding finishing tools like sanding tools, orbital sanders, and high-quality paint application tools will help you achieve a professional finish. As you move forward with your project, you'll discover the importance of having the right tools at your disposal.
Key Takeaways
• Essential tools for wall renovation include dust masks, safety goggles, pry bars, scrapers, and levels to ensure a safe and successful project.
• High-quality trowels, such as plastering, pointing, and finishing trowels, are necessary for efficient and smooth plaster application.
• A high-capacity electric mixer with adjustable speed and direction controls is crucial for consistent and high-quality plaster mixing.
• Efficient finishing tools like orbital sanders, scraping planes, and grit sandpaper are necessary for achieving a professional finish.
• Safety gear, including hard hats, safety glasses, dust masks, steel-toed boots, and gloves, is vital to prevent injuries and ensure a smooth project.
Essential Tools for Preparation
Before diving into the renovation process, you'll need to gather essential tools for preparation, including a high-quality dust mask, safety goggles, and a pry bar, to guarantee a safe and efficient removal of old finishes and materials.
These tools will help protect you from hazardous airborne particles and debris, while also providing the necessary leverage to pry off stubborn materials.
Next, you'll need to focus on surface cleaning, which involves removing dirt, grime, and old adhesives from the wall surface.
A sturdy scraper or putty knife will come in handy for this task. You may also need to use a wire brush or sandpaper to smooth out rough surfaces and secure a strong bond between the old and new materials.
After surface cleaning, it's essential to conduct a thorough wall inspection to identify any cracks, holes, or weak spots that may need to be addressed before applying new finishes.
This involves visually examining the wall for signs of damage or deterioration, and using tools like a level and a stud finder to detect any underlying structural issues.
Best Tools for Exterior Wall Plaster
When you're working on exterior wall plaster, you'll need the right tools to achieve a smooth, even finish.
You'll want to focus on selecting a high-quality plastering trowel that's designed for exterior use, as it will help you apply the plaster efficiently and effectively.
Plastering Trowel Essentials
You'll typically need a range of plastering trowel sizes and types to effectively cover and finish exterior wall plaster. The right trowel can make a significant difference in the quality of your work.
Here are three essential trowel types you'll need to get the job done:
-
Pointing Trowel: For applying and finishing small areas, such as edges and corners.
-
Finishing Trowel: For spreading and smoothing out plaster over larger areas.
-
Notched Trowel: For applying plaster to large areas quickly and efficiently.
Mastering various trowel techniques is vital to achieving a smooth, even finish. You'll need to develop skills such as holding the trowel at the correct angle, applying the right amount of pressure, and using long, sweeping motions to spread the plaster evenly.
Practice makes perfect, so don't be discouraged if it takes some time to get the hang of it. With the right trowel types and techniques, you'll be well on your way to achieving professional-looking results.
Exterior Finishing Techniques
Mastering exterior finishing techniques requires selecting the right tools to achieve a durable, weather-resistant exterior wall plaster finish that can withstand harsh environmental conditions. When it comes to exterior wall plaster, you'll need tools that can handle the demands of siding installation and texture application.
A sturdy, high-capacity mixer is essential for combining large batches of plaster mix. A plaster hawk, with its flat, rectangular shape, allows you to hold and transfer large amounts of plaster to the wall. A finishing trowel, with its curved blade, is ideal for applying and smoothing out the plaster.
For texture application, a texture sprayer or a stomp brush is necessary to achieve the desired texture. A putty knife or a joint knife can be used to apply and smooth out the finish coat. Additionally, a level and a straightedge guarantee that the finish is even and plumb.
Don't forget to invest in a good quality safety gear, including gloves, goggles, and a dust mask, to protect yourself from the harsh materials and debris. By having the right tools, you'll be able to achieve a professional-looking exterior wall plaster finish that will withstand the elements.
Efficient Plaster Mixing Equipment
Select a high-capacity, electric-powered mixer that can handle large batches of plaster, guaranteeing you can complete your wall renovation project efficiently and effectively.
This type of mixer is ideal for large-scale projects, allowing you to mix multiple batches quickly and consistently. When choosing a plaster mixer, take into account the type of project you're working on and the amount of plaster needed.
Here are some key factors to take into account when selecting a plaster mixer:
-
Mixer capacity: Choose a mixer that can handle the volume of plaster required for your project.
-
Motor power: A powerful motor guarantees efficient mixing and reduces the risk of overheating.
-
Mixing technique: Consider a mixer with adjustable speed and direction controls to achieve the perfect mix.
Top-Notch Finishing Tools Required
As you move forward with your wall renovation project, you'll need to guarantee you have the right finishing tools to achieve a professional-looking result.
You'll be focusing on sanding and scraping to create a smooth surface, as well as applying paints and coatings to protect and enhance the wall's appearance.
These tasks require precision and attention to detail, so it's crucial to choose the best tools for the job.
Sanding and Scraping
You'll need to strip away old finishes and smooth out rough surfaces by sanding and scraping, a labor-intensive process that demands high-caliber finishing tools to achieve a flawless result.
To master sanding techniques, you'll require a range of grit sandpaper, from coarse to fine, to progressively smooth out the surface.
Scraping methods, on the other hand, involve using specialized tools to remove old paint, varnish, or adhesives.
Here are the high-quality finishing tools you'll need for sanding and scraping:
-
Orbital sander: A versatile power tool for efficient sanding, ideal for large surfaces.
-
Scraping plane: A manual tool for removing old finishes, perfect for intricate areas and corners.
-
Sandpaper: A range of grits (80, 120, 220) for progressive sanding and smoothing.
Painting and Coating
With your walls now smooth and even, it's time to apply a fresh coat of paint or coating. This process requires high-quality finishing tools to guarantee a flawless, long-lasting finish.
When it comes to painting and coating, you'll need the right tools to ensure a professional-looking result. Start by selecting the perfect color for your space, considering factors like natural light, furniture, and personal taste.
For paint application, you'll need a high-quality roller extension pole, which allows you to reach high ceilings and cover large areas efficiently. A paintbrush set with various sizes and angles is also essential for cutting in and creating sharp edges. Don't forget a paint tray with a built-in grid to prevent drips and messes.
If you're using a coating, invest in a specialized applicator designed for your specific product. With these exceptional finishing tools, you'll be able to achieve a beautiful, even finish that enhances the overall look of your newly renovated walls.
Exterior Wall Plaster Tool Rental Options
Renting exterior wall plaster tools can be a cost-effective alternative to purchasing them outright, especially for small to medium-sized renovation projects.
You'll avoid the upfront costs of buying the tools and won't have to worry about storing them after the project is completed. Rental costs can vary depending on the type and quality of the tools, as well as the rental duration.
Here are some popular exterior wall plaster tool rental options to take into account:
-
Mixers and pumps: Rent a mixer to combine plaster and water, and a pump to apply the mixture to the wall. Brands like Multiquip and Wacker Neuson offer high-quality rental options.
-
Trowels and floats: Rent a variety of trowels and floats to achieve the desired texture and finish. Look for brands like Marshalltown and Kraft Tool.
-
Scaffolding and ladders: Rent scaffolding and ladders to guarantee safe and easy access to the exterior wall. Brands like Sunbelt Rentals and United Rentals offer a range of options.
When renting exterior wall plaster tools, be certain to factor in the rental costs, delivery fees, and any additional accessories you may need.
This will help you stay within budget and guarantee a successful renovation project.
Safety Gear for a Smooth Project
As you prepare to tackle your exterior wall plaster renovation project, don't overlook the importance of investing in proper safety gear to protect yourself and others from potential hazards. Safety guidelines are vital to guarantee a smooth project, and neglecting them can lead to serious injuries or even fatalities.
Here are some essential protective equipment you should consider:
| Safety Gear | Description | Purpose |
| Hard Hat | Protects head from falling debris | Prevents head injuries |
| Safety Glasses | Protects eyes from dust and debris | Prevents eye injuries |
| Dust Mask | Filters out dust and particles | Prevents respiratory issues |
| Steel-Toed Boots | Protects feet from heavy objects | Prevents foot injuries |
| Gloves | Protects hands from cuts and abrasions | Prevents hand injuries |
Frequently Asked Questions
Can I DIY a Wall Renovation Project Without Professional Experience?
You're considering DIYing a wall renovation project without professional experience? That's a bold move!
While it's possible, it's essential to be aware of beginner mistakes to avoid costly setbacks. Start by researching DIY tips and tutorials specific to your project.
Create a detailed plan, and don't skip prep work. Measure twice, cut once, and be prepared to adapt to unexpected issues.
With patience and attention to detail, you can successfully tackle a wall renovation project, but be honest about your limits and don't hesitate to seek help when needed.
How Do I Dispose of Old Plaster and Debris Safely?
As you sweep away the old, crumbling plaster, imagine shedding the weight of unnecessary waste.
Now, it's time to tackle debris management. You'll want to separate the plaster from other materials, like wood and metal, to maximize recycling potential.
Check with local authorities for plaster recycling programs or facilities that accept construction waste.
Proper disposal won't only clear your conscience but also reduce the environmental impact of your renovation project.
Are There Any Specific Regulations for Exterior Wall Renovations?
When tackling exterior wall renovations, you'll need to comply with local building codes and safety standards.
You're responsible for guaranteeing your project meets these regulations, so research your area's specific requirements.
Check with your local government for permits, inspections, and compliance guidelines.
Failure to comply can result in fines, removal of non-compliant work, or even project shutdown.
It's essential to prioritize compliance to avoid costly delays and assure a safe, successful renovation.
Do I Need a Permit to Renovate My Exterior Wall?
You're wondering if you need a permit to renovate your exterior wall. The answer depends on your location and the scope of the project.
Check with your local government to determine the renovation permit requirements. Typically, permits are required for structural changes, electrical or plumbing work, or if you're modifying the exterior wall's footprint.
Even if a permit isn't required, it's important to verify your renovation meets local building codes and regulations to avoid potential fines or legal issues.
Can I Use Interior Plaster Tools for Exterior Wall Renovation?
You're wondering if you can use interior plaster tools for exterior wall renovation.
The answer is, it's not recommended. Interior plaster tools are designed for smooth, controlled plaster application on interior walls.
Exterior walls, on the other hand, require more robust tools that can withstand harsh weather conditions and handle thicker, heavier plaster mixes.
Using interior tools on exterior walls may lead to subpar results, so it's best to invest in exterior-specific tools for a durable, long-lasting finish.
Conclusion
As you near the end of your wall renovation project, remember that having the right tools is vital to achieving professional-looking results.
Notably, according to a recent survey, nearly 70% of DIYers admit to using the wrong tools, resulting in costly mistakes and rework.
By investing in the essential tools outlined in this article, you'll avoid common pitfalls and guarantee a successful, stress-free renovation.
Related Posts
-
Smart Guide to Buying Second-Hand Renovation Tools
When buying second-hand renovation tools, you'll want to set clear renovation goals and a realistic budget to priorit...
-

5 Must-Have Plastering Tools for Safe Renovation
You'll need a range of essential tools to tackle your plastering project safely. Invest in a variety of trowels, incl...
-

5 Best Home Renovation Project Timeline Checklists
You're looking for a clear understanding of the timeline for your home renovation project. A good place to start is w...
