What Are the Best Tools for Ceiling Renovation
Share
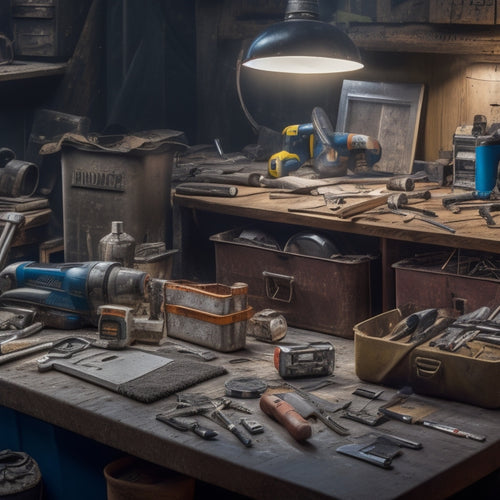
When tackling a ceiling renovation, it's essential to have the right tools for the job. You'll need safety gear like sturdy ladders, hard hats, and dust masks to protect yourself from falls and debris. Measurement and marking tools, such as laser levels and chalk reels, guarantee accurate room measurements and clear markings. For plaster and drywall repair, joint compound knives and putty knives are must-haves. Sanding and smoothing tools, like orbital sanders and detail sanders, help achieve a professional finish. With the right tools, you'll be well on your way to a successful renovation - and there's more to explore to take your project to the next level.
Key Takeaways
• Ensure a safe working environment with essential safety gear, including sturdy ladders, hard hats, safety goggles, and dust masks.
• Invest in quality measurement and marking tools, such as high-quality measuring tapes, laser levels, and chalk reels, for accurate room measurements.
• Choose the right plaster and drywall repair tools, including joint compound knives, putty knives, and texture scrapers, for a seamless finish.
• Select the appropriate sanding and smoothing tools, like orbital sanders, detail sanders, and sandpaper, to achieve a smooth ceiling surface.
• Consider eco-friendly options, such as low-VOC paints and natural ingredient paints, to promote a healthier indoor environment and reduce environmental impact.
Essential Safety Gear for Beginners
Before you start your ceiling renovation, invest in essential safety gear to protect yourself from falls, dust, and debris.
As a beginner, it's vital to prioritize your safety above all else. A good starting point is to get a sturdy ladder or scaffolding that can support your weight and provide a stable working platform.
Next, don't forget to wear personal protective equipment (PPE) such as a hard hat, safety goggles, and a dust mask to shield yourself from falling objects and airborne contaminants.
Best Plaster Ceiling Repair Tools
When tackling a plaster ceiling repair, you'll need the right tools to address common issues like cracked surfaces and imperfect textures.
To achieve a smooth, even finish, you'll want to invest in tools that can effectively fill gaps and scrape away imperfections.
Repairing Cracked Surfaces
You'll need a reliable arsenal of plaster ceiling repair tools to tackle those unsightly cracks and restore your ceiling's smooth finish.
Before you begin, it's vital to conduct a thorough crack assessment to identify the extent of the damage. This involves examining the crack's length, width, and depth to determine the best course of action.
Next, you'll need to prepare the surface for repair. This involves cleaning the area around the crack to remove dirt, dust, and debris. You may also need to sand the surface to create a smooth, even finish. Surface preparation is critical to ensuring a strong bond between the repair material and the surrounding plaster.
With your surface prepared, you can now apply a suitable repair compound. This may be a specialized plaster or a joint compound, depending on the type and severity of the crack.
Using a putty knife, spread the compound evenly, feathering it out towards the edges to create a seamless finish. Allow the compound to dry completely before sanding it down to a smooth finish.
Smoothing Imperfect Textures
To achieve a flawless finish, you're going to need the right tools to smooth out imperfect textures, which can make or break the overall appearance of your newly repaired ceiling. Imperfections can be distracting and detract from the beauty of your renovated space.
To tackle this challenge, you'll need a set of specialized tools designed specifically for smoothing out textures. Invest in a high-quality joint compound knife, which is ideal for applying and smoothing out joint compound. A putty knife is also essential for scraping off excess material and feathering out edges.
For more extensive texture blending techniques, consider a texture scraper or a hawk and trowel combo. These tools will help you achieve a seamless finish by allowing you to spread and smooth out materials with precision.
Before you start, make sure to follow proper surface preparation methods. Clean the area thoroughly, and apply a primer if necessary.
With the right tools and techniques, you'll be able to achieve a smooth, even finish that complements your newly renovated ceiling. Remember, a flawless finish is all about attention to detail, so take your time and work methodically to achieve the results you desire.
Drywall Ceiling Installation Essentials
As you prepare to install a drywall ceiling, you'll need to master two critical skills: accurately measuring your drywall to guarantee a precise fit, and applying joint compound to create a seamless finish.
You'll want to develop techniques for measuring around obstructions, calculating cuts, and marking your drywall for efficient installation.
Drywall Measurement Techniques
Accurate drywall measurement techniques are essential for a successful ceiling renovation, guaranteeing a precise fit and minimizing waste and labor costs.
When measuring for drywall, you'll need to account for the location of electrical outlets, switches, and any other obstacles. Take precise measurements of the ceiling's length, width, and any obstructions, using a laser level or a long tape measure to guarantee accuracy. To avoid errors, double-check your measurements and mark them clearly on the drywall sheets.
When cutting drywall, use a utility knife or a drywall saw, and always cut on a stable surface. For complex cuts, consider using a drywall router or a jigsaw.
When applying drywall tape, use drywall tape techniques such as the 'L' method or the 'X' method to guarantee a strong bond.
Joint Compound Application
Apply a thin layer of joint compound to the drywall seams, using a 6-inch joint knife to spread it smoothly and evenly. Hold the knife at a 45-degree angle to guarantee proper coverage. Make sure to fill the entire seam, but avoid applying too much compound, as it can lead to uneven finishes.
Here are some essential joint compound techniques to keep in mind:
-
Work in small sections: Divide the ceiling into manageable areas to maintain even coverage and prevent the compound from drying before you're finished.
-
Use the right consistency: Mix the compound to a smooth, creamy texture to guarantee easy spreadability and minimal shrinkage.
-
Don't overmix: Stop mixing once the compound is smooth, as overmixing can lead to air pockets and uneven finishes.
-
Allow proper drying time: Let the compound dry completely according to the manufacturer's instructions, usually between 30 minutes to an hour, before sanding or applying additional coats.
-
Sand lightly: Use a sanding block or sandpaper to smooth out the area, feathering the edges to create a seamless finish.
Must-Have Measuring and Marking Tools
You'll need a reliable set of measuring and marking tools to guarantee precise calculations and accurate placements during your ceiling renovation project. A high-quality measuring tape is essential for taking accurate room measurements, calculating material quantities, and identifying potential obstacles. Look for a tape with a sturdy hook, clear markings, and a comfortable grip.
In addition to a measuring tape, you'll need a reliable marking tool to transfer your measurements onto the ceiling. Marking chalk is an excellent option for creating temporary lines and marks that can be easily removed once the project is complete. It's also useful for labeling studs, joists, and other structural elements.
For more precise marks, consider using a laser level or a chalk reel with a built-in level. These tools will guarantee your lines are straight and level, even on uneven or vaulted ceilings.
Ceiling Sanding and Smoothing Tools
With the measuring and marking phase complete, it's time to focus on smoothing out the ceiling's surface, and that's where specialized sanding and smoothing tools come into play. To achieve a flawless finish, you'll need the right tools for the job.
Here are the must-haves for ceiling sanding and smoothing:
-
Orbital sanders: perfect for removing old paint, texture, or imperfections, and ideal for large, flat areas
-
Detail sanders: designed for tight spaces, corners, and edges, ensuring a precise finish
-
Sandpaper: choose the right grit for your specific sanding techniques, from coarse to fine
-
Smoothing compounds: fill in holes and imperfections with a variety of textures and finishes
-
Sanding blocks: keep your sandpaper flat and even, ensuring a smooth, consistent finish
Mastering the right sanding techniques and smoothing methods can make all the difference in your ceiling renovation project. By investing in these essential tools, you'll be able to achieve a professional-looking finish that's both durable and visually stunning.
Top Rated Paint and Finish Tools
Now that your ceiling's surface is smooth and even, it's time to bring it to life with a fresh coat of paint and the right finish tools. You'll want to choose eco-friendly paints that not only look great but also promote a healthier indoor environment.
Look for paints with low VOCs (volatile organic compounds) and made from natural ingredients. Some top-rated eco-friendly paint brands include Benjamin Moore's Natura line and Behr's Premium Plus ULTRA.
When it comes to finish tools, you'll need high-quality rollers, brushes, and sprayers to achieve a professional-looking finish. Consider investing in innovative finishes like texture sprays or metallic finishes to add visual interest to your ceiling.
A good quality roller extension pole will allow you to reach high ceilings with ease, while a microfiber roller cover will help you achieve a smooth, even finish. Don't forget to choose the right brush for your paint type - natural bristle brushes work well with oil-based paints, while synthetic brushes are better suited for water-based paints.
With the right paint and finish tools, you'll be able to achieve a beautiful, long-lasting ceiling finish that you'll love for years to come.
Ceiling Texture and Pattern Tools
Achieving unique ceiling textures and patterns requires specialized tools, including texture guns, pattern stamps, and joint compound applicators that help you create distinctive designs and add depth to your ceiling renovation. With the right tools, you can master various texture application techniques and bring your pattern design ideas to life.
Here are some essential tools to get you started:
-
Texture guns: Perfect for creating intricate patterns and designs, these guns allow for precise control over texture application.
-
Pattern stamps: Add visual interest to your ceiling with these stamps, which come in a variety of designs and patterns.
-
Joint compound applicators: Apply joint compound with ease and precision using these applicators, ensuring a smooth finish.
-
Texture sprayers: Create a uniform texture across your ceiling with these sprayers, ideal for large areas.
-
Pattern combs: Add a decorative touch to your ceiling with these combs, which create unique patterns and designs.
Ladder and Scaffolding Options
You'll need reliable ladder and scaffolding options to guarantee safe and efficient access to your ceiling during the renovation process.
When selecting ladders, consider extension ladders that can be adjusted to reach high ceilings. Look for ladders with sturdy feet and non-slip rungs to ascertain stability and traction. For added convenience, choose ladders with leveling systems that can adapt to uneven flooring.
For larger renovation projects, folding scaffolding is an excellent option. It provides a stable and spacious platform to work on, allowing you to move around freely and efficiently. Opt for folding scaffolding with adjustable heights and widths to accommodate different ceiling configurations. Make certain the scaffolding is made from durable materials and has a weight capacity that exceeds your needs.
Remember to always follow safety guidelines when using ladders and scaffolding. Ensure you have a stable and secure base, and maintain three points of contact (two hands and one foot, or two feet and one hand) when climbing or descending.
Specialty Tools for Unique Ceilings
Unique ceiling designs, such as vaulted, cathedral, or drop ceilings, often require specialty tools to guarantee a successful renovation.
You'll need the right equipment to tackle those tricky corners, curves, and angles. When it comes to textured ceiling treatments, you'll want to invest in a texture sprayer or a knockdown knife to achieve the desired effect.
For acoustic ceiling solutions, a sound-absorbing material cutter and a grid suspension system will help you create a functional and stylish space.
Here are some essential specialty tools to evaluate:
-
Texture sprayer: Applies texture to ceilings with ease and precision
-
Knockdown knife: Used to create a knockdown or orange peel texture on ceilings
-
Sound-absorbing material cutter: Cuts acoustic panels to fit your ceiling design
-
Grid suspension system: Suspends acoustic panels or tiles from the ceiling
-
Curved ceiling scraper: Removes old material from curved or vaulted ceilings
Frequently Asked Questions
How Do I Prevent Dust From Spreading During Ceiling Renovation?
When renovating your ceiling, you'll want to contain dust to prevent it from spreading throughout your space. To do this, implement effective dust containment methods, such as sealing off adjacent areas with plastic sheeting and using drop cloths to cover floors and furniture.
Additionally, consider investing in air filtration systems to capture airborne particles, ensuring a cleaner and healthier environment.
Can I DIY a Ceiling Renovation or Do I Need a Professional?
You're wondering if you can tackle a ceiling renovation on your own or if it's better to hire a pro. It depends on your comfort level with DIY techniques and the scope of the project.
If you're dealing with complex designs, electrical or plumbing issues, or asbestos removal, it's best to leave it to professional services.
However, if you're comfortable with basic carpentry and have a straightforward design, you can take on the task yourself and save some cash.
How Long Does a Typical Ceiling Renovation Project Take?
Imagine you're planning a road trip - you wouldn't start driving without a map, right?
Similarly, before diving into your ceiling renovation, you need to map out the timeline.
Typically, a ceiling renovation project takes around 3-5 days for a small to medium-sized room.
Break it down into project phases: preparation (1-2 days), installation (1-2 days), and finishing touches (1 day).
Set realistic timeline expectations to avoid delays and guarantee a smooth ride.
What Is the Average Cost of a Ceiling Renovation Project?
When planning a ceiling renovation, you'll want to establish a realistic budget.
The average cost of a ceiling renovation project can vary widely, ranging from $2 to $10 per square foot, depending on cost factors like materials, labor, and complexity.
To guarantee successful budget planning, consider the scope of your project, set a contingency fund, and prioritize your needs versus wants.
Do I Need a Permit for a Ceiling Renovation in My Area?
You'll need to check with your local authorities to determine if a permit is required for your ceiling renovation.
Familiarize yourself with ceiling height regulations and local building codes to guarantee compliance.
Don't assume what's allowed in neighboring areas applies to your region.
You're responsible for obtaining necessary permits, so research and verify requirements to avoid costly fines or project delays.
Conclusion
You've made it to the final stage of your ceiling renovation journey!
As you put the finishing touches on your project, remember that a staggering 65% of homeowners report feeling more satisfied with their home after a renovation.
With the right tools, you've not only transformed your ceiling but also boosted your home's value and your own sense of pride.
Now, take a step back, admire your handiwork, and enjoy the fruits of your labor!
Related Posts
-

Smart Guide to Buying Second-Hand Renovation Tools
When buying second-hand renovation tools, you'll want to set clear renovation goals and a realistic budget to priorit...
-

Why Do Cinder Block Wall Renovations Cost So Much
You're likely surprised by the high cost estimate for your cinder block wall renovation project, but it's driven by s...
-

DIY Plastering Supply Checklist for Home Renovation
To tackle a DIY plastering project for your home renovation, you'll need a solid checklist of supplies. Start with es...


