Top Waterproofing Supplies for Home Renovation
Share
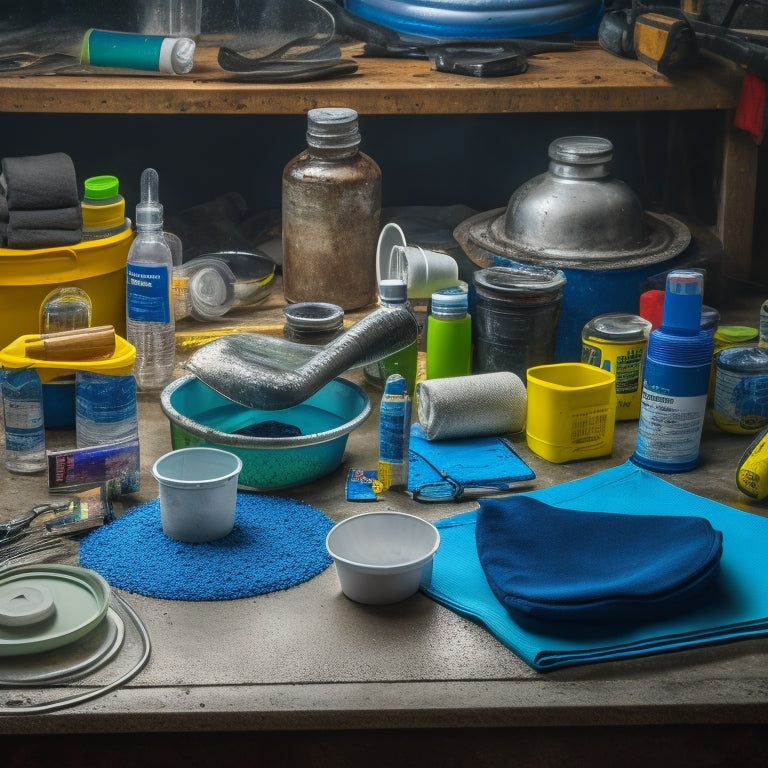
When renovating your home, it is vital to choose the right waterproofing supplies to prevent water damage, structural issues, and costly repairs. You'll need a range of materials, including membranes, drainage systems, and sealants. Membranes come in sheet-applied, fluid-applied, and spray-applied types, each with specific applications. Sealants, such as caulk and epoxy-based sealants, are important for filling gaps and joints. Drainage solutions, like drainage mats and channels, prevent water accumulation. Waterproofing paints and coatings provide an additional protection layer. By understanding the different types of waterproofing supplies and their applications, you'll be able to create a watertight seal and protect your home from water damage - and that's just the beginning of creating a truly waterproof home.
Key Takeaways
• Select high-performance waterproofing membranes that prioritize durability, adhesion, and UV resistance for long-term effectiveness.
• Choose sealants compatible with materials, considering gap width and depth, and opt for flexible caulk for gaps up to 1 inch.
• Ensure reliable drainage systems, including drainage mats and channels, to prevent water accumulation and structural damage.
• Apply waterproofing paints and coatings as an additional protection layer, selecting types based on durability, moisture resistance, and material compatibility.
• Utilize flashing and weatherproofing tools, such as self-adhesive flashing tape and silicone-based sealants, to seal joints, seams, and vulnerable areas.
Essential Waterproofing Materials
You'll need a range of essential waterproofing materials to secure a watertight seal in your home renovation project, including waterproofing membranes, drainage systems, and sealants. These components work together to prevent water ingress and guarantee a dry, comfortable living space.
When selecting your materials, reflect on the latest waterproofing innovations that prioritize sustainability. Look for products made from eco-friendly materials, such as recycled plastic or natural fibers, which reduce waste and minimize environmental impact.
In addition to membranes and drainage systems, you'll need a reliable sealant to fill gaps and joints. Choose a sealant that's compatible with your chosen materials and can withstand varying temperatures and weather conditions.
It's also vital to evaluate the durability and lifespan of your materials, as well as their ease of installation and maintenance. By specifying the right waterproofing materials for your project, you'll create a watertight seal that protects your home from water damage and guarantees a safe, healthy living environment.
Membranes for Block Wall Design
When designing a block wall, you'll need to prepare the surface to guarantee a strong bond between the block and the waterproofing membrane.
You'll also need to select the right membrane for your specific project, considering factors like durability, adhesion, and UV resistance.
Block Wall Preparation
Block wall preparation begins with the application of a high-performance membrane to the entire surface, guaranteeing a watertight seal that prevents water infiltration and subsequent damage.
Before applying the membrane, you'll need to conduct a thorough block wall inspection to identify any cracks, voids, or other imperfections that could compromise the membrane's performance. Once you've identified any issues, you can address them through block wall reinforcement, such as installing additional rebar or filling gaps with a patching compound.
To guarantee a successful membrane application, make sure you:
-
Clean the wall: Remove any dirt, debris, or old adhesives from the surface to create a smooth, even substrate for the membrane.
-
Repair any cracks: Fill in any cracks or gaps with a suitable patching compound to prevent water from seeping behind the membrane.
-
Prime the surface: Apply a primer specifically designed for the membrane you're using to guarantee a strong bond between the two.
Membrane Selection Criteria
Selecting the right membrane for your block wall design requires careful consideration of several key factors, including its waterproofing performance, adhesion capabilities, and compatibility with the wall's substrate and other construction materials.
You'll want to evaluate the membrane's ability to prevent water ingress, its bonding strength to the wall, and its resistance to degradation from environmental factors like UV light, temperature fluctuations, and chemical exposure.
When choosing a membrane, you'll encounter various types, such as sheet-applied, fluid-applied, and spray-applied membranes. Each has its own strengths and weaknesses, so it's vital to understand the specific requirements of your project. For instance, a sheet-applied membrane may be more suitable for walls with complex geometries, while a fluid-applied membrane might be better suited for large, flat surfaces.
Membrane durability is also significant, as it affects the membrane's long-term performance and lifespan. Look for membranes with high tensile strength, puncture resistance, and resistance to cracking and delamination.
Application Best Practices
You'll need to prepare the block wall substrate thoroughly before applying the membrane to guarantee a strong, long-lasting bond. This involves more than just slapping on the membrane; it requires attention to detail and a solid understanding of application techniques.
Here are some essential steps to keep in mind:
-
Clean the surface: Remove any dirt, oil, or other contaminants that might interfere with the membrane's adhesion.
-
Fill voids and cracks: Use a compatible filler to seal any gaps or cracks in the block wall, ensuring a smooth surface for the membrane.
-
Treat the surface: Apply a primer or surface treatment to enhance the bond between the membrane and the block wall.
Sealants for Joints and Cracks
When you're preparing to seal joints and cracks, you'll need to assess the width and depth of the gaps to choose the right sealant.
You'll find that caulk is suitable for wider gaps, typically up to 1 inch, whereas epoxy-based sealants are better suited for deeper cracks that require more strength and durability.
Caulk for Wide Gaps
In renovation projects, caulk plays an essential role in bridging wide gaps and sealing joints and cracks, effectively protecting your home from water damage and air leaks.
When it comes to caulk application, you'll want to make certain you're using the right type for the job. For wide gaps, you'll need a caulk that's specifically designed for gap filling.
Here are three key things to keep in mind when selecting a caulk for wide gaps:
-
Flexibility: Look for a caulk that's flexible and can stretch to accommodate movement and settling of the surrounding materials.
-
Adhesion: Choose a caulk that has strong adhesion to guarantee a long-lasting seal.
-
Moisture resistance: Select a caulk that's resistant to water and moisture to prevent water damage and air leaks.
Epoxy for Deep Cracks
Sealing deep cracks with epoxy-based sealants provides a robust solution for joints and cracks that are too large for caulk, allowing you to create a durable, long-lasting barrier against water infiltration and air leaks.
When it comes to crack repair, epoxy-based sealants are ideal for filling deep cracks that are 1/4 inch or wider. There are several epoxy types to choose from, including 100% solids, flexible, and fast-setting epoxies.
For example, 100% solids epoxies are great for filling large gaps and providing a strong bond, while flexible epoxies are better suited for areas that are prone to movement or vibration. Fast-setting epoxies, on the other hand, are ideal for projects that require quick turnaround times.
Regardless of the type you choose, it's crucial to follow the manufacturer's instructions and prepare the surface properly to guarantee a strong bond. This may involve cleaning the area, removing any debris, and applying a primer to the surface.
Drainage Solutions for Walls
You'll need to install a reliable drainage system behind your walls to prevent water accumulation and subsequent damage. This is vital, especially in areas prone to heavy rainfall or high humidity. A well-designed drainage system guarantees that water is directed away from your walls, reducing the risk of moisture seepage and structural damage.
To achieve this, consider the following essential components:
-
Drainage mats: These dimpled plastic sheets create a gap between the wall and the insulation, allowing water to flow freely towards the drainage channel.
-
Drainage channels: Installed at the bottom of the wall, these channels collect and redirect water away from the foundation.
-
Waterproofing membranes: Applied to the exterior of the wall insulation, these membranes prevent water from penetrating the insulation and reaching the wall.
Waterproofing Paints and Coatings
Waterproofing paints and coatings provide an additional layer of protection against water ingress, allowing homeowners to fortify their walls and ceilings against moisture damage. By applying a waterproofing coating, you can prevent water from seeping into your home, reducing the risk of structural damage, mold growth, and other issues. One common waterproofing myth is that a single coat is enough; however, it's important to follow the manufacturer's instructions for application and drying times to guarantee ideal results.
Here's a comparison of popular waterproofing paints and coatings:
| Product | Durability | Moisture Resistance |
|---|---|---|
| Silane-based coating | 10-15 years | High |
| Acrylic-based coating | 5-10 years | Medium |
| Polyurethane-based coating | 15-20 years | High |
| Epoxy-based coating | 20-25 years | High |
When choosing a waterproofing paint or coating, consider factors such as coating durability, moisture resistance, and compatibility with your home's materials. By selecting the right product and following application guidelines, you can enjoy a watertight seal that protects your home from water damage.
Flashing and Weatherproofing Tools
When applying waterproofing paints and coatings, it's equally important to confirm that joints, seams, and other vulnerable areas are properly sealed with flashing and weatherproofing tools to prevent water intrusion.
These areas are notorious for leaks and water damage, so you'll want to make sure you're using the right tools for the job.
Here are three essential flashing and weatherproofing tools to have in your arsenal:
-
Self-adhesive flashing tape: A versatile and easy-to-use tape that can be applied to a variety of surfaces, including metal, wood, and plastic.
-
Rubberized asphalt flashing: A durable and flexible flashing material ideal for sealing complex joints and seams, such as those found in roof-to-wall connections.
-
Silicone-based weatherproofing sealants: A reliable and long-lasting sealant for filling gaps and cracks in masonry, concrete, and other porous surfaces.
Below-Grade Waterproofing Systems
How do you guarantee that the foundation of your home remains dry and secure from groundwater and soil moisture? A reliable below-grade waterproofing system is essential to prevent water seepage and damage. You'll need to evaluate a combination of products and techniques to guarantee a watertight foundation.
| Component | Function |
|---|---|
| Sump pump systems | Collect and redirect water away from the foundation |
| Foundation drainage | Direct water away from the foundation walls and footings |
| Waterproof membranes | Prevent water infiltration through the foundation walls |
| Drainage boards | Protect the membrane and facilitate water flow |
When selecting a below-grade waterproofing system, assess the soil conditions, water table levels, and local building codes. A thorough system should include a sump pump system to collect and redirect water, foundation drainage to direct water away from the foundation, and a waterproof membrane to prevent water infiltration. Additionally, drainage boards can protect the membrane and facilitate water flow. By incorporating these components, you'll guarantee a dry and secure foundation for your home renovation project.
Moisture-Resistant Drywall Options
You'll need to choose the right moisture-resistant drywall for your renovation project, as it's a critical component in preventing water damage and mold growth in humid or wet areas. When selecting a moisture-resistant drywall, consider the specific needs of your project, including the level of moisture exposure and the desired level of durability.
Here are three key factors to keep in mind:
-
Moisture barriers: Look for drywall products with built-in moisture barriers, such as a waterproof coating or a specialized paper facing. These barriers help prevent water from penetrating the drywall and reduce the risk of mold growth.
-
Core material: Opt for drywall with a moisture-resistant core material, such as gypsum or cement-based products. These materials are more durable and resistant to water damage than traditional drywall.
-
Drywall installation: Verify that your drywall installation meets local building codes and manufacturer's instructions. Proper installation, including the use of moisture-resistant fasteners and joint compounds, is essential for preventing water damage and verifying the long-term durability of your drywall.
Frequently Asked Questions
Can I Apply Waterproofing Supplies Over Existing Paint or Finishes?
When applying waterproofing supplies, you'll need to take into account the existing paint or finishes on your surface. You can apply them over existing coats, but it's essential to guarantee paint compatibility.
Proper surface preparation is key - clean the area thoroughly and scrape off any loose or flaking paint.
Then, check the manufacturer's instructions for specific guidance on applying their products over existing finishes.
How Long Does It Take for Waterproofing Materials to Fully Cure?
When you apply waterproofing materials, you're probably wondering how long it takes for them to fully cure.
The curing time depends on various application factors, such as temperature, humidity, and thickness of the coating.
Typically, it can take anywhere from a few hours to several days for the material to reach its maximum strength.
You'll need to follow the manufacturer's instructions and wait for the recommended time before exposing the surface to water or heavy use.
Are Waterproofing Supplies Safe to Use Around Plants and Pets?
When working with waterproofing supplies, you'll want to take safety precautions to guarantee they don't harm your plants and pets.
Always check the product labels for eco-friendly options that are non-toxic and biodegradable. Even then, keep them out of reach of curious pets and avoid direct exposure to plants.
Wear protective gear, like gloves and masks, when applying these products, and make certain the area is well-ventilated to prevent any adverse reactions.
Can I Use Waterproofing Supplies on Surfaces With Existing Mold or Mildew?
When dealing with surfaces infested with mold or mildew, you'll need to take a step back before applying waterproofing supplies.
First, you'll need to employ effective mold removal techniques, such as scrubbing with a solution of bleach and water, and then thoroughly rinsing the area.
Afterwards, implement mildew prevention strategies, like ensuring good ventilation and reducing humidity.
Only once the surface is clean and dry can you safely apply waterproofing supplies to prevent future growth.
Do I Need Specialized Training to Apply Waterproofing Supplies Correctly?
When applying waterproofing supplies, you'll want to guarantee you're using the right techniques and methods to get the job done correctly.
While specialized training isn't always necessary, it's highly recommended to learn about advanced waterproofing techniques and application methods.
This will help you identify potential issues, choose the right products, and apply them effectively.
Conclusion
As you stand back to admire your newly renovated home, remember that the most critical elements are the ones you can't see - the waterproofing supplies that protect your investment from the ravages of time and moisture.
While your beautifully finished walls and floors may catch the eye, it's the membranes, sealants, and drainage solutions that will guarantee they remain safe from water damage.
These materials work quietly behind the scenes to safeguard your dream home.
Related Posts
-

Top Drill for Concrete Wall Renovation
When choosing the top drill for your concrete wall renovation, you'll want to prioritize key features like drill powe...
-

7 Patio Safety Tips for DIY Renovation Projects
As you begin your DIY patio renovation project, prioritize safety by evaluating the worksite for tripping hazards and...
-

Top 3 Tools to Buy for Stucco Renovation
You'll need the right tools to guarantee a successful stucco renovation, and it all starts with three essential items...


