
Top Tools for Smooth Home Renovation Repairs
You'll need the right tools to achieve a flawless finish in your home renovation repairs. Start with essential concrete surface preparation tools like wire brushes, patching compounds, and self-leveling compounds. Then, invest in epoxy mixing and application tools, such as high-quality trowels and squeegees, for a smooth and even application. Don't forget floor scraping and grinding machines, crack repair and filling tools, surface cleaning and etching tools, and finishing and polishing equipment like sanding machines and polishing pads. With these must-haves, you'll be well on your way to a showroom-quality finish - and with a little more guidance, you can take your renovation to the next level.
Key Takeaways
• Invest in high-quality trowels with flexible blades for even epoxy spread and a smooth finish.
• Utilize floor scraping machines with adjustable handles and rotating drums to remove old adhesives and stubborn substances.
• Employ crack assessment kits to evaluate crack conditions and choose the right epoxy-based or polyurethane-based repair materials.
• Use pressure washers, degreasers, and acid-based etching solutions to thoroughly clean and prepare the concrete surface for renovation.
• Invest in high-quality sanding machines and polishing compounds to achieve a glossy, showroom-quality finish for renovations.
Essential Concrete Surface Preparation
You'll need to guarantee the concrete surface is properly prepared before starting your renovation project, as a poorly prepared surface can lead to subpar results and costly rework. This involves confirming the surface is clean, dry, and free of cracks or imperfections.
Start by sweeping or blowing away any debris, and then scrub the surface with a wire brush to remove dirt and oil residue. Next, fill any cracks or holes with a patching compound and allow it to dry according to the manufacturer's instructions.
Once the surface is clean and repaired, it's crucial to verify it's level. Use a self-leveling compound to fill any low spots, and then use a screed or trowel to smooth out the surface. Allow the compound to set before moving on to the next step.
Finally, make sure the concrete is fully cured before applying any coatings or finishes. This can take anywhere from a few days to several weeks, depending on the type of concrete and environmental conditions.
Epoxy Mixing and Application Tools
When working with epoxy, you'll need the right tools to guarantee a successful application.
You'll want to focus on epoxy mixing essentials, such as using a clean and dry mixing container, and smooth application techniques, like maintaining a consistent flow rate.
Epoxy Mixing Essentials
To guarantee a strong and durable bond, epoxy mixing essentials, including a mixing stick, a clean surface, and a precise ratio indicator, are must-haves for any successful epoxy application project.
As you prepare for your epoxy project, remember that the mixing process is just as important as the application itself. You'll want to make sure you're working with a clean and dust-free surface to prevent any contaminants from affecting the bond.
When it comes to selecting the right epoxy color, consider the surface you're working with and the aesthetic you're aiming for. With the right epoxy color selection, you can achieve a seamless blend or create a bold contrast.
Additionally, understanding epoxy curing techniques is essential to achieve the desired finish. This includes controlling the temperature, humidity, and mixing ratio to make certain a smooth and even cure.
Smooth Application Techniques
With a solid foundation in epoxy mixing essentials, it's time to focus on smooth application techniques, starting with the right epoxy mixing and application tools that will help you achieve a flawless finish.
To get the job done, you'll need the following essential tools:
-
Trowels: Invest in a set of high-quality trowels with flexible blades that won't scratch the surface. Practice your trowel techniques to achieve an even spread and smooth finish.
-
Smoothing compounds: Choose the right smoothing compound for your project, depending on the surface and desired finish. These compounds help fill imperfections and create a smooth surface.
-
Notched trowels: Notched trowels are perfect for applying epoxy to large areas, ensuring an even spread and reducing air pockets.
- Squeegees: Use a squeegee to remove excess epoxy and achieve a smooth, even finish.
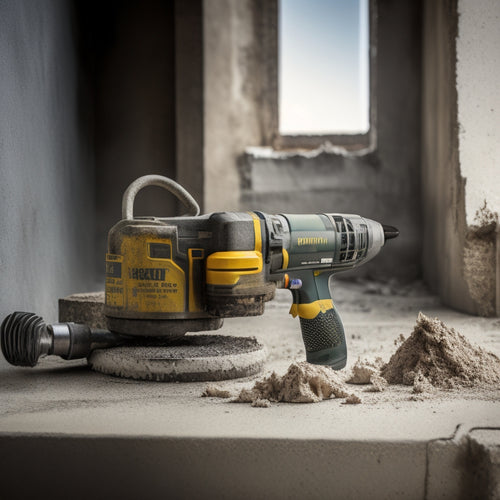
Floor Scraping and Grinding Machines
You'll need a floor scraping machine to remove old adhesives, epoxies, and other stubborn substances from your floor before applying a new finish. This essential tool helps create a smooth surface, guaranteeing a strong bond between the old floor and the new finish.
When choosing a floor scraping machine, consider the floor texture and surface durability. A machine with adjustable handles and a rotating drum will allow you to tackle various floor types and textures with ease.
For efficient floor scraping, look for a machine with a powerful motor and a durable scraper blade. Some machines come with vacuum attachments, making it easier to collect debris and dust.
Additionally, consider the weight and maneuverability of the machine, as you'll need to move it around the floor with ease. By investing in a high-quality floor scraping machine, you'll be able to achieve a smooth, even surface, perfect for applying a new finish.
This will guarantee a durable and long-lasting result, saving you time and money in the long run.
Crack Repair and Filling Tools
After scraping and grinding your floor, it's time to address any cracks that may have appeared, and that's where crack repair and filling tools come in. You'll need to assess the cracks to determine the best course of action, and that's where these tools come in handy.
Here are the essential tools you'll need for crack repair and filling:
-
Crack assessment kit: This kit usually includes a magnifying glass, a crack width gauge, and a flashlight to help you evaluate the cracks and determine the best repair approach.
-
Epoxy-based repair materials: These are suitable for most concrete cracks and provide a strong, long-lasting bond.
-
Polyurethane-based repair materials: These are flexible and suitable for cracks that are subject to movement or vibration.
- Filling tools: These include trowels, putty knives, and other tools designed to fill cracks with precision and accuracy.
Surface Cleaning and Etching Tools
Now that you've filled those cracks, it's essential to clean and etch the surface to secure a strong bond between the old concrete and the new finish. This step is critical for successful surface preparation, as it removes dirt, grime, and other substances that can weaken the bond. You'll need the right tools to get the job done efficiently.
For cleaning, a pressure washer is an excellent tool to blast away dirt and debris. Make sure to use a wide fan tip and keep the nozzle at least 12 inches away from the surface to avoid damaging it. For tougher stains, consider using a degreaser or a concrete cleaner. Always follow the manufacturer's instructions and take necessary safety precautions.
For etching, you'll need an acid-based etching solution and a stiff-bristled broom or brush to apply it evenly. This process helps to open up the pores of the concrete, allowing for a stronger bond with the new finish. Remember to always wear protective gear, including gloves, goggles, and a mask, when working with acid-based solutions.
Finishing and Polishing Equipment
With the surface clean and etched, it's time to bring out the big guns - your finishing and polishing equipment - to transform the concrete into a glossy, showroom-quality finish.
You'll need the right tools to achieve a smooth, high-gloss finish that'll make your renovation stand out.
Here are the essential finishing and polishing tools you won't want to skip:
-
Sanding machines: These powerful tools help remove imperfections and smooth out the surface. Invest in a high-quality sanding machine that can handle various grits and polishing compounds.
-
Polishing compounds: From coarse to fine grits, these compounds help remove scratches and imperfections, leaving a mirror-like finish.
-
Polishing pads: These pads come in various sizes and grits, allowing you to tackle small or large areas with ease.
- Sealants and coatings: Finally, apply a sealant or coating to protect your hard work and guarantee the finish lasts for years to come.
Frequently Asked Questions
What Safety Gear Should I Wear During Renovation Repairs?
When tackling renovation repairs, you should always wear protective equipment to guarantee renovation safety. You'll need a hard hat, safety glasses, gloves, and a dust mask to shield yourself from debris and hazardous materials.
Can I Rent Equipment Instead of Buying It Outright?
"Just like a medieval knight borrowing a trusty steed, you can rent equipment instead of buying it outright, reaping cost savings and flexibility. Research local equipment rental options to find the best fit for your renovation needs."
How Do I Dispose of Hazardous Renovation Waste Safely?
You'll need to identify hazardous materials, segregate them from regular waste, and contact local authorities for guidance on safe disposal options, ensuring you follow safe renovation practices and responsible hazardous waste disposal.
What Are the Best Brands for Home Renovation Tools and Equipment?
"You're probably thinking, 'Who needs the best tools when you can just wing it?' But trust us, investing in top brands like DeWalt, Makita, and Bosch, with essential features like durability and precision, will save you headaches and dollars in the long run."
Should I Hire a Professional for Complex Renovation Projects?
When tackling complex renovation projects, you'll need to weigh the cost vs benefit of hiring a pro, considering the project timeline and your own expertise, to guarantee a smooth, stress-free experience that meets your budget and deadline.
Conclusion
As you stand back to admire your renovated space, remember that the foundation of a beautiful renovation is like a masterpiece of art - it's the preparation that makes the final product shine.
Just as a painter primes the canvas, you've primed your surface for a flawless finish.
With these top tools, you've laid the groundwork for a renovation that will stand the test of time.
Now, step back and enjoy the beauty of your handiwork!
Related Posts
-

Top Tools for DIY Home Renovation Plastering Success
To achieve DIY home renovation plastering success, you'll need a range of essential tools. Start with hand tools like...
-
Top Drill for Concrete Wall Renovation
When choosing the top drill for your concrete wall renovation, you'll want to prioritize key features like drill powe...
-

Why Exterior Wall Renovation Requires a Plan
You're about to commence a complex and potentially costly project when you decide to renovate your exterior walls, an...


