Top Tools for a Seamless Renovation Experience
Share
To guarantee a seamless renovation experience, you'll need the right tools for the job. Start with essential plasterboard tools like a high-quality saw or utility knife for precise cuts, and a dustless or vacuum-powered saw to minimize mess. Don't forget fixing tools like drill bits, screwdrivers, and a hammer for securing plasterboard. Customizing your tool kit with specialized tools like joint compound spreaders and sanders will also help you achieve smooth finishes. By investing in the right tools and techniques, you'll be well on your way to a successful renovation - and there's more to explore to take your project to the next level.
Key Takeaways
- High-quality plasterboard saw or utility knife for precise cuts and minimal waste.
- Essential fixing tools include drill bits, screwdrivers, and hammers for securing plasterboard.
- Invest in quality joint compound and putty knife for smooth finishes and seamless repairs.
- Select reliable fastening systems, such as bugle head screws or coarse thread screws, for optimal plasterboard thickness.
- Use a dustless or vacuum-powered saw to minimize mess and enhance the renovation experience.
Essential Plasterboard Renovation Tools
When tackling a plasterboard renovation project, you'll need a solid arsenal of specialized tools to get the job done efficiently and effectively.
First and foremost, you'll require a high-quality plasterboard saw or utility knife to make precise cuts in the plasterboard. A dustless saw or vacuum-powered saw is recommended to minimize mess and dust.
Next, you'll need a range of fixing tools, including drill bits, screwdrivers, and a hammer, to secure the plasterboard to the studs or joists. It's also crucial to have a level, stud finder, and pencil to guarantee accurate placement and alignment of the plasterboard.
When it comes to plasterboard insulation options, consider eco-friendly materials like recycled denim or fiberglass batts. These materials not only reduce environmental impact but also provide excellent thermal and acoustic insulation.
Additionally, a tape measure, square, and pencil will come in handy for measuring and marking the plasterboard for cutting and installation.
Customizing Plasterboard Tool Kits
By equipping yourself with the right tools, as discussed earlier, you're now ready to take your plasterboard renovation project to the next level by customizing your tool kit to fit your specific needs and preferences. A customized tool kit allows you to tackle unique challenges and exploit DIY plasterboard hacks, ensuring a seamless installation process.
To begin, assess your plasterboard installation project's specific requirements. Identify areas that may necessitate specialized tools or modifications. Consider factors like wall type, corner construction, and surface finishing. You can then proceed to assemble or adjust your tool kit accordingly.
Key areas to focus on include adjusting joint compound spreaders and sanders to achieve smooth finishes and sharp corners. Add or create customized putty knives, enabling precision applications. It's also essential to enhance drill and driver settings, considering best screw-setting strategies and taping knife specifications.
Keep your kit compact, easily transportable, and durable to handle varying job conditions. Applying plasterboard installation tips will yield greater work efficiency.
To excel, scrutinize potential constraints or problematic surfaces within the site before incorporating respective equipment solutions, in conjunction with basic principles such as suitable angles for recessing board, improving screws-to-space correlation, and finally allowing finer management control within contained installation site protocols.
Plasterboard Cutting and Scoring
To achieve precise cuts and scores on plasterboard, you'll need to master the use of specialized cutting tools, such as utility knives, plasterboard saws, or scoring cutters, each designed to handle specific cutting tasks efficiently and effectively.
When working with different plasterboard types, it's vital to choose the right tool for the job. For example, utility knives are ideal for cutting small sections of plasterboard, while plasterboard saws are better suited for making long, straight cuts.
Scoring techniques also play a significant role in achieving clean cuts and minimizing waste. By applying the right amount of pressure and using the correct scoring tool, you can create a precise score line that allows for easy snapping of the plasterboard.
It's also important to note that different scoring techniques are required for different plasterboard types. For instance, a deeper score may be necessary for thicker plasterboard, while a lighter score may be sufficient for thinner boards.
Efficient Plasterboard Fastening Systems
You'll need a reliable plasterboard fastening system to secure your boards firmly in place, and there are several options available, including bugle head screws, coarse thread screws, and plasterboard nails, each designed for specific applications and offering distinct advantages.
When selecting a fastening system, consider the type of plasterboard you're using, the thickness of the board, and the surface finish required. For example, bugle head screws are ideal for thicker boards, while coarse thread screws provide a stronger hold in thinner boards.
Innovative fastening techniques, such as self-drilling and self-tapping screws, can save you time and effort. Ergonomic tool designs, like cordless screwdrivers, also make the fastening process more efficient and comfortable.
Some key benefits of efficient plasterboard fastening systems include:
-
Increased stability and security of the boards
-
Reduced risk of damage or collapse
-
Improved surface finish and reduced likelihood of nail pops or screw heads visible after finishing
- Time-saving and increased productivity
Smoothing and Finishing Techniques
A crucial step in achieving a professional finish is mastering the art of smoothing and finishing techniques, which involves selecting the right tools and materials to create a seamless joint and a smooth surface.
You'll want to invest in a good quality joint compound, also known as spackling compound, and a putty knife for applying and smoothing it out. For a smooth finish, use a taping knife to apply the compound to the seams, then use a 6-inch putty knife to spread it evenly. Use a sanding block or sandpaper to smooth out the surface, feathering the edges to blend with the surrounding area.
To achieve a high-quality finish, you'll need to master various smoothing techniques, such as 'knifing' and 'sponging.' Knifing involves holding the putty knife at a 45-degree angle and applying gentle pressure to remove excess compound, while sponging uses a damp sponge to smooth out the surface.
You'll also need to choose the right finishing methods, such as using a primer or a coat of paint to protect and enhance the surface. By mastering these techniques and methods, you'll be able to achieve a seamless and professional-looking finish on your renovation project.
Advanced Plasterboard Repair Methods
Having mastered the art of smoothing and finishing techniques, it's now time to tackle more complex plasterboard repairs, which require a deeper understanding of the materials and methods involved in restoring damaged or deteriorated plasterboard surfaces.
As you immerse yourself in advanced plasterboard repair methods, you'll need to take into account the specific challenges posed by different types of damage, such as water stains, cracks, and holes.
To achieve professional-grade results, you'll want to focus on three key areas:
-
Assessing damage: Carefully evaluate the extent of the damage to determine the best course of action, taking into account factors like plasterboard insulation and moisture resistance.
-
Selecting materials: Choose the right materials for the job, including specialized joint compounds, tapes, and fasteners designed to provide superior moisture resistance and durability.
-
Executing repairs: Employ advanced techniques, such as using mesh patches for reinforcing damaged areas, to guarantee a strong and long-lasting repair.
Frequently Asked Questions
What Safety Gear Is Required for Plasterboard Renovation?
When renovating plasterboard, you're working with a potentially hazardous material that can release airborne particles.
You must wear the right safety gear to protect yourself. Start by donning a dust mask or respirator with a HEPA filter to prevent inhalation of dust and debris.
Wear protective eyewear, such as goggles or safety glasses, to shield your eyes from falling particles.
Additionally, cover your skin with long sleeves, pants, and gloves to prevent cuts and scratches.
Can I Reuse Old Plasterboard in My Renovation?
When deciding whether to reuse old plasterboard in your renovation, you'll want to weigh the benefits against potential drawbacks.
Reusing plasterboard can save you money and reduce waste, but it may not be the best option if the boards are damaged or contaminated.
Consider the plasterboard benefits, such as its fire-resistance and soundproofing properties, and compare them to plasterboard alternatives like drywall or plywood.
Inspect the boards carefully before making a decision.
How Do I Dispose of Leftover Plasterboard Materials?
As you wrap up your renovation project, you're left with the not-so-glamorous task of dealing with leftover plasterboard materials.
Don't worry, you'll be breathing a sigh of relief soon!
You'll want to explore recycling options and disposal methods that are both eco-friendly and cost-effective.
Consider partnering with a local recycling facility that accepts gypsum-based materials, or check with your waste management provider for special collection programs.
Proper disposal is just a phone call away!
What Is the Best Way to Store Plasterboard Tools?
When storing plasterboard tools, you'll want to prioritize organization and maintenance.
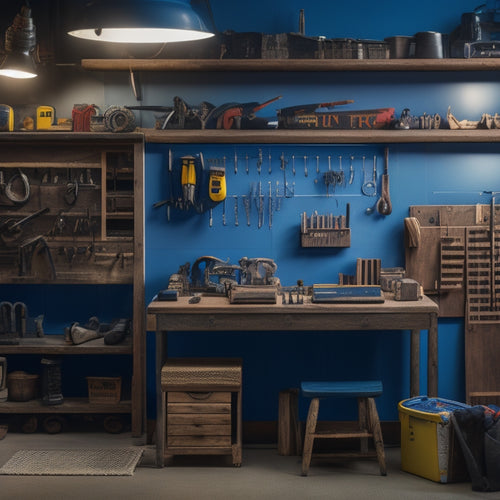
First, designate a specific area for your tools, keeping them off the floor to prevent damage. Use a pegboard or hooks to hang items like trowels, saws, and sanders.
Store smaller items like joint compound and screws in labeled containers.
Regularly clean and dry your tools to prevent rust and extend their lifespan.
This will help maintain your plasterboard tools' performance and longevity.
Can I Renovate Plasterboard in a Small, Enclosed Space?
When renovating plasterboard in a small, enclosed space, you'll face unique challenges.
You'll need to adapt your plasterboard installation techniques to accommodate the limited area. Consider using specialized tools, like a compact joint knife or a handheld sanding block, to navigate tight spaces.
Additionally, guarantee proper ventilation to prevent dust buildup and maintain a safe working environment.
Measure carefully and plan your cuts to minimize waste and optimize material usage.
Conclusion
You've got the top tools for a seamless plasterboard renovation experience at your fingertips.
Don't worry if you're thinking, 'But I'm not a pro, I'll never be able to master these tools.' With practice, you'll be a plasterboard expert in no time.
The key is to start with the essentials, customize your tool kit, and gradually move on to advanced techniques.
Before you know it, you'll be tackling even the most complex plasterboard projects with ease and precision.
Related Posts
-

Why Use Concrete Blocks in Home Renovation
You're considering using concrete blocks in your home renovation, and for good reason: they offer a unique combinatio...
-

7 Smart Tool Organization Tips for Small Renovations
As you tackle your small renovation, you're likely wasting precious time searching for misplaced tools. To enhance ef...
-

What Tools to Rent for Block Wall Renovation
When renovating a block wall, it's vital to have the right tools for the job. You'll need demolition tools like pry b...


