
Top Patching Tool Kit for DIY Home Renovators
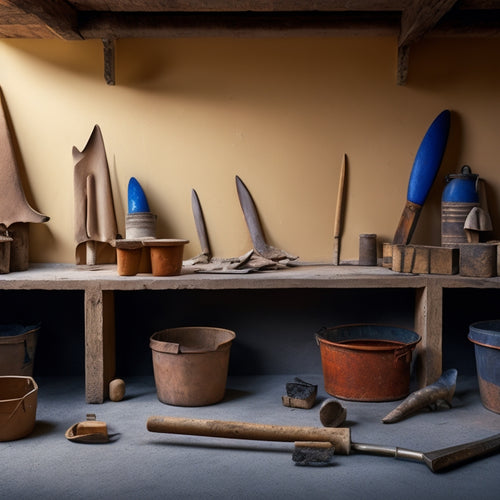
You'll need a well-rounded patching tool kit to tackle stucco repairs successfully. Start with essential tools like a putty knife, trowel, float, hawk or mortar pan, wire brush, mixing bucket and stick, level and straightedge, safety gear, and a sponge. Additionally, choose the right patching materials for the job, such as stucco, joint compound, epoxy, caulk, or plaster. Next, follow checklists for stucco repair, assess cracks, and apply effective repair techniques. With the right tools and knowledge, you'll be well on your way to fixing stucco cracks like a pro - and the best part is, you're just getting started on mastering the art of stucco repair.
Key Takeaways
- Essential tools for stucco patching include a putty knife, trowel, float, hawk or mortar pan, wire brush, and mixing bucket and stick.
- A variety of patching materials are available, including stucco, joint compound, epoxy, caulk, and plaster, each suited for specific tasks.
- For successful stucco repairs, identify the type of crack, measure its dimensions, analyze patterns, and check for moisture before applying a bonding agent and patching compound.
- Effective repair techniques involve cleaning, applying a bonding agent, selecting the right patching compound, and layering with feathered edges for blending.
- Final touches include applying a finish coat, painting, sealing, inspecting, and properly cleaning and storing tools and materials.
Essential Stucco Patching Tools
What makes a stucco patching job successful? It's not just about slapping on some repair materials and calling it a day. You need the right tools for the job.
As a DIY home renovator, you'll want to invest in a patching tool kit that covers the basics for various stucco types. Start with a sturdy putty knife for mixing and applying stucco repair compounds. A notched trowel is essential for spreading and smoothing out the material.
You'll also need a hawk or mortar pan to hold and transport your repair mixture. Don't forget a level and straightedge to guarantee your patches are even and plumb.
When working with different stucco types, such as traditional, synthetic, or insulated concrete forms (ICFs), you may need specialized tools. For instance, a grout bag and grout saw can come in handy for repairing ICF stucco.
Additionally, a wire brush and scraper can help prepare the surface for patching. With the right tools, you'll be well-equipped to tackle any stucco patching job that comes your way.
Checklists for Stucco Repair
Frequently, DIY home renovators overlook the importance of preparation when tackling a stucco repair project. This lack of planning can lead to costly mistakes, wasted time, and a subpar finish.
To avoid these common pitfalls, create a thorough checklist for your stucco repair project.
-
Inspect the damaged area to identify the root cause of the problem, making sure you address the underlying issue, not just the symptoms.
-
Clean the surrounding area to prevent debris and dust from interfering with the repair process.
-
Prepare the necessary materials, including stucco mix, water, and weatherproofing agents, to guarantee a strong and durable bond.
-
Apply a bonding agent to the damaged area to create a strong foundation for the new stucco.
-
Verify that the surrounding stucco is securely attached to the substrate, confirming a solid base for the repair.
Best Stucco Patching Tool Kit
With your stucco repair checklist in hand, you're ready to tackle the task at hand.
Now, it's time to assemble the best stucco patching tool kit to guarantee a professional-like finish. A good stucco patching tool kit should include a putty knife, trowel, and float to apply and smooth out patching materials.
A texture sponge or sprayer is also essential for achieving the desired stucco texture. Don't forget a mixing bucket and mixing stick to prepare the patching materials according to the manufacturer's instructions.
A hawk or mud pan is also necessary for holding and transporting the patching materials to the repair area. Additionally, a level, straightedge, and pencil will come in handy for marking and guaranteeing the patch is level and even.
With these tools, you'll be well-equipped to tackle any stucco repair project and achieve a seamless, long-lasting finish.
DIY Stucco Repair Essentials
Get ready to plunge into the nitty-gritty of stucco repair by gathering the essential materials that'll help you achieve a flawless finish.
You'll need a combination of repair materials and specialized tools to restore your stucco texture to its original state.
- Stucco patching compound: A must-have for filling in gaps and holes
- Stucco mesh tape: For reinforcing areas prone to cracking
- Stucco texture spray: To achieve a uniform finish
- Putty knife: For applying and smoothing out patching compound
- Sandpaper: To fine-tune the surface and remove any excess material
With these essentials in your toolkit, you'll be well-equipped to tackle stucco repair projects with confidence.
Remember to always follow the manufacturer's instructions for each product, and take the necessary safety precautions to avoid injury.
Fixing Stucco Cracks Successfully
When you're dealing with stucco cracks, it's essential to assess the damage and plan your repair strategy accordingly.
You'll need to identify the type and severity of the cracks, as well as the underlying causes, to guarantee a successful fix.
Crack Assessment and Planning
How do you determine the severity of stucco cracks and decide where to focus your repair efforts? Evaluating cracks is essential in planning a successful repair. You need to identify the type of crack, its location, and the underlying cause to develop an effective plan.
-
Crack types: Identify hairline cracks, structural cracks, or cracks caused by settling, water damage, or weathering. Each type requires a different approach to repair.
-
Crack width and depth: Measure the width and depth of cracks to determine the extent of damage and required repair materials.
-
Crack pattern: Analyze the pattern of cracks to identify areas of high stress or weakness in the stucco.
-
Moisture detection: Check for signs of water intrusion or moisture behind the stucco, which can exacerbate cracks.
-
Structural integrity: Evaluate the overall structural integrity of the wall or surface to confirm your repair plan addresses any underlying issues.
Effective Repair Techniques
Now that you've assessed the cracks and developed a plan, it's time to execute the repair. Effective repair techniques are essential to ensuring a long-lasting fix.
Start by cleaning the crack area with a wire brush to remove dirt and debris. Next, apply a bonding agent to the crack to enhance the adhesion of the repair material.
When it comes to material selection, choose a stucco patching compound that matches the original stucco's color and texture. Apply the compound in thin layers, feathering it out towards the edges to blend with the surrounding area.
Use a putty knife or trowel to smooth out the material, making sure to press it firmly into the crack. Allow each layer to dry completely before applying the next.
Once the final layer is dry, sand the area to a smooth finish. By following these repair techniques and selecting the right materials, you'll be able to successfully fix stucco cracks and enjoy a durable, long-lasting result.
Stucco Patching Tool Must-Haves
You'll need a specific set of tools to successfully patch stucco, as the process requires a combination of precision and durability.
To achieve a seamless repair, you'll need to match the original stucco texture and use high-quality repair materials.
Here are the essential tools for stucco patching:
- Putty knife: A sturdy, flexible knife for applying and smoothing out stucco repair materials
- Trowel: A flat, wide tool for spreading and leveling stucco mix
- Float: A long, flat tool for finishing and texture-matching the stucco surface
- Wire brush: A stiff-bristled brush for cleaning and preparing the area around the patch
- Mixer: A drill-mounted mixer or a mixing paddle for thoroughly combining stucco repair materials
With these tools in your arsenal, you'll be well-equipped to tackle stucco patching projects and achieve professional-looking results.
Completing Stucco Repairs Efficiently
With your stucco patching toolkit in hand, it's time to focus on completing the repair efficiently. You've got the right tools, now it's about executing the repair with precision and speed.
When it comes to stucco repairs, timing is vital. You want to complete the repair before water seeps behind the stucco, causing further damage. Here's a breakdown of the ideal repair timing:
| Repair Stage | Ideal Timing | Description |
|---|---|---|
| Initial Assessment | Immediately | Identify the source of the damage and assess the extent of the repair needed |
| Cleaning and Preparation | Within 24 hours | Clean the area, remove damaged stucco, and prepare the surface for repair |
| Applying Stucco Texture | Within 48 hours | Apply the new stucco texture, matching the original as closely as possible |
| Final Touches | Within 72 hours | Apply a finish coat, paint, and seal the stucco to guarantee a durable finish |
Frequently Asked Questions
Can I Use a Regular Putty Knife for Stucco Patching?
You can use a regular putty knife for stucco patching, but a stiff-bladed knife or a specialized stucco knife is better suited for scraping and applying stucco repair compounds, ensuring a smoother finish with your stucco repair techniques.
Do I Need to Prime the Stucco Surface Before Patching?
You'll likely need to prime the stucco surface before patching to guarantee a strong bond between old and new stucco, especially if the surface is porous or has an uneven texture, requiring advanced patching techniques to match the original stucco texture.
How Long Does It Take for Stucco Patching Compound to Dry?
As you patiently wait for your stucco patch to set, imagine a skilled chef carefully crafting a dish - just like you, they require precision timing. Stucco drying typically takes 24-48 hours, depending on environmental conditions, but with proper patching techniques, you'll be cooking up a flawless finish in no time.
Can I Patch Stucco in Extreme Weather Conditions?
You can patch stucco in extreme weather, but it's essential to take into account the type of stucco and weather conditions. For instance, traditional stucco may not perform well in high winds or freezing temps, while acrylic-based stucco can tolerate more flexibility.
Are There Any Safety Precautions for Stucco Patching Beginners?
As you venture into stucco patching, remember Hercules' labors weren't without precautions; you too should wear protective gear, guarantee a stable ladder, and follow manufacturer instructions for stucco materials to excel in patching techniques and avoid hazards.
Conclusion
You've now got the ultimate blueprint for stucco repair success. With the right tools and a clear plan, you're ready to tackle those pesky cracks and holes like a skilled chef whipping up a culinary masterpiece. Remember, stucco repair is a puzzle, and with the best patching tool kit, you've got all the pieces to complete the image. Get to work, and soon your walls will be smooth, strong, and crack-free!
Related Posts
-

Streamlining Your Exterior Renovation Timeline
To streamline your exterior renovation timeline, start by identifying your project goals and objectives, and prioriti...
-

Protect Your Tools for Outdoor Renovation Success
To guarantee outdoor renovation success, you need to protect your tool investment by understanding warranty and suppo...
-
7 Best Plastering Bat Sizes for DIY Renovations
When tackling DIY renovations, you'll want to choose the right plastering bat size to achieve a professional-looking ...
