
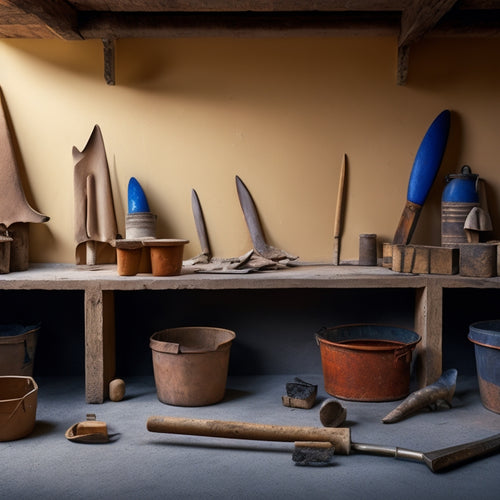
Top DIY Home Renovation Wall Plastering Tool Picks
To achieve a professional-looking finish in your DIY home renovation project, you'll need the right plastering tools. Start with a high-quality plastering trowel, choosing a flexible blade for smooth finishes and a curved or angled blade for tight spaces. Pair it with a lightweight plastering hawk made of aluminum or stainless steel for ease of use. Don't forget a plastering knife set with durable handles and high-carbon steel blades, as well as a plastering brush with natural or synthetic bristles suitable for your plaster type. With the right tools in hand, you're ready to tackle the basics – but the key to a flawless finish lies in the details, and the right techniques and tools can make all the difference.
Key Takeaways
- Flexible plastering trowels with stainless steel or carbon steel materials are ideal for smooth finishes.
- Plastering hawks made of lightweight materials like aluminum and stainless steel facilitate easy plaster handling.
- Plastering knife sets with high-carbon steel or stainless steel blades and ergonomic grips enhance performance and comfort.
- Natural and synthetic plastering brushes are suitable for different plaster types and finishes, requiring proper care for longevity.
- Electric and manual plastering mixers offer options for large and small projects, with consistent mixing ensuring uniform plaster quality.
Best Plastering Trowels for Beginners
When it comes to plastering, having the right trowel can make all the difference between a smooth, even finish and a lumpy, uneven mess. As a beginner, you're probably enthusiastic to get started, but don't rush into buying just any trowel.
Look for one with a flexible blade, preferably made of stainless steel or carbon steel, which will help you achieve a smooth finish. A trowel with a curved or angled blade is also ideal for getting into tight spaces and corners.
When using your trowel, remember to hold it at a 45-degree angle and apply gentle pressure. Don't press too hard, as this can create air pockets and unevenness.
Also, avoid using a trowel that's too big or too small for the job. A trowel that's too big will be hard to maneuver, while one that's too small won't cover enough surface area.
By mastering basic plastering techniques and avoiding common beginner mistakes, such as applying too much plaster at once, you'll be well on your way to achieving a professional-looking finish.
With practice and patience, you'll become a pro at plastering in no time!
Top Rated Plastering Hawks
A plastering hawk is an important tool for any serious plastering project, and having a top-rated one can make a significant difference in the quality of your work. You'll be using it to hold and carry plaster, so it's vital to choose a hawk that's durable, comfortable, and easy to maneuver.
When selecting a top-rated plastering hawk, consider the materials it's made of. Aluminum and stainless steel hawks are popular choices due to their lightweight and rust-resistant properties. However, some plasterers swear by wooden hawks, which can provide a more comfortable grip and better control over the plaster.
When it comes to plastering techniques, a good hawk can make all the difference. Look for a hawk with a flat, smooth surface that allows for easy scooping and carrying of plaster. A comfortable handle with a secure grip is also important, as you'll be using the hawk for extended periods.
Top-rated plastering hawks often feature ergonomic designs and balanced weight distribution, making them perfect for professionals and DIYers alike. By investing in a top-rated plastering hawk, you'll be able to tackle even the most demanding plastering projects with confidence and precision.
Essential Plastering Knife Sets
You're ready to add the final touches to your plastering job with an essential plastering knife set, and choosing the right tools starts with selecting the right knife handle.
Your options typically include handles made of durable fiberglass, contoured wooden handles that fit comfortably in your hand, or ergonomic rubber grips that provide shock absorption and reduced slippage.
As you evaluate handle options, consider the pros and cons of knife blade materials, including high-carbon steel, stainless steel, and flexible steel blades that excel at various plastering tasks.
Knife Handle Options
The choice of handle on your essential plastering knife sets is just as important as the blade itself, playing a critical role in overall tool performance, durability, and your personal comfort level during use.
You'll want to evaluate ergonomic designs that fit comfortably in your hand, reducing fatigue and strain on your wrist and arm. Look for handles made from high-quality materials that can withstand the rigors of plastering, such as fiberglass, wood, or durable plastics.
When it comes to handle materials, you've got options.
Fiberglass handles are lightweight, yet incredibly strong, making them a popular choice among plasterers.
Wooden handles, on the other hand, offer a comfortable grip and can be contoured to fit your hand perfectly.
Durable plastics, like polypropylene or nylon, are also great options, offering a comfortable grip and resistance to wear and tear.
Whichever material you choose, make sure it's durable, comfortable, and designed with ergonomic principles in mind.
A well-designed handle can make all the difference in your plastering experience, so don't skimp on this critical component.
Knife Blade Materials
When selecting a plastering knife, the blade material is just as essential as the handle. You want a blade that's durable, flexible, and easy to clean. Now, let's explore the nitty-gritty of knife blade materials.
Carbon steel blades are a popular choice among DIYers. They offer excellent blade durability and are relatively inexpensive. However, they can rust if not properly maintained, so make sure to clean and dry them after each use.
Stainless steel blades, on the other hand, are resistant to rust and corrosion, making them a great option for those who plan to use their knife in humid or wet conditions.
If you're looking for a blade that offers flexibility, consider a high-carbon stainless steel or titanium-coated blade. These materials provide excellent knife flexibility, making them perfect for smoothing out uneven surfaces.
Additionally, they're resistant to corrosion and easy to clean. Ultimately, the blade material you choose will depend on your specific needs and preferences.
High Quality Plastering Brushes
Five essential tools for any DIY home renovation project are high-quality plastering brushes. You'll use them to apply, smooth, and finish plaster, so it's vital to choose the right ones.
When it comes to plastering brush materials, you've got a few options. Natural bristle brushes are great for applying thick, textured plasters, while synthetic brushes are better suited for smooth, fine finishes. Look for brushes with sturdy ferrules (the metal band that holds the bristles in place) and comfortable, ergonomic handles.
To keep your plastering brushes in top condition, follow some simple brush maintenance tips. Always clean your brushes thoroughly after use, and store them in a dry place to prevent mold and mildew. Use a brush comb to remove dried plaster and prevent bristle matting.
And, don't soak your brushes in water for too long – it can cause the bristles to become brittle and break. By choosing the right plastering brush materials and following these simple maintenance tips, you'll be able to achieve professional-looking results on your DIY home renovation project.
Recommended Plastering Sponges
With your plastering brushes in hand, you're ready to move on to another essential tool for a successful DIY home renovation project: plastering sponges.
When it comes to selecting the right plastering sponge, you'll find a range of types to choose from. Natural sea sponges are great for smoothing out imperfections and creating a texture, while synthetic sponges are perfect for applying and smoothing large areas. Another popular option is the combination sponge, which has a scrubbing surface on one side and a smooth surface on the other.
Regardless of the sponge type, it's vital to know the best cleaning techniques. A well-maintained sponge can extend its lifespan and guarantee it performs at its best.
For instance, natural sea sponges should be cleaned with mild soap and lukewarm water, while synthetic sponges can handle stronger detergents and hotter water. You'll also want to squeeze out as much water as possible and shape your sponge to maintain its natural curve.
Don't overclean, though, or your sponge will fall apart - remember, the key to effective plastering lies in precision and subtlety!
Top Performing Plastering Mixers
You're now ready to tackle the next essential step in your DIY home renovation project: mixing plaster. This is where the magic happens, and a good plastering mixer can make all the difference.
You've got two main plastering mixer types to choose from: electric and manual. Electric mixers are the way to go if you're dealing with large quantities of plaster or want to save some elbow grease. Manual mixers, on the other hand, are perfect for small projects or when you need more control over the mixing process.
When it comes to electric mixers, you'll want to pay attention to the power rating. A higher power rating means a faster mixing time, but it also means a higher risk of over-mixing. Look for a mixer with a variable speed control to give you more flexibility.
Some popular options include the 500-watt mixer for small to medium projects and the 1000-watt mixer for larger jobs.
Don't be afraid to invest in a good quality mixer – it'll make the mixing process a breeze and guarantee a smooth finish for your plastering project.
Expert Recommended Plastering Edgers
When working with plaster, you need edgers that can handle the demands of your project.
You'll want to contemplate the type of edger blade you'll use, as carbide-tipped blades are best for heavy-duty applications, while stainless steel blades are ideal for smaller, more detailed work.
To achieve a smooth finish, you'll also need to think about edge control and corner smoothing tools, which can make all the difference in the quality of your plastering job.
Edger Blade Types
Precision is key when it comes to achieving a professional finish in plastering, and the right edger blade can make all the difference.
You'll want to choose an edger blade that's designed for your specific plastering needs. There are two main types of edger blades: flexible and rigid. Flexible edger blades are great for curved or irregular surfaces, while rigid edger blades are better suited for straight edges and sharp corners.
When selecting an edger blade, consider the features that matter most to you. Look for blades with a durable, rust-resistant coating to guarantee they'll withstand the rigors of plastering.
Some edger blades also feature a built-in scraper or notcher, which can be a huge time-saver. Don't forget to think about maintenance, too. Some edger blades are designed for easy cleaning and replacement, while others may require more elbow grease.
Plastering Edge Control
Selecting the right edger blade is just the first step in achieving a professional finish in plastering. To truly master plastering edge control, you need to take into account the entire process, from plaster application techniques to edge finishing tips. A good edger is essential, but it's only as good as the person wielding it.
To get the most out of your edger, focus on developing smooth, consistent strokes. Apply gentle to moderate pressure, depending on the type of plaster you're working with. Don't press too hard, or you'll end up with a messy, uneven edge.
Here are some expert-recommended tips for achieving perfect plastering edges:
- Use a putty knife or trowel to apply a thin layer of plaster to the edge area before using your edger.
- Hold your edger at a 45-degree angle to the wall for a smooth, seamless finish.
- Use a damp cloth to wipe away excess plaster and prevent it from drying on the edger.
- Apply a second coat of plaster to the edge area after edging for added strength and durability.
- Practice, practice, practice – the more you use your edger, the more comfortable you'll become with its feel and movement.
Corner Smoothing Tools
You're now ready to take your plastering edge control to the next level with the right corner smoothing tools.
These expert-recommended plastering edgers are designed to help you achieve a seamless angle finish and perfect corner bead. With the right corner smoothing tools, you'll be able to create sharp, clean lines and eliminate any pesky lumps or bumps.
When it comes to corner smoothing tools, you've got a few options to choose from. One popular choice is the corner smoothing trowel, which features a curved or angled blade that's specifically designed for smoothing out corners.
Another option is the corner edger, which is a smaller, handheld tool that's perfect for getting into tight spaces.
Both of these tools are essential for achieving a professional-looking angle finish, and they're surprisingly easy to use.
Simply apply a small amount of plaster to the corner, then use your chosen tool to smooth it out and create a sharp, clean line.
With a little practice, you'll be a pro at creating perfect corners in no time!
Best Plastering Sanding Blocks
When tackling a plastering project, your sanding block is an extension of your hand, helping you smooth out imperfections and achieve a flawless finish.
With the right sanding block, you'll be able to tackle any plastering job with confidence. But, let's get real, not all sanding blocks are created equal. You'll want to choose a block that fits comfortably in your hand and is designed for your specific sanding needs.
Here are the top picks for plastering sanding blocks that'll make your life easier:
-
Foam sanding blocks: Perfect for smooth finishes and detail work. They're lightweight and easy to maneuver, making them ideal for small areas.
-
Rubber sanding blocks: Great for heavy-duty sanding and removing old plaster. They're durable and can withstand tough sanding techniques.
-
Wooden sanding blocks: Excellent for large, flat areas. They're sturdy and provide a solid base for sanding.
-
Sanding block sets: A must-have for any serious DIYer. These sets usually include multiple blocks with different grits and sizes.
-
Ergonomic sanding blocks: Designed for comfort and reduced fatigue. They're perfect for long sanding sessions.
Frequently Asked Questions
Can I Use a Putty Knife for Plastering Small Areas?
You're tackling small area plastering, eh? Yeah, you can use a putty knife, but master the techniques first! Hold it at a 45-degree angle, scoop, and smooth - don't scrub! Practice makes perfect, so don't be afraid to get a little messy!
How Often Should I Clean My Plastering Tools?
You're probably wondering how often to clean your plastering tools to avoid a sticky mess. Clean them after each use, and sanitize weekly to prevent dried plaster buildup. Trust us, your tools (and your sanity) will thank you!
Are Plastering Tools Suitable for Textured Ceilings?
You're tackling textured ceilings, eh? Plastering tools can work, but it's all about mastering the right plastering techniques. For a smooth finish, use a specialized ceiling finish tool or a putty knife with a curved edge.
Can I Use a Regular Brush for Applying Plaster?
You're about to get plastered - literally! Don't even think about using a regular brush for applying plaster, it's a recipe for disaster. Instead, grab a specialized plaster brush with stiff bristles and angled tips for smooth application techniques.
Do I Need a Mixer for Small Plastering Projects?
You're tackling small plastering projects, eh? Don't worry, you won't need a mixer for tiny tasks. Mastering plastering techniques and nailing mixing ratios is key. For small jobs, a bucket and drill with a paddle bit will suffice.
Conclusion
You've got the lowdown on the top DIY home renovation wall plastering tools. Now, it's time to put them to work. Think of your plastering project as a puzzle, with each tool an essential piece that fits together to create a smooth, seamless finish. With the right tools in hand, you'll be able to tackle even the toughest plastering jobs with confidence. Get ready to plaster like a pro!
Related Posts
-

Affordable Plastering Tools for Home Renovation Success
You're taking the first step towards a successful home renovation by investing in the right plastering tools. Start w...
-
7 Best Plastering Bat Sizes for DIY Renovations
When tackling DIY renovations, you'll want to choose the right plastering bat size to achieve a professional-looking ...
-

Stucco Patching Material Checklist for Home Renovation
You'll need a range of essential tools, including a putty knife, wire brush, hawk or flat trowel, level, and straight...


