
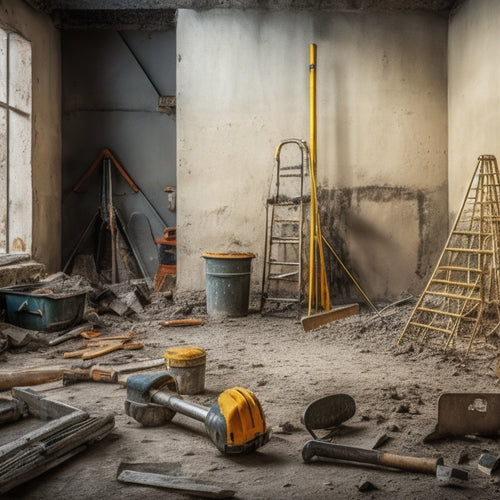
Top 5 Plastering Tools for Small Renovation Jobs
For small renovation jobs, you'll want to start with the top 5 crucial plastering tools: a putty knife for applying and smoothing plaster, a hawk for efficiently holding and carrying plaster, a trowel for spreading and smoothing plaster, a joint knife for finishing joints and edges, and a sanding block for smoothing out the finished plaster surface. These hand tools will cover the basics of your plastering needs. To take your plastering skills to the next level, it's vital to reflect on specialized trowels, mixing and applying tools, and finishing equipment, all of which play critical roles in achieving a professional-grade finish.
Key Takeaways
- A putty knife is essential for applying and smoothing plaster in small renovation jobs.
- A hawk is necessary for holding and carrying plaster efficiently, especially in tight spaces.
- A trowel is crucial for spreading and smoothing plaster to achieve a uniform finish.
- A joint knife is vital for finishing joints and edges, ensuring a clean and professional look.
- A sanding block is necessary for smoothing out the finished plaster surface, removing imperfections.
Essential Plastering Hand Tools
You'll need about a dozen vital plastering hand tools to tackle most renovation jobs effectively. These tools will help you master various plastering techniques and avoid common mistakes that can lead to costly rework.
First, you'll need a putty knife for applying and smoothing out plaster. A hawk is also essential for holding and carrying plaster, allowing you to work efficiently. A trowel is used for spreading and smoothing plaster, while a joint knife is used for finishing joints and edges.
Other vital tools include a scratch awl for scratching the surface of the plaster, a darby for smoothing out large areas, and a corner trowel for finishing corners. A nail spotter is used to fill nail holes, and a sanding block is used to smooth out the finished surface.
A level and a straightedge are also necessary for ensuring your work is straight and level. With these tools, you'll be well-equipped to handle most plastering tasks and produce professional-looking results.
Best Plastering Trowels for Small Jobs
When tackling small plastering jobs, consider reaching for a specialized trowel that's designed to handle tight spaces and delicate details. There are several trowel types to choose from, each with its own unique characteristics. For small jobs, a putty knife or a small, flexible trowel is often the best choice. These trowels are perfect for smoothing out small areas, filling gaps, and applying plaster to intricate details.
When selecting a trowel, look for one with a stainless steel or carbon steel blade, as these are more durable and resistant to rust. A trowel with a rubber or plastic handle is also a good choice, as it provides a comfortable grip and can help reduce fatigue.
Regular trowel maintenance is also vital to guarantee peak performance. Clean your trowel regularly with soap and water, and apply a rust-inhibiting coating to the blade to prevent corrosion. Store your trowel in a dry place to prevent damage and extend its lifespan.
Plastering Mixing and Applying Tools
Mixing and applying plaster requires a range of specialized tools, including hawks, buckets, and sponges, that help you achieve a smooth, even finish.
When it comes to mixing techniques, you'll need a bucket that's sturdy enough to withstand the rigors of plaster mixing. A heavy-duty bucket with a non-slip handle is ideal for large batches of plaster. For smaller jobs, a hawk and trowel combo is perfect for mixing and applying small amounts of plaster.
When it comes to application methods, a sponge is an essential tool for applying plaster to large areas quickly and efficiently. A good-quality sponge will help you achieve a smooth, even finish, and can be used to apply multiple coats of plaster.
For more intricate work, a specialized plastering brush is perfect for getting into tight spaces and applying plaster to small areas.
Smoothing and Finishing Equipment
Smoothing and finishing equipment, such as trowels, edgers, and sanding blocks, are essential for achieving a flawless, professional-grade finish on your renovation job. When it comes to smoothing techniques, you'll want to use the right tool for the job. A putty knife or trowel is perfect for smoothing out small imperfections, while a sanding block is better suited for larger areas.
Here's a comparison of some common finishing products:
| Product | Grain Size | Best For |
|---|---|---|
| Fine Sandpaper | 120-150 | Smoothing out small imperfections |
| Coarse Sandpaper | 80-100 | Removing old plaster or paint |
| Steel Wool | Extra Fine | Polishing metal surfaces |
| Sanding Block | 120-220 | Smoothing large areas of drywall or plaster |
When choosing a finishing product, consider the surface you're working with and the level of smoothness you need to achieve. Using the right tool and technique will help you achieve a professional-grade finish on your renovation job. By investing in the right smoothing and finishing equipment, you'll be able to tackle even the toughest jobs with confidence and precision.
Specialized Plastering Accessories Needed
You'll need specialized plastering accessories to tackle specific renovation tasks, such as applying texture, creating decorative finishes, or repairing complex plaster damage. These accessories are designed to help you achieve high-quality results while guaranteeing plastering safety.
For instance, a texture additive can be used to create a specific finish, such as a popcorn or orange peel texture. This specialized equipment allows you to customize the texture to suit your renovation needs.
When working with plaster, it's crucial to have the right tools to avoid injuries and guarantee a successful outcome. A plastering hawk, for example, is a must-have for holding and applying plaster.
You'll also need a trowel or putty knife for smoothing and finishing the plaster. Additionally, a joint knife can be used to repair cracks and joints.
Frequently Asked Questions
Can I Use Regular Paintbrushes for Applying Plaster?
When applying plaster, you're better off using specialized tools rather than regular paintbrushes.
Paintbrush types designed for plaster application have stiffer bristles that can handle the thick, heavy mixture. Regular paintbrushes will likely leave brush strokes and marks on the surface.
You'll get a smoother finish with a plaster brush or a trowel, which are specifically designed for this task.
Using the right tool will save you time and effort in the long run.
How Do I Clean and Maintain My Plastering Tools?
You're likely to spend 20% more time on a project if your tools aren't properly maintained. To avoid this, prioritize tool cleaning and maintenance.
After each use, scrub your plastering tools with soap and water to remove dried plaster. Regularly inspect for damage and replace worn-out parts.
Store them in a dry place to prevent rust. By doing so, you'll guarantee your tools remain in top condition, saving you time and effort in the long run.
Are There Any Safety Precautions for Handling Plaster?
When handling plaster, you're exposing yourself to potential health risks. You must take safety precautions seriously.
Wear safety gear like gloves, goggles, and a dust mask to prevent skin irritation and inhalation of plaster particles. Make certain good ventilation in your workspace to minimize dust accumulation.
Keep your work area clean and organized to avoid accidents. You're responsible for your own safety, so take the necessary steps to protect yourself from plaster handling hazards.
Can I Use Plastering Tools for Other DIY Projects?
You're about to reveal a secret: your plastering tools aren't limited to just plastering.
You can repurpose them for other DIY projects.
Think about it, the techniques you've mastered for plaster application can be applied to other materials.
You can use your trowel for joint compound or your hawk for mixing alternative materials.
Experiment with different materials and techniques to discover new uses for your trusty plastering tools.
How Do I Store Plastering Tools to Prevent Damage?
To keep your plastering tools in top condition, you're looking for smart storage solutions.
Effective tool organization is key to preventing damage and making your next project a breeze. You need a dedicated space for your tools, like a toolbox or storage bin with dividers.
Label each section to guarantee easy access and maintain a clean workspace. Invest in a rugged tool case or bag for on-site storage, and hang your tools from hooks or pegs to save floor space.
Conclusion
You've got your top 5 plastering tools for small renovation jobs. With these essentials, you'll be well-equipped to tackle minor repairs and achieve professional-looking results.
Did you know that a staggering 75% of homeowners consider DIY projects, like plastering, a key factor in increasing their property's value?
By investing in the right tools, you'll not only save money but also boost your home's worth.
Get plastering and see the difference for yourself.
Related Posts
-

What to Inspect When Buying Used Renovation Tools
When buying used renovation tools, you need to scrutinize every detail to avoid costly mistakes. Inspect for rust and...
-
What Tools to Rent for Block Wall Renovation
When renovating a block wall, it's vital to have the right tools for the job. You'll need demolition tools like pry b...
-

What to Look for in Pneumatic Renovation Tools
When selecting pneumatic renovation tools, you'll want to take into account several key factors to guarantee optimal ...


