
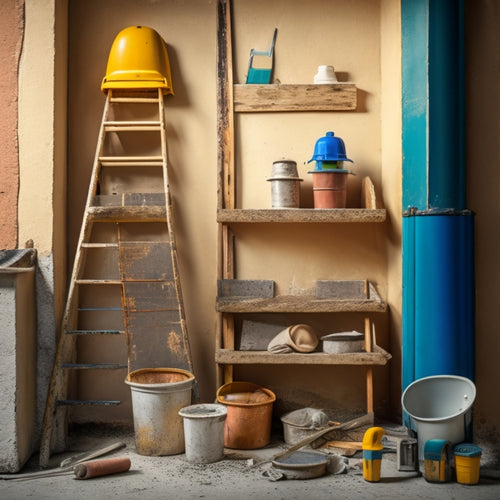
Tools You Need for Exterior Block Wall Renovation
When renovating an exterior block wall, you'll need a range of specialized tools to get the job done safely and effectively. Start with essential safety gear like hard hats, respirator masks, and knee pads. Demolition and removal tools like sledgehammers, pry bars, and wheelbarrows will help you break down and remove old blocks. Next, use pressure washers, wire brushes, and surface sealants to clean and prepare the surface. You'll also need adhesives and fastening tools, measuring and marking tools, and mixing and application tools to secure the new blocks in place. Now that you have a solid foundation, you can move on to the finer details of your renovation project.
Key Takeaways
• Safety gear, including goggles, hard hats, and respirator masks, is essential for protecting yourself from debris and hazardous materials during renovation.
• Demolition and removal tools, like sledgehammers and pry bars, are necessary for breaking down and removing old block walls.
• Cleaning and preparation tools, such as pressure washers and wire brushes, help remove dirt and grime from block surfaces, ensuring a strong bond with new materials.
• Adhesives and fastening tools, including mechanical and chemical fastening options, are required for securing new blocks in place.
• Measuring and marking tools, like tape measures and laser levels, ensure accurate measurements and proper alignment for a successful renovation.
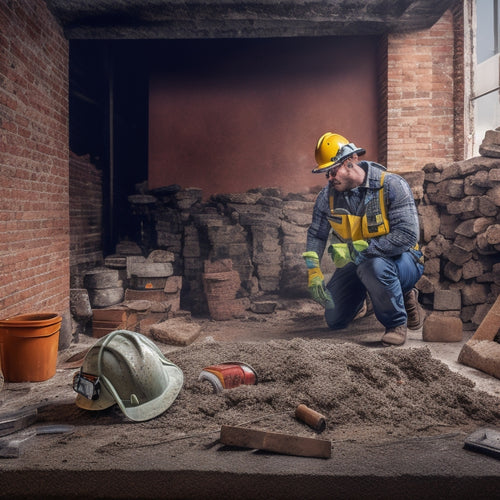
Safety Gear and Protective Equipment
When renovating an exterior block wall, you must wear essential safety gear and protective equipment to prevent injuries from falling debris, chemical exposure, and other hazards.
Your eyes are vulnerable to dust and debris, so don't forget to wear safety goggles to protect them. A hard hat is also a must-have to prevent head injuries from falling objects.
Breathing in construction dust and chemicals can be harmful, so wear a respirator mask to filter the air. Protect your hands from cuts and abrasions with work gloves, and knee pads will save your knees from bruising and scraping. Ear protection is also vital to prevent hearing damage from loud machinery.
Safety harnesses can prevent fatal falls, especially when working at heights. And, in case of an emergency, have a first aid kit on hand to treat minor injuries.
Don't compromise on your safety – wear the right gear and take necessary precautions to guarantee a safe and successful renovation project. Remember, safety isn't just a priority, it's a necessity.
Demolition and Removal Tools
With your exterior block wall renovation project underway, you'll need to gather the necessary demolition and removal tools to efficiently dismantle the existing structure.
A sledgehammer is a must-have for breaking down the block wall into manageable pieces. Mastering various sledgehammer techniques, such as using a controlled swing and targeting the block's weakest points, will make the process less labor-intensive.
You'll also need a pry bar to remove blocks that are stubbornly stuck together.
Debris disposal is a critical aspect of demolition, so invest in a heavy-duty trash can or dumpster to contain the rubble. A wheelbarrow or dumpster dolly will come in handy for transporting the debris to the disposal site.
Don't forget a pair of gloves and safety glasses to protect yourself from flying debris and dust.
Finally, a shovel or scoop will help you collect and remove smaller pieces of debris.
With these tools, you'll be well-equipped to tackle the demolition phase of your exterior block wall renovation project.
Cleaning and Preparation Tools
You'll need a range of specialized cleaning and preparation tools to thoroughly remove dirt, grime, and old mortar from the exposed block surface, guaranteeing a strong bond between the old and new materials. A pressure washer is a must-have for blasting away stubborn dirt and grime. Be sure to use a wide fan tip and keep the nozzle at least 12 inches away from the surface to avoid damaging the blocks.
| Tool | Description | Purpose |
|---|---|---|
| Pressure Washer | High-pressure water sprayer | Remove dirt, grime, and old mortar |
| Wire Brush | Stiff-bristled brush | Remove loose debris and mortar |
| Surface Sealant | Protective coating | Seal and protect the block surface |
| Safety Gear | Gloves, goggles, and mask | Protect yourself from debris and chemicals |
When using these tools, make sure to wear appropriate safety gear, including gloves, goggles, and a mask. Additionally, apply a surface sealant to the cleaned block surface to protect it from the elements and guarantee a strong bond with the new materials. By having the right cleaning and preparation tools, you'll be able to achieve a strong and durable bond between the old and new materials, guaranteeing a successful exterior block wall renovation.
Adhesives and Fastening Tools
To guarantee a secure and lasting bond between the old block wall and new materials, it's vital to select the right adhesives and fastening tools for the job.
You'll need to choose from various adhesive types, such as epoxy-based, acrylic-based, or polyurethane-based adhesives, each suited for specific applications and environmental conditions. For instance, epoxy-based adhesives are ideal for high-strength bonding, while acrylic-based adhesives are better suited for flexible joints.
When it comes to fastening techniques, you'll need to decide between mechanical fastening, such as anchor bolts or screw anchors, and chemical fastening, using adhesives or epoxies. Mechanical fastening provides high shear strength, while chemical fastening offers flexibility and resistance to vibration. You may also consider hybrid fastening techniques, combining mechanical and chemical fastening for added security.
Regardless of the adhesive or fastening technique you choose, make sure to follow the manufacturer's instructions and take necessary safety precautions. Proper surface preparation, including cleaning and priming, is also essential to guarantee a strong bond between the old block wall and new materials.
Measuring and Marking Tools
Accurate measurements and precise markings are essential in guaranteeing a successful exterior block wall renovation, and that's where measuring and marking tools come into play.
You'll need to invest in a reliable tape measure, a level, and a laser level to verify your measurements are spot on. When it comes to marking methods, a chalk line reel and a marker are must-haves. These will help you create precise lines and marks on your block wall, assuring a professional finish.
Mastering measuring techniques is vital to achieving accurate results. You'll need to learn how to take precise measurements, convert them to scale, and transfer them to your block wall.
Marking methods, on the other hand, involve creating clear and visible lines that guide your renovation process. With the right tools and techniques, you'll be able to create a precise and accurate layout for your block wall renovation.
Mixing and Application Tools
When you're preparing to renovate an exterior block wall, you'll need the right mixing and application tools to guarantee a successful project.
You'll be working with mortar, so it's vital to have a sturdy mixing bucket and a reliable paddle to mix it to the correct consistency.
Next, you'll need to apply the mortar, and that's where your mortar application tools come in - we'll explore these tools in more detail.
Mixing Buckets and Paddles
You'll need a sturdy mixing bucket and a reliable paddle to combine and apply the renovation materials efficiently. When it comes to mixing techniques, having the right tools can make all the difference. A good mixing bucket should be durable, easy to clean, and resistant to the materials you're working with.
Here are three essential bucket types to take into account:
-
Stainless Steel Buckets: Ideal for mixing small batches of mortar, these buckets are non-reactive and easy to clean.
-
Heavy-Duty Plastic Buckets: Perfect for large-scale projects, these buckets are durable and can withstand the rigors of heavy use.
-
Fiberglass Buckets: A cost-effective option, fiberglass buckets are lightweight and resistant to corrosion.
When pairing your bucket with a paddle, look for one that's sturdy, comfortable to hold, and easy to maneuver. A reliable paddle will help you achieve the perfect consistency and mix your materials efficiently.
Mortar Application Tools
By selecting the right mortar application tools, you're guaranteeing a smooth, consistent finish and minimizing the risk of costly rework. The type of mortar you're working with will influence your tool choice. For instance, if you're using a high-strength mortar, you'll need a tool that can handle its thick, dense consistency.
You'll need a pointing trowel for applying and finishing mortar joints. Its flat, wide blade allows for even spreading and smoothing of the mortar. For larger areas, a screed trowel or darby is ideal for leveling and smoothing out the mortar.
When working with specific mortar types, such as epoxy-based or polymer-modified mortars, you may require specialized application tools designed for those particular products.
Mastering various application techniques is essential for achieving a professional finish. You'll need to practice different strokes, such as the 'V' stroke or the 'buttering' technique, to guarantee proper adhesion and coverage.
Finishing and Smoothing Tools
To achieve a uniform, visually appealing exterior block wall finish, employ a range of specialized finishing and smoothing tools that help remove imperfections, fill gaps, and create a polished surface.
These tools are essential for refining your block wall renovation, ensuring a professional-looking outcome that withstands the elements.
You'll need the following finishing and smoothing tools to perfect your exterior block wall:
-
Trowels: For applying and spreading finishing materials, such as stucco or plaster, to create a smooth, even surface.
-
Floats: To further smooth and flatten the surface, removing any excess material and air pockets.
-
Sponges or texture mats: For adding texture or pattern to the surface, depending on your desired aesthetic.
Frequently Asked Questions
How Do I Ensure the Wall Is Structurally Sound Before Renovation?
Before diving into renovation, you'll want to verify the wall is structurally sound.
You'll need to conduct a thorough structural inspection to identify any weaknesses or damage.
As part of this, you'll also need to perform a load assessment to determine the weight the wall can safely bear.
This will give you a clear picture of what repairs or reinforcements are needed to assure the wall's stability and safety during the renovation process.
Can I Reuse Old Blocks or Must I Purchase New Ones?
You're weighing your options, wondering if you can breathe new life into old blocks or if it's time to bring in fresh reinforcements.
Conduct a thorough block condition assessment to determine if the existing blocks are still structurally sound.
Compare the cost of cleaning and reusing them to purchasing new ones. Crunch the numbers, considering factors like labor, materials, and potential future repairs.
Your decision will depend on the blocks' condition, your budget, and the desired outcome of your renovation project.
What Is the Best Way to Match the Original Block Color?
You're wondering how to match the original block color? Well, you've got a few options!
Start by examining the original blocks' color, texture, and tone.
Then, explore color matching techniques like taking a block sample to a local supplier or using online color picker tools.
If the original color is no longer available, consider block stain options like acid-based or latex-based stains. These can help you achieve a near-perfect match.
Remember to test the stains on a small area first to guarantee the desired result.
Do I Need to Obtain a Permit for Exterior Block Wall Renovation?
'Ha! You thought matching the original block color was the hardest part, didn't you?
Think again! Before you start that exterior block wall renovation, you'll need to navigate the permit requirements maze.
Don't assume you're exempt - check with your local government to see if you need a permit.
Familiarize yourself with renovation guidelines to avoid costly delays.
Trust us, it's worth the hassle to guarantee your project is up to code and safe for everyone involved.'
Can I Renovate an Exterior Block Wall in Extreme Weather Conditions?
When renovating an exterior block wall, you'll want to exercise extreme caution in harsh weather conditions.
Don't risk compromising the integrity of your wall - or your safety. Take necessary weather precautions, like covering the area with tarps or canopies, to shield it from direct sunlight, heavy rain, or strong winds.
Proper surface preparation is also essential, so make certain the wall is clean, dry, and free of debris before starting the renovation.
Conclusion
Now that you've got the right tools for your exterior block wall renovation, it's time to get to work.
Remember, a successful renovation depends on attention to detail and precision.
Will you be able to transform your exterior block wall into a stunning façade that turns heads?
With these tools, you're one step closer to achieving that goal.
Related Posts
-
7 Crucial Tools for a Successful Stucco Renovation
To guarantee a successful stucco renovation, you'll need a range of essential tools. First, invest in a stucco mixer ...
-
7 Must-Have Safety Gears for Brick Wall Renovation
When renovating a brick wall, you'll face a multitude of hazards, making it essential to wear and use the right safet...
-

7 Smart Tool Organization Tips for Small Renovations
As you tackle your small renovation, you're likely wasting precious time searching for misplaced tools. To enhance ef...


