
Tools You Need for DIY Plaster Renovation Success
You'll need a range of tools to succeed in your DIY plaster renovation. Essential hand tools include a putty knife, hawk or trowel, joint knife, scratching awl, and wire brush. Additionally, specialized equipment like plastering trowels, floats, and edgers will help you achieve professional-looking results. Power tools like rotary hammer drills and angle grinders will make quick work of breaking up old plaster and shaping new edges. Don't forget safety gear like protective eyewear, respiratory masks, and gloves to keep you safe on the job. Now, let's dive deeper into the specifics of each tool and how to use them to achieve a stunning renovation.
Key Takeaways
• Essential hand tools like putty knives, hawks, and joint knives are must-haves for scraping, applying, and smoothing plaster surfaces.
• Specialized plastering equipment like plastering trowels, floats, and edgers help achieve a smooth, even finish and clean edges.
• Power tools such as rotary hammer drills and angle grinders efficiently break up and remove old plaster, and shape new plaster.
• Sanders, including orbital and belt sanders, are necessary for smoothing and refining plaster surfaces to achieve a high-quality finish.
• Safety gear, including protective eyewear, respiratory masks, and gloves, is crucial for protecting yourself from hazardous plaster dust and debris.
Essential Hand Tools for Plastering
As you commence your plaster renovation project, you'll need a solid arsenal of essential hand tools to get the job done efficiently and effectively. Mastering various plastering techniques requires the right tools, and having them at your disposal will guarantee a successful renovation.
First and foremost, a putty knife is a must-have for scraping and smoothing out surfaces. A hawk or trowel is also vital for holding and applying plaster to the wall. A joint knife or finishing knife will come in handy for creating clean joints and edges. Additionally, a scratching awl or scratch tool is necessary for creating a key for the plaster to bond to the surface.
Surface preparation is critical, and a wire brush or stiff-bristled brush will help remove debris and old adhesive. A damp cloth or sponge will also be necessary for cleaning and dampening the surface before applying plaster.
With these essential hand tools, you'll be well-equipped to tackle your plaster renovation project with confidence. Remember, having the right tools is only half the battle – mastering plastering techniques and surface preparation is key to achieving a professional finish.
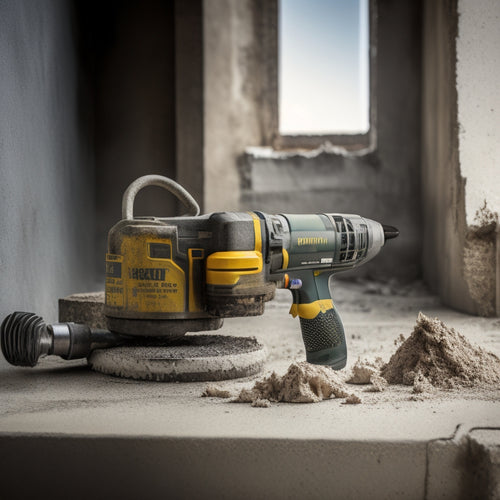
Power Tools for Efficient Renovation
When you're ready to tackle more demanding plaster renovation tasks, you'll need to bring in the big guns - power tools that can help you work more efficiently.
You'll be using these tools to perform tasks that require more power and precision, such as drilling, shaping, and smoothing.
Rotary Hammer Drilling
You'll need a rotary hammer drill to efficiently break up and remove old plaster, especially when dealing with thick or heavily reinforced material. This powerful tool is essential for DIY plaster renovation success. With the right drilling techniques, you'll be able to tackle even the most challenging projects.
Rotary hammer drills offer several advantages over traditional drills. They're capable of delivering powerful blows while rotating the drill bit, making them perfect for breaking up hard materials like plaster. Additionally, rotary hammers are more efficient and reduce fatigue, allowing you to work longer without getting tired.
Here's a comparison of rotary hammer drills and traditional drills:
| Feature | Rotary Hammer Drill | Traditional Drill |
|---|---|---|
| Power | High-torque motor for heavy-duty applications | Lower power for lighter tasks |
| Speed | Faster drilling and breaking | Slower drilling and breaking |
| Efficiency | Reduces fatigue with less effort required | Requires more effort and energy |
| Versatility | Suitable for drilling, chiseling, and breaking | Limited to drilling and driving |
| Material Handling | Handles thick and reinforced materials | Struggles with hard materials |
Angle Grinder Shaping
With a rotary hammer drill handling the heavy lifting, an angle grinder becomes an indispensable tool for shaping and refining your plaster renovation project.
You'll use it to smooth out rough edges, remove excess plaster, and create precise curves. To get the most out of your angle grinder, it's essential to master various angle grinder techniques. For instance, use a slow, controlled motion to prevent scratching the surrounding area. Keep the grinder at a 20- to 30-degree angle to maintain ideal control.
Regular angle grinder maintenance is also critical. Confirm the grinder is properly secured to your work surface to prevent accidents. Clean the grinder's air vents regularly to prevent overheating. Additionally, inspect the grinding wheels for wear and tear, replacing them as needed.
By following these tips, you'll be able to achieve professional-looking results with your angle grinder. Remember to always wear protective gear, including gloves, safety glasses, and a dust mask, when operating the grinder.
With practice and patience, you'll become proficient in using this powerful tool to shape and refine your plaster renovation project.
Sanders for Smoothing
Two key types of sanders - orbital sanders and belt sanders - are vital power tools for efficiently smoothing out your plaster renovation project, allowing you to achieve a high-quality finish.
You'll use orbital sanders for fine-tuning and detail work, as they provide a high level of control and precision. They're ideal for smoothing out small areas, removing minor imperfections, and creating a uniform surface.
Belt sanders, on the other hand, are designed for heavier-duty smoothing and are perfect for larger areas. They're more aggressive and can quickly remove old plaster, uneven surfaces, and rough patches.
When choosing a sander, consider the type of plaster renovation project you're working on and the level of smoothing required. For most projects, a combination of both orbital and belt sanders will provide the best results.
By mastering the right smoothing techniques with these sander types, you'll be able to achieve a professional-looking finish that's smooth, even, and free of imperfections.
Remember to always work progressively through grits, starting with coarse and moving to fine, to guarantee a flawless finish.
With the right sanders and techniques, you'll be able to transform your plaster renovation project into a stunning success.
Specialized Plastering Equipment Needs
To achieve a professional-grade finish, specialized plastering equipment is essential, as it enables you to tackle complex tasks efficiently and produce high-quality results. Mastering various plastering techniques requires the right tools, and investing in specialized equipment will elevate your work. When it comes to material selection, you'll need the right gear to handle different types of plaster.
Here are some essential specialized plastering equipment needs:
| Equipment | Purpose | Type |
|---|---|---|
| Plastering trowel | Apply and smooth plaster | Stainless steel or carbon fiber |
| Hawk | Hold and transport plaster | Aluminum or stainless steel |
| Float | Smooth and finish plaster | Wooden or resin |
| Edger | Create clean edges and lines | Stainless steel or carbon fiber |
| Stilts | Reach high ceilings and walls | Adjustable aluminum or fiberglass |
These specialized tools will help you achieve a flawless finish and take your plastering skills to the next level. By investing in the right equipment, you'll be able to master various plastering techniques and produce high-quality results that will impress.
Safety Gear for Protection
As you begin working with specialized plastering equipment, you must also prioritize your personal safety by wearing the right gear to protect yourself from potential hazards.
Protective eyewear is a must-have when working with plaster. Plaster particles and debris can fly into the air, posing a significant risk to your eyes. Wear goggles or safety glasses with a protective shield to prevent eye injuries.
Respiratory masks are another essential safety item. Plaster dust can be hazardous when inhaled, causing respiratory issues. A good-quality respiratory mask will filter out 99.97% of particles as small as 0.3 microns, keeping you safe from airborne contaminants.
Additionally, wear long-sleeved shirts, pants, and gloves to prevent skin irritation from plaster dust. Steel-toed boots or shoes with slip-resistant soles will also help prevent accidents.
Measuring and Mixing Essentials
With accurate measurements and precise mixing, you'll guarantee a strong and durable plaster finish. Therefore, invest in a reliable digital scale and a sturdy mixing bucket. A digital scale guarantees precise weight measurements, which is fundamental for achieving the correct mixing ratios. For instance, a typical plaster mix consists of 2-3 parts sand to 1 part cement, and a digital scale helps you achieve this ratio with ease.
Mastering measuring techniques is also essential for a successful plaster renovation. Start by measuring the dry ingredients, such as sand and cement, separately to guarantee accuracy. Then, use a bucket or container with clear markings to measure the correct amount of water.
It's important to follow the manufacturer's instructions for the recommended water-to-plaster ratio. When mixing, use a mixing stick or trowel to combine the ingredients in a specific pattern, such as a 'figure-eight,' to prevent lumps and achieve a smooth consistency.
Cleaning and Finishing Tools
You'll need a set of specialized cleaning and finishing tools to remove excess plaster, smooth out imperfections, and achieve a high-quality finish. These tools will help you master advanced cleaning techniques and add the perfect finishing touches to your DIY plaster renovation project.
Here are some essential cleaning and finishing tools to have in your toolkit:
-
Soft-bristled brush: For gentle removal of excess plaster and debris from surfaces
-
Steel trowel: For scraping and smoothing out imperfections in the plaster
-
Fine-grit sandpaper: For polishing and refining the finish of your plaster surfaces
- Dusting brush: For removing dust and debris from surfaces before applying finishes
With these tools, you'll be able to refine your cleaning techniques and add a professional finish to your DIY plaster renovation project.
Remember to use them in conjunction with your measuring and mixing essentials to guarantee a seamless renovation process.
Frequently Asked Questions
Can I Reuse Old Plaster or Do I Need to Replace It Entirely?
You're wondering if you can reuse old plaster or need to replace it entirely.
First, conduct a thorough plaster assessment to identify the extent of damage.
If cracks are shallow and the plaster is still firmly attached, you might be able to get away with repair techniques like filling and sanding.
However, if the damage is extensive or the plaster is crumbling, it's best to replace it entirely to guarantee a stable and long-lasting renovation.
How Do I Prevent Dust From Spreading Throughout the House?
You'll want to contain the dust chaos by sealing off the renovation zone with plastic sheets and tape, creating a dust-tight barrier.
Next, employ dust containment strategies like misting the area to minimize airborne particles.
Don't forget to utilize air filtration solutions, such as HEPA-filtered vacuums and air purifiers, to capture any stray dust.
What Is the Ideal Temperature for Plastering a Room?
When you're plastering a room, you'll want to ascertain the ideal temperature for best results. Aim for a range of 60°F to 70°F (15°C to 21°C), as this allows for proper drying and setting of the plaster.
Extreme temperatures can affect plastering techniques, causing uneven finishes or delayed drying.
Be mindful of temperature effects, as they can impact the final outcome of your project.
Can I Plaster Over Existing Paint or Wallpaper?
As you stand before the canvas of your walls, ready to apply a fresh layer of plaster, you wonder: can you plaster over existing paint or wallpaper?
The answer lies in the bond between old and new. If the paint is well-adhered, you might get away with a light scrape and prime.
But wallpaper removal is a must, lest the new plaster crack and falter.
Guarantee a strong foundation by removing old layers, and your new plaster will be a masterpiece.
How Long Does It Take for Plaster to Fully Dry and Harden?
You're probably wondering how long it takes for plaster to fully dry and harden.
The drying time for plaster curing depends on several factors, including environmental conditions, thickness of application, and type of plaster used.
Generally, it takes around 24-48 hours for the initial set, but it can take up to 28 days for the plaster to fully cure and reach its maximum strength.
Conclusion
You've made it to the finish line! With the right tools, you're ready to tackle your DIY plaster renovation project.
Did you know that a single coat of plaster can increase a wall's fire-resistance rating by up to 45 minutes? Impressive, right?
Now, get ready to transform your space with confidence. Remember, having the proper tools is key to achieving professional-looking results and staying safe on the job.
Happy renovating!
Related Posts
-
Top Drill for Concrete Wall Renovation
When choosing the top drill for your concrete wall renovation, you'll want to prioritize key features like drill powe...
-

7 Patio Safety Tips for DIY Renovation Projects
As you begin your DIY patio renovation project, prioritize safety by evaluating the worksite for tripping hazards and...
-

3 Best Planter Shopping Timeline Tips for Renovators
When incorporating planters into your renovation project, you'll want to plan carefully to avoid delays and guarantee...


