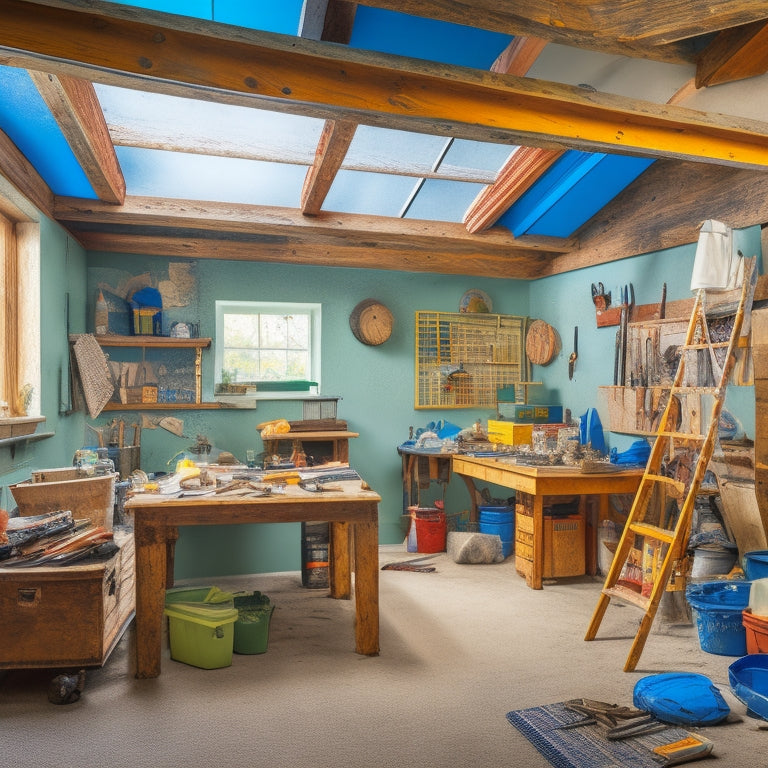
Tools You Need for a Successful Ceiling Renovation
When tackling a ceiling renovation, you'll need a range of specialized tools to guarantee success. Start with essential safety gear like safety goggles, respirator masks, and protective clothing to prevent injury. Then, gather drywall and plaster tools, including cutting tools, installation tools, and finishing tools. Measuring and marking tools, like tape measures and marking tools, are vital for accurate cuts and precise lines. Don't forget ladders and scaffolding, painting and finishing tools, and joint compound tools. Additionally, power tools for demolition, cleanup and disposal tools, and drywall repair kits are necessary. As you prepare for your project, explore these tools in more depth to guarantee a professional-looking result.
Key Takeaways
• Essential safety gear, including goggles, respirator masks, and protective clothing, is crucial for a safe ceiling renovation process.
• Drywall and plaster tools, such as cutting tools, installation tools, and finishing tools, are necessary for proper installation and finishing.
• Measurement and marking tools, including tape measures, levels, and marking tools, ensure accurate measurements and precise lines.
• Ladders and scaffolding, with safety features and weight ratings, provide safe access to high areas for renovation tasks.
• Specialized tools, such as joint compound tools, power tools for demolition, and cleanup and disposal tools, are required for specific tasks in the ceiling renovation process.
Essential Safety Gear
Before you start tearing out old ceiling tiles or scraping off popcorn ceilings, make sure you're equipped with the essential safety gear to protect yourself from potential hazards.
You'll need safety goggles to shield your eyes from falling debris and dust. Look for goggles with anti-fog coating and good ventilation to prevent fogging.
A respirator mask is another must-have to prevent inhalation of airborne particles and dust. Choose a mask with a HEPA filter or one that's specifically designed for ceiling renovation.
Don't forget to wear a dust mask when working with drywall or plaster. These materials can release fine particles that can irritate your lungs. A good dust mask should fit snugly around your nose and mouth, and have a filter that can be replaced when it gets clogged.
Additionally, wear long-sleeved shirts, long pants, and closed-toe shoes to protect your skin from cuts and abrasions.
Drywall and Plaster Tools
With your safety gear in place, you're ready to tackle the task at hand: preparing the necessary drywall and plaster tools to remove or install ceiling materials. These tools will help you achieve a smooth, even finish and guarantee a successful ceiling renovation.
Here are the essential drywall and plaster tools you'll need:
-
Drywall saw or utility knife: for cutting drywall to fit around vents, electrical outlets, or other obstacles
-
Drywall screws and drill: for securing drywall panels to the ceiling frame during drywall installation
-
Plaster mixing bucket and trowel: for mixing and applying plaster to the ceiling surface
-
Joint compound and joint tape: for finishing and reinforcing drywall seams
-
Sandpaper and sanding block: for smoothing out rough edges and surfaces
Remember to choose high-quality tools that are suitable for your specific ceiling renovation project. With these tools in your arsenal, you'll be well-equipped to tackle any drywall or plaster task that comes your way.
Ladders and Scaffolding
As you ascend to work on your ceiling renovation, selecting the right ladders and scaffolding becomes vital to guarantee safe and efficient access to the ceiling area.
You'll need to take into account ladder safety features, such as non-slip feet, sturdy handrails, and level platforms. Make certain the ladder is rated for your weight and the weight of any materials you'll be carrying.
For more extensive projects, scaffolding may be necessary. There are several scaffolding types to choose from, including rolling scaffolds, fixed scaffolds, and suspended scaffolds. Each type has its own advantages and limitations, so it's important to select the one that best suits your project's requirements.
When setting up scaffolding, make sure to follow the manufacturer's instructions and take necessary precautions to prevent falls and other accidents. Always maintain three points of contact with the ladder or scaffolding, whether it's two hands and one foot or two feet and one hand.
Measuring and Marking Tools
When you're preparing to renovate a ceiling, you'll need to make certain you have the right measuring and marking tools to get the job done accurately.
You'll be working with complex calculations and precise markings, so it's crucial to have reliable tools that can help you measure and mark straight lines, calculate ceiling angles, and take precise measurements.
Tape Measures Required
You'll regularly rely on a tape measure to accurately assess the dimensions of your ceiling renovation project, guaranteeing precise calculations and minimizing potential mistakes. As you begin this project, it's crucial to understand the different tape measure types and measuring techniques to get the most accurate results.
When it comes to tape measure types, you'll need to choose between a standard tape measure, a laser tape measure, or a digital tape measure. Each type has its advantages, but a standard tape measure is usually the most cost-effective and reliable option.
Here are some critical measuring techniques to keep in mind:
-
Take multiple measurements to guarantee accuracy
-
Use a level to confirm the tape measure is straight
-
Measure from the center of any obstructions, such as electrical outlets
-
Record all measurements carefully to avoid mistakes
-
Double-check calculations before cutting or installing materials
Marking Straight Lines
With accurate measurements in hand, mark straight lines on your ceiling using the right measuring and marking tools to guarantee a precise fit for your renovation materials.
For this task, you'll need a reliable line level, which assures your lines are perfectly horizontal or vertical. Choose a laser line level for increased accuracy and efficiency. This tool projects a precise, self-leveling line onto your ceiling, allowing you to mark it with confidence.
When it comes to marking techniques, use a pencil or marker specifically designed for marking on drywall or plaster. These writing tools produce clear, fine lines that won't smudge or bleed, making it easier to achieve precise cuts and installations.
For added precision, use a straightedge or ruler to guide your marking tool. By combining the right tools and techniques, you'll be able to create accurate, straight lines that serve as a solid foundation for your ceiling renovation.
Calculating Ceiling Angles
To accurately calculate ceiling angles, measure the rise and run of your ceiling's slope using a digital angle finder or a combination square, guaranteeing precise markings for your renovation materials. This step is vital, as it will determine the correct angle for your ceiling installation. By mastering angle measurement techniques, you'll be able to tackle complex ceiling slope calculations with confidence.
Here are some essential considerations for calculating ceiling angles:
-
Take precise measurements of the ceiling's rise and run to determine the slope.
-
Use a digital angle finder or combination square to guarantee accurate angle readings.
-
Record the angle measurements in degrees to reference later.
-
Calculate the ceiling's pitch by dividing the rise by the run, and express it as a ratio (e.g., 4:12).
-
Verify your calculations by checking the angle against the manufacturer's recommendations for your specific ceiling materials.
Painting and Finishing Tools
What specific tools will you need to attain a flawless, professional-looking finish when painting and finishing your ceiling renovation project?
To start, you'll need high-quality paintbrushes in various sizes to master different brush techniques. Natural bristle brushes are ideal for oil-based paints, while synthetic brushes work best with water-based paints. Invest in a range of brush sizes, from 1-inch to 4-inch, to tackle different areas of your ceiling.
Next, choose the right paint type for your ceiling. Will you opt for a matte, eggshell, or semi-gloss finish? Consider factors like moisture resistance, durability, and color retention when selecting your paint. Don't forget to pick up a paint tray, roller extension pole, and paint grid to guarantee a smooth, even application.
Additionally, you'll need a putty knife for filling small imperfections, a sanding block for smoothing out rough spots, and a drop cloth to protect your floors from paint spills. A paint edger or painter's tape will help you achieve crisp, clean lines.
With these tools in your arsenal, you'll be well-equipped to tackle your ceiling painting and finishing project with confidence.
Ceiling Repair Accessories
When tackling ceiling repairs, you'll need the right accessories to guarantee a seamless finish.
You'll require drywall repair kits that include everything from mesh tape to spackling compound, allowing you to tackle holes and cracks with confidence.
Additionally, joint compound tools, such as putty knives and taping knives, will help you achieve a smooth, professional-looking finish.
Drywall Repair Kits
You'll likely need a drywall repair kit, an essential ceiling repair accessory, to effectively patch holes and cracks in your ceiling, ensuring a smooth surface for finishing. A good drywall repair kit should include a variety of materials to help you achieve a seamless repair.
When selecting a drywall repair kit, consider the following components:
-
Pre-mixed joint compound or spackling compound
-
Drywall tape or mesh
-
Sandpaper or a sanding block
-
A putty knife or joint knife
-
A drywall screwdriver or utility knife for cutting and scraping
These tools will enable you to master various drywall installation techniques, such as applying drywall texture options like knockdown or orange peel. By having the right materials and tools, you'll be able to efficiently repair imperfections in your ceiling, ensuring a professional-looking finish.
Joint Compound Tools
How effectively you apply joint compound determines the success of your ceiling renovation, making joint compound tools an indispensable component of your ceiling repair accessories. You'll need the right tools to guarantee a smooth, even application and a professional-looking finish.
Here are the essential joint compound tools you'll need:
| Tool | Description |
|---|---|
| Joint compound knife | Used for scooping and applying joint compound to the ceiling |
| Mud pan | A container for mixing and holding joint compound |
| Putty knife | For scraping and smoothing out excess joint compound |
When it comes to joint compound application, you'll want to guarantee you're mixing the compound to the right consistency. A joint compound mixing tool, such as a mixing paddle or drill bit, will help you achieve the perfect blend. Remember to always follow the manufacturer's instructions for mixing and application to avoid any mishaps. With the right joint compound tools, you'll be able to tackle even the most complex ceiling repairs with confidence. By investing in these essential tools, you'll be well on your way to a successful ceiling renovation.
Power Tools for Demolition
Demolition of a ceiling typically begins with the removal of existing ceiling materials. For this task, you'll need a range of power tools capable of breaking, cutting, and scraping. These tools will help you execute various demolition techniques efficiently and safely.
Here are some essential power tools you'll need for ceiling demolition:
-
Reciprocating saw: for cutting through drywall, plywood, and other materials
-
Demolition hammer: for breaking up tiles, plaster, and other stubborn materials
-
Circular saw: for making straight cuts in drywall, plywood, and other materials
-
Rotary hammer: for drilling through concrete, brick, and other hard surfaces
-
Grinder: for scraping off old adhesives, paint, and other residue
Remember to always follow proper safety protocols and tool maintenance procedures when using these power tools. Regular maintenance will guarantee your tools remain in good working condition, allowing you to complete your ceiling renovation project efficiently and effectively.
Cleanup and Disposal Tools
After completing the demolition phase, turning your attention to cleanup and disposal is essential, as it guarantees a safe and organized workspace for the renovation process.
You'll need the right tools to efficiently remove debris, dust, and other hazardous materials. Invest in a heavy-duty vacuum cleaner or a shop vacuum with a HEPA filter to capture fine particles and prevent airborne contaminants. A dustpan and brush will also come in handy for sweeping up larger debris.
When it comes to disposal methods, you'll need heavy-duty trash bags or a dumpster to contain and remove waste. Consider using a dumpster with a lid to prevent debris from spilling out during transport.
For efficient cleanup techniques, use a broom or a dusting mop to remove dust and debris from surfaces. Don't forget to wear personal protective equipment, such as gloves, safety glasses, and a dust mask, to protect yourself from hazardous materials.
Frequently Asked Questions
How Do I Ensure a Uniform Ceiling Height Throughout the Room?
To guarantee a uniform ceiling height throughout the room, you'll need to carefully plan your ceiling framing.
Start by taking precise height measurements at multiple points along the walls, noting any variations.
Then, use a level and a string line to establish a consistent reference point for your ceiling framing.
Can I Reuse Old Ceiling Materials or Should I Replace Them?
You're likely aware that 70% of homeowners renovate to increase their home's value.
Now, when it comes to reusing old ceiling materials or replacing them, you need to weigh your options carefully.
Assess the condition and quality of your current ceiling material options, considering factors like water damage, mold, or outdated materials.
Conduct a thorough renovation cost analysis to determine whether reusing or replacing will save you more in the long run.
What Is the Best Way to Handle Asbestos-Containing Ceiling Tiles?
When handling asbestos-containing ceiling tiles, you'll want to prioritize safety above all.
Don't attempt to remove them yourself, as asbestos fibers can be deadly if inhaled. Instead, hire a certified asbestos abatement professional to handle the removal.
They'll take necessary safety precautions, such as sealing off the area, wearing protective gear, and using specialized equipment to minimize fiber release.
Ascertain they follow strict asbestos removal protocols to guarantee a safe and successful process.
How Do I Match the Original Ceiling Texture and Pattern?
When renovating a historic hotel, you likely encountered the challenge of matching the original ceiling texture and pattern.
To achieve an identical look, you'll need to employ advanced texture matching techniques. Start by creating a sample board with different textures and patterns.
Then, use pattern replication tips like stenciling or molding to recreate the original design. By studying the original ceiling's nuances, you'll be able to perfectly replicate its unique character.
Do I Need to Hire a Professional for a Ceiling Renovation Project?
You're wondering if you need to hire a pro for your ceiling renovation project.
It depends on your comfort level with DIY techniques and cost considerations.
If you're willing to invest time and effort into learning specialized skills, like texture matching, you might save on labor costs.
However, if you're short on time or unsure about tackling complex tasks, hiring a professional guarantees a high-quality finish and minimizes potential errors.
Conclusion
You've made it to the finish line!
With these essential tools in your arsenal, you're all set to tackle that ceiling renovation like a pro.
Remember, when it comes to renovation, the devil is in the details, so don't cut corners and make sure you're well-equipped for the job.
Now, get ready to hammer out a stunning new ceiling that's the icing on the cake of your dream space!
Related Posts
-

Why Invest in Quality Plastering Tools for Renovation
When renovating, investing in quality plastering tools is essential for achieving professional-looking results and mi...
-

Why Do Cinder Block Wall Renovations Cost So Much
You're likely surprised by the high cost estimate for your cinder block wall renovation project, but it's driven by s...
-
7 Must-Have Safety Gears for Brick Wall Renovation
When renovating a brick wall, you'll face a multitude of hazards, making it essential to wear and use the right safet...


