Selecting the Right Gear for White Plaster Renovation
Share
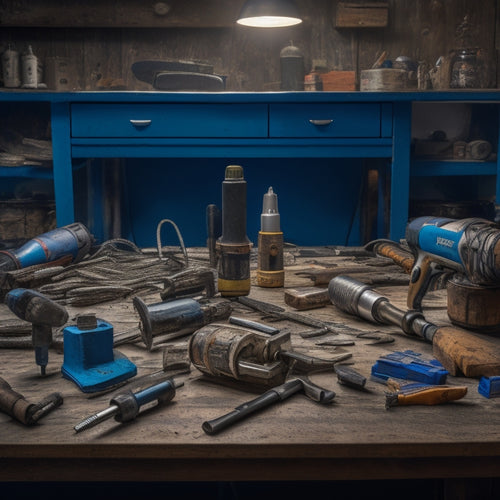
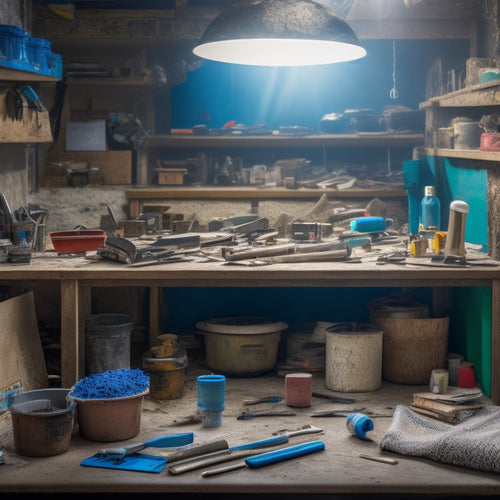
When selecting the right gear for your white plaster renovation, you'll need essential tools for preparation, such as a sturdy ladder, reliable flashlight, and removal tools like putty knives and wire brushes. Choosing the right trowel is vital, considering factors like size, type, and technique. Don't forget smoothing and finishing tools like stainless steel or blue steel trowels, plastering floats, and edgers. Additionally, select the right sandpaper and grinders, measuring and marking devices, safety gear, and cleanup tools. With the correct equipment, you'll be well on your way to a successful renovation - and there's more to explore to guarantee a flawless finish.
Key Takeaways
• Choose the right trowel size and type for the job, considering factors such as surface area, technique, and maintenance.
• Select the appropriate blade material for your project, including stainless steel, blue steel, and high-carbon steel, based on requirements and desired finish.
• Invest in essential preparation tools, including a ladder, illumination, removal tools, mixing equipment, and moisture control measures.
• Ensure you have the necessary smoothing and finishing tools, such as putty knives, finishing knives, plastering floats, and sponge floats for a smooth finish.
• Don't forget to prioritize safety gear and equipment, including respiratory protection, eye protection, skin protection, and foot protection to prevent injuries and health risks.
Essential Tools for Preparation
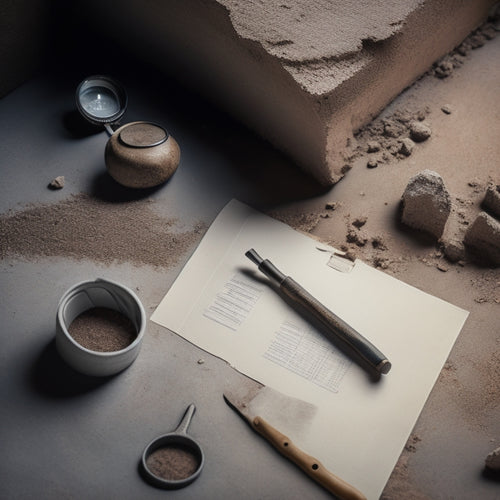
When tackling a plaster renovation, you'll need to gather essential tools for preparation, starting with a sturdy ladder and a reliable flashlight to illuminate the work area. These fundamental tools will provide a solid foundation for a successful renovation.
Next, you'll need a putty knife or scraper to remove old plaster and debris from the surface. A wire brush or sandpaper will help smooth out the surface, ensuring a strong bond between the old and new plaster. Don't forget to include a bucket, mixing stick, and clean water for mixing and applying the new plaster.
Proper plaster surface preparation is critical, and that includes implementing moisture control techniques. You'll need a vapor barrier, such as a plastic sheet, to prevent moisture from seeping into the walls. Additionally, a dehumidifier or fans can help reduce moisture levels in the work area.
With these essential tools and techniques in place, you'll be well on your way to a successful plaster renovation. Remember to always follow safety guidelines and take necessary precautions when working with power tools and construction materials.
Choosing the Right Trowel
When it comes to choosing the right trowel for your plaster renovation project, you'll want to evaluate the size of the trowel and the material of its blade.
A trowel that's too small won't cover enough surface area, while one that's too large will be unwieldy. You'll need to select a trowel that strikes the right balance,
and then decide between a stainless steel, carbon steel, or specialty blade to suit your specific project needs.
Trowel Size Matters
How do you determine the ideal trowel size for your plaster renovation project, considering the specific requirements of your job?
The right trowel size can greatly impact the quality of your work and your overall efficiency. A trowel that's too small will lead to fatigue and slow progress, while one that's too large may be difficult to maneuver in tight spaces.
When selecting a trowel, consider the surface area you need to cover and the type of plaster you're working with. For large, open areas, a larger trowel (12-14 inches) is suitable. For smaller areas, such as ceilings or intricate details, a smaller trowel (8-10 inches) is more appropriate.
Your trowel techniques will also influence your choice. If you're using a 'flick and spread' method, a larger trowel might be better. For a 'push and spread' method, a smaller trowel is more suitable.
Don't forget about trowel maintenance – a well-maintained trowel will perform better and last longer.
Blade Material Options
You have three primary blade material options to evaluate when choosing the right trowel for your plaster renovation project: stainless steel, blue steel, and high-carbon steel. Each blade type has its unique characteristics, and understanding these differences will help you make an informed decision.
Stainless steel blades are resistant to corrosion and rust, making them ideal for wet plaster applications. They're also easy to clean and maintain, requiring minimal blade maintenance.
Blue steel blades, on the other hand, are known for their flexibility and are often preferred by experienced plasterers. They're more prone to rust than stainless steel, but their flexibility allows for a smoother finish.
High-carbon steel blades are the most durable option, offering excellent wear resistance and a long lifespan. However, they require more maintenance than stainless steel blades and can be brittle, making them prone to cracking.
When selecting a blade material, consider the specific requirements of your project, including the type of plaster, the surface finish desired, and your personal preferences.
Selecting Sandpaper and Grinders
Selecting the right sandpaper and grinders for your plaster renovation project is crucial, as they directly impact the quality of the final finish and the efficiency of the entire process. You'll need to choose the right tools to guarantee a smooth, even surface.
When it comes to sandpaper, consider the grit selection. Coarser grits (80-100) are ideal for removing old plaster and rough surfaces, while finer grits (220-320) are better suited for smoothing out the finish. For grinders, look for ones with adjustable speed settings and dust collection features to minimize mess and improve control.
Here are some key considerations to keep in mind:
-
The type of sandpaper (open-coat, closed-coat, or waterproof) and its compatibility with your project
-
The grinder's power source (electric, pneumatic, or cordless) and its impact on your work pace
-
The importance of dust control and how it affects your health and the final finish
-
The role of sanding techniques (circular, back-and-forth, or diagonal) in achieving a smooth finish
-
The need for regular tool maintenance to prevent wear and tear
Mixing and Applying Plaster
With the surface preparation complete, it's time to focus on mixing and applying the plaster, a vital phase that demands attention to detail to achieve a strong, durable, and visually appealing finish.
When mixing plaster, you'll need to achieve the right consistency, which is essential for a successful application. The ideal plaster consistency should be thick enough to hold its shape when applied to the wall, but still flow easily off the trowel. If the mix is too runny, it'll be difficult to control, and you may end up with a weak, porous finish.
To achieve the perfect consistency, start by following the manufacturer's instructions, then adjust the mix as needed.
Once you've got the right consistency, it's time to apply the plaster using the appropriate application techniques. You'll want to work in small sections, applying the plaster in thin, even layers. Hold the trowel at a 20- to 30-degree angle, and use long, sweeping strokes to spread the plaster evenly. Be sure to press the trowel firmly onto the wall to guarantee good adhesion.
Smoothing and Finishing Tools
What tools will you need to smooth and finish your newly applied plaster to achieve a flawless, high-quality finish? Mastering the right plastering techniques requires the right tools to create desired surface textures.
You'll need:
-
A stainless steel or blue steel trowel for initial smoothing and shaping
-
A putty knife or finishing knife for removing excess plaster and creating a smooth surface
-
A plastering float for applying pressure and creating a uniform texture
-
A sponge float or damp cloth for creating a smooth, matte finish
-
A steel or plastic edger for creating sharp, defined edges and corners
With these essential tools, you'll be able to achieve a high-quality finish that meets your standards.
Remember, the key to success lies in the attention to detail and the ability to adapt your techniques to the specific requirements of your project.
Measuring and Marking Devices
To guarantee accurate layout and precise application of plaster, you'll need to equip yourself with a range of measuring and marking devices that help you translate your design vision into reality. These tools make certain that your walls are straight, your lines are level, and your patterns are precise.
Here are some essential measuring and marking devices to include in your toolkit:
| Device | Function | Benefit |
|---|---|---|
| Laser Levels | Project precise levels and lines | Ensures accurate layout and reduces errors |
| Chalk Lines | Creates temporary markings on surfaces | Allows for easy transfer of designs and patterns |
| Measuring Tapes | Measures distances and widths | Provides accurate measurements for cutting and fitting plaster |
| Straightedges | Guides cutting and smoothing tools | Ensures straight cuts and smooth finishes |
| Combination Squares | Verifies angles and squareness | Guarantees accurate layout and prevents errors |
Safety Gear and Equipment
As you begin applying plaster, you'll need to don the right safety gear and equipment to protect yourself from the hazards that come with working with this material. Plaster can be messy and irritating to skin and eyes, so it's vital to follow strict safety protocols to avoid accidents and injuries.
To guarantee your safety, make sure you have the following protective gear:
-
Dust mask or respirator: to prevent inhaling dust and particles
-
Safety goggles: to shield your eyes from splashes and debris
-
Long-sleeved shirt and pants: to protect your skin from plaster splatters
-
Gloves: to prevent skin irritation and abrasion
-
Steel-toed boots: to protect your feet from heavy objects and tools
Cleanup and Disposal Tools
You'll need an arsenal of cleanup and disposal tools to tackle the inevitable mess that comes with plaster renovation, including a vacuum cleaner, a wet/dry vacuum, and a scraper. These tools will help you employ effective cleanup techniques to remove debris, dust, and excess plaster from your workspace.
| Tool | Purpose | Tips |
|---|---|---|
| Vacuum Cleaner | Remove dry debris and dust | Use a HEPA-filter vacuum to minimize dust circulation |
| Wet/Dry Vacuum | Clean up wet plaster and debris | Use a gentle suction setting to avoid spreading the mess |
| Scraper | Remove excess plaster from surfaces | Use a putty knife or 5-in-1 tool for scraping and prying |
| Trash Bags | Dispose of debris and waste | Use heavy-duty bags to prevent tears and punctures |
When it comes to disposal methods, it's crucial to separate recyclable materials from non-recyclable waste. Make sure to follow local regulations and guidelines for disposing of construction waste. By having the right cleanup and disposal tools, you'll be able to efficiently manage the mess and focus on completing your plaster renovation project.
Specialized Tools for Corners
When working on corners, specialized tools like corner trowels and edge finishers become essential for achieving smooth, curved surfaces and precise joints. You'll want to invest in these tools to guarantee professional-looking results and avoid costly rework.
Here are some must-haves for corner finishing and corner reinforcement:
-
Corner trowels with curved blades for scooping and smoothing plaster
-
Edge finishers with rounded edges for creating sharp, defined corners
-
Corner notches for precise joint formation and reinforcement
-
Flex feathers for applying and shaping plaster in tight spaces
-
Corner beads for added reinforcement and smooth finishing
With these specialized tools in your arsenal, you'll be able to tackle even the most complex corner configurations with confidence.
Remember, the right tools can make all the difference in achieving a high-quality, long-lasting finish.
Frequently Asked Questions
Can I Reuse Old Plastering Tools for a Renovation Project?
When deciding if you can reuse old plastering tools for a renovation project, you'll need to perform a thorough tool assessment.
Inspect each tool for signs of wear, rust, or damage. Reusing subpar tools can hinder renovation efficiency, leading to substandard results and wasted time.
Be honest about the tool's condition; if it's not up to par, it's better to invest in new ones to guarantee a smooth, successful project.
How Do I Store My Gear to Prevent Rust and Damage?
You're thinking, 'I've got a bunch of tools, how can I possibly keep them organized and rust-free?' Fear not!
When storing your gear, prioritize rust prevention by wiping tools clean and dry before storing.
Invest in a well-ventilated, dry storage space or container with dividers to keep tools separate. Label each section for easy access.
This gear organization system will keep your tools in top condition, saving you time and money in the long run.
Are There Any Eco-Friendly Options for Plastering Materials?
You're looking for eco-friendly options for plastering materials. Fortunately, you have sustainable alternatives to traditional plaster.
Consider using natural lime-based plasters, which are breathable and non-toxic. You can also opt for plant-based plasters made from hemp, bamboo, or cornstarch. These eco-friendly materials reduce waste and minimize environmental impact.
Additionally, explore eco-friendly techniques like troweling, which reduces material consumption. By choosing sustainable materials and techniques, you'll create a healthier, more environmentally friendly space.
What Is the Best Way to Clean Dried Plaster off My Tools?
You've got a mountain of dried plaster to tackle on your tools - it's an intimidating task, but don't worry, you're not alone!
To conquer this mess, you'll need to master some effective plaster removal techniques. Start by soaking your tools in warm water, then gently scrape off excess plaster with a putty knife. For tougher bits, try using a wire brush or a specialized plaster-removing solution.
Regular tool maintenance tips include cleaning and drying tools after each use to prevent plaster buildup. With these tricks, you'll be a pro in no time!
Can I Rent Specialized Tools Instead of Buying Them?
You're wondering if renting specialized tools is a better option than buying them. It's a smart question!
Compare the cost of renting versus buying - you might be surprised at the savings. Tool rental services often offer a wide range of specialized tools, and the cost can be considerably lower than purchasing them outright.
Crunch the numbers and consider the frequency of use before making a decision that works best for your project and budget.
Conclusion
As you stand back to admire your freshly renovated walls, the smooth, luminous surface is a reflection of your hard work and attention to detail.
You've navigated the labyrinth of tools and techniques, and emerged victorious, with a finish that's as smooth as silk.
With the right gear in your arsenal, you've tamed the chaos of white plaster renovation, and brought order to the space.
Now, bask in the glow of a job well done!
Related Posts
-

Crack Repair Inspection Checklist for Home Renovation
When creating a crack repair inspection checklist for your home renovation project, you'll want to identify crack typ...
-

What to Look for in Pneumatic Renovation Tools
When selecting pneumatic renovation tools, you'll want to take into account several key factors to guarantee optimal ...
-

Get Discounted Plastering Tool Sets for DIY Renovations
You can find discounted plastering tool sets online, at local hardware stores, and thrift stores, offering a range of...


