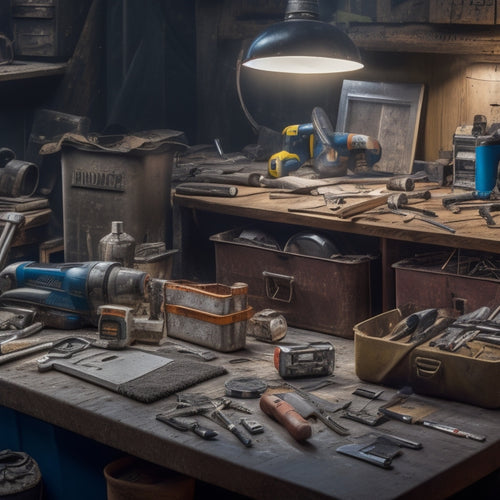
Renovate Your Patio With These Must-Have Tools
Share
As you prepare to renovate your patio, gather essential tools to guarantee a successful project. Start with safety gear like hard hats, safety glasses, and steel-toed boots to protect yourself from harm. Next, invest in measuring and marking tools, such as reliable tape measures and laser levels, to guarantee accurate layouts. Don't forget cinder block cutting essentials like power saws and tile cutters, as well as mortar mixing and application tools. Proper tamping and leveling tools, along with sand and gravel handling equipment, will also come in handy. With these must-haves, you'll be well on your way to creating a beautiful and functional outdoor space - and there's more to discover to take your patio to the next level.
Key Takeaways
• Accurate measurements are crucial; invest in reliable tape measures, laser levels, and layout software for precise patio designs.
• Safety gear, including hard hats, safety glasses, and earplugs, is essential for protecting yourself from potential hazards during renovation.
• Select the right cutting tools, such as power saws, tile cutters, and masonry saws, to prevent material waste and ensure precise cuts.
• Achieve a level and compacted base by using tamping and leveling tools, including plate compactors, hand tampers, and spirit levels.
• Invest in quality edging and jointing tools, such as edging trowels and jointing irons, to create a polished and durable patio surface.
Essential Safety Gear Checklist
Before you begin your patio renovation, make certain you're protected from potential hazards by wearing essential safety gear, including a hard hat, safety glasses, earplugs, dust mask, steel-toed boots, and gloves. This safety gear isn't just a precaution; it's a necessity to prevent serious injuries. Without it, you're exposing yourself to a range of risks, from head trauma to respiratory problems.
Your hard hat will shield your head from falling objects, while your safety glasses will protect your eyes from debris and dust. Earplugs will reduce the risk of hearing damage from loud power tools, and a dust mask will prevent airborne particles from entering your lungs.
Steel-toed boots will safeguard your feet from heavy objects, and gloves will provide grip and protection for your hands. Don't underestimate the importance of this protective equipment – it's the first line of defense against accidents.
Make sure you wear it every time you're working on your patio renovation to ensure a safe and successful project.
Measuring and Marking Tools
As you begin your patio renovation, you'll quickly realize that accurate measurements are vital to the project's success.
You'll be reaching for your trusty tape measure more often than you think, so it's important to choose one that's reliable and easy to use.
Tape Measures Matter
You'll rely heavily on your trusty tape measure to accurately assess your patio's dimensions, identifying potential obstacles and opportunities for renovation. When it comes to tape measure accuracy, you can't afford to compromise. A high-quality tape measure guarantees precise measurements, saving you from costly mistakes and rework.
There are various tape measure types to choose from, each suited for specific tasks. For general patio measurements, a 25-foot or 30-foot tape measure is ideal. If you're working with tight spaces or require more precise measurements, consider a pocket tape measure or a digital tape measure with fractional readouts.
Some tape measures feature standout or self-locking mechanisms, allowing you to extend and lock the tape in place, making it easier to take solo measurements. Others have rugged designs, with durable casings and rust-resistant blades, perfect for withstanding harsh outdoor conditions.
Whatever type you choose, make certain it's accurate, reliable, and comfortable to use, as it'll be your go-to tool for measuring your patio's every nook and cranny.
Marking Made Easy
Marking Made Easy
With accurate measurements in hand, grab a reliable marking tool to transfer those dimensions onto your patio's surfaces, ensuring precise layouts and minimizing errors. This vital step requires the right tools to achieve layout precision. You'll need marking tools that can withstand outdoor conditions and provide clear, long-lasting marks.
Here are three must-have marking tools for your patio renovation:
-
Laser Level: Project precise lines and levels onto your patio surfaces, ensuring accurate marking techniques.
-
Chalk Reel: Quickly and easily mark long lines and arcs, ideal for layout precision and marking curves.
-
Permanent Markers: Use waterproof, UV-resistant markers to create long-lasting marks on various patio materials, including concrete, stone, and wood.
Accurate Layout Plans
With precise measurements and reliable marking tools, you're ready to create an accurate layout plan that translates your patio renovation vision into a tangible reality. This vital step guarantees that your design considerations are well-executed, and your patio renovation turns out exactly as envisioned.
To achieve this, you'll need a combination of traditional measuring tools, such as tape measures and levels, alongside modern technology like layout software. These digital tools allow you to create a precise, scaled representation of your patio, accounting for every detail, from furniture placement to paver patterns.
By inputting your measurements and design elements, you can visualize your renovation and make adjustments before breaking ground. This precision will save you time, money, and potential headaches down the line.
With an accurate layout plan, you'll be confident in your design decisions, guaranteeing a beautiful, functional patio that meets your needs and exceeds your expectations.
Cinder Block Cutting Essentials
When you're tackling a patio renovation, you'll likely need to cut cinder blocks to fit your design.
To guarantee a successful cut, you'll want to select the right tool for the job and take necessary safety precautions to avoid injuries.
You'll need to take into account options like masonry saws, block chisels, and safety gear like gloves and goggles to get the job done efficiently and safely.
Cutting Tool Options
How do you efficiently slice through cinder blocks to achieve precise cuts and minimize waste in your patio renovation project? The key lies in choosing the right cutting tools for the job. When it comes to cutting cinder blocks, you'll need tools that can handle the dense, porous material without crumbling or breaking.
Here are three cutting tool options you should consider:
-
Power saws: Ideal for making straight cuts, power saws are a popular choice for cutting cinder blocks. Look for a saw with a diamond-coated blade or a carbide-tipped blade for best results.
-
Tile cutters: Designed for cutting ceramic tiles, tile cutters can also be used to cut cinder blocks. They're perfect for making curved or intricate cuts, and their compact size makes them easy to maneuver.
-
Masonry saws: Specifically designed for cutting masonry materials like cinder blocks, masonry saws are a great option for making precise, angled cuts. They often come with adjustable blades and are relatively affordable.
Safety Precautions Needed
You must prioritize safety precautions when cutting cinder blocks to prevent injuries and guarantee a successful patio renovation project.
When working with power tools, it's vital to wear protective gear, including safety glasses, gloves, and a dust mask. These patio maintenance tips will help you avoid common hazards and guarantee a safe working environment.
Injury prevention strategies are significant when cutting cinder blocks. Always keep your work area clean and clear of debris to avoid tripping or slipping. Make sure you're standing on a stable surface, and keep your body positioned away from the cutting area.
When using a saw or other power tool, maintain a firm grip and keep your hands away from the blade. Remember to follow the manufacturer's instructions for your specific cutting tool, and never use a tool that's damaged or malfunctioning.
Mortar Mixing and Application
Mixing mortar to the correct consistency is essential, as it directly affects the structural integrity and durability of your patio renovation project.
You'll need to choose the right mortar type for your project, considering factors like compressive strength, workability, and color. There are three main types of mortar: Type N (general-purpose), Type S (high-strength), and Type M (high-compressive-strength).
When mixing mortar, it's vital to get the ratios right. Here are three essential items to keep in mind:
-
Mixing ratios: Aim for a mix of 1 part cement to 2-3 parts sand, depending on the type of mortar you're using.
-
Water content: Add water gradually, as excessive water can lead to a weak and brittle mortar.
-
Mixing technique: Mix the ingredients thoroughly, using a drill and mixing paddle or a manual mixing tool, until you achieve a consistent workable paste.
Remember to follow the manufacturer's instructions and take necessary safety precautions when working with mortar.
With the right tools and techniques, you'll be able to create a strong and durable patio that will withstand the elements and last for years to come.
Tamping and Leveling Tools
Your patio renovation project's success hinges on achieving a level and compacted base, which is where tamping and leveling tools come into play. You'll need these tools to guarantee your patio's foundation is stable and even, preventing future settling or shifting.
Start by using a plate compactor or hand tamper to compact the soil and remove any air pockets. This will help prevent settling and create a solid base for your patio.
Next, use a leveling tool, such as a spirit level or laser level, to verify your patio is perfectly horizontal. You can also use a leveling tool to check the surface for any dips or humps, making adjustments as needed.
When it comes to tamping techniques, you'll want to use a combination of gentle and firm tamping motions to achieve the best compaction.
Sand and Gravel Handling
With sand and gravel forming the base of your patio, efficient handling of these materials is essential to maintaining a stable and even surface. You'll want to choose the right sand types and gravel selection for your project, but it's equally important to have the right tools to handle them.
Here are three must-have tools for sand and gravel handling:
-
Wheelbarrow or Dumper: A sturdy wheelbarrow or dumper is necessary for transporting heavy loads of sand and gravel around your patio area. Look for one with sturdy wheels and a durable body to withstand the weight.
-
Shovel and Trowel: A good quality shovel and trowel are essential for scooping, pouring, and spreading sand and gravel evenly. Choose a shovel with a sturdy handle and a trowel with a comfortable grip.
-
Rake and Broom: A rake and broom are necessary for leveling and smoothing out the sand and gravel surface. A garden rake is ideal for spreading and leveling, while a broom is perfect for sweeping away excess material.
Edging and Jointing Tools
After preparing the sand and gravel base, you'll need to define the patio's boundaries and create a visually appealing pattern with edging and jointing tools.
Edging techniques play an essential role in creating a clean, polished look for your patio. You'll need a combination of edging tools, such as edging trowels, edging spades, and jointing irons, to achieve professional-looking results.
When choosing jointing materials, consider the type of pavers you're using and the look you want to achieve. Sand, cement, and polymeric sand are popular options, each with their own benefits and drawbacks. Sand is a cost-effective option, while cement provides added durability. Polymeric sand, on the other hand, offers excellent stability and resistance to erosion.
To guarantee a successful jointing process, make sure to follow the manufacturer's instructions for the specific jointing material you've chosen. Proper preparation, including cleaning the pavers and removing excess debris, is also essential for achieving a strong bond between the pavers and jointing material.
With the right edging and jointing tools, you'll be able to create a beautiful, long-lasting patio that complements your outdoor space.
Finishing Touches and Cleanup
Finish your patio renovation by adding the final flourishes, from sealing the pavers to installing decorative elements, to create a polished outdoor space that's both functional and aesthetically pleasing.
This stage is all about attention to detail, so don't rush through it. Take your time to guarantee every aspect of your patio is perfect.
Here are three essential tools to help you achieve a flawless finish:
-
Sealant applicator: Apply a protective sealant to your pavers to prevent stains and damage from the elements.
-
Outdoor furniture assembly tools: Assemble and install your outdoor furniture, such as a patio set or BBQ station, to create a comfortable and inviting atmosphere.
-
Decorative finish brushes: Add a touch of elegance with decorative finishes, like stain or paint, to your outdoor furniture, planters, or other decorative elements.
With these tools, you'll be able to add the perfect finishing touches to your patio renovation.
Remember to clean up as you go to avoid leaving any debris or mess behind.
The end result will be a beautiful, functional, and safe outdoor space that you'll enjoy for years to come.
Frequently Asked Questions
How Do I Protect My Plants During Patio Renovation?
When planning a patio renovation, you'll want to prioritize plant protection to guarantee their survival.
Consider the renovation timing, opting for a period when your plants are dormant or less fragile.
Relocate potted plants to a safe area, and cover in-ground plants with breathable fabrics or burlap to shield them from debris and dust.
With careful planning, you can safeguard your plants and enjoy a successful renovation.
Can I Use a Regular Drill for Mixing Mortar?
When it comes to mixing mortar, you'll want to choose the right drill for the job.
A regular drill won't cut it - you'll need a drill with a high torque output, like a hammer drill or an impact driver.
These drill types are designed for heavy-duty mixing and can handle the thick, viscous consistency of mortar.
Using the wrong drill can lead to a poor mix, which can compromise the structural integrity of your patio renovation.
What Is the Ideal Temperature for Laying Pavers?
When you're about to lay pavers, you'll want to verify the ideal temperature for a successful installation.
You're aiming for a range of 40°F to 90°F (4°C to 32°C), as extreme temperatures can affect the mortar's setting time and strength.
If it's too hot, the mortar may set too quickly, while cold temperatures can slow it down.
Optimize your paver installation techniques by working within this temperature range to achieve a durable and long-lasting result.
How Often Should I Clean My Patio Renovation Tools?
'A clean slate is a happy slate,' as the old adage goes.
When it comes to your patio renovation tools, a regular cleaning schedule is essential for tool maintenance.
You should clean your tools after every use to prevent dirt and debris buildup.
Set aside time each week to thoroughly clean and lubricate moving parts.
This will make certain your tools remain in top condition, extending their lifespan and guaranteeing peak performance for your next project.
Can I Renovate My Patio in a Single Weekend?
Can you renovate your patio in a single weekend?
It's doable, but it depends on the scope of your project. If you're tackling a small to medium-sized patio, you can realistically complete weekend renovations with some solid DIY tips.
Prioritize tasks, work efficiently, and don't be afraid to delegate or ask for help.
With a clear plan and dedication, you can transform your outdoor space in just 48 hours.
Conclusion
As you put the finishing touches on your patio renovation, it's likely that you're standing on the same spot where you first envisioned your outdoor oasis. Coincidence? Perhaps.
But what's not coincidental is the fact that having the right tools made all the difference. With these must-haves, you've transformed a blank space into a haven.
Take a step back, admire your handiwork, and appreciate the precision that went into creating your new favorite spot.
Related Posts
-

Smart Guide to Buying Second-Hand Renovation Tools
When buying second-hand renovation tools, you'll want to set clear renovation goals and a realistic budget to priorit...
-

Why Tool Exchange Matters in Home Renovation
You rely on a well-maintained tool belt to complete home renovation projects efficiently, and having access to the ri...
-

Budget-Friendly Materials for Your Home Renovation Needs
As you initiate your home renovation, you're enthusiastic to find budget-friendly materials that fit your vision with...


