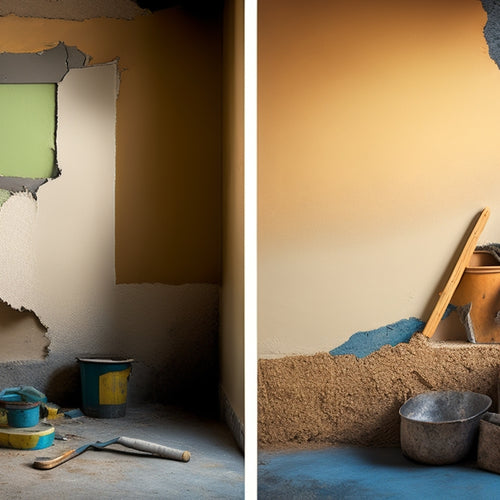
Renovate Your Cinder Block Wall in 7 Easy Steps
Share
You'll transform your cinder block wall in 7 easy steps, starting with thorough preparation - cleaning the surface, repairing damages, and selecting the right bonding agent. Next, you'll choose a facing material that fits your style and budget, such as stucco, brick veneer, or stone veneer. After that, add decorative finishing touches like paint, wall art, or tile. Seal and protect the wall with a suitable coating, and finally, inspect and touch up any imperfections. With these steps, you'll achieve a beautiful, durable, and well-protected wall that enhances your space. To get started, explore each step in detail to guarantee a successful renovation.
Key Takeaways
• Prepare the wall surface by cleaning, repairing damages, and choosing a surface preparation technique for a successful renovation.
• Apply a bonding agent coat to ensure a strong foundation for the new facing material, allowing it to dry completely before proceeding.
• Select a suitable facing material, such as stucco, brick veneer, or stone veneer, based on durability, aesthetic appeal, and budget constraints.
• Add decorative finishing touches, like decorative paint, wall art, or stenciling, to enhance the ambiance and personalize the space.
• Seal and protect the wall with a suitable sealant, such as silane-based or acrylic-based coatings, to ensure long-lasting durability and protection.
Prepare the Wall Surface
Clean the cinder block wall thoroughly to remove dirt, grime, and old adhesives, as any remaining debris can compromise the new surface. This vital step guarantees a strong bond between the wall and your chosen finish.
You'll need to decide on the best surface preparation techniques for your specific wall. Will you power wash, wire brush, or use a chemical cleaner? The method you choose will depend on the level of dirt and grime buildup.
Once clean, inspect the wall's texture. Are you looking for a smooth finish or a more rustic, exposed look? Your wall texture options range from a simple sealant to a decorative overlay.
Consider your desired aesthetic and the wall's intended use when making your decision. A well-prepared surface is fundamental for a successful renovation. Take your time, and don't skip this step. Your new surface will thank you.
Clean and Repair Damages
Now that you've prepared the wall surface, it's time to clean and repair damages.
You'll need to inspect the cinder block wall for damaged blocks, remove any loose debris that's accumulated, and fill in cracks and holes to create a solid foundation for renovation.
Damaged Block Inspection
As you examine the cinder block wall, inspect each block individually to identify cracks, holes, or crumbling surfaces that require attention before renovating.
This block integrity assessment is vital to determine which blocks need repair or replacement. Look for signs of moisture damage detection, such as efflorescence (white salt deposits) or discoloration, which can indicate water seepage behind the wall.
Take note of the extent of the damage, and prioritize the most important areas. You may need to remove loose mortar or debris to get a closer look. Pay attention to the block's surface texture, checking for spalling (flaking or peeling) or delamination (separation of layers).
Document your findings, taking photos or making sketches to reference later. This will help you create a plan of action for the necessary repairs.
Remove Loose Debris
With your damage assessment complete, you're ready to tackle the loose debris obstructing your renovation progress, starting by carefully extracting crumbling mortar and fractured block fragments from the affected areas. This vital step guarantees a stable foundation for your renovation.
Use a stiff-bristled brush or a wire scrubber to gently remove loose debris, taking care not to dislodge surrounding blocks. For more stubborn debris, employ debris removal techniques like using a pry bar or a hammer and chisel to carefully dislodge fragments. Be cautious not to damage surrounding blocks or mortar.
As you remove debris, inspect the wall for signs of water damage or structural weaknesses. This is an excellent opportunity to incorporate wall maintenance tips into your renovation.
Take note of areas that require additional attention, such as cracks or weakened mortar joints. Remove any vegetation or dirt that may have accumulated in the wall's crevices, as these can exacerbate damage over time.
Fill Cracks and Holes
Using a patching compound specifically designed for masonry, you'll fill cracks and holes in the cinder block wall, carefully following the manufacturer's instructions to guarantee a strong bond between the old and new materials.
This vital step in wall repair makes certain that your renovation project starts on a solid foundation.
To fill cracks and holes effectively, keep the following tips in mind:
-
Use a crack filler that matches the color of your cinder block wall to maintain its original appearance.
-
Clean the area around the crack or hole with a wire brush to remove dirt and debris.
-
Apply the patching compound with a putty knife, pressing it firmly into the crack or hole.
-
Use a level to make sure the filled area is even with the surrounding wall.
-
Allow the compound to dry completely according to the manufacturer's instructions before moving on to the next step.
Apply Bonding Agent Coat
You'll typically apply a bonding agent coat to the cinder block wall once it's been thoroughly cleaned and prepared. This essential step guarantees a strong bond between the old wall and the new facing material. There are several bonding agent types to choose from, including epoxy-based, acrylic-based, and polyurethane-based agents. Select one that suits your project's specific needs and follows the manufacturer's instructions.
When applying the bonding agent, use a roller or brush to cover the entire wall surface. Work in sections to maintain even coverage and avoid drips. Use a lambswool roller or a high-nap roller to apply a thick, uniform coat. For more precise application, use a brush to cut in around edges, corners, and any areas where a roller can't reach.
Allow the bonding agent to dry completely according to the manufacturer's instructions, usually between 30 minutes to an hour, depending on the type and environmental conditions. Once dry, the wall is ready for the new facing material.
Install New Facing Material
Now that you've applied the bonding agent coat, it's time to install new facing material to give your cinder block wall a fresh look.
You'll need to select the right facing material for your project, prepare the wall surface for installation, and apply the new facing material to achieve a seamless finish.
Choose Facing Material
Selecting the right facing material for your cinder block wall renovation involves pondering factors such as durability, aesthetic appeal, and budget. You want a material that not only looks great but also withstands the test of time and weather conditions.
When it comes to design aesthetics, you have several material options to choose from, each with its own unique characteristics. Here are some popular facing material options to ponder:
-
Stucco: A classic choice, stucco provides a durable and weather-resistant finish.
-
Brick Veneer: Adds a touch of elegance and sophistication to your cinder block wall.
-
Natural Stone: Offers a rustic, earthy look and can increase your home's value.
-
Fiber Cement Panels: A cost-effective option that's durable and low maintenance.
-
Ceramic or Porcelain Tiles: Adds a pop of color and can be used to create unique designs.
Remember to consider factors like climate, budget, and personal style when making your decision. By choosing the right facing material, you'll be able to achieve the look you want while ensuring your cinder block wall renovation lasts for years to come.
Prepare Wall Surface
Before installing your chosen facing material, thoroughly clean the cinder block wall surface to confirm a strong bond between the old and new materials. This vital step guarantees the facing material adheres properly, preventing peeling or crumbling.
Use surface preparation techniques like power washing or wire brushing to remove dirt, grime, and old adhesives. Make sure to wear protective gear, including gloves, safety glasses, and a dust mask.
Next, inspect the wall surface for any cracks or damaged areas. Fill these gaps with a patching compound specifically designed for cinder block walls. Allow the compound to dry according to the manufacturer's instructions before proceeding.
If you're working with an extremely porous wall surface, consider applying a primer to create a more even surface. This will help your new facing material bond more effectively.
Apply New Facing
With your cinder block wall surface prepared, you're ready to apply your chosen facing material, guaranteeing a smooth and even installation process. This is where you get to transform the look and feel of your wall, so choose your facing material wisely. Consider your design aesthetics and the overall style you're aiming for.
When it comes to facing material options, you have a range to choose from, including:
-
Stucco: A popular choice for its durability and low maintenance.
-
Brick Veneer: Adds a touch of elegance and sophistication to your wall.
-
Stone Veneer: Gives your wall a natural, rustic look.
-
Paneling: A cost-effective option that's easy to install.
-
Tile: Perfect for adding a pop of color and texture to your wall.
Before applying your chosen facing material, make certain to follow the manufacturer's instructions and take necessary safety precautions.
Assure a strong bond between the facing material and the cinder block wall by applying a suitable adhesive or bonding agent.
With the right techniques and materials, you'll achieve a beautiful, long-lasting finish that elevates the look of your entire space.
Add Decorative Finishing Touches
You can now apply a range of decorative finishes to your renovated cinder block wall, from a simple coat of paint to more complex treatments like stenciling or mosaic tile. This is where you can get creative and add a personal touch to your space.
Consider using decorative paint to add a pop of color or create a unique texture. You can also use wall art to add visual interest and create a focal point in the room. If you're feeling adventurous, try your hand at stenciling or create a mosaic tile design to add an extra layer of sophistication.
Remember to choose a finish that complements the overall aesthetic of your space and fits your personal style. With a little creativity, you can transform your cinder block wall from a bland, industrial surface to a stunning design element.
Take your time, have fun, and don't be afraid to experiment – after all, it's your wall, and it should reflect your unique personality!
Seal and Protect the Wall
To guarantee your newly renovated cinder block wall remains durable and resistant to the elements, it's essential to apply a suitable sealant or protective coating. This step is vital in preventing water damage, mold growth, and structural weakening.
When selecting a sealant or coating, consider the following options:
-
Silane-based sealants: Penetrate deep into the cinder block, providing long-lasting protection against moisture and water.
-
Acrylic-based coatings: Offer a breathable, water-repellent barrier while allowing moisture to escape.
-
Epoxy-based coatings: Provide a strong, chemical-resistant finish ideal for high-traffic areas or industrial settings.
-
Moisture barriers: Apply a layer of protection between the cinder block and finishing materials, such as paint or stucco.
-
Paint options: Choose from a range of paint finishes, from matte to glossy, to enhance the wall's appearance while providing an additional layer of protection.
Final Inspection and Touch-ups
After completing the sealing and protective coating process, inspect your cinder block wall thoroughly to identify any imperfections or areas that require additional attention. This final inspection is essential for quality assurance, ensuring your wall looks great and lasts long. Go through your final checklist, double-checking for any cracks, uneven surfaces, or spots where the coating may have been missed.
Take note of any areas that need touch-ups, and address them promptly. You can use a small brush to apply additional coats of sealant or protective coating to these areas. Make sure to follow the manufacturer's instructions and take necessary safety precautions.
Once you've completed the touch-ups, take a step back and admire your handiwork. Your cinder block wall should now look revitalized, with a fresh new coat of protection.
Frequently Asked Questions
Can I Renovate a Cinder Block Wall That's Been Painted Before?
You're wondering if you can renovate a cinder block wall that's been painted before. The short answer is yes, but it'll require some extra effort.
First, you'll need to tackle paint removal, which can be a tedious process.
Once the old paint is gone, focus on surface preparation to guarantee a strong bond between the old wall and your new finish.
With the right techniques and materials, you can achieve a stunning result that'll make the extra work worthwhile.
Will the New Facing Material Affect the Wall's Structural Integrity?
As you commence this renovation journey, you're wise to contemplate the weight of your decisions, just like Atlas shouldering the heavens.
Will the new facing material affect the wall's structural integrity? Conduct a thorough structural assessment to guarantee the facing material you choose won't compromise the wall's load-bearing capacity.
Do I Need a Permit to Renovate My Cinder Block Wall?
Before you start your wall renovation, you'll need to check if you require a permit.
Permit requirements vary depending on your location, so you'll need to contact your local government to determine if you need one.
Typically, permits are required for structural changes or if you're making significant alterations to the wall's exterior.
Don't risk fines or having to redo the work - get the necessary permits to guarantee a smooth renovation process.
Can I Use a Different Type of Facing Material for Each Wall Section?
You're wondering if you can mix and match facing materials for each wall section. The answer is yes, you can!
This approach allows you to explore different design options, creating a unique look for each area.
Just make sure the materials you choose are compatible and meet local building codes.
Consider factors like durability, maintenance, and aesthetic appeal when selecting your facing materials.
With careful planning, you can create a visually striking and functional space that reflects your personal style.
How Long Does It Take for the Bonding Agent to Fully Dry?
You're probably wondering how long it takes for the bonding agent to fully dry.
The drying time depends on factors like temperature, humidity, and the specific product you're using.
Typically, it takes anywhere from 30 minutes to an hour for the bonding agent to set, but it can take up to 24 hours for it to fully cure.
Make certain to follow the manufacturer's instructions for the recommended drying time to guarantee a strong bond.
Conclusion
You've done it! You've transformed that drab, crumbling cinder block wall into a stunning showstopper that'll be the envy of the entire neighborhood!
With these 7 easy steps, you've not only revitalized the wall's appearance but also reinforced its structural integrity.
Your friends will be green with envy, your family will be amazed, and you'll be basking in the glory of your handiwork.
Congratulations, you've pulled off a renovation miracle!
Related Posts
-

Top 3 Insurance Options for Home Renovation
When renovating your home, you need specialized insurance coverage to protect your finances from unexpected setbacks ...
-

7 Smart Tool Organization Tips for Small Renovations
As you tackle your small renovation, you're likely wasting precious time searching for misplaced tools. To enhance ef...
-

Top 3 Tools to Buy for Stucco Renovation
You'll need the right tools to guarantee a successful stucco renovation, and it all starts with three essential items...


