Must-Have Tools for Safe Plaster Repair During Renovation
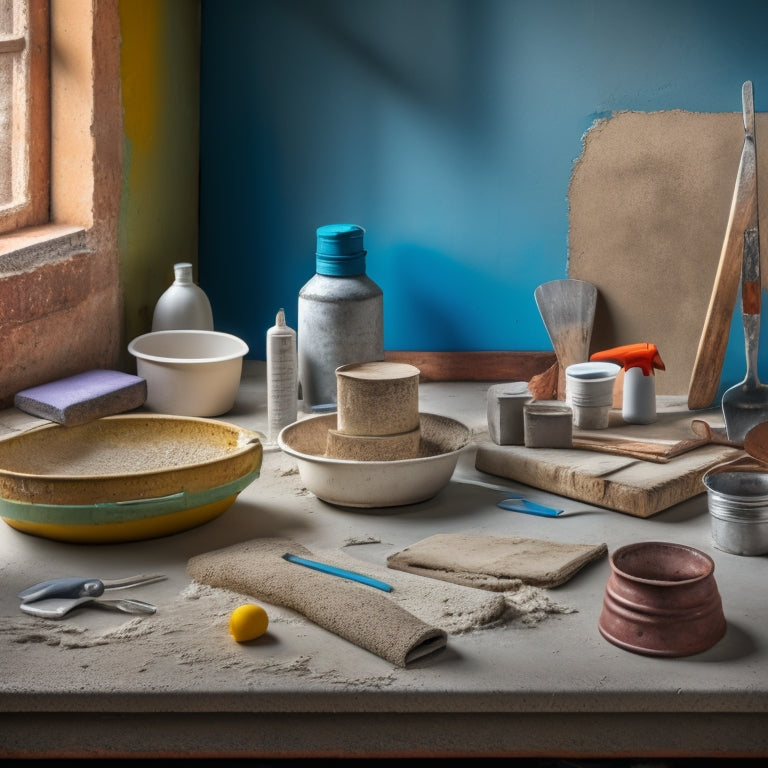
When tackling plaster repair during renovation, you'll need a thorough arsenal of tools and equipment to guarantee a safe and successful outcome. Start with essential safety gear like dust masks, safety goggles, and gloves, as well as a long-sleeved shirt to prevent skin irritation. Next, gather hand tools like putty knives, trowels, and hawks for applying and smoothing plaster. Specialized equipment like plaster mixers, sprayers, and hopper guns will also come in handy for efficient application. Finally, don't forget measuring and testing devices, protective coverings, and cleaning tools to guarantee a precise and mess-free repair - and that's just the beginning of what you'll need to know to get the job done right.
Key Takeaways
• Invest in high-quality safety gear, including dust masks, safety goggles, gloves, and long-sleeved shirts, to prevent injury and skin irritation.
• Essential hand tools like putty knives, trowels, hawks, scratch awls, and joint knives are necessary for scraping, applying, and smoothing plaster.
• Specialized equipment, such as plaster mixers, sprayers, and hopper guns, can improve efficiency and quality of repairs, especially for large or complex projects.
• Measuring and testing devices, including moisture meters, leveling tools, and thickness gauges, help ensure accurate and effective repairs.
• Protective coverings and cleaning tools, like tarps, cleaning solvents, HEPA filter vacuums, and soft-bristled brushes, prevent damage and ensure a clean workspace.
Safety Gear for Plaster Repair
When tackling a plaster repair project, wear protective gear to shield yourself from dust, debris, and potential health hazards. This includes a dust mask, safety goggles, gloves, and a long-sleeved shirt.
This safety gear is essential to prevent respiratory problems and eye injuries caused by airborne particles and flying debris. Your dust mask should filter out 99.97% of particles as small as 0.3 microns, ensuring you breathe clean air. Safety goggles with shatter-resistant lenses will protect your eyes from impact and chemical splashes.
Choose gloves with a grip to prevent slipping and made from a material that can withstand harsh chemicals. A long-sleeved shirt will prevent skin irritation and reduce the risk of dermatitis. Don't compromise on your safety - invest in high-quality gear that meets industry standards.
Essential Hand Tools for Ceiling Work
With your safety gear in place, you're ready to tackle the task of repairing your ceiling plaster, which requires a set of specialized hand tools to guarantee a smooth and efficient process. These essential tools will help you achieve professional-looking results and secure a successful ceiling patching job.
Here are the must-have hand tools for ceiling work:
-
Putty knife: A flexible, 4-6 inch putty knife is perfect for scraping off old plaster and applying new compound. Its flexibility allows you to reach into tight spaces and corners.
-
Trowel: A sturdy, 12-14 inch trowel is ideal for applying and smoothing out plaster. Look for one with a comfortable grip and a rust-resistant blade.
-
Hawk: A plaster hawk is a must-have for holding and carrying plaster. Its flat surface and comfortable grip make it easy to scoop and apply plaster.
-
Scratch awl: A scratch awl is a handy tool for scratching and scoring the surface of the plaster to secure a strong bond.
-
Joint knife: A joint knife is used to fill and smooth out joints, creating a seamless finish.
With these essential hand tools, you'll be well-equipped to tackle your ceiling plaster repair and achieve a smooth, professional-looking finish.
Specialized Equipment for Plaster Fixing
You'll need to supplement your hand tools with specialized equipment to tackle more complex plaster repairs, guaranteeing precise control and exceptional results. This equipment is designed to help you master advanced plaster repair techniques and achieve professional-grade finishes.
For instance, a plaster mixer or mixing drill is essential for thorough mixing and blending of plaster compounds, securing consistent application and reducing the risk of defects. Additionally, a plaster sprayer or hopper gun allows for efficient and uniform application of plaster, especially when working with large areas or intricate designs.
Regular equipment maintenance is vital to guarantee peak performance and extend the lifespan of your tools. Clean and lubricate your equipment regularly, and store them in a dry, protected area to prevent damage.
Measuring and Testing Devices
Accurate measurements and thorough testing are essential to achieving a flawless plaster repair, and that's where measuring and testing devices come into play. These devices help you diagnose issues, guarantee proper application, and verify the quality of your work.
They ensure that you're working with precise data, which is critical in plaster repair where even the slightest miscalculation can lead to costly mistakes.
Here are some must-have measuring and testing devices for your plaster repair toolkit:
-
Moisture meter: measures the moisture levels in walls and ceilings, helping you identify potential water damage or leaks that may affect your repair work.
-
Leveling tool: makes sure that your repair work is level and plumb, preventing uneven finishes and structural weaknesses.
-
Thickness gauge: measures the thickness of plaster, allowing you to determine the correct amount of material needed for the job.
-
Surface profiler: assesses the surface texture and condition, helping you decide on the best approach for your repair.
-
Inspection mirror: provides a clear view of hard-to-reach areas, such as behind walls or above ceilings, allowing you to inspect for hidden damage or defects.
Protective Covering and Cleaning Tools
Protective covering and cleaning tools are essential for containing messes, preventing damage, and ensuring a clean working environment, as they allow you to focus on the plaster repair task at hand.
You'll need protective tarps to cover floors, furniture, and surrounding surfaces, shielding them from dust, debris, and potential water damage. These tarps should be heavy-duty, waterproof, and large enough to cover the entire work area.
When it comes to cleaning, you'll require cleaning solvents specifically designed for plaster dust and debris. These solvents should be effective at breaking down and removing stubborn residue without damaging the surrounding surfaces.
A vacuum cleaner with a HEPA filter is also a must-have for containing and removing fine plaster dust particles. Additionally, a soft-bristled brush and a damp cloth will come in handy for gently removing dust and debris from surfaces.
Frequently Asked Questions
Can I Reuse Old Plaster or Do I Need to Replace It Entirely?
When deciding whether to reuse old plaster or replace it entirely, you'll need to assess its durability.
If the plaster is still structurally sound, you might be able to salvage it with advanced repair techniques.
However, if it's crumbling or water-damaged, it's best to replace it to guarantee a safe and long-lasting renovation.
Take a closer look at the plaster's condition and make an informed decision based on your findings.
How Do I Match the Original Plaster Texture and Finish?
You'll need to master texture matching techniques to replicate the original plaster finish.
Study the existing finish, taking note of its style, whether it's smooth, rough, or ornate.
Identify the type of plaster finish styles, such as Venetian, Rococo, or Art Deco.
Then, practice recreating the texture using specialized tools, like trowels, floats, and combs, to achieve an identical finish.
What Is the Best Way to Dispose of Old, Broken Plaster?
When disposing of old, broken plaster, you'll want to prioritize eco-friendly disposal methods.
Consider recycling plaster by breaking it down into smaller pieces and separating it from other construction materials. Many cities have specialized facilities that accept plaster for recycling.
You can also look into local companies that offer plaster recycling services.
Can I Do Plaster Repair Myself or Do I Need a Professional?
Are you brave enough to tackle plaster repair on your own? It's a challenging task, but with the right techniques, you might just pull it off.
You'll need to master DIY plastering tips, like applying the perfect mix of plaster and water, and smoothing it out with precision.
But, if you're not confident in your skills, it's better to call in a pro to avoid costly mistakes.
How Long Does It Typically Take to Complete a Plaster Repair Project?
You're wondering how long it'll take to complete your plaster repair project.
The answer depends on the scope and complexity of the job. Generally, a small repair can take a few hours to a few days, while a larger project can span several weeks or even months.
To establish a realistic project timeline, you'll need to assess the repair duration, considering factors like the size of the area, the number of layers, and the level of damage.
Conclusion
As you wrap up your plaster repair project, remember that safety and precision are key.
According to the National Institute for Occupational Safety and Health, falls from ladders account for nearly 20% of workplace injuries. Don't become a statistic - invest in the right tools and take necessary precautions to guarantee a successful and safe renovation.
With the must-have tools listed above, you'll be well-equipped to tackle even the most intimidating plaster repair tasks.
Related Posts
-

5 Must-Have Plastering Tools for Safe Renovation
You'll need a range of essential tools to tackle your plastering project safely. Invest in a variety of trowels, incl...
-

Stucco Tool Kit Checklist for Home Renovation
You'll need a thorough stucco tool kit to guarantee a successful home renovation, as the right tools can make all the...
-

Home Renovation Safety Checklist for Homeowners
As a homeowner initiating a renovation project, you know that safety should be your top priority. Start by establishi...


