Must-Have Tools for a Smooth Plaster Renovation
Share
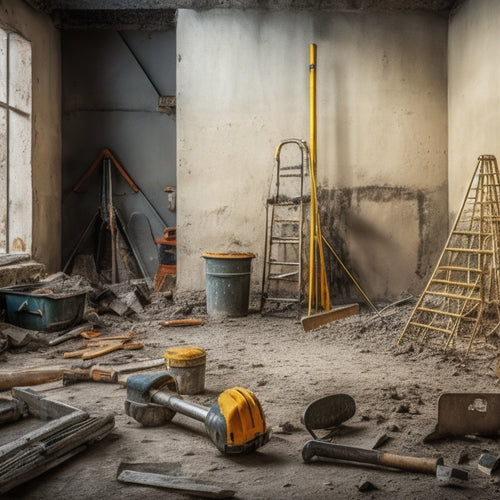
You'll need a range of specialized tools to tackle a plaster renovation project efficiently and effectively. For preparation, you'll require a dustless vacuum, mixing bucket and trowel, primer and roller extension pole, putty knife and scraper, and a ladder or step stool. Additionally, you'll need tools for drywall and plaster repair, sanding and smoothening, painting and finishing, safety gear, ladders and access equipment, measuring and marking, and cleaning and debris removal. With these must-have tools at your disposal, you'll be well-equipped to handle every stage of the renovation process - and taking a closer look at each category will help you fine-tune your workflow for best results.
Key Takeaways
• Essential equipment for preparation includes a dustless vacuum, mixing bucket, and putty knife to ensure a clean and efficient workspace.
• Drywall and plaster repair tools like a drywall saw, plaster rasp, and joint tape are necessary for making effective repairs.
• Sanding and smoothening essentials such as sandpaper selection, coarse-grit sandpaper, and effective surface cleaning techniques guarantee a smooth finish.
• Safety gear including a dust mask, safety goggles, and heavy-duty gloves are crucial for preventing injuries and ensuring a safe working environment.
• Ladders and access equipment, measuring and marking tools, and cleaning and debris removal tools are also must-haves for a successful plaster renovation.
Essential Equipment for Preparation
To guarantee a successful plaster renovation, you'll need to assemble an arsenal of essential equipment for preparation, starting with a reliable dustless vacuum that can efficiently capture fine dust and debris. This will facilitate a clean and safe working environment, allowing you to focus on the task at hand.
Next, you'll need a high-quality mixing bucket and trowel for efficient plaster mixing. A mixing paddle or drill with a mixing attachment can also be useful for achieving the right consistency.
For surface priming, invest in a good-quality primer and a roller extension pole to reach those hard-to-access areas. A putty knife and scraper will also come in handy for scraping off old plaster and filling in gaps.
Don't forget a ladder or step stool to guarantee you can reach the ceiling and upper sections of the wall.
Drywall and Plaster Repair Tools
As you move on to the repair phase, outfit yourself with a set of specialized drywall and plaster repair tools, including a drywall saw or utility knife for cutting out damaged areas, a plaster rasp or file for smoothing rough edges, and a joint tape for reinforcing weak seams.
These tools will help you tackle common issues like cracks, holes, and water damage.
When it comes to mixing plaster, invest in a mixing bucket and a paddle or drill mixer to get the right consistency.
For texture application, use a texture sprayer or a stomp brush to achieve the desired finish.
Don't forget a putty knife for applying and smoothing out plaster or joint compound.
With these tools, you'll be well-equipped to tackle even the most challenging repairs.
Remember to always follow safety guidelines and manufacturer instructions when working with these tools.
Sanding and Smoothening Essentials
When you're ready to tackle the sanding and smoothening phase of your plaster renovation, you'll need to make some critical decisions about the tools you use.
You'll want to select the right sandpaper for the job, considering factors like grit, material, and size.
Sandpaper Selection Guide
You'll need a range of sandpaper grits to tackle the various stages of plaster renovation, from coarse to fine, to achieve a smooth finish.
For rough sanding, use coarse-grit sandpaper (80-100) to remove old plaster, drywall, or joint compound. This type of sandpaper is usually made of aluminum oxide or silicon carbide and is ideal for heavy-duty sanding.
For intermediate sanding, switch to medium-grit sandpaper (120-150) to smooth out the surface, removing any scratches or imperfections. This grit range is perfect for feathering out joint compound or filling holes.
Surface Preparation Tips
Tackle surface imperfections head-on by attacking rough spots with aggressive sanding, then methodically shift to finer grits for a silky smooth finish.
As you work, remember that surface preparation is vital to a successful plaster renovation. You'll need to employ effective surface cleaning techniques to remove dirt, grime, and old adhesives that can compromise your new plaster.
Start by sweeping or vacuuming the area to eliminate loose debris. Next, use a wire brush or scrubber to remove stubborn dirt and grime. For tougher stains, consider using a chemical cleaner or degreaser.
Once the surface is clean, it's important to assess the substrate using methods like visual inspection, sounding, or probing to identify any cracks, voids, or weaknesses. This will help you determine the best course of action for repair or reinforcement.
Painting and Finishing Tools
When it comes to painting and finishing, you'll need the right tools to attain a professional-looking result.
You'll be selecting the perfect brushes and rollers for the job, prepping the surface to guarantee a smooth finish, and applying that all-important final coat.
Brush and Roller Selection
Selecting the right brush and roller for your plaster renovation project is essential, as it directly impacts the quality of your finish and the overall efficiency of your work.
You'll want to choose brushes that are specifically designed for plastering, as they'll be able to handle the thick, heavy mixture. Natural bristle brushes are a popular choice, but synthetic brushes are also effective and often more durable.
When it comes to roller selection, you'll need to evaluate the type of roller material that's best suited for your project. Microfiber rollers are great for smooth finishes, while wool rollers are better for textured finishes.
You'll also want to think about the nap length of your roller, as this will affect the finish you achieve. A shorter nap length is best for smooth finishes, while a longer nap length is better for textured finishes.
By choosing the right brush and roller for your project, you'll be able to achieve a professional-looking finish and avoid common mistakes that can lead to rework.
With the right tools, you'll be able to work efficiently and effectively, saving you time and stress in the long run.
Surface Preparation Essentials
You'll need to guarantee your surface is properly prepared for plastering by gathering the necessary painting and finishing tools, as a well-prepared surface is key to achieving a smooth, even finish. This stage is essential, as any imperfections will be amplified once the plaster is applied. To guarantee a successful renovation, you must conduct a thorough surface assessment to identify any cracks, holes, or uneven areas that need attention.
| Tool | Purpose |
|---|---|
| Putty knife | Fills small holes and cracks |
| Sandpaper | Smooths out rough surfaces |
| Moisture meter | Detects moisture levels to prevent water damage |
| Primer | Creates an even base for plastering |
| Cleaning solution | Removes dirt, grime, and old adhesive |
Finishing Coat Applications
With a well-prepared surface in place, you're ready to apply a finishing coat that meets your desired aesthetic and durability standards. This requires the right painting and finishing tools. To achieve a professional-looking finish, you'll need a range of tools that cater to your specific finishing techniques and texture options.
For a smooth finish, invest in a high-quality roller extension pole and a selection of roller covers with varying nap lengths. These will allow you to achieve a uniform coat and minimize texture inconsistencies. If you're opting for a textured finish, consider a texture sprayer or a stomp brush to add depth and visual interest.
Additionally, don't overlook the importance of precision cutting-in tools, such as angle cutters and trim brushes, which will enable you to create crisp, clean lines around edges and corners.
Safety Gear for Plaster Work
Wearing the right safety gear is essential when tackling a plaster renovation project, as it protects you from the hazards of dust, debris, and physical injury. You'll be working with heavy materials, power tools, and potentially hazardous substances, so it's vital to prioritize personal protective equipment for injury prevention.
Here are the must-haves for your safety arsenal:
-
Dust mask or respirator: Prevents inhalation of dust and debris, which can cause respiratory issues.
-
Safety goggles or glasses: Shields your eyes from flying particles and debris.
-
Heavy-duty gloves: Protects your hands from cuts, abrasions, and impact injuries.
Investing in quality safety gear may seem like an extra expense, but it's a small price to pay for avoiding costly medical bills and lost worktime.
Ladders and Access Equipment
Ladders and access equipment become your lifeline when working on plaster renovation projects that require reaching high ceilings, maneuvering tight spaces, or accessing hard-to-reach areas.
You'll need a reliable and sturdy ladder that can support your weight and the weight of your tools. Look for ladders with non-slip feet, sturdy frames, and secure rungs. Don't compromise on ladder safety - it's essential to guarantee you're using the right ladder for the job.
When it comes to access equipment, you'll want to take into account scaffolding, step stools, or aerial lifts, depending on the scope of your project. These tools will give you the flexibility to reach those hard-to-access areas without compromising your safety. Make sure you're familiar with the manufacturer's instructions and guidelines for using access equipment.
Investing in high-quality ladders and access equipment will pay off in the long run. You'll be able to work efficiently, safely, and with confidence.
Measuring and Marking Tools
You'll need a reliable set of measuring and marking tools to guarantee accurate calculations and precise markings, saving you time and effort in the long run.
With the right tools, you'll be able to master various measuring techniques and achieve marking precision. Here are the essentials you shouldn't miss:
-
Laser level: Confirm perfectly level surfaces with a high-accuracy laser level. This tool is especially useful for large rooms or areas with complex shapes.
-
Digital caliper: Take precise measurements with a digital caliper, perfect for measuring small distances, widths, and depths.
-
Marking gauge: Create consistent and accurate markings with a marking gauge, ideal for repetitive measurements and layout work.
Cleaning and Debris Removal
Proper cleaning and debris removal are essential steps in plaster renovation, as they prevent damage to newly applied plaster and guarantee a strong bond between old and new surfaces. You'll need the right tools to get the job done efficiently and effectively.
| Tool | Purpose | Benefits |
|---|---|---|
| Vacuum cleaner | Remove dust and debris | Prevents airborne particles from interfering with new plaster |
| Dustpan and brush | Sweep and collect debris | Allows for precise control over debris disposal |
| Damp cloth | Wipe down surfaces | Prevents dust from spreading and promotes better bonding |
| Safety goggles | Protect your eyes | Guarantees your safety while cleaning and renovating |
| Debris bags | Dispose of waste | Keeps the work area organized and facilitates easy cleanup |
When it comes to cleaning techniques, you'll want to focus on gentle yet thorough methods to avoid damaging the existing surfaces. Use a gentle sweeping motion with your dustpan and brush to collect debris, and then dispose of it in the debris bags. For stubborn areas, use a damp cloth to wipe down surfaces, taking care not to soak the area. By following these steps and using the right tools, you'll be able to ascertain a smooth and successful plaster renovation.
Frequently Asked Questions
Can I Reuse Old Plaster or Do I Need to Replace It Entirely?
You're wondering if you can breathe new life into old plaster or if it's time to start from scratch. To determine that, you'll need to conduct a thorough plaster condition assessment.
If the damage is minimal, you might be able to salvage it using specialized plaster salvaging techniques. However, if it's severely damaged or water-damaged, it's best to replace it entirely to guarantee a strong, durable finish.
Don't risk compromising your renovation - assess the situation carefully before making a decision.
How Do I Prevent Plaster Dust From Spreading Throughout the House?
You'll want to contain that pesky plaster dust to prevent it from spreading throughout the house.
Implement dust containment strategies like sealing off rooms with plastic sheets and using a vacuum with a HEPA filter.
During renovation, regularly employ effective cleanup methods, such as dampening surfaces and using a wet mop.
What Is the Best Way to Match the Original Plaster Texture?
When it comes to matching the original plaster texture, you'll need to master various plaster texture techniques.
Start by examining the existing finish, noting its pattern, depth, and material.
Then, practice replicating it using different tools and materials until you achieve a perfect match.
Remember, it's all about subtlety, so don't be afraid to experiment and adjust your technique.
With patience and persistence, you'll be able to match the original plaster finishes flawlessly.
Can I Do a Plaster Renovation Project Without Professional Help?
You stand at the threshold of your renovation project, the blank canvas of walls stretching out before you like an uncharted territory.
Can you conquer it alone, without the guiding hand of a professional? Absolutely!
With the right DIY techniques and renovation tips, you can navigate the complexities of plaster renovation.
Take control, don't be afraid to get your hands dirty, and remember, practice makes perfect.
How Long Does It Take for Plaster to Fully Dry and Harden?
You're wondering how long it takes for plaster to fully dry and harden.
Well, the drying time largely depends on the environmental conditions, specifically the moisture levels.
Typically, it takes around 24 to 48 hours for the initial set, but it can take up to 28 days for the plaster to reach its full strength.
Keep in mind that high humidity and temperature fluctuations can slow down the process.
You'll need to monitor the conditions to guarantee ideal drying.
Conclusion
As you wrap up your plaster renovation, remember that a smooth finish relies on the right tools for the job.
You've prepped with precision, repaired with care, sanded with finesse, painted with perfection, and protected yourself every step of the way.
Now, stand back and admire the result: a flawless surface that's a reflection of your hard work and attention to detail.
Related Posts
-

Why Invest in Quality Plastering Tools for Renovation
When renovating, investing in quality plastering tools is essential for achieving professional-looking results and mi...
-

Why Inspect Stucco Repair Equipment Before Renovation
When starting a stucco repair renovation, you need to inspect your equipment to prevent accidents, save time and mone...
-

What Tools to Rent for Block Wall Renovation
When renovating a block wall, it's vital to have the right tools for the job. You'll need demolition tools like pry b...


