
Masonry Construction Checklist for Home Renovation
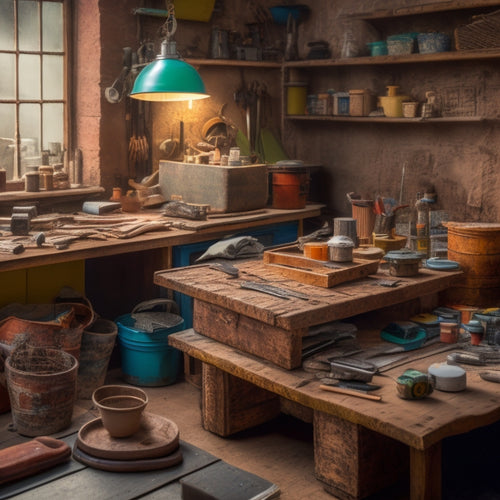
When tackling a home renovation involving masonry construction, you'll want to make sure you have a thorough checklist covering essential tools, specialized equipment, and safety gear. This includes a level, string line, and pointed trowel for mortar application, as well as a mixing bucket, masonry saw, and wheelbarrow for transporting materials. Don't forget safety essentials like hard hats, safety glasses, and respirators. You'll also need measuring and testing devices like levels, spirit levels, and material moisture meters to verify accurate alignments and moisture management. With this checklist, you'll be well-prepared to start your project - and a closer look at each of these elements will reveal even more critical details to take into account.
Key Takeaways
• Ensure accurate measurements and alignments using level, string line, and straightedge tools to prevent structural issues.
• Wear essential safety gear, including hard hats, safety glasses, earplugs, steel-toed boots, and respirators, to prevent injuries.
• Select and use the right mixing and laying tools, such as mortar mixers and pointing trowels, to achieve quality results.
• Conduct thorough cleanup and removal of excess mortar, debris, and dust to ensure a professional finish and prevent damage.
• Test masonry materials for excess moisture using material moisture meters to prevent structural issues and implement effective moisture management strategies.
Concrete Block Tool Inventory Checklist
Verify you have the following essential tools in your inventory to guarantee efficient concrete block construction. You'll need a level, string line, and a pointed trowel for applying and smoothing mortar.
A jointer or joint raker is necessary for finishing joints, while a spirit level and straightedge verify accurate block alignment. Don't forget a hammer, chisel, and safety gear like gloves and safety glasses.
When working with different concrete block types, such as hollow, solid, or insulated blocks, it's vital to choose the right tools. For instance, a hollow block requires a specialized tool for filling the cores.
Familiarize yourself with various block laying techniques, like the running bond pattern or the stack bond pattern, to achieve professional-looking results.
Having the right tools and understanding the techniques will enable you to work efficiently and produce high-quality masonry construction. By investing time in preparing your tool inventory, you'll save time and frustration on the job site.
Essential Masonry Construction Equipment
You'll need to invest in specialized equipment to tackle masonry construction projects efficiently and effectively. To guarantee a successful project, it's essential to have the right masonry equipment types at your disposal.
A mixing bucket, mortar hoe, and trowel are fundamental for mixing and applying mortar. A level, string line, and straightedge will help you achieve accurate and level courses.
Additionally, a masonry saw or grinder is necessary for cutting and shaping materials. A pointing trowel and jointer are also critical for finishing and refining joints.
Don't forget to include a wheelbarrow or mixer for transporting and mixing materials. Regular masonry tool maintenance is also important to extend the lifespan of your equipment and guarantee peak performance.
Make sure to clean and store your tools properly, and perform routine checks for wear and tear. By investing in the right masonry construction equipment and maintaining it properly, you'll be well on your way to completing your project efficiently and effectively.
Safety Gear and Protective Apparel
Wearing the right safety gear and protective apparel is essential when working with heavy materials, power tools, and hazardous substances on a masonry construction site. You're not just protecting yourself, but also guaranteeing the success of your project. Without proper safety gear, you're at risk of serious injury or even death.
Here are some essential safety gear and protective apparel you should have:
| Safety Gear | Description |
| Hard Hat | Protects your head from falling objects and debris |
| Safety Glasses | Protects your eyes from flying particles and chemicals |
| Earplugs | Protects your hearing from loud machinery and tools |
| Steel-Toed Boots | Protects your feet from heavy objects and sharp edges |
| Respirator | Protects your lungs from hazardous substances and airborne contaminants |
When it comes to safety protocols, you should always conduct a risk assessment before starting a task, and guarantee you have the necessary protective equipment. Don't compromise on safety – invest in high-quality protective gear that meets industry standards. Remember, safety is not just a regulation, it's a responsibility to yourself and others on the construction site.
Measuring and Testing Devices Needed
When you're preparing for a masonry construction project, you'll need to verify you have the right measuring and testing devices to get the job done accurately.
You'll be working with precise materials and techniques, so it's essential to have tools that can provide reliable readings.
You should have level and alignment tools, as well as material moisture meters, to assure a successful project outcome.
Level and Alignment Tools
Accurate leveling and alignment rely on a set of essential measuring and testing devices that help masons guarantee their work meets the required standards and specifications.
You'll need to invest in the right tools to guarantee your masonry construction project is precise and error-free.
As a mason, you're familiar with the importance of leveling techniques in laying a strong foundation. A spirit level, laser level, and electronic level will help you achieve precise horizontal and vertical alignments.
For alignment strategies, you'll need a string line and a chalk line to mark straight lines and guarantee your walls are plumb. A combination square and a straightedge will also come in handy for checking and maintaining alignment.
Don't forget a precision instrument like a theodolite or a total station for more complex layouts. By having these level and alignment tools at your disposal, you'll be able to tackle even the most intricate masonry projects with confidence.
Material Moisture Meters
Test for excess moisture in your masonry materials with a reliable material moisture meter, an essential device that helps you detect potential issues before they compromise your construction project's integrity.
This device is vital for implementing effective moisture management strategies, ensuring that your masonry structure remains durable and long-lasting.
When selecting a material moisture meter, consider the type of masonry material you're working with, as different meters are designed for specific materials like concrete, brick, or block.
Look for a meter that uses advanced moisture measurement techniques, such as electrical impedance or capacitive sensing, to provide accurate readings.
Using a material moisture meter, you can identify areas with high moisture levels, which can lead to issues like mold growth, corrosion, or structural damage.
Mixing and Laying Tools Required
You'll need a range of specialized tools to mix and lay masonry materials efficiently and effectively. For mixing, you'll require a mortar mixer or a mixing drill with a paddle attachment. This will enable you to achieve the correct consistency and avoid air pockets. A mixing bucket or wheelbarrow is also essential for holding and transporting the mixed material.
When it comes to laying, you'll need a variety of tools to guarantee precise and level placement. A spirit level, straightedge, and line blocks will help you maintain accuracy and alignment. A pointing trowel and jointer will allow you to fill gaps and create a smooth finish. Additionally, a laying trowel and edger will come in handy for applying and shaping the masonry material.
Familiarize yourself with mixing techniques, such as gradually adding water and mixing in a figure-eight pattern, and laying methods, including buttering and pressing the material into place. Having the right tools and mastering these techniques will guarantee a professional-looking finish and a structurally sound masonry construction.
Cleanup and Finishing Essentials
As you've mastered the art of mixing and laying masonry materials, it's time to focus on the cleanup and finishing essentials that will transform your construction project from rough to refined.
A thorough cleanup is vital to guarantee a professional-looking finish and prevent damage to surrounding areas. You'll need to remove excess mortar, debris, and dust from the site, using effective cleaning techniques to avoid scratching or staining the masonry.
To achieve a polished finish, don't forget these essential steps:
-
Remove scaffolding and temporary supports
-
Clean and prepare joints for pointing or repointing
-
Apply a sealant or waterproofing agent to protect the masonry
-
Touch up any imperfections or mistakes
-
Dispose of waste materials and debris responsibly
Frequently Asked Questions
Can I Mix and Match Different Masonry Materials for My Project?
When selecting masonry materials, you're likely wondering if you can mix and match different types.
While it's technically possible, it's essential to take into account masonry material compatibility to guarantee structural integrity.
Aesthetic design factors also come into play, as mismatched materials can affect your project's visual appeal.
You'll need to balance functionality with style to achieve a cohesive look.
How Do I Ensure Proper Drainage in My Masonry Construction?
Oh, you thought building with masonry was just about stacking blocks, didn't you? Think again!
Proper drainage is essential to prevent water damage and structural issues. You'll need to install a reliable drainage system, complete with a moisture barrier to keep water out.
Don't skimp on this step - it's not just about aesthetics, it's about ensuring your structure stays intact. Research and invest in a high-quality system to safeguard your project's longevity.
What Is the Ideal Temperature for Laying Masonry Blocks?
When laying masonry blocks, you'll want to make certain the ideal temperature is between 40°F and 90°F (4°C and 32°C). This range allows for the best masonry curing conditions.
If it's too hot, the mortar will set too quickly, compromising strength. If it's too cold, it won't set at all.
You'll achieve the best results when the masonry block temperature is within this range, allowing for proper hydration and bonding.
Can I Use Masonry Construction for Load-Bearing Walls?
You're building a sturdy foundation, just like the ancient Egyptians who crafted the pyramids to last millennia.
Now, can you use masonry construction for load-bearing walls? Absolutely, but it's essential to calculate the masonry wall strengths accurately.
You'll need to take into account factors like compressive strength, mortar joint thickness, and brick density to guarantee your walls can bear the weight.
Load-bearing calculations will be your guiding light, so don't skip this vital step.
With careful planning, your masonry walls will stand tall and strong, supporting your dream home.
How Do I Prevent Water Seepage in Masonry Walls?
To prevent water seepage in masonry walls, you'll need to employ effective waterproofing techniques.
Start by applying a masonry sealant to the wall's surface, ensuring a uniform coat.
Next, install a drainage plane behind the wall to direct water away from the structure.
You'll also want to use flashing around windows and doors to prevent water intrusion.
Additionally, consider applying a waterproofing membrane to the wall's exterior to further protect against moisture ingress.
Conclusion
You've made it to the final stage of your masonry construction checklist for home renovation.
With this thorough guide, you're now equipped to tackle your project with confidence.
Did you know that a well-constructed masonry wall can last up to 500 years with proper maintenance? That's a demonstration of the durability of masonry construction.
By following this checklist, you'll guarantee a sturdy and long-lasting structure that will stand the test of time.
Related Posts
-
Budget-Friendly Materials for Your Home Renovation Project
As you plan your home renovation project, finding budget-friendly materials is key to turning your design vision into...
-

5 Must-Have Plastering Tools for Safe Renovation
You'll need a range of essential tools to tackle your plastering project safely. Invest in a variety of trowels, incl...
-

Top 3 Safety Essentials for DIY Renovations
When tackling a DIY renovation, you'll want to prioritize three essential safety items to protect yourself from poten...


