Leveling Old Block Walls for Smooth Renovation
Share
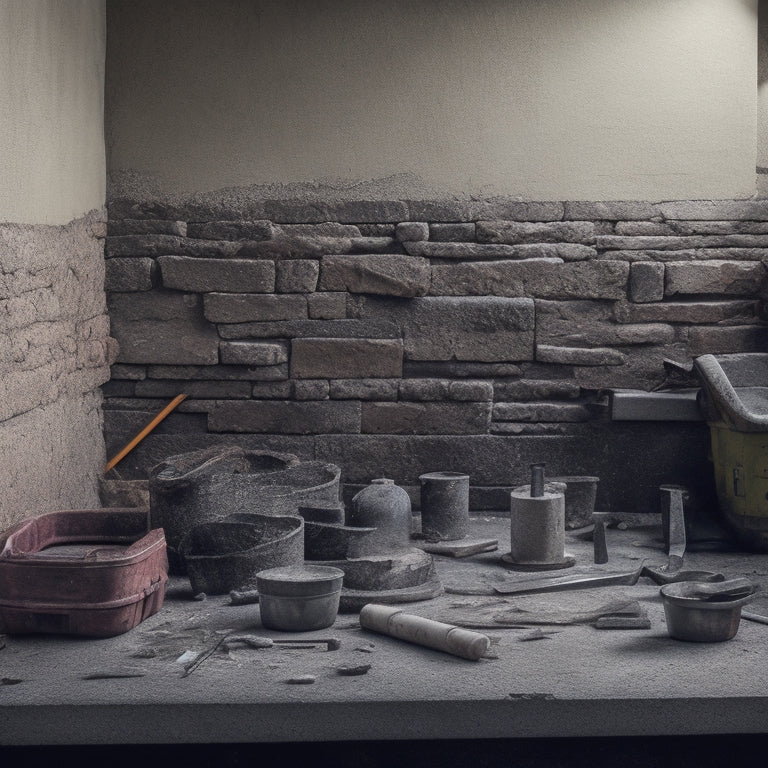
You're about to begin a vital step in your renovation project: leveling old block walls to achieve a smooth, even surface. To guarantee success, start by evaluating the wall's condition, identifying cracks, damage, and settlement issues. Then, choose the right tools, like laser levels and Fein multi-tools, and take precise measurements to mark deviations from the desired plane. Remove old mortar and debris, grind down high spots, and fill low areas with compound. With the right techniques and tools, you'll be well on your way to a stable, aesthetically pleasing wall - but there's still more to learn to achieve a flawless finish.
Key Takeaways
• Assess the wall's condition by inspecting for damage, cracks, and water damage, and develop a plan to address identified issues.
• Choose the right tools, such as laser levels and spirit levels, to ensure precise and efficient correction of wall deviations.
• Measure the wall's dimensions, mark deviations, and prepare the surface by removing old mortar and debris for a strong bond.
• Use surface correction techniques like grinding down high spots and filling low areas with compound to achieve a uniform base for renovation.
• Ensure stability and aesthetics by installing new anchors and ties, and finishing with a smooth surface through surface preparation, leveling compound, and final sanding.
Assessing Wall Damage and Needs
Before attempting to level old block walls, you must thoroughly inspect the walls to identify signs of damage, deterioration, or settlement that may impact the leveling process. This vital step guarantees you're aware of any potential issues that could affect the outcome of your renovation project.
You'll need to employ effective wall inspection techniques to detect cracks, crumbling, or shifting blocks, as well as signs of water damage or structural weaknesses. Damage assessment methods, such as visual examinations, sounding tests, and material sampling, will help you determine the extent of the damage and identify areas that require repair or replacement.
By taking the time to assess the wall's condition, you'll be able to develop a detailed plan to address any issues and guarantee a successful leveling process. A thorough assessment will give you the confidence to move forward with your project, knowing you've addressed any potential pitfalls.
Choosing the Right Leveling Tools
With a thorough understanding of your wall's condition, you'll need to select the appropriate leveling tools to guarantee a precise and efficient correction of any deviations from the desired plane. The right tools will enable you to execute your chosen leveling techniques with confidence and accuracy.
When it comes to tool selection, consider the following essentials:
-
Laser level: A laser level projects a level line or dot onto the wall, allowing you to identify high and low spots with ease. This tool is particularly useful for detecting subtle deviations in the wall's surface.
-
Spirit level: A spirit level is a versatile tool that can be used to check the levelness of individual blocks, as well as the overall wall plane. Look for a high-quality spirit level with precise markings and a stable vial.
-
Fein multi-tool: A Fein multi-tool is a handy device that can be used to remove old mortar, scrape away debris, and even cut through stubborn block anchors. Its oscillating head and variety of attachments make it an indispensable asset in your leveling arsenal.
Measuring and Marking the Wall
You'll begin the leveling process by taking precise measurements of the wall to identify the extent of the deviations from the desired plane. This step is essential in determining the amount of correction needed to achieve a smooth, even surface.
Using a high-quality level and a tape measure, record the wall dimensions, including the length, width, and any obstructions or irregularities. Take note of any areas where the wall deviates from the desired plane, and mark these sections with a pencil or marker.
Next, employ marking techniques such as snapping a chalk line or applying a laser level to identify the high and low points on the wall. This will give you a visual representation of the wall's deviations and help you plan your leveling strategy.
Be sure to mark the wall in multiple locations, including the top, middle, and bottom, to guarantee accuracy. By taking precise measurements and using effective marking techniques, you'll be able to identify the areas that require correction and develop a plan to achieve a level, even surface.
Removing Old Mortar and Debris
Your block wall's surface must be cleared of old, deteriorated mortar and debris to secure a strong bond between the existing blocks and the new leveling material. This vital step guarantees a successful renovation.
To begin, put on your safety gear, including gloves, safety glasses, and a dust mask.
Next, employ effective mortar removal techniques to clear the surface. You can use a hammer and chisel, a mortar scraper, or a grinder with a wire brush attachment. Remove any loose or crumbling mortar, taking care not to damage the surrounding blocks.
Properly dispose of the removed mortar and debris using approved debris disposal methods. This may involve bagging the material or using a dumpster. Be sure to follow local regulations and guidelines.
Here are three essential tips to keep in mind:
-
Work in small sections to maintain control and avoid spreading debris.
-
Use the right tools for the job to avoid damaging the blocks or injuring yourself.
-
Clean the surface thoroughly to secure a strong bond between the old and new materials.
Grinding Down High Spots
After removing old mortar and debris, focus on grinding down high spots on the block wall's surface to secure a uniform base for the leveling material. You'll need a grinder or an angle grinder with a diamond blade to tackle this task.
Before you start, take necessary safety precautions: wear protective gear, including gloves, safety glasses, and a dust mask. Confirm proper equipment maintenance by regularly checking and cleaning the grinder to prevent overheating.
Grind the high spots in small, circular motions, working your way across the wall. Apply moderate pressure, increasing as needed, but avoid applying too much pressure, which can damage the blocks. Keep the grinder at a consistent angle to maintain even grinding.
As you grind, regularly inspect the wall's surface to verify it's becoming level. Once you've ground down the high spots, use a vacuum or broom to remove any dust or debris.
Filling Low Areas With Compound
Now that you've ground down the high spots, it's time to focus on filling the low areas.
You'll need to identify these areas by visually inspecting the wall or using a level to detect any depressions.
Next, you'll apply a filling compound to these low spots, making sure to follow the manufacturer's instructions for proper application.
Low Spot Identification
Identify low spots in the block wall by visually inspecting the surface, searching for areas where the blocks are lower than the surrounding areas or where water may be pooling. This initial assessment is essential in determining the extent of the leveling required.
As you inspect the wall, take note of any cracks, unevenness, or signs of water damage, as these can indicate areas that need attention.
To further aid in spot detection techniques, consider the following:
-
Shine a light: Hold a flashlight or lamp at an angle to highlight any imperfections on the wall's surface.
-
Measure the wall: Use a level or straightedge to identify areas that are out of plumb or have unevenness.
-
Check for moisture: Look for signs of water damage, such as stains, warping, or mineral deposits, which can indicate low areas that need filling.
Filling Compound Application
Apply a filling compound to the low areas you've detected, making sure to follow the manufacturer's instructions for preparation, mixing, and application to guarantee a strong bond with the existing block wall.
Choose a compound type suitable for your wall's specific needs, such as epoxy-based, acrylic, or polyurethane-based compounds. For best results, select a compound with good adhesion, flexibility, and resistance to water and weathering.
When applying the compound, use appropriate filling techniques to make certain of a smooth, even finish. Start by filling the lowest areas first, working your way up to avoid creating air pockets or unevenness.
Use a putty knife or trowel to spread the compound, feathering it out towards the edges to create a seamless blend with the surrounding block.
Allow the compound to dry according to the manufacturer's instructions before sanding or applying additional coats.
Using Laser Leveling Technology
When you're working with old block walls, achieving precise angles and grades is essential.
That's where laser leveling technology comes in - it allows you to detect even the slightest deviations from perfect levelness.
Precise Angle Detection
By incorporating laser leveling technology into your leveling process, you can accurately detect even the slightest deviations from a true angle, ensuring precise surface alignment. This is especially essential when working with old block walls, where even minor imperfections can throw off the entire renovation.
To achieve precise angle detection, you'll want to utilize advanced angle measurement techniques and digital inclination tools.
Here are three key benefits of incorporating laser leveling technology into your workflow:
-
Enhanced accuracy: Laser leveling technology provides highly accurate readings, ensuring that your measurements are precise and reliable.
-
Increased efficiency: With laser leveling, you can quickly and easily detect deviations from a true angle, saving you time and effort in the long run.
-
Improved results: By ensuring precise surface alignment, you can achieve a smoother, more professional-looking finish – a vital component of any successful renovation project.
Automated Grade Checking
You can streamline the grade checking process with automated laser leveling technology, which rapidly detects and reports deviations from the desired grade. This technology utilizes automated surveying methods to guarantee accurate and efficient grade checking, saving you time and effort. With digital elevation models, you can visualize the wall's surface and identify areas that require adjustment.
Here's a comparison of traditional and automated grade checking methods:
| Method | Accuracy | Time Required |
|---|---|---|
| Traditional | ±1/4 inch | 2-3 hours |
| Automated | ±1/16 inch | 30 minutes |
| Traditional | Requires manual calculations | Requires physical measurements |
| Automated | Automatic calculations | Real-time data |
| Traditional | Prone to human error | Limited data analysis |
| Automated | Minimizes human error | Advanced data analysis |
Installing New Anchors and Ties
With the wall prepared, it's vital to install new anchors and ties to securely connect the block wall to the surrounding structure. This step guarantees the wall remains stable and secure during the renovation process.
You'll need to select the appropriate anchor types for your specific project, considering factors such as the type of block, wall thickness, and load-bearing capacity. Some common anchor types include epoxy anchors, mechanical anchors, and adhesive anchors.
Here are the essential steps for tie installation:
-
Drill holes: Drill holes in the block wall and surrounding structure, making sure they align properly.
-
Insert ties: Insert the ties into the holes, verifying they're securely fastened.
-
Tighten anchors: Tighten the anchors to the recommended torque, ensuring a snug fit.
Finishing With a Smooth Surface
Once the anchors and ties are securely in place, finishing the block wall with a smooth surface becomes the final essential step in the renovation process.
You've worked hard to stabilize the wall, and now it's time to focus on aesthetics. Surface preparation is key to achieving a smooth finish. Start by applying a bonding agent to the entire wall to guarantee a strong bond between the block and the finishing material. Next, use a leveling compound to fill in any gaps or imperfections, feathering it out towards the edges to create a seamless shift.
With the wall prepared, you can move on to smoothing techniques. Apply a thin layer of finishing compound, using a putty knife or trowel to spread it evenly. Use long, smooth strokes to remove excess material, working from the top down to prevent drips and runs.
Allow the compound to dry completely before sanding the wall to a smooth finish. With patience and attention to detail, you'll be rewarded with a beautifully finished block wall that's ready for painting or other decorative finishes.
Inspecting and Testing the Results
After applying the finishing touches, inspect the wall meticulously for any imperfections or defects, guaranteeing that the surface is even, smooth, and free of irregularities.
You've put in the hard work; now it's time to evaluate the results. This critical step in the renovation process requires attention to detail and a keen eye for imperfections.
To guarantee a job well done, employ the following inspection techniques:
-
Visual Inspection: Walk along the wall, examining it from different angles and lighting conditions to detect any imperfections or defects.
-
Tactile Inspection: Run your hand over the surface to feel for any bumps, dips, or rough spots.
-
Measurement Inspection: Take precise measurements to verify that the wall is level, plumb, and square.
Frequently Asked Questions
Can I Level a Block Wall That's Severely Structurally Damaged?
You're wondering if it's possible to level a severely structurally damaged block wall. The answer depends on the extent of the damage.
Before attempting any repair techniques, you need a thorough structural assessment to determine if the wall can be salvaged.
If the damage is too extensive, it may be more cost-effective to replace the wall altogether.
Don't risk compromising the integrity of your building - prioritize a professional assessment to guide your next steps.
Do I Need to Wear Protective Gear During the Leveling Process?
When working with power tools and handling heavy materials, you'll want to prioritize your safety above all.
You should always wear protective gear during the leveling process to prevent injuries. Make sure to don protective gloves to shield your hands from cuts and abrasions, and safety goggles to protect your eyes from debris and dust.
How Long Does It Take to Level a Typical Block Wall?
You've seen it before: a 100-year-old building in downtown Chicago, its block walls uneven and worn.
When it comes to leveling a typical block wall, you're looking at a process that can take anywhere from a few days to several weeks, depending on the wall's size and condition.
Factors like wall leveling techniques and the type of block wall materials used can greatly impact the timeline.
For instance, using a laser leveling system can speed up the process, while working with crumbling concrete blocks may require more time and labor.
Can I Reuse Old Anchors and Ties or Must I Replace Them?
When deciding what to do with old anchors and ties, you'll need to assess their condition carefully.
You can't reuse just any anchor or tie; it depends on the type and durability.
For instance, old expansion anchors might be reusable, but corroded or damaged ones must be replaced.
Similarly, rusted or brittle ties won't hold up, so inspect them closely.
If in doubt, it's safer to replace them to guarantee a secure and stable structure.
Will Leveling a Block Wall Increase Its Load-Bearing Capacity?
As you lay the foundation for a stronger structure, you wonder: will leveling a block wall increase its load-bearing capacity?
Think of it like a well-balanced seesaw - leveling guarantees even load distribution, which in turn boosts structural integrity.
By doing so, you're not creating new capacity, but rather revealing the wall's full potential.
Conclusion
You've reached the finish line, where the once-buckled and worn block walls now stand tall and proud, a testament to your perseverance.
Just as a master conductor brings harmony to a discordant orchestra, you've orchestrated a symphony of leveling tools and techniques to create a smooth, even surface.
The final notes of your renovation are now in perfect pitch, ready to be filled with the beauty of new finishes and fixtures, a true masterpiece of transformation.
Related Posts
-

7 Patio Safety Tips for DIY Renovation Projects
As you begin your DIY patio renovation project, prioritize safety by evaluating the worksite for tripping hazards and...
-

Safeguard Your Home Renovation With the Right Gear
When starting a home renovation, safeguarding your safety is paramount. You'll need essential gear, including persona...
-

3 Must-Have Irrigation Tools for Home Renovation
When renovating your home, you'll need a laser level to guarantee proper slope and alignment of irrigation pipes, a m...


