Home Renovation DIY Project Supply Checklist Revealed
Share
As you prepare for your DIY home renovation project, it is crucial to have a thorough supply checklist to guarantee success. You'll need to assess your space, define the project's scope, and establish a timeline to gauge complexity and allocate resources effectively. Must-have tools include a scraper, wire brush, and concrete finishing tools, while mixing and pouring supplies like a mixing bucket, measuring tape, and concrete mix are critical. Don't forget safety gear like gloves, safety glasses, and a respirator, as well as decorative finishing touches like paint and wall decor items. With the right supplies, you'll be well on your way to achieving professional-looking results - and that's just the beginning of your DIY journey.
Key Takeaways
• Assess the project space, define the scope of work, and establish a timeline to gauge complexity and resource needs.
• Gather essential tools, including a scraper, wire brush, concrete finishing tool, level, and straightedge, to ensure safety and project success.
• Prepare mixing and pouring supplies, such as a mixing bucket, concrete mix, and trowel, to achieve the desired consistency and finish.
• Wear necessary safety gear and protective equipment, including gloves, safety glasses, and a dust mask, to prevent injuries and hazards.
• Consider decorative finishing touches, such as paint, wall decor, and accessories, to add personality and style to the renovated space.
DIY Concrete Project Planning Essentials
Before diving into your DIY concrete project, you'll need to assess your space and identify three key areas:
-
The purpose of the project.
-
The scope of the work.
-
The timeline for completion.
This will help you determine the resources you'll need, the complexity of the task, and how to allocate your time effectively.
Must-Have Tools for Concrete Work
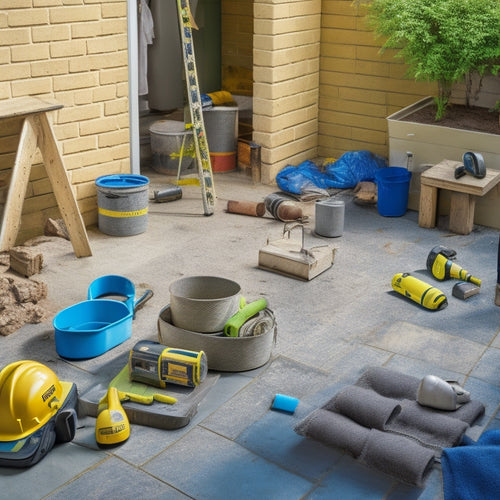
With your project's scope and timeline established, you'll need the right tools to bring your concrete vision to life. When it comes to concrete work, having the necessary tools is essential for a successful and safe project. You'll need a set of essential tools to guarantee proper surface preparation and concrete curing.
First, invest in a sturdy scraper or trowel for removing old concrete, dirt, and debris from the surface. A wire brush or broom is also necessary for cleaning and roughening the surface to guarantee a strong bond between old and new concrete.
For concrete curing, you'll need a concrete finishing tool, such as a float or tamping tool, to achieve a smooth and even finish. Don't forget a level and straightedge to guarantee your concrete is poured and finished to perfection.
Concrete Mixing and Pouring Supplies
You'll need a range of concrete mixing and pouring supplies to achieve the right consistency and finish for your project. To start, you'll require a mixing bucket, mixing stick, and a measuring tape to guarantee accurate mixing ratios.
Don't forget to grab some concrete mix, sand, and aggregate (like gravel or crushed stone) to create the perfect blend. A concrete trowel and edger will come in handy for finishing and smoothing out the surface. If you're planning to use a specific concrete curing method, such as a membrane or spray, be certain to add those to your list as well.
When it comes to pouring, you'll need a chute or pouring bucket to control the flow of concrete. A level and screed board will help you achieve a smooth, even surface.
Don't overlook the importance of having a clean, stable work area – you'll need a surface to mix and pour on, after all! Make sure you have a suitable subbase prepared, whether that's a layer of sand or a specialized underlayment material.
With these essential supplies, you'll be well on your way to a successful concrete project.
Safety Gear and Protective Equipment
Protect yourself from the hazards of concrete mixing and pouring by wearing essential safety gear, including gloves, safety glasses, and a dust mask, to prevent skin and eye irritation and respiratory problems.
As you begin your DIY home renovation project, it's vital to prioritize your safety above all else. Establishing safety protocols is key to avoiding accidents and ensuring a successful project.
Your personal protective equipment (PPE) should include steel-toed boots, a hard hat, and earplugs to protect you from falling objects, loud noises, and hazardous materials.
Don't forget to wear a long-sleeved shirt, long pants, and a face shield to prevent skin exposure and splashes. Additionally, consider investing in a respirator or air purifier to minimize inhalation of harmful particles.
Decorative Finishing Touches Needed
As you near the completion of your DIY home renovation project, it's time to focus on adding those decorative finishing touches that will elevate your space from functional to fabulous. Now that the major construction work is done, it's time to think about the aesthetic details that will make your space truly shine.
Here are a few essential items you'll need to add those finishing touches:
-
Decorative paint: Choose a color that complements your new fixtures and furniture, and consider adding a statement wall or accent ceiling to create visual interest.
-
Wall decor: Whether it's a statement piece of art, a collection of family photos, or a decorative mirror, wall decor can add depth and personality to your space.
-
Finishing techniques: Consider adding texture and interest with techniques like stenciling, stamping, or faux finishing.
- Accessories: Add the final touches with decorative items like throw pillows, rugs, and plants to bring your space to life.
Remember to always follow safety guidelines when working with paint, power tools, and other materials.
With these finishing touches, you'll be able to step back and admire your hard work, knowing that your DIY home renovation project is truly complete.
Frequently Asked Questions
What Is the Ideal Temperature for Concrete Mixing and Pouring?
When you're working with concrete, you need to get the temperature just right. The ideal temperature for mixing and pouring concrete is between 50°F and 70°F (10°C and 21°C).
If it's too cold, the mix won't set properly, and if it's too hot, it'll set too quickly.
You should also use proper mixing techniques, like gradually adding water and using a mixing stick, to guarantee a strong and durable finish.
Can I Use a Regular Drill for Mixing Concrete?
You're wondering if you can use a regular drill for mixing concrete. The short answer is no.
Regular drills aren't designed for concrete mixing and can overheat or break under the heavy load.
Instead, you'll need a heavy-duty drill or a mixing drill specifically designed for concrete mixing. These drills have more torque and a slower speed to handle thick mixes.
Using the right drill type will guarantee a safe and efficient mixing process.
How Long Does It Take for Concrete to Fully Cure?
You're wondering how long it takes for concrete to fully cure. The answer depends on various factors, including temperature, humidity, and mix design.
Generally, concrete reaches its initial set within 24-48 hours, but it takes around 28 days to fully cure.
During this time, you'll need to keep the area moist and protected from heavy traffic.
Be patient, as rushing the curing process can lead to weak and brittle concrete.
Can I Mix and Pour Concrete in the Rain?
When you're planning to mix and pour concrete, you're probably wondering if rain is a deal-breaker.
Unfortunately, it is. Pouring concrete in the rain can compromise its quality, leading to a weaker and more porous final product.
The rain effects can cause the cement to wash away, reducing the concrete's strength and making it more prone to cracking.
It's better to reschedule for a dry day to guarantee a strong and durable result.
Do I Need a Permit for a Small DIY Concrete Project?
You're probably thinking, 'A permit for a small DIY concrete project? That's overkill, right?'
But, believe it or not, even tiny projects can have huge consequences if not done correctly.
And, surprise! Permit requirements vary by location, but it's always better to be safe than sorry.
Check with your local government to see if you need a permit, even for small projects.
It's not worth risking your safety or getting fined for non-compliance.
Conclusion
You've planned, prepared, and poured your way to a successful DIY concrete project. Now, take a step back and admire your handiwork!
With the right tools, mixing and pouring supplies, safety gear, and decorative finishing touches, you've transformed your space.
You've measured, mixed, and mastered the art of concrete work. You've protected yourself, poured with precision, and perfected the final details.
Your hard work has paid off, and your newly renovated space is ready to shine!
Related Posts
-

7 Patio Safety Tips for DIY Renovation Projects
As you begin your DIY patio renovation project, prioritize safety by evaluating the worksite for tripping hazards and...
-

Top 3 Safety Essentials for DIY Renovations
When tackling a DIY renovation, you'll want to prioritize three essential safety items to protect yourself from poten...
-

Home Renovation Safety Checklist for Homeowners
As a homeowner initiating a renovation project, you know that safety should be your top priority. Start by establishi...


